Introduction
Google Calendar is a popular scheduling tool that helps users stay organized and keep track of their events and appointments. It offers a wide range of features and customization options, making it a valuable tool for individuals, businesses, and organizations. One handy feature of Google Calendar is the ability to copy and paste calendars, which can save you time and effort when setting up multiple calendars or sharing your schedule with others.
In this article, we will guide you through the process of copying and pasting a Google Calendar. We will explain why you might want to use this feature and provide step-by-step instructions for both copying and pasting calendars. Whether you need to duplicate a calendar for personal or professional use or want to share your schedule with colleagues, family, or friends, this guide will help you accomplish your goals.
By copying and pasting a Google Calendar, you can quickly create duplicate calendars without having to manually recreate each event. This can be especially useful if you have a recurring schedule or need to create multiple calendars with similar content. Additionally, copying and pasting allows you to easily share your schedule with others, whether it’s sharing important dates with team members at work or sharing a family calendar with your loved ones.
The process of copying and pasting a Google Calendar is straightforward and can be done within a few simple steps. We will walk you through each step, from exporting the calendar file to importing it into your Google Calendar. You will also learn how to customize the imported calendar’s color and visibility options to suit your preferences.
So, if you’re ready to streamline your scheduling process and make the most out of Google Calendar’s features, let’s get started with learning how to copy and paste a Google Calendar.
Why would you want to copy and paste a Google Calendar?
There are several reasons why you might want to copy and paste a Google Calendar. Here are a few scenarios where this feature can come in handy:
- Creating multiple calendars: If you need to create multiple calendars with similar events or recurring schedules, copying and pasting can save you from the hassle of manually recreating each event. It allows you to quickly duplicate calendars and make necessary adjustments as needed.
- Sharing schedules: Copying and pasting a Google Calendar is an efficient method to share your schedule with others. Whether you want to provide your team members at work with important dates and deadlines or share a family calendar with your loved ones, this feature makes collaboration and coordination easier.
- Backing up your calendar: By copying your Google Calendar and saving it as a backup file, you can ensure that you have a copy of your important events and appointments in case of any data loss or accidental deletion.
- Migrating to a new account: If you’re switching to a new Google account or need to transfer your calendar to another user, copying and pasting allows you to seamlessly move your events and settings to the new account without losing any valuable information.
Regardless of your specific needs, the ability to copy and paste Google Calendars offers flexibility and convenience. It saves you time and effort by eliminating the need to manually recreate events and allows for easy sharing and collaboration. With a few simple steps, you can duplicate calendars or migrate them to new accounts, ensuring that you stay organized and in sync with your schedule.
How to copy a Google Calendar
Copying a Google Calendar is a straightforward process that involves a few simple steps. Here’s a step-by-step guide to help you copy a Google Calendar:
-
- Step 1: Open your Google Calendar
Start by opening Google Calendar in your web browser. Sign in to your Google account if you’re not already logged in.
-
- Step 2: Choose the calendar you want to copy
On the left sidebar, you’ll see a list of calendars under “My calendars.” Locate and click on the calendar that you want to copy.
-
- Step 3: Open the calendar settings
In the top-right corner, click on the settings gear icon and select “Settings” from the dropdown menu. This will open the settings page for the selected calendar.
-
- Step 4: Export the calendar
In the settings page, click on the “Export calendar” option. A pop-up window will appear, allowing you to customize the export settings.
-
- Step 5: Save the exported calendar file
Choose the desired export options, such as the date range and file format. Once you’ve made your selections, click on the “Export” button and save the exported calendar file to your computer or storage device.
Congratulations! You’ve successfully copied a Google Calendar by exporting it as a file. Now, let’s move on to the next section to learn how to paste a Google Calendar.
Step 1: Open your Google Calendar
To begin the process of copying a Google Calendar, you need to open Google Calendar in your web browser. Here’s how you can do it:
- Launch your preferred web browser and visit the Google Calendar website.
- If you’re not already signed in to your Google account, enter your credentials to log in.
- Once you’re signed in, you will be taken to your main Google Calendar page.
Google Calendar allows you to access your schedule from any device with an internet connection, providing seamless accessibility and synchronization. Whether you’re using a computer, smartphone, or tablet, you can easily open your Google Calendar and proceed to the next steps of copying it.
It’s important to open the correct Google Calendar that you want to copy. If you have multiple calendars, make sure to choose the specific one that you wish to duplicate. The selected calendar will be the one that you export and later import into another account or share with others.
By opening your Google Calendar as the initial step, you’re ready to move on to the next step, which involves selecting the calendar you want to copy. Let’s proceed to step 2 to continue the process.
Step 2: Choose the calendar you want to copy
Once you have opened your Google Calendar, it’s time to select the specific calendar that you want to copy. This step is crucial, especially if you have multiple calendars associated with your Google account. Here’s how you can choose the calendar you want to copy:
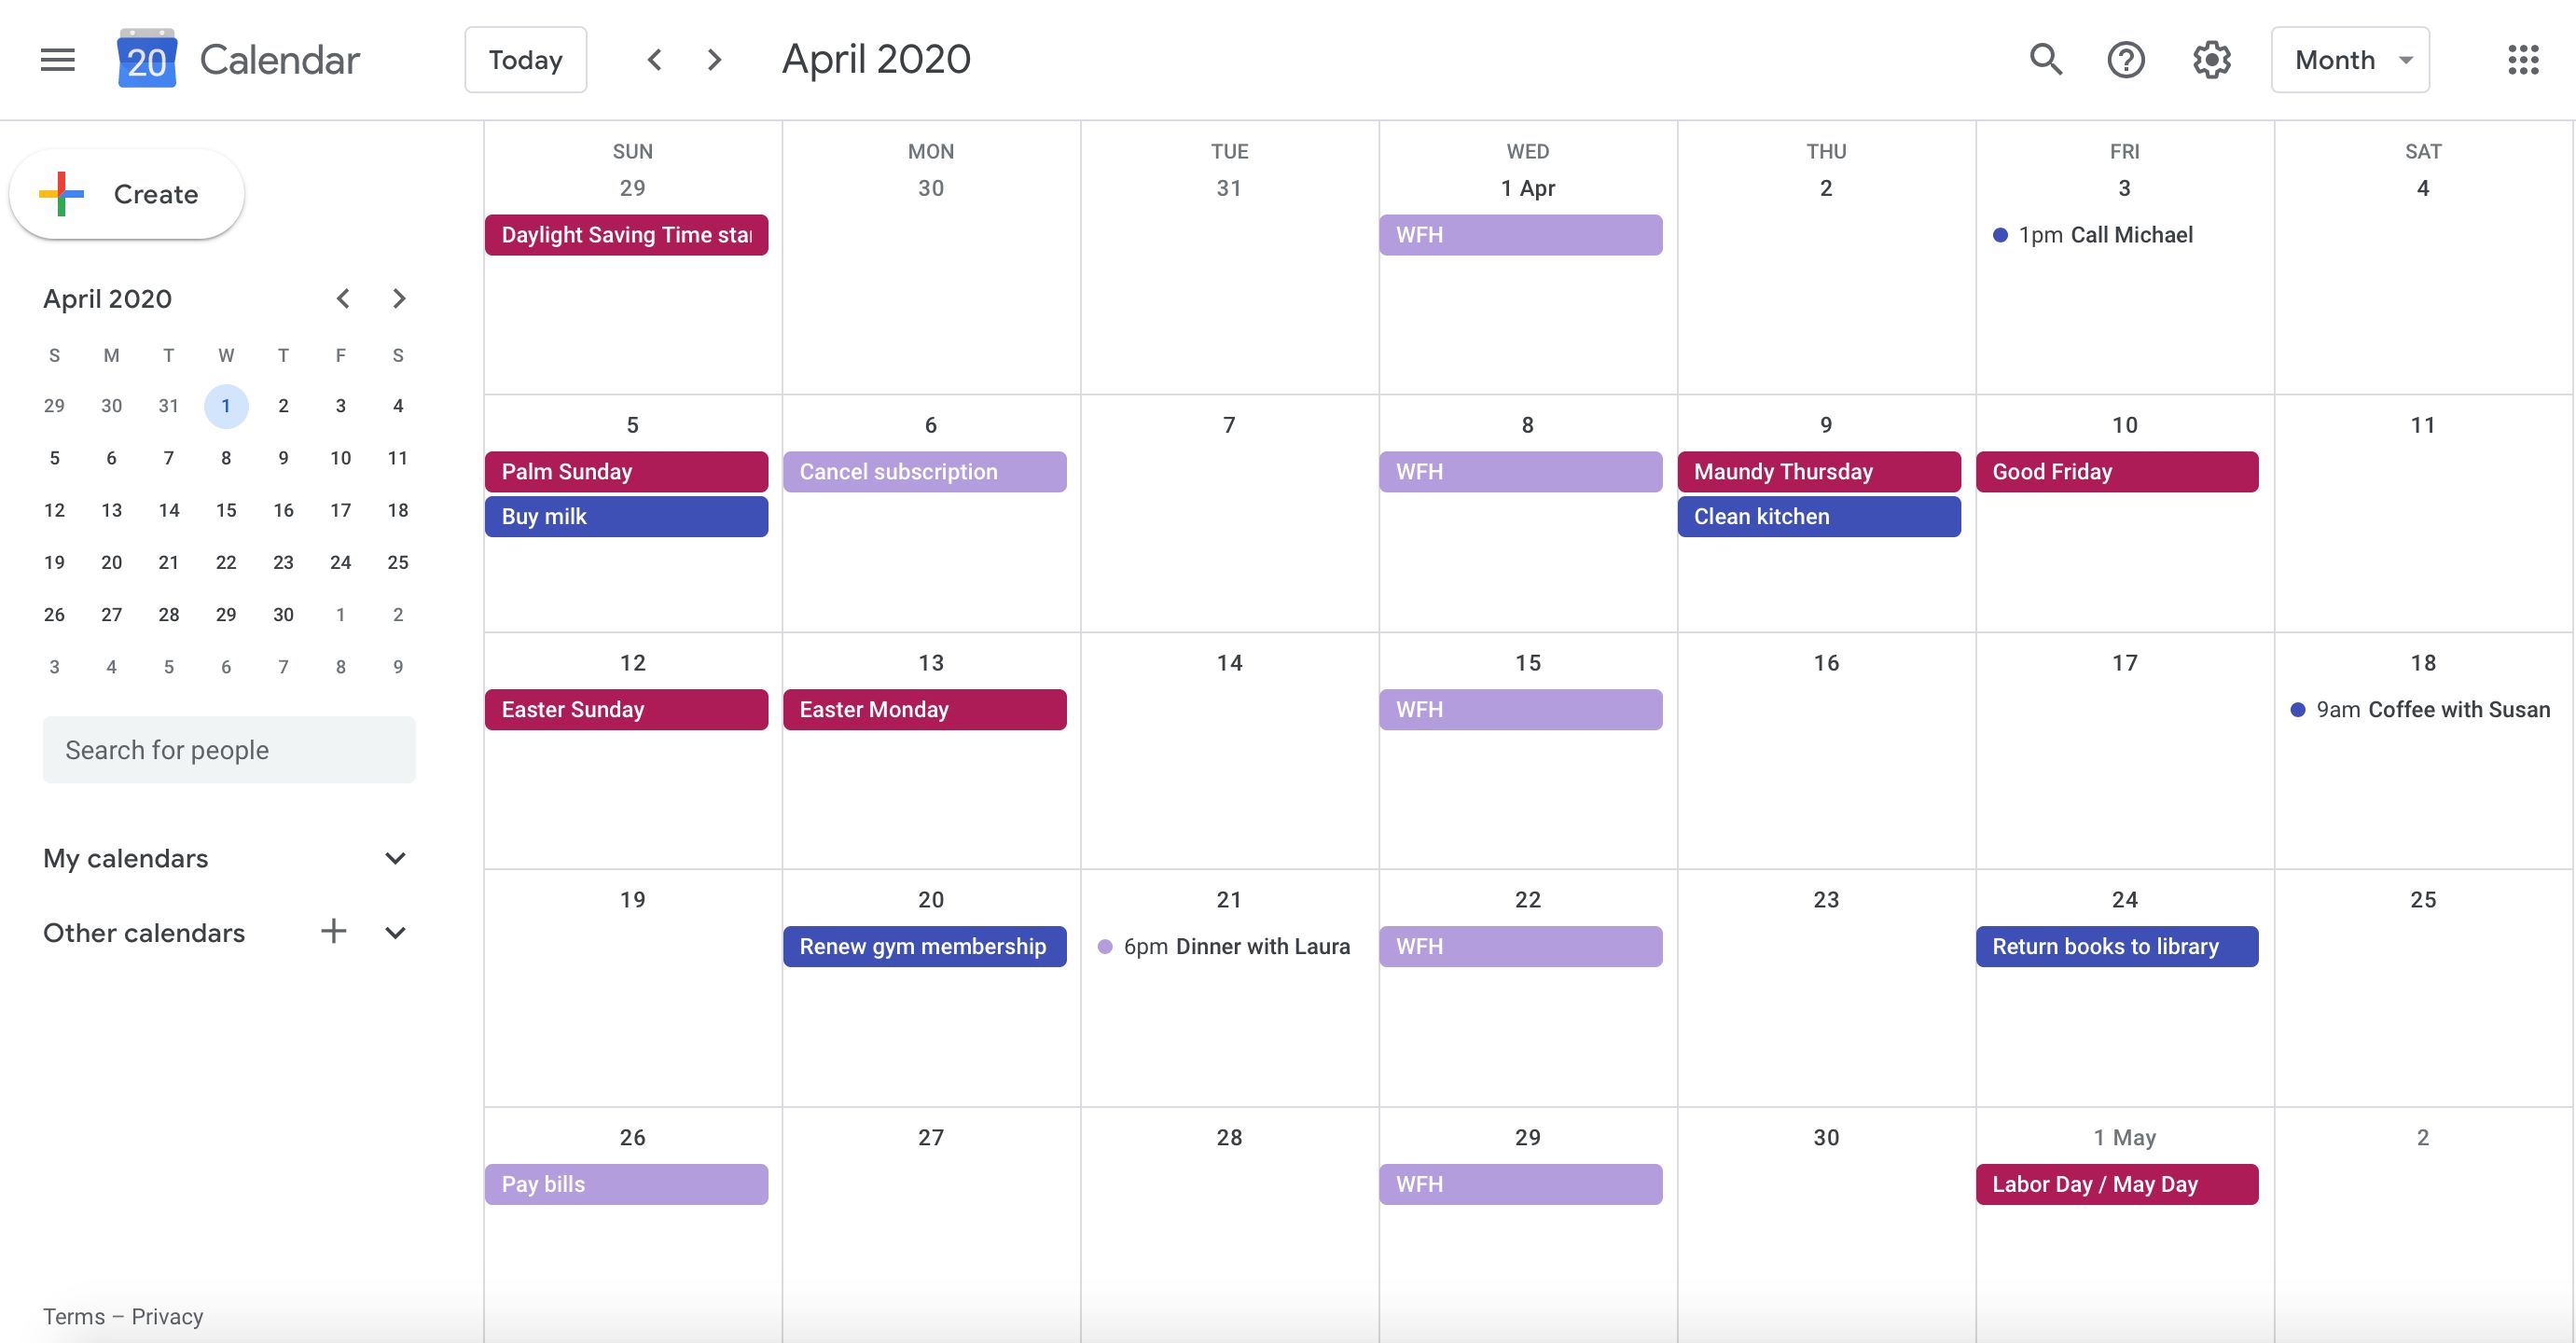
- On the left sidebar of your Google Calendar interface, you will see a list of calendars under the “My calendars” section. These calendars may include your personal calendar, work calendar, or any other custom calendars you have created.
- Locate and click on the calendar that you wish to copy. The calendar you select will be highlighted or displayed with a border to indicate that it is currently active.
- Once you have chosen the calendar, it will become the source from which you will export and copy the events and settings.
Take care to choose the correct calendar that you want to duplicate. It should be the one that contains the events and schedules you wish to copy and share with others or import into another account. If you are unsure which calendar to select, you can check the events on the calendar to verify if it is the correct one.
Remember, you can copy individual calendars as well as subscribed calendars that you have added to your Google Calendar. By choosing the specific calendar you want to copy, you can proceed with exporting it in the next step of the process.
Now that you have selected the calendar you want to copy, let’s move on to the next step, which involves opening the calendar settings.
Step 3: Open the calendar settings
In order to copy a Google Calendar, you need to access the settings of the specific calendar you have chosen. Opening the calendar settings will allow you to customize various options and access the export feature. Follow these steps to open the calendar settings:
- In the top-right corner of your Google Calendar interface, you will find a gear icon. Click on this gear icon to access the settings menu.
- Once you click on the gear icon, a dropdown menu will appear. From the menu, select the “Settings” option.
- Upon selecting “Settings,” you will be redirected to the settings page specifically for the calendar you have chosen.
The calendar settings page provides you with various customization options for the selected calendar. Here, you can adjust settings such as the visibility of the calendar, event notifications, and sharing permissions. It is also the page where you can export the calendar for duplication or sharing purposes.
By opening the calendar settings, you are one step closer to copying your Google Calendar. The next step involves exporting the calendar, saving it as a file that can be imported or shared with others. Let’s proceed to step 4 to continue the process.
Step 4: Export the calendar
After opening the calendar settings, the next step to copy a Google Calendar is to export it as a file. This allows you to save the calendar’s events, settings, and other information in a format that can be easily imported or shared. Follow these steps to export the calendar:
- In the calendar settings page, look for the option labeled “Export calendar.” It may be located under different tabs, such as “General,” “Calendar settings,” or “Integrations.”
- Once you have found the “Export calendar” option, click on it to initiate the export process. This will open a pop-up window or prompt that provides further export settings.
- In the export settings window, you may have the option to specify the date range for the events you want to include in the exported file. Choose whether you want to export events within a specific time period or export all events from the calendar.
- Another option you may encounter is the choice of file format for the exported calendar. Depending on the version of Google Calendar you are using, you may have options such as .ics (iCalendar), .csv (Comma Separated Values), or .xml (Extensible Markup Language).
- Once you have selected the desired export settings, click on the “Export” or “Download” button to begin the export process. The calendar will be converted into the specified file format and downloaded to your computer or storage device.
By exporting the calendar, you create a copy of the selected Google Calendar that can be utilized in various ways. The exported file contains the calendar’s events, their details, and any customizations you have made. This file can be imported into another Google Calendar account, shared with others to view or import, or kept as a backup for your own records.
Congratulations! You have successfully exported the Google Calendar that you want to copy. Now, let’s proceed to the next step, where you will save the exported calendar file to your device.
Step 5: Save the exported calendar file
After you have successfully exported your Google Calendar, the next step is to save the exported calendar file to your computer or storage device. Saving the file ensures that you have a copy of the exported calendar that can be easily accessed and imported when needed. Follow these steps to save the exported calendar file:
- Once the export process is complete, you will typically be prompted to choose a location to save the file. The prompt may vary depending on your web browser or operating system.
- Click on the “Save” or “Save File” button in the prompt. This will open a file explorer window, allowing you to choose a destination folder to save the file.
- Browse through your folders and select the desired location where you want to save the exported calendar file. You can choose an existing folder or create a new one specifically for your calendar backup or sharing purposes.
- Once you have chosen the destination folder, click on the “Save” button to save the exported calendar file. The file will then be saved to the selected location on your device.
It is recommended to choose a location that is easily accessible and organized. You may consider creating a dedicated folder for your exported calendar files to keep them separate from other files and easily locate them in the future. Additionally, it’s a good practice to include the date or a descriptive name in the file name to identify the exported calendar.
Congratulations! You have successfully saved the exported calendar file to your device. The file is now ready to be imported into another Google Calendar account or shared with others for collaboration or reference purposes.
With the completion of step 5, you have successfully copied a Google Calendar by exporting it and saving the exported file. In the next section, we will explore how to paste a Google Calendar by importing the saved calendar file into another account.
How to paste a Google Calendar
Now that you have successfully copied a Google Calendar by exporting it as a file, the next step is to paste it by importing the saved calendar file into another Google Calendar account. This allows you to duplicate the events, settings, and other information from the exported calendar. Follow these steps to paste a Google Calendar:
- Open your Google Calendar in a web browser and sign in to the Google account where you want to import the copied calendar.
- On the left sidebar, you will find a list of calendars under the “My calendars” section. Scroll down to the bottom and click on the “Add” button.
- In the dropdown menu, select the “Import” option. This will open a file explorer window, allowing you to browse for the calendar file you exported and saved.
- Locate the saved calendar file on your device and select it. Depending on the file format, you may need to choose the correct file type from the dropdown menu.
- Once you have selected the calendar file, click on the “Open” or “Import” button to begin the import process. The events, settings, and details from the copied calendar will be imported into the chosen Google account.
After importing the calendar file, you will see the newly added calendar in the “Other calendars” section on the left sidebar of your Google Calendar interface. The events and information from the copied calendar will be visible on the corresponding dates and times.
It’s important to note that the imported calendar may have its own color and visibility settings. In the next step, we will explore how to review and adjust these settings to ensure the imported calendar is customized according to your preferences.
Congratulations! You have successfully pasted a Google Calendar by importing the saved calendar file into another Google Calendar account. The events and settings from the copied calendar are now available for you to view, edit, and manage in the imported account.
In the next step, we will explore how to review the imported calendar and make any necessary adjustments to its color and visibility options.
Step 1: Open your Google Calendar
To begin with, you need to open your Google Calendar in order to copy and paste events. Follow these simple steps to access your Google Calendar:
- Launch your preferred web browser on your computer or mobile device.
- In the address bar, type in “calendar.google.com” and press Enter.
- If you are not already signed in to your Google account, you will be prompted to do so. Enter your login credentials to access your Google Calendar.
- After signing in, you will be directed to your Google Calendar dashboard, where you can view your schedule and manage your events.
It’s essential to open the correct Google Calendar account associated with the events you want to copy. If you have multiple Google accounts, ensure that you are signed in to the account containing the calendar you wish to duplicate.
Opening your Google Calendar allows you to view your existing events, navigate through different dates, and access the necessary functions to copy and paste events. With Step 1 completed, you can now proceed to the next step, where you will choose the calendar you want to copy.
Step 2: Import the calendar file
Once you have the calendar file that you want to import, you can proceed to import it into your Google Calendar. Follow these steps to import the calendar file:
- Open your Google Calendar in your web browser and sign in to the Google account where you want to import the calendar file.
- On the left sidebar, locate the “Other calendars” section and click on the “+” icon next to it.
- From the dropdown menu, select “Import.”
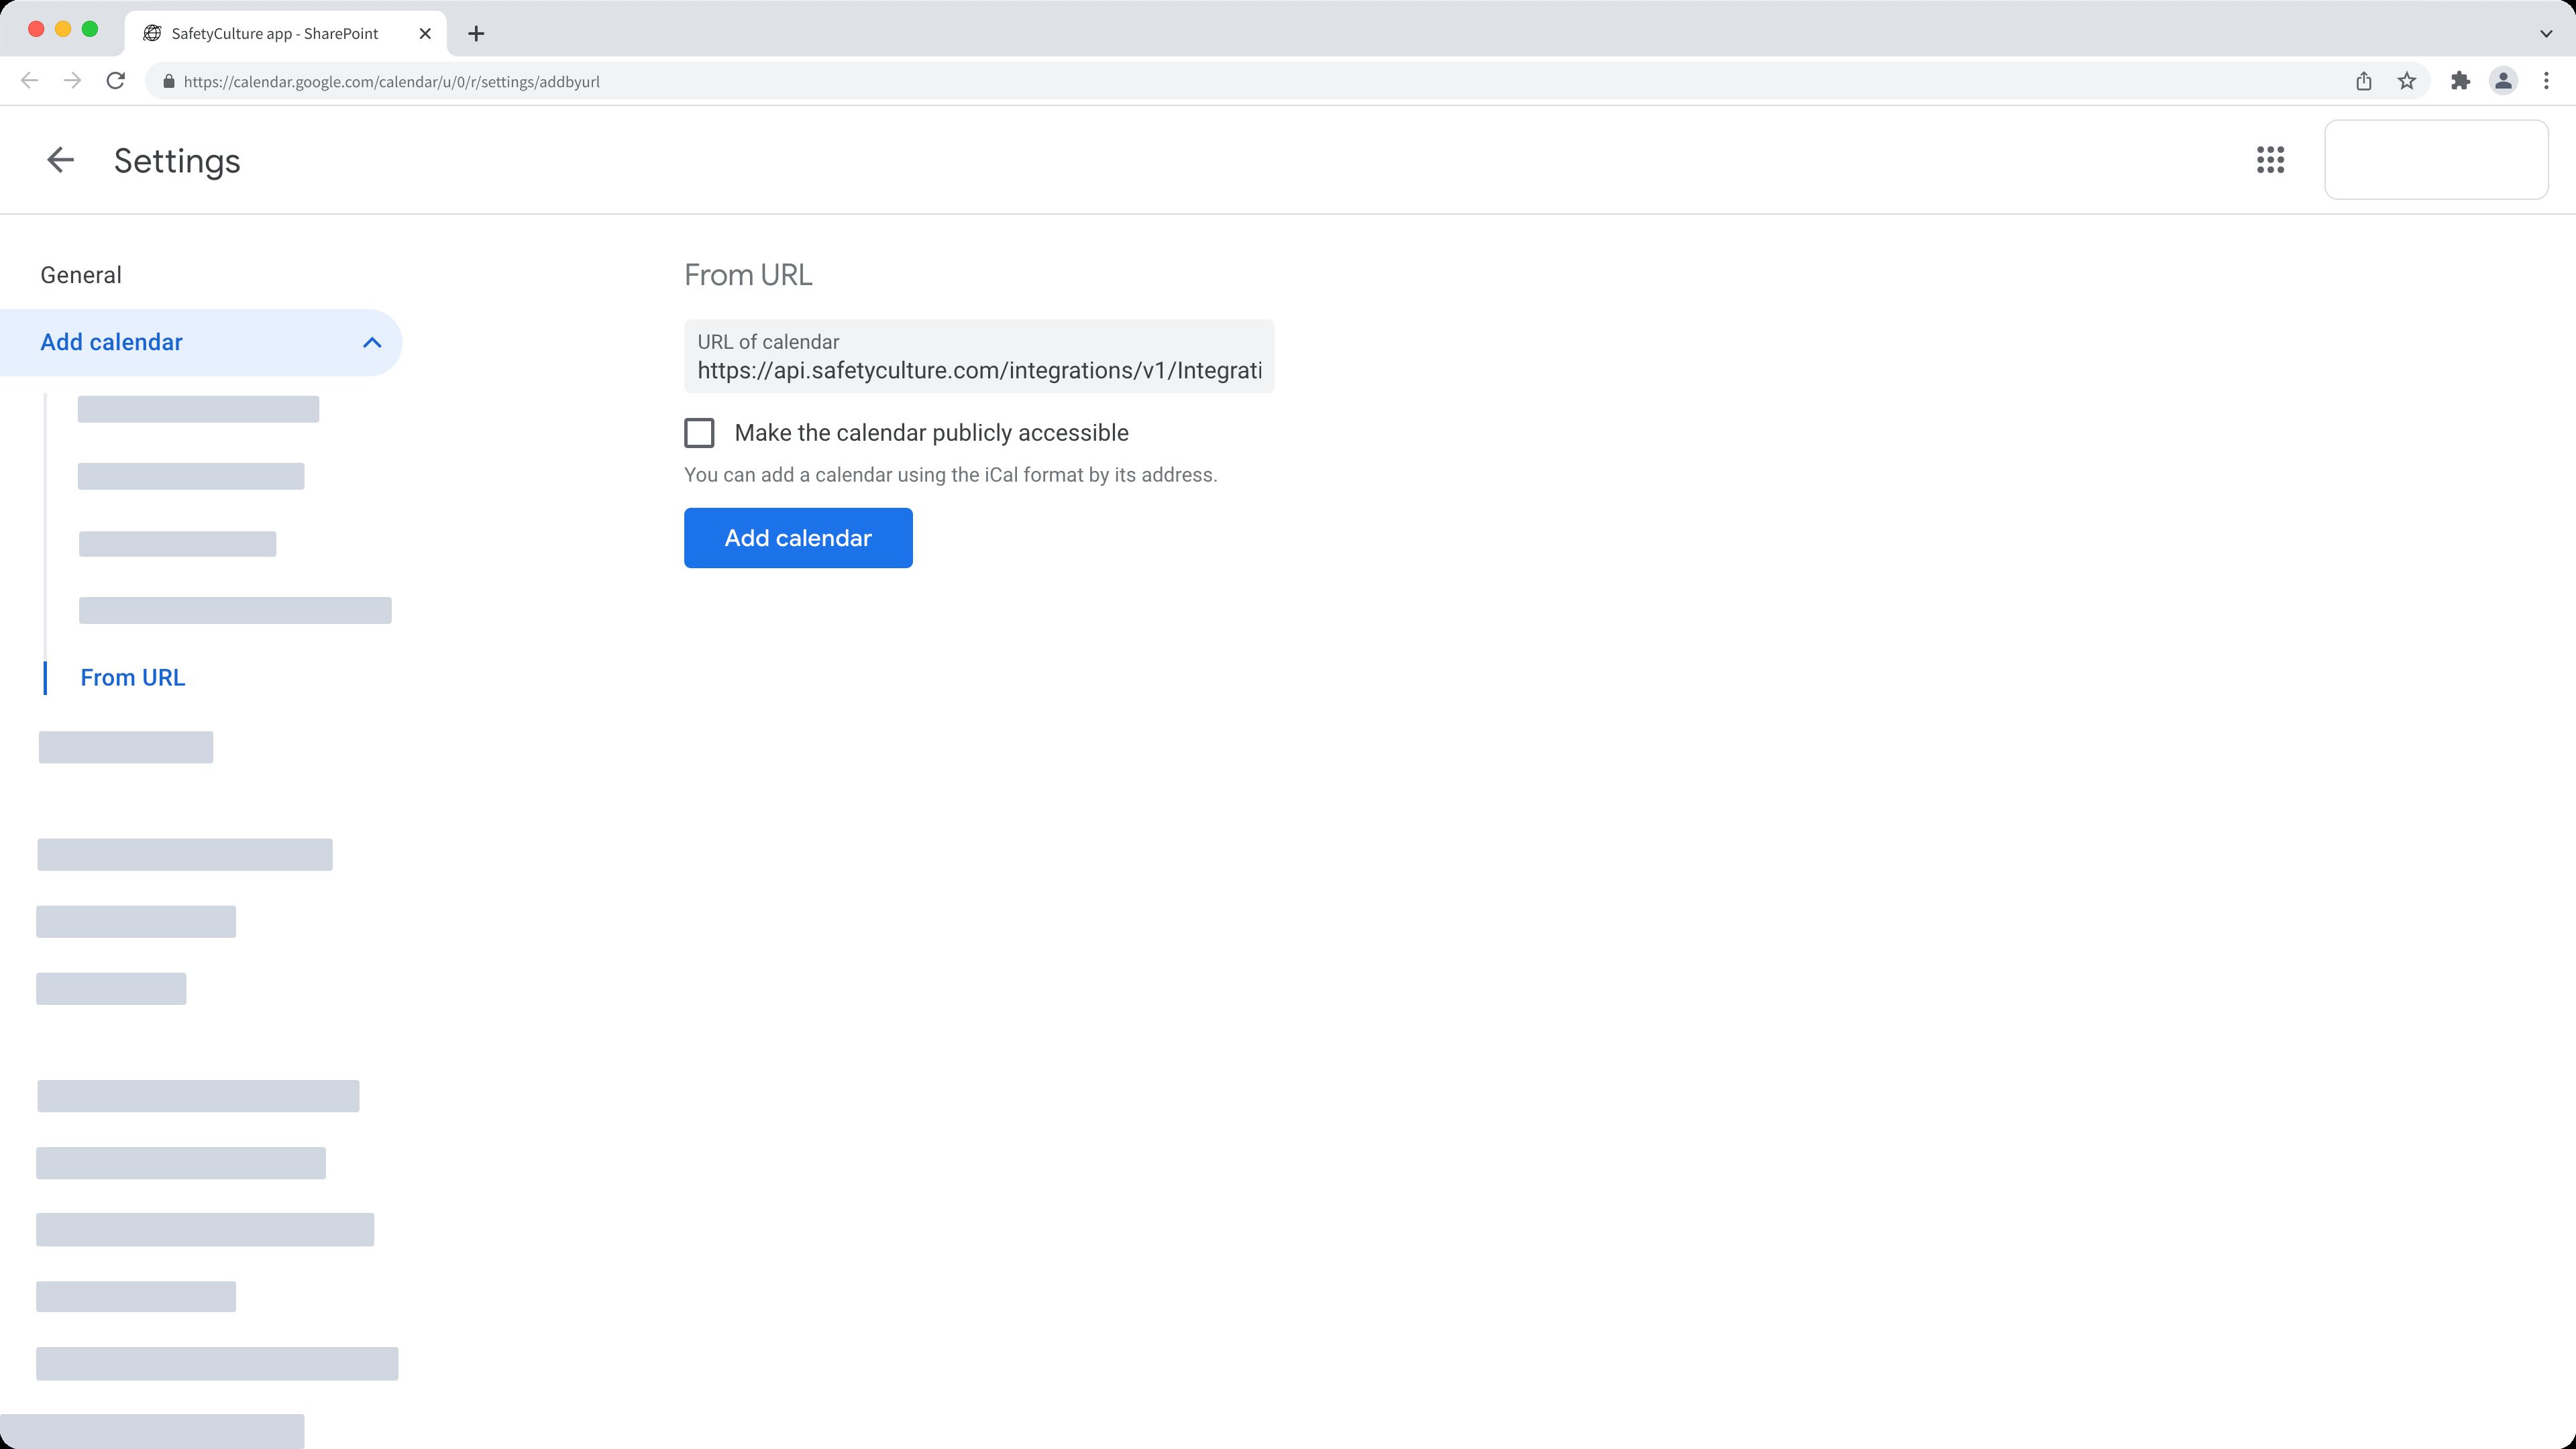
- A new window or tab will open, prompting you to select the calendar file you want to import. Click on the “Select file from your computer” button or drag and drop the calendar file into the designated area.
- Browse your computer’s files and select the calendar file you want to import. The file must be in a compatible format, such as .ics (iCalendar).
- Once you’ve selected the file, click on the “Open” button. The import process will begin, and Google Calendar will start importing the events from the file.
- After the import is complete, you will see the imported calendar listed under the “Other calendars” section on the left sidebar. The imported calendar and its events will be displayed alongside your existing calendars.
You have successfully imported the calendar file into your Google Calendar. The events from the imported calendar will now be visible and can be managed within your Google Calendar interface.
Importing a calendar file allows you to transfer events from one calendar to another or import events shared with you by others. It is a convenient way to consolidate multiple calendars or collaborate with colleagues, friends, or family members.
With Step 2 completed, you can now move on to the next step, where you will review and make adjustments to the imported calendar’s settings.
Step 3: Choose the calendar to import into
After importing the calendar file into your Google Calendar, the next step is to choose the specific calendar within your account where you want to import the events. Follow these steps to select the calendar for the imported events:
- On the left sidebar of your Google Calendar interface, locate the “Other calendars” section where the imported calendar is listed.
- Hover over the imported calendar name, and an options menu will appear (typically denoted by three vertical dots or an arrow).
- Click on the options menu, and a dropdown list will appear with various actions and settings for the calendar. From the list, select “Display this calendar.”
- Once you have chosen to display this calendar, the imported events will be merged and displayed alongside the events in your main calendar.
- If you want to import events into a specific calendar within your account, you can choose “Add to My Calendars” from the options menu instead. This will list the imported calendar as a separate calendar within your account.
When choosing the calendar to import into, keep in mind your organizational preferences and the purpose of the imported events. You can merge them into your main calendar to have a consolidated view of all your events, or you can keep them separate by adding them to a specific calendar within your account.
By selecting the calendar to import into, you have successfully managed the placement of the imported events within your Google Calendar. The imported events will now be visible and can be accessed alongside your existing events, helping you stay organized and manage your schedule effectively.
With Step 3 completed, you are now ready to review the imported calendar and make any necessary adjustments to its color and visibility options.
Step 4: Review the imported calendar
After importing a calendar file into your Google Calendar and selecting the calendar to import into, the next step is to review the imported calendar. This allows you to ensure that the events and settings have been accurately transferred and make any necessary adjustments. Follow these steps to review the imported calendar:
- On the left sidebar of your Google Calendar interface, find the imported calendar listed under the “Other calendars” section.
- Make sure the checkbox next to the imported calendar is checked. This ensures that the events from the imported calendar are visible on your main calendar interface.
- Take a moment to scroll through the calendar and review the events. Check for any discrepancies or missing information that may have occurred during the import process.
- If you notice any issues, such as incorrect event details or missing events, you can make edits directly within your Google Calendar. Simply click on the event and make the necessary adjustments.
- Additionally, you can customize the color of the imported calendar by hovering over the calendar name in the “Other calendars” section and clicking on the colored box that appears. Select a color that helps you easily identify the imported events.
- If you want to change the visibility settings for the imported calendar, click on the options menu (typically denoted by three vertical dots or an arrow) and select “Calendar settings.” From there, you can adjust the visibility and sharing settings to meet your needs.
By reviewing the imported calendar, you can ensure that the events and settings have been successfully transferred and that everything is accurate and up-to-date. Making any necessary adjustments and customizing the visual aspects of the calendar will help you effectively manage and differentiate the imported events from your existing schedule.
With Step 4 completed, you have successfully reviewed the imported calendar within your Google Calendar account. The imported events are now seamlessly integrated with your existing schedule, allowing you to stay organized and manage your time efficiently.
Next, we will explore how to adjust the color and visibility options for the imported calendar to further personalize it according to your preferences.
Step 5: Adjust the color and visibility options
After reviewing the imported calendar and ensuring its accuracy, the final step is to adjust the color and visibility options according to your preferences. This will help you differentiate the imported calendar from your other calendars and manage its visibility within your Google Calendar interface. Follow these steps to adjust the color and visibility options:
- On the left sidebar of your Google Calendar interface, locate the imported calendar under the “Other calendars” section.
- Hover over the imported calendar name, and an options menu will appear (usually denoted by three vertical dots or an arrow).
- Click on the options menu, and a dropdown list will appear with various actions and settings for the calendar. From the list, select “Calendar settings.”
- In the calendar settings, you can choose a different color to represent the imported calendar by clicking on the colored box next to the calendar name.
- Select your preferred color from the available options or use the custom color picker to choose a color that suits your preferences.
- Furthermore, you can adjust the visibility settings for the imported calendar under the “Access permissions” section in the settings.
- Select the visibility option that aligns with your intended usage. You can make the imported calendar public, share it with specific individuals, or keep it private for personal use.
- Once you have made your desired changes, click on the “Save” or “Done” button to save the updated color and visibility settings.
By adjusting the color and visibility options, you can easily distinguish the imported calendar from your other calendars at a glance. The chosen color will be applied to the imported calendar’s events, making them visually distinct within your Google Calendar interface. Additionally, adjusting the visibility settings allows you to manage who can see the imported calendar and its events.
With Step 5 completed, you have successfully adjusted the color and visibility options for the imported calendar in your Google Calendar account. The imported events are now personalized and easily accessible, allowing you to effectively manage your schedule and stay organized.
Congratulations! You have completed all the steps to copy and paste a Google Calendar. By following this process, you can seamlessly transfer events, settings, and information between calendars, making it easier to collaborate, share schedules, or organize your own schedule efficiently.
Conclusion
Copying and pasting a Google Calendar can be a time-saving and convenient process, allowing you to duplicate calendars, share schedules with others, or back up your important events. By following the step-by-step guide provided in this article, you can easily copy and paste calendars, ensuring efficient schedule management and collaboration.
Through the process of exporting the calendar file, you create a copy of the desired calendar, including all its events, details, and settings. This exported file can then be imported into another Google Calendar account, allowing for easy sharing or consolidation of multiple calendars. The imported calendar can also be reviewed and adjusted, such as customizing its color and visibility options according to your preferences.
Whether you need to duplicate a calendar for personal use, collaborate with team members, or share a family schedule, the ability to copy and paste Google Calendars proves invaluable. It eliminates the need for manual recreation of events and ensures accuracy and consistency across different accounts.
Remember to always review the imported calendar and make any necessary adjustments to ensure its accuracy. This includes checking event details, making edits if needed, and customizing its appearance and visibility.
By leveraging the power of Google Calendar’s copy and paste feature, you can streamline your scheduling process and stay organized. Whether you are a professional managing work deadlines, a student juggling multiple class schedules, or an individual managing personal events, the ability to copy and paste Google Calendars makes managing your schedule a breeze.
Now that you are equipped with the knowledge and steps to copy and paste Google Calendars, feel free to create duplicates, share schedules, and manage your events with ease. Embrace this feature to optimize your time, increase productivity, and stay on top of your busy schedule.