Introduction
Welcome to the digital age where email has become an essential part of our lives. Whether it’s for personal or professional use, we rely on email for communication, file sharing, and important conversations. It’s no wonder that our email accounts often contain a wealth of valuable information.
However, what if something were to happen to your email account? Accidental deletions, hacking attempts, or even service outages can result in the loss of your precious emails. That’s why it’s crucial to backup your Gmail emails to ensure that you have a copy of your important messages.
In this article, we will guide you through the process of backing up your Gmail emails to an external hard drive, providing you with peace of mind and secure storage. By following these steps, you can safeguard your valuable data and easily access it whenever needed.
Are you ready to protect your emails and take control of your data? Let’s get started!
Step 1: Create a Google Takeout Archive
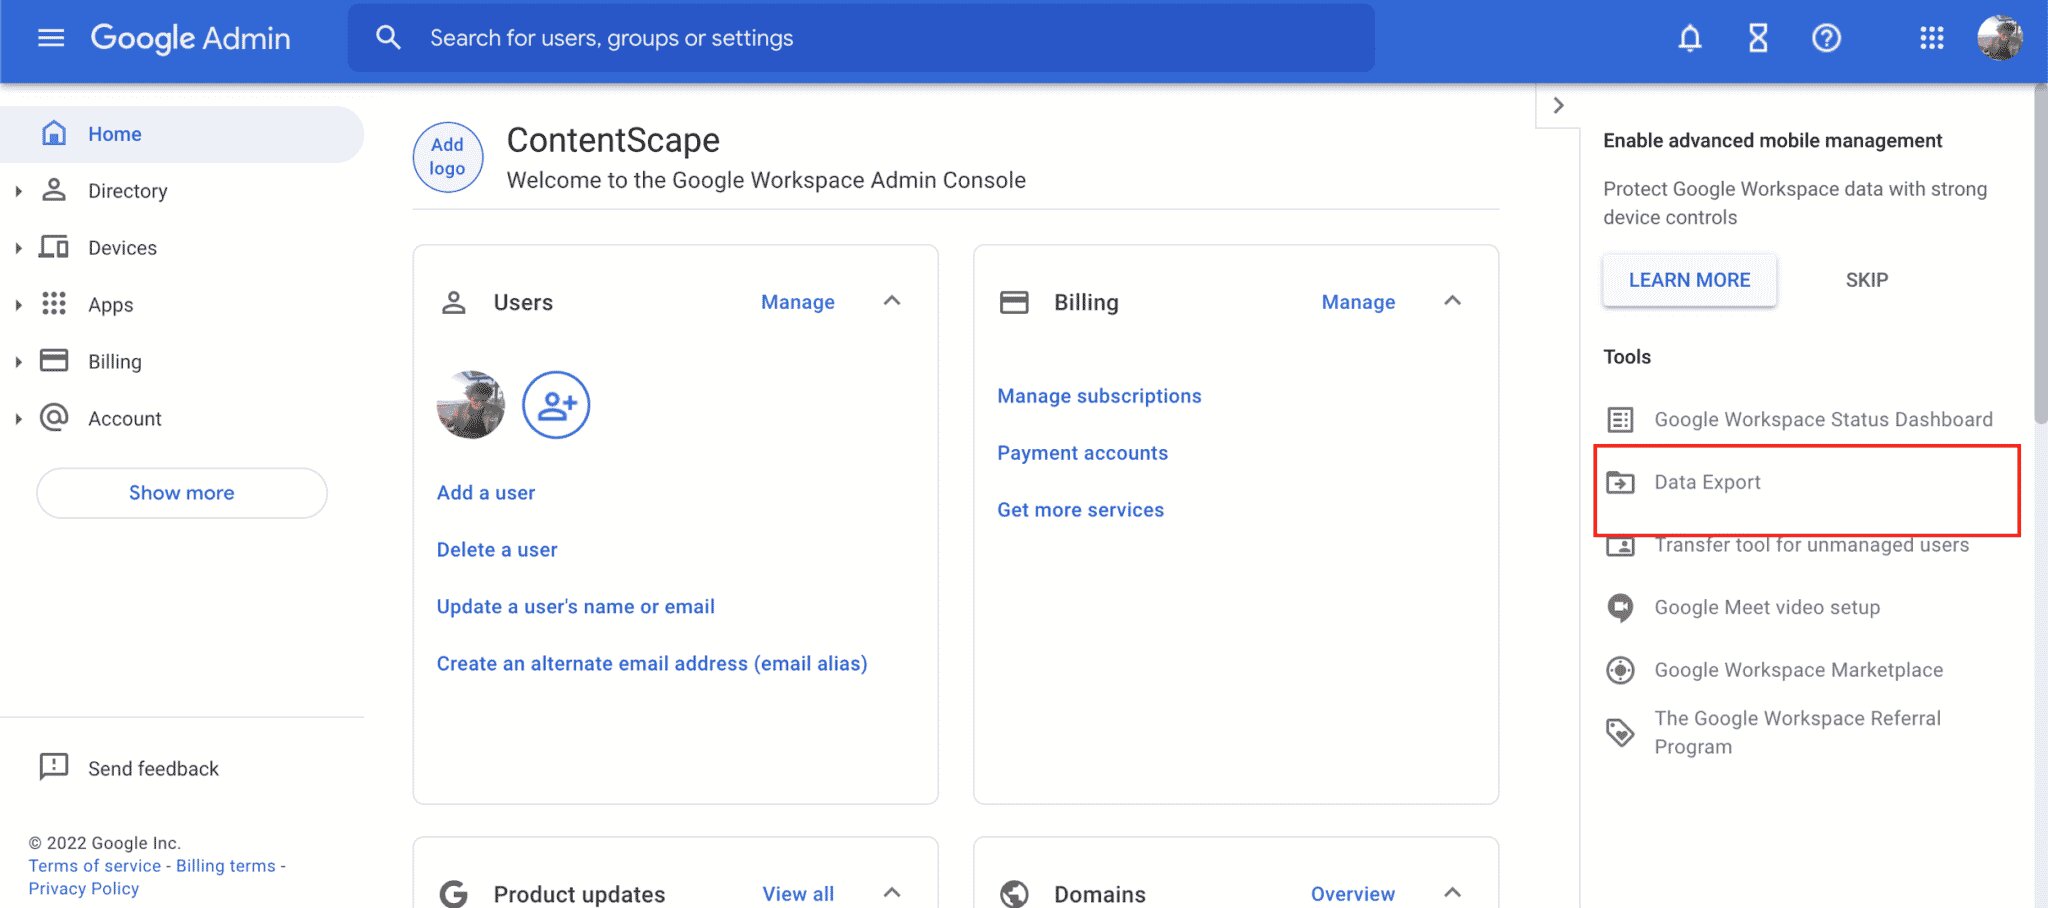
The first step in backing up your Gmail emails to an external hard drive is to create a Google Takeout archive. Google Takeout is a service provided by Google that allows you to download a copy of your data from various Google products, including Gmail.
To create a Google Takeout archive:
- Open a web browser and go to the Google Takeout website.
- Sign in to your Google account if you haven’t already.
- Once signed in, you will see a list of Google products. Select “Deselect All” to uncheck all the products.
- Scroll down and locate “Mail”. Check the box next to it to include your Gmail data in the archive.
- Click on “Next” at the bottom of the page.
- On the next page, you can customize your archive settings. Here, you can choose the file type, delivery method, and other options.
- For Gmail backups, it is recommended to keep the default settings. However, if you prefer a specific file format or want the archive to be delivered via email or a cloud storage service, you can make the necessary selections.
- Click on “Create export” to initiate the creation of your Google Takeout archive.
- Google will now begin preparing your archive. The time it takes to create the archive will depend on the size of your Gmail account and the selected options.
- Once the archive is ready, you will receive an email notification containing a download link.
By following these steps, you have successfully created a Google Takeout archive of your Gmail emails. In the next step, we will download the archive to your computer in preparation for transferring it to an external hard drive.
Step 2: Download the Archive to Your Computer
Now that you have created a Google Takeout archive of your Gmail emails, it’s time to download it to your computer. By having a local copy of the archive, you can easily access and transfer it to an external hard drive for safekeeping.
Follow these steps to download the archive:
- Open the email notification you received from Google after the archive was created. This email will contain a download link.
- Click on the download link to initiate the download process.
- You will be redirected to the Google Takeout website once again.
- Verify that the correct archive is selected and click on the “Download” button.
- Select the destination folder on your computer where you want to save the archive.
- Click on “Save” to begin the download.
- Depending on the size of the archive and your internet connection speed, the download may take some time.
- Once the download is complete, you will have a compressed file (ZIP file) containing all your Gmail emails.
- Extract the contents of the ZIP file to a location on your computer for easy access.
Now that you have successfully downloaded the Google Takeout archive to your computer, you are one step closer to safeguarding your Gmail emails. In the next step, we will explore how to transfer the archive to an external hard drive for additional backup.
Step 3: Transfer the Archive to an External Hard Drive
Now that you have downloaded the Google Takeout archive of your Gmail emails to your computer, it’s time to transfer the archive to an external hard drive. This additional backup ensures that your data is stored in a separate physical location, providing an extra layer of security.
Follow these steps to transfer the archive to an external hard drive:
- Connect your external hard drive to your computer using a USB cable or other appropriate connection.
- Open the folder where you saved the extracted Google Takeout archive.
- Locate the archive folder, which should be named something like “Takeout-YYYYMMDD-XXXXXX” where “YYYYMMDD” represents the date of the archive and “XXXXXX” is a unique identifier.
- Copy the entire folder or drag and drop it onto your external hard drive.
- The transfer process may take some time depending on the size of the archive and the speed of your computer and external hard drive.
- Once the transfer is complete, safely disconnect the external hard drive from your computer.
Congratulations! You have successfully transferred the Google Takeout archive of your Gmail emails to an external hard drive. This additional backup ensures that your data is stored in a separate location, reducing the risk of data loss. In the next step, we will provide some tips for safely storing your external hard drive.
Step 4: Safely Store the External Hard Drive
Now that you have transferred the Google Takeout archive of your Gmail emails to an external hard drive, it is important to properly store it to ensure the security and longevity of your backup. Follow these guidelines to safely store your external hard drive:
- Choose a suitable location: Select a secure and dry location to store your external hard drive. Avoid areas prone to excessive heat, moisture, or potential physical damage.
- Use a protective case: Invest in a durable protective case or sleeve for your external hard drive to shield it from potential scratches, dust, and accidental impact.
- Avoid extreme temperatures: Extreme temperatures can damage the internal components of the hard drive. Ensure that the storage area is within the manufacturer’s recommended temperature range.
- Backup redundancy: Consider making additional copies of your Google Takeout archive and storing them in separate external hard drives or cloud storage services. This provides an extra layer of redundancy in case of hardware failures or unexpected incidents.
- Update your backup regularly: As you continue to use your Gmail account, regularly update your Google Takeout archive to include new emails and changes. This ensures that your backup remains up-to-date and reflects the latest changes to your mailbox.
- Protect against theft: If your external hard drive contains sensitive information, consider using encryption software to protect your data from unauthorized access in case of theft or loss.
- Periodically test your backup: Occasionally, verify the integrity of your backup by restoring a few emails from the archive to ensure that the restoration process works smoothly and that your data is recoverable.
By following these guidelines, you can ensure the safety and longevity of your external hard drive backup. Remember to regularly update and maintain your backup to keep it current and reliable.
Conclusion
Backing up your Gmail emails to an external hard drive is a smart and proactive step to protect your valuable data. In this article, we have covered the four essential steps to create a secure backup of your Gmail emails.
We started by creating a Google Takeout archive, allowing us to download a copy of our Gmail data. Then, we downloaded the archive to our computer, ensuring we have a local copy readily available. Next, we transferred the archive to an external hard drive for an additional layer of backup.
Finally, we discussed the importance of safely storing the external hard drive to protect against physical damage, theft, and data loss. Remember to choose a suitable location, use proper protective cases, and consider backup redundancy to provide an extra level of security.
By following these steps and best practices, you can safeguard your Gmail emails and have peace of mind knowing that your data is protected. Regularly updating and testing your backup ensures that it remains current and reliable.
Now that you are equipped with the knowledge and tools to back up your Gmail emails to an external hard drive, take action today and secure your valuable data for the future. Protect your emails, safeguard your memories, and ensure you never lose important information again!