Today, there’s a lot of audio editing software available in the market. Choosing the best program for you might be challenging and a bit of a hassle. Well, Adobe Audition might be the answer for you as it is a premium option that brings a powerful, intuitive, and flexible digital audio workstation.
What Is Adobe Audition?
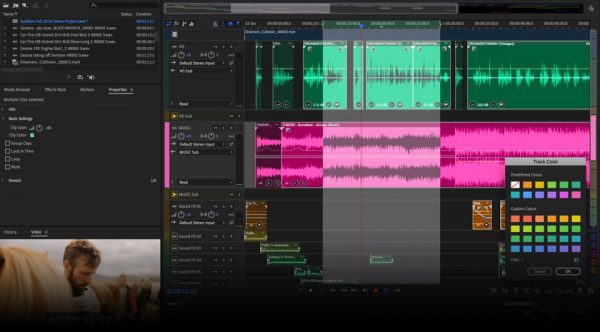

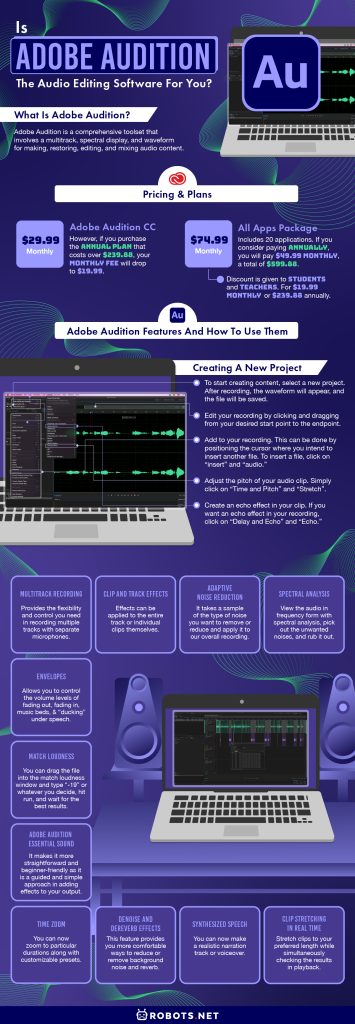
Adobe Audition is a comprehensive toolset that involves a multitrack, spectral display, and waveform for making, restoring, editing, and mixing audio content. This is a diverse audio workstation that is particularly designed to improve and speed up video production and audio enhancement. It is geared toward providing a superior output with pristine sound. It can be used by beginners and professionals alike and for different purposes including music and podcasts.
As a premium software, Adobe Audition requires a cost for you to be able to enjoy all its features, although a free trial is also available.
If you’re enjoying this, we also have reviews for other editing software like Audacity and Ocenaudio.
Pricing & Plans
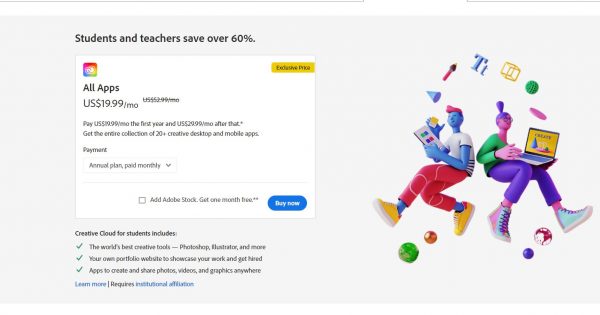

If you sign up for any of the plans offered, additional features and updates will be available and earned. Adobe Audition can be availed annually or monthly. The cost of Adobe Audition CC monthly is $29.99. However, if you purchase the annual plan that costs over $239.88, your monthly fee will drop to $19.99.
Additionally, Adobe’s All Apps package includes 20 applications such as Photoshop, Illustrator, and Audition that can be available at $74.99 every month. If you consider paying annually, you will pay $49.99 monthly, a total of $599.88.
The best thing about getting the All Apps package is that a discount is given to students and teachers. For this, you’ll be paying $19.99 monthly or $239.88 annually.
Adobe Audition Features and How to Use Them
Creating a New Project
To familiarize yourself with the Adobe Audition, we have compiled steps and tips that you can follow to maximize all its unique features and gain the best results.
Step 1
To start creating content, select a new project. After recording, the waveform will appear, and the file will be saved.
Step 2
Edit your recording by clicking and dragging from your desired start point to the endpoint. The selected area will be highlighted and all you have to do is to double-click on the spot to edit.
Pressing the spacebar will let you preview the part you’re editing. Use your mouse to choose and narrow down the clip you wish to alter. By editing, you can get rid of unwanted noise or errors by highlighting them and pressing “delete.”
Step 3
Add to your recording.
Spaces and other files may be inserted in your recording. This can be done by positioning the cursor where you intend to insert another file. To insert a file, click on “insert” and “audio.” It is always a clever move to edit a clip before inserting it into your project. However, upon inserting, changes are typical to make the outcome sound more natural.
Step 4
Adjust the pitch of your audio clip.
Simply click on “Time and Pitch” and “Stretch” if you wish to increase or decrease your recording pitch. This would not affect its length.
Step 5
Adjust the length of your audio clip.
To lengthen or shorten the clip you’re working on, simultaneously left-click your mouse and press the Shift button with the cursor placed at the end of your clip. To extend the clip, drag the clip to the right side and to shorten it, drag the mouse to the left.
Step 6
Create an echo effect in your clip.
If you want an echo effect in your recording, click on “Delay and Echo” and “Echo.” This will make the recording sound like an echo from a mountain or even a canyon. The effects can be altered by adjusting various settings available within this mode in editing. With this, you can experiment with the other special effects available to enhance the recording even more.
Multitrack Recording
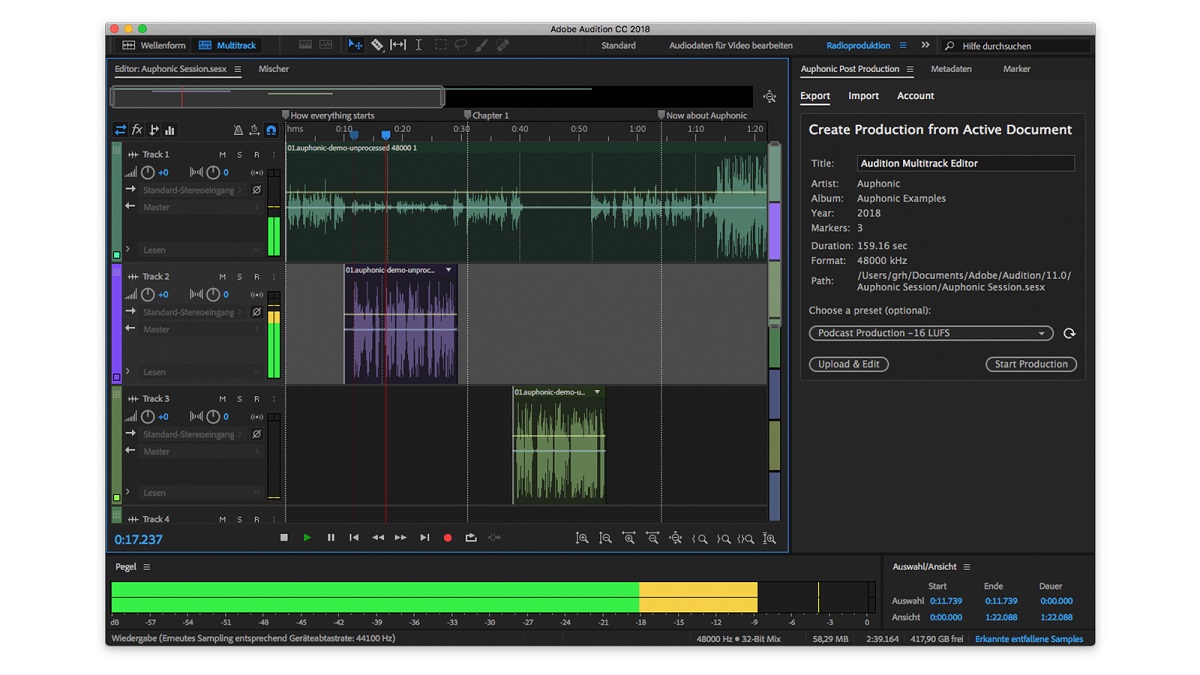
The program provides the flexibility and control you need in recording multiple tracks with separate microphones. Multitrack recording can set appropriate gain levels to match each person’s voice; this feature can give each voice individual EQ and processing treatment in post-production. This feature also allows you to record a round table talk show and audio dramas where you can straightly record a group of actors in Adobe Audition’s multitrack function.
Clip and Track Effects
During the editing process, various effects can be applied to the audio clips. Effects can be applied to the entire track or individual clips themselves. The good thing about using effects to the clips is that it is not permanent and can easily remove them if it does not suit your taste. These effects won’t damage your track and vary from reverb and EQ to compression or telephone filter effects.
Adaptive Noise Reduction
If you want to reduce the background noise or any noise per se, this process is the one you need. It takes a sample of the type of noise you want to remove or reduce and apply it to our overall recording. This is perfect if you’re going to clean your track. This feature runs as a track effect in the multitrack, which can clean up any vocal tracks exceptionally. With this feature, you can export tracks to create a clean version of the project you’re working with.
Spectral Analysis
Constant hiss and dog barking are some of the unwanted noises created in the background during recording. If such happens when you are recording someone talking and what they say is imperative to the conversation, you cannot edit it out with the traditional cut sense. This is where spectral analysis comes in. You can view the audio in frequency form with spectral analysis, pick out the unwanted noises, and rub it out. However, there are limits when using spectral analysis. Like any other restoration work, there are times when this feature works like magic and comes in handy.
Envelopes
This feature allows you to control the volume levels of fading out, fading in, music beds, and “ducking” under speech. These are commonly used in podcasting. Also, it allows you to control volume levels and pan audio from right to left. Lastly, it will enable you to edit directly on the track instead of the clip. This means you can simultaneously exchange clips while still having these panning and volume changes.
Match Loudness
For podcasters, volume levels can be a problem. There are potential variations from show to show, segment to segment, and episodes to episodes.
You can drag the file into the match loudness window and type “-19” or whatever you decide, hit run, and wait for the best results.
Adobe Audition Essential Sound
This feature helps beginners use Adobe Audition easier. How? It makes it more straightforward and beginner-friendly as it is a guided and simple approach in adding effects to your output. Users can also maximize this feature by setting and adjusting the clip reverb levels, volume, and panning.
DeNoise and DeReverb Effects
This feature provides you more comfortable ways to reduce or remove background noise and reverb from your work without leaving any intricate noise prints through your Essential Sound Panel.
Upgraded Recording Performance and Playback
This new feature permits you to play over a hundred tracks or record over 32 tracks in low latencies without expensive and single-purpose acceleration equipment.
Time Zoom
You can now zoom to particular durations along with customizable presets. Say no more to guessing or making challenging adjustments just to see the exact time length.
Effects and Preset Migration
This permits you to import all third-party effects that are already scanned by Audition’s previous versions. It also includes custom effect presets and many more.
On-Clip Gain Control and Waveform Scaling
This new feature permits you to do your audio productions with ease as it allows you to alter your audio without having to move your cursor away from your work. Having said that, all you have to do is strategically determine the clip that needs loudness adjustment and match it to the adjacent audio clip with a waveform.
Deleting Empty Tracks and Adding Tracks
These additional commands let you quickly add bus tracks or multiple audios at once. It also makes your tasks easier because you can clear all clips that are not used in just one session.
Auto-Duck Music
With Auto-Duck, you can automatically create a volume envelope for sound effects or any clips using the Ducking parameter located in the Essential Sound panel. Additionally, it simplifies the steps required to bring about professional audio outputs.
Running Scripts
This allows you to run scripts within Audition to access functions such as QC validation, loudness normalization, and many more. Through this, you can include third-party integrations and streamline common tasks.
Visual Keyboard Shortcut Editor
This gives you access to see which keys have been designated to shortcuts and which ones are available to use. To view the full command name, you must access the tooltip by hovering over the keyboard layout. Also, this feature makes you maximize the keyboard layout, particularly the modifier key, and it will show you all the shortcuts that must be assisted by a modifier.
Timecode Overlay
This feature enables you to view the media and session timecode that overlays the Video panel. Not to mention that it can lock your video output to an external display. It also shows the current time string as an overlay on the video full screen and panel.
Synthesized Speech
You can now make a realistic narration track or voiceover. This is perfect for synthesizing voices for audio productions, games, and videos.
Clip Stretching in Real Time
You can immediately stretch clips to your preferred length while simultaneously checking the results in playback. All you have to do is select multiple clips on the Editor panel to extend them accurately. You can also pick from an array of stretch types to optimize your audio content.
Parameter Automation and Control Surface Support
Using the Logic Control Protocols, EUCON, or Mackie MCU, you can mix your audio interactively with well-known control surfaces. Aside from that, you can use third-party tablet controllers that support these features. Additionally, you can use several devices simultaneously.
Frequency Band Splitter
The frequency and band splitter allows you to work on one audio output and create a maximum of eight copies. Here, each duplicate will consist of ranges of frequencies that have originated from the original audio track. Furthermore, each copy made will be saved as a new file and under the Files panel, wherein you can edit them and apply the necessary effects separately.
Waveform Editing With Spectral Frequency Display
This removes, adds, and inverts spectral selections using the paintbrush selection tools, lasso tool, or marquee.
Audio Extraction From Compact Discs
You can extract selected audio from CDs to a single file. All you have to do is insert an audio CD to an optical drive, choose File and then Extract Audio from CD. The last step is to pick out the track and allow Extract to Single File.
Paste Control for Multitrack Sessions
You can paste all the clips you desire in multiple clips or just one audio track. To do this, just hit Alt and drag to toggle. In the Multitrack Clip preferences, you can specify the default behavior. When this is enabled, the new preferred specification avoids overlapping clips when you insert or paste new clips.
Phase Analysis Panel
This feature’s goal is to reveal out-of-phase channels for stereo waveforms. It also shows a stereo separation, and from there, you can pick various phase views, including Lissajous, Phase Wheel, Mid/Side, and Histogram. To better see the options displayed, just right-click the actual graph and pick out your preferred choice.
Pros and Cons of Using Adobe Audition
Pros
- The software doesn’t have a complicated process and features.
- Its extensive set of tools makes it ideal and perfect for podcasters and videographers.
- The restoration and repair capability is peerless.
- It has a tremendous dynamic link.
- The versatility of how you can remove noise in Adobe Audition is wide.
- Adobe Audition offers a variety of ways to edit sections and clips within a wavelength.
- Stable long recordings are possible.
- You can cut and arrange clips using a clearer interface.
- It offers a ready-made template based on your needs.
Cons
- Some advanced features are not available in the trial version.
- The advanced features are only included in the premium version, which you have to pay. However, these features are more than enough for the price.
- The subscription plan is quite expensive.
- It does not offer features for music creations.
- It takes a while to load and finish.
- Adobe Audition does not monitor single-track recordings.
- It does not offer crowd-sharing.
Adobe Audition vs Other Editing Software
There are various types of editing software that you can encounter in the market. Deciding what to use is problematic since some of the features you want are not offered. In this light, we have reasons why you should choose Adobe Audition and why it is better than other editing software out there.
Audition vs. Audacity
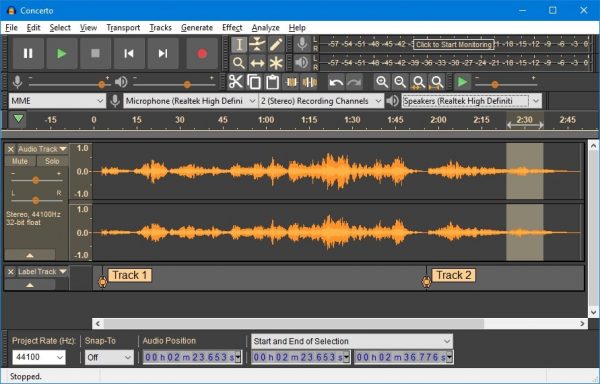

Audition and Audacity are both audio editing tools available for sound editing and productions. One key difference between the two is the price point. While Audacity is a free and open-source product, Audition is not. However, Audition may come in a bundle with other Adobe products, giving it more advantage and making up for the cost.
Audition vs. GarageBand
GarageBand is a music-making workstation that comprises keyboard controls, piano roll notation, MIDI, and other instruments. At the same time, Audition is purely an audio editing software and multitrack recording program within MIDI function.
Audition vs. Adobe Premiere Pro
Also an Adobe product, Premiere Pro is more known as a video editing program. However, it does have a comprehensive set of tools for sound editing as well. On the other hand, if we’re talking about ease of use, Audition is more comfortable and straightforward to set up. It also has better quality and ongoing product support. Adobe Premiere Pro is better for business entities as it provides superior feature updates and roadmaps.
