Introduction
Welcome to the comprehensive guide on repairing the speaker on the iPhone 12. If you've been experiencing muffled sound, crackling, or no audio at all from your iPhone 12, it's likely that the speaker needs to be repaired or replaced. This guide will walk you through the step-by-step process of repairing the speaker on your iPhone 12, allowing you to restore its audio functionality and enjoy crystal-clear sound once again.
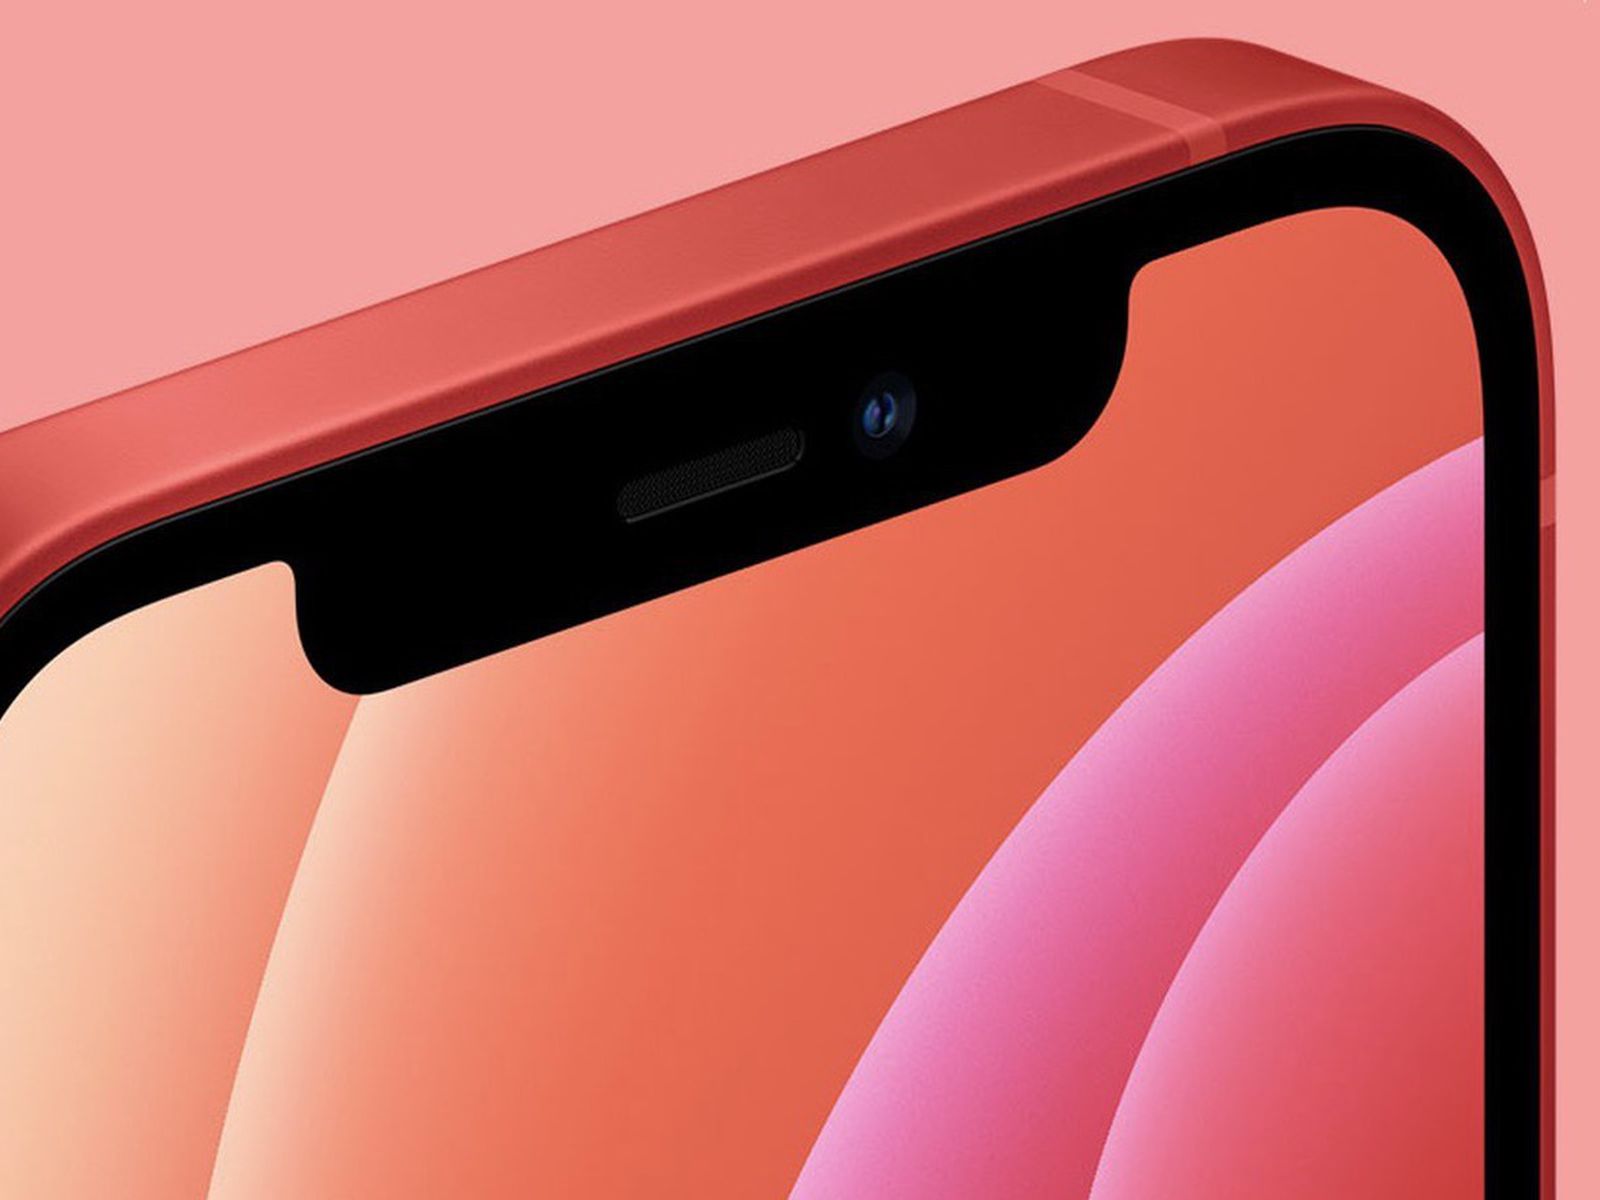
The speaker is a crucial component of the iPhone 12, responsible for delivering clear and high-quality audio during calls, music playback, and video watching. A malfunctioning speaker can significantly hinder your overall user experience, making it essential to address any issues promptly.
By following this guide, you can save time and money by repairing the speaker yourself, rather than seeking professional assistance. With the right tools and careful attention to detail, you can successfully troubleshoot and resolve speaker-related issues, giving your iPhone 12 a new lease on life.
This guide will take you through the necessary steps, from disassembling the iPhone 12 to replacing the speaker and reassembling the device. Each step is explained in detail, ensuring that even those with minimal technical experience can follow along.
Before you begin, it's essential to gather the required tools and prepare a clean, well-lit workspace. Additionally, make sure to power off your iPhone 12 before starting the repair process to avoid any potential damage.
With this comprehensive guide, you'll be equipped with the knowledge and confidence to tackle the speaker repair on your iPhone 12. Let's dive into the essential tools needed for this repair process and get your iPhone 12's audio back in top-notch condition.
Tools Needed for Repairing Speaker on iPhone 12
Before embarking on the speaker repair process for your iPhone 12, it’s crucial to gather the necessary tools to ensure a smooth and successful repair experience. Having the right tools at your disposal will enable you to disassemble the device, remove the faulty speaker, and install a new one with precision and care. Here’s a comprehensive list of the essential tools required for repairing the speaker on your iPhone 12:
- Pentalobe Screwdriver: The iPhone 12 features proprietary pentalobe screws that secure the display assembly. A pentalobe screwdriver is essential for removing these specialized screws without causing damage to the device.
- Y000 Screwdriver: This specialized screwdriver is necessary for removing internal components, such as the Taptic Engine and speaker, which are secured with small Y000 screws.
- Spudger Tool: A spudger tool is invaluable for safely prying and disconnecting delicate ribbon cables and connectors within the iPhone 12 without causing damage to the components or the device’s logic board.
- Tweezers: Precision-point tweezers are essential for handling small screws, connectors, and delicate components during the disassembly and reassembly process.
- Replacement Speaker: To complete the repair, you’ll need a high-quality replacement speaker designed specifically for the iPhone 12. Ensure that the replacement part is compatible with your device model to guarantee optimal performance.
- Clean Workspace: Prepare a clean, well-lit workspace with ample room to lay out the iPhone 12 and its components during the repair process. A clutter-free environment will help prevent misplacement of small parts and ensure a focused and organized repair experience.
By ensuring that you have these essential tools at your disposal, you’ll be well-equipped to undertake the speaker repair on your iPhone 12 with confidence and precision. With the tools in hand, you’re ready to begin the step-by-step process of resolving the speaker-related issues and restoring your iPhone 12’s audio functionality.
Step 1: Removing the Display Assembly
Before delving into the intricate process of speaker repair, the initial step involves safely removing the display assembly of the iPhone 12. This critical step provides access to the internal components, including the speaker and Taptic Engine, facilitating their subsequent removal and replacement. Follow these detailed steps to effectively remove the display assembly:
- Power Off the iPhone 12: Prior to any disassembly, ensure that your iPhone 12 is powered off to prevent any potential electrical mishaps during the repair process.
- Prepare the Pentalobe Screwdriver: Use a pentalobe screwdriver to remove the two screws located at the base of the device, adjacent to the charging port.
- Apply Heat and Use a Suction Handle: Apply gentle heat to the lower edge of the iPhone 12 using a heat gun or hairdryer to soften the adhesive securing the display. Once heated, affix a suction handle to the lower half of the display to create a slight gap.
- Insert a Spudger Tool: Gently insert a spudger tool into the gap created by the suction handle, then carefully slide it along the lower edge of the display to loosen the adhesive securing the assembly.
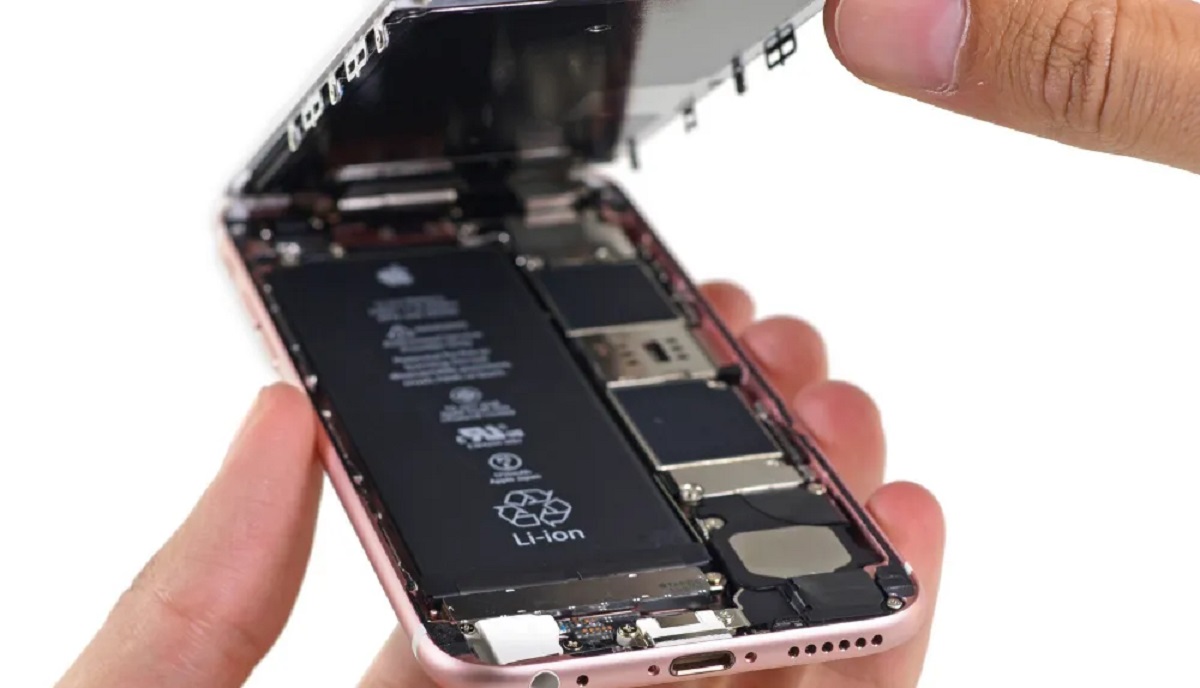
- Open the Display: With the adhesive loosened, carefully lift the display assembly by the sides, ensuring that the flex cable connecting the display to the device’s logic board is not strained or damaged.
- Secure the Display: Use a prop or a specialized fixture to secure the display assembly at a 90-degree angle, allowing for unobstructed access to the internal components, including the speaker and Taptic Engine.
By meticulously following these steps, you’ll successfully remove the display assembly of your iPhone 12, granting access to the internal components that require attention during the speaker repair process. With the display assembly safely removed, you’re now prepared to proceed with the subsequent steps, including the removal and replacement of the faulty speaker.
Step 2: Removing the Taptic Engine
After successfully removing the display assembly, the next crucial step in the speaker repair process involves the careful removal of the Taptic Engine from the iPhone 12. The Taptic Engine, responsible for providing haptic feedback and vibrations, is positioned adjacent to the speaker and must be extracted to access and replace the speaker effectively. Follow these detailed steps to remove the Taptic Engine:
- Identify the Taptic Engine: Locate the Taptic Engine, which is positioned near the bottom of the iPhone 12, adjacent to the speaker assembly.
- Disconnect the Flex Cable: Gently disconnect the flex cable attached to the Taptic Engine, ensuring a firm yet delicate grip to avoid damaging the connector.
- Remove the Securing Screws: Using a Y000 screwdriver, carefully remove the small screws securing the Taptic Engine in place, ensuring that they are safely set aside for reassembly.
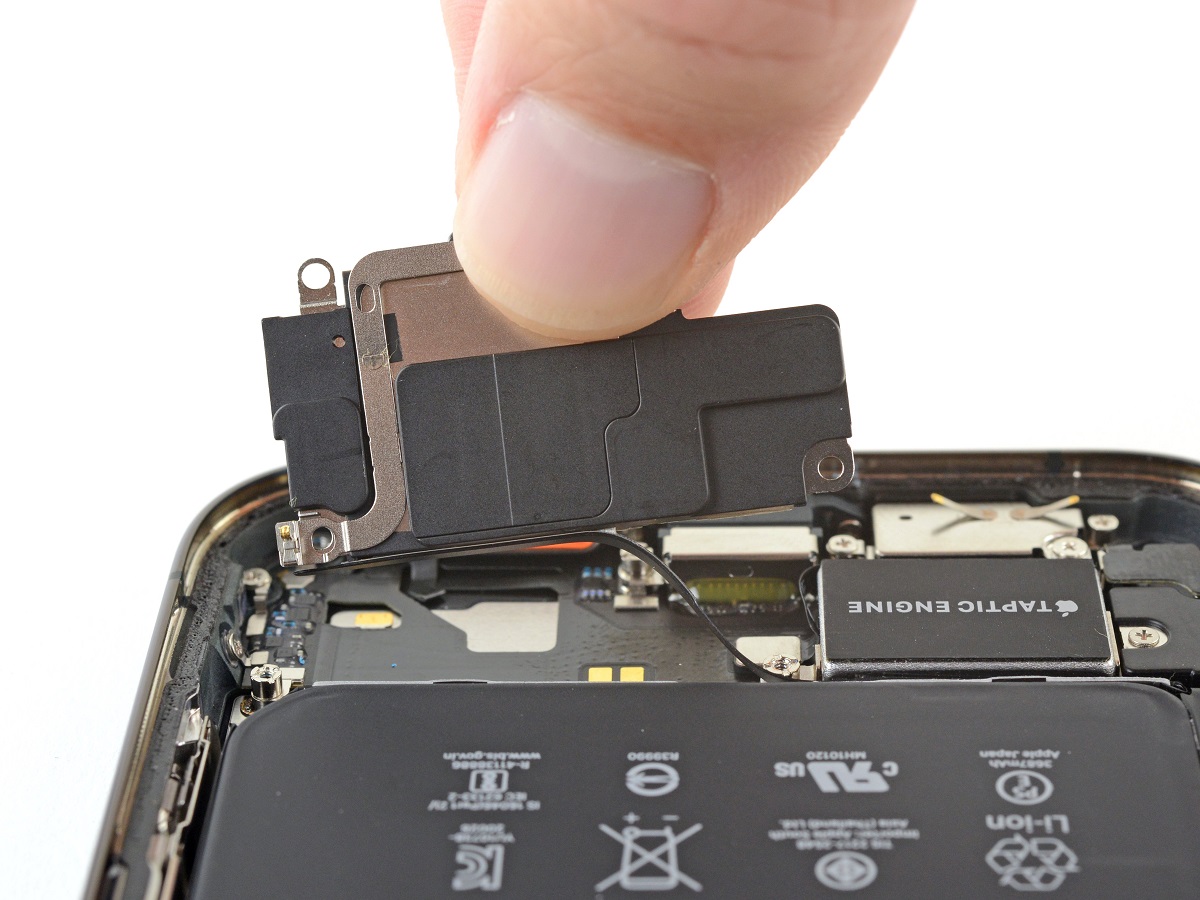
- Utilize a Spudger Tool: With the screws removed, employ a spudger tool to carefully pry the Taptic Engine from its position, ensuring gentle and precise movements to release it from the adhesive securing it to the device.
- Extract the Taptic Engine: Once the Taptic Engine is loosened, carefully lift and extract it from the iPhone 12, taking care not to damage any surrounding components or cables.
- Secure the Taptic Engine: Safely store the removed Taptic Engine in a designated container to prevent misplacement and ensure its protection during the subsequent steps of the repair process.
By meticulously following these steps, you’ll effectively remove the Taptic Engine from your iPhone 12, paving the way for seamless access to the speaker assembly for the subsequent replacement process. With the Taptic Engine safely extracted, you’re now prepared to proceed with the next critical phase of the speaker repair process.
Step 3: Removing the Speaker
With the Taptic Engine successfully removed, the next pivotal step in the speaker repair process involves the careful extraction of the speaker from the iPhone 12. Removing the faulty speaker is essential to pave the way for the installation of a new, fully functional speaker. Follow these detailed steps to effectively remove the speaker from your iPhone 12:
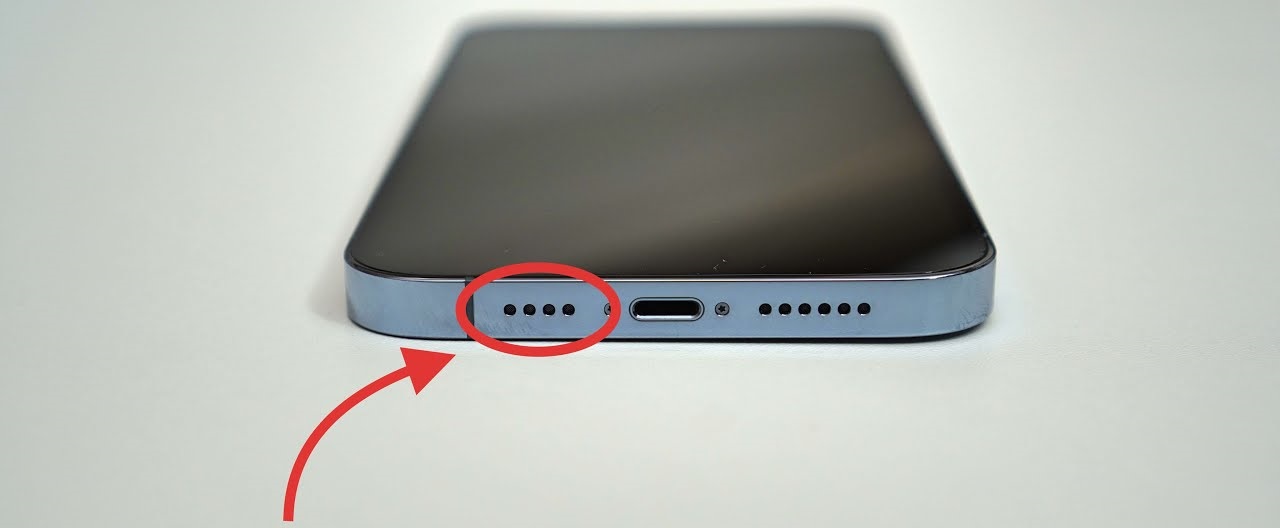
- Locate the Speaker Assembly: Identify the speaker assembly positioned within the internal framework of the iPhone 12, typically situated near the lower edge of the device.
- Disconnect the Speaker Connector: Gently disconnect the speaker connector, ensuring a steady grip and delicate handling to prevent damage to the connector or surrounding components.
- Remove the Securing Screws: Using a Y000 screwdriver, carefully remove the small screws securing the speaker in place, ensuring that they are safely stored for reassembly.
- Utilize a Spudger Tool: With the screws removed, employ a spudger tool to carefully pry the speaker from its position, ensuring gentle and precise movements to release it from any adhesive or securing clips.
- Extract the Speaker: Once loosened, carefully lift and extract the speaker from the iPhone 12, ensuring that no cables or components are strained or damaged during the removal process.
- Inspect the Removed Speaker: Take a moment to inspect the removed speaker for any visible signs of damage, such as tears in the speaker cone or water damage, which may have contributed to its malfunction.
By meticulously following these steps, you’ll effectively remove the faulty speaker from your iPhone 12, setting the stage for the subsequent installation of a new, fully operational speaker. With the speaker safely extracted, you’re now prepared to proceed with the critical phase of replacing the speaker to restore the device’s audio functionality.
Step 4: Replacing the Speaker
With the faulty speaker successfully removed from the iPhone 12, the next crucial step in the repair process involves the precise installation of a new, fully functional speaker. Replacing the speaker with a high-quality replacement part is essential to restore the device’s audio functionality and ensure crystal-clear sound output. Follow these detailed steps to effectively replace the speaker in your iPhone 12:
- Prepare the Replacement Speaker: Ensure that the replacement speaker is compatible with the iPhone 12 and free from any defects or damage. Verify that the speaker connectors and mounting points align with the device’s internal framework.
- Position the New Speaker: Carefully position the new speaker within the designated area in the iPhone 12, aligning the mounting points and ensuring that it sits flush and secure against the internal framework.
- Secure the Speaker with Screws: Using the appropriate screws and a Y000 screwdriver, securely fasten the new speaker in place, ensuring that it is firmly anchored within the device to prevent any unwanted movement or vibration.
- Reconnect the Speaker Connector: Delicately reconnect the speaker connector, ensuring a secure and snug fit without applying excessive force that may damage the connector or surrounding components.
- Perform a Functionality Test: Power on the iPhone 12 and test the newly installed speaker to ensure that it delivers clear and distortion-free audio output during calls, music playback, and video watching. Verify that all audio channels are functioning as expected.
By meticulously following these steps, you’ll successfully replace the faulty speaker in your iPhone 12 with a new, fully functional component, restoring the device’s audio capabilities to their optimal state. With the new speaker securely installed, you’re now prepared to proceed with the final phase of reassembling the iPhone 12 to complete the repair process.
Step 5: Reassembling the iPhone 12
With the new speaker successfully installed in the iPhone 12, the final critical step in the repair process involves reassembling the device to its original state. Careful reassembly is essential to ensure that all internal components are properly secured, connectors are reattached, and the device functions seamlessly. Follow these detailed steps to effectively reassemble your iPhone 12:
- Position the Display Assembly: Align the display assembly with the device’s framework, ensuring that the flex cable is delicately connected to the logic board and that the display sits flush against the iPhone 12.
- Secure the Display Screws: Using a pentalobe screwdriver, reinsert and tighten the pentalobe screws at the base of the device, adjacent to the charging port, to secure the display assembly in place.
- Reconnect the Taptic Engine: Delicately reconnect the flex cable of the Taptic Engine, ensuring a secure and snug fit without applying excessive force that may damage the connector or surrounding components.
- Secure the Taptic Engine Screws: Using a Y000 screwdriver, reinsert and tighten the small screws securing the Taptic Engine in place, ensuring that they are firmly anchored within the device.
- Perform a Final Functionality Test: Power on the iPhone 12 and thoroughly test its audio functionality, ensuring that the newly installed speaker delivers clear and high-quality sound output during various usage scenarios, including calls, music playback, and video watching.
By meticulously following these steps, you’ll effectively reassemble your iPhone 12, ensuring that all internal components are securely positioned and functioning optimally. With the device fully reassembled and the new speaker seamlessly integrated, you’ve successfully completed the repair process, restoring your iPhone 12’s audio capabilities to their pristine condition.
Conclusion
Congratulations on successfully completing the comprehensive speaker repair process for your iPhone 12. By diligently following the step-by-step guide outlined in this comprehensive resource, you’ve taken the proactive and empowering approach of resolving audio-related issues with your device. Through careful disassembly, removal, replacement, and reassembly, you’ve effectively restored your iPhone 12’s audio functionality, ensuring crystal-clear sound output during calls, music playback, and video watching.
By leveraging the essential tools and meticulous instructions provided in this guide, you’ve not only saved time and money but also gained valuable insight into the internal workings of your iPhone 12. This hands-on experience can instill confidence and a sense of accomplishment, empowering you to undertake future repairs and maintenance with greater ease and proficiency.
It’s important to note that the successful repair of the speaker on your iPhone 12 demonstrates the potential for self-sufficiency and resourcefulness when addressing device-related issues. By taking charge of the repair process, you’ve exemplified the spirit of innovation and problem-solving, attributes that can serve you well in various aspects of life.
As you power on your fully restored iPhone 12 and revel in the pristine audio quality delivered by the new speaker, take pride in your accomplishment and newfound expertise. The knowledge and skills acquired through this repair journey can serve as a foundation for future endeavors, whether they involve device maintenance, technical troubleshooting, or embracing new challenges with confidence.
With your iPhone 12 now equipped with a fully functional speaker, you can once again immerse yourself in the seamless audio experience that enhances your daily interactions and entertainment. The successful completion of this repair process underscores your ability to overcome challenges and emerge with a device that’s not just repaired, but revitalized.
As you continue to explore and engage with your iPhone 12, may the experience of repairing its speaker serve as a reminder of your capability to conquer technical obstacles and emerge victorious, equipped with newfound knowledge and a device that reflects your dedication to excellence.