Introduction
Are you experiencing muffled or distorted sound from the ear speaker of your iPhone 12? This common issue can be frustrating, but the good news is that you can resolve it by replacing the ear speaker. With the right tools and a step-by-step guide, you can tackle this repair with confidence.
In this comprehensive guide, we will walk you through the process of repairing the ear speaker on your iPhone 12. Whether you are a tech-savvy individual or a novice in the world of smartphone repairs, this guide will equip you with the knowledge and instructions needed to successfully replace the ear speaker and restore crystal-clear sound to your device.
By following these detailed steps, you will be able to address the ear speaker issue without the need for professional assistance, saving both time and money. Before we begin, make sure you have the necessary tools and a replacement ear speaker kit. With these in hand, you are ready to embark on the journey of repairing your iPhone 12's ear speaker.
Let's dive into the process of repairing the ear speaker on your iPhone 12, empowering you to take control of the maintenance and functionality of your device.
Tools Required
Before you begin the repair process, it’s essential to gather the necessary tools to ensure a smooth and efficient experience. Here’s a list of the tools you will need:
- Pentalobe screwdriver (specifically for iPhone)
- Y000 screwdriver
- Suction handle
- Spudger tool
- Tweezers
- Replacement ear speaker kit
- Adhesive strips (for resealing the iPhone)
The pentalobe screwdriver is crucial for removing the screws securing the iPhone’s display, while the Y000 screwdriver is used for various internal components. The suction handle will assist in lifting the display, and the spudger tool and tweezers are essential for disconnecting and handling delicate internal connectors and components.
Additionally, it’s important to have a replacement ear speaker kit on hand, ensuring that you have the new component ready for installation. Adhesive strips are also necessary for resealing the iPhone after the repair is complete, maintaining its structural integrity.
By having these tools at your disposal, you can proceed with confidence, knowing that you are well-equipped to address the ear speaker issue effectively.
Step 1: Power Off the iPhone
Before initiating any repair on your iPhone 12, it is crucial to power off the device to prevent any potential electrical mishaps. Follow these steps to safely turn off your iPhone:
- Begin by pressing and holding the side button along with either volume button until the “slide to power off” slider appears on the screen.
- Drag the slider, and your iPhone will power down.
- Ensure that the device is completely powered off before proceeding to the next step.
By powering off your iPhone, you reduce the risk of electrical shock and protect the internal components during the repair process. This simple yet crucial step sets the foundation for a safe and effective ear speaker replacement.
With the iPhone powered off, you are now ready to move on to the next step in the repair process, setting the stage for a successful resolution to the ear speaker issue.
Step 2: Remove the Screws
With the iPhone powered off, the next step is to remove the screws securing the display. To accomplish this, you will need a pentalobe screwdriver, specifically designed for iPhone models. Follow these steps to remove the screws:
- Locate the two pentalobe screws positioned at the bottom of the iPhone, on either side of the charging port.
- Using the pentalobe screwdriver, carefully unscrew and remove these two screws.
It is crucial to keep track of the screws and their placement to ensure they are correctly reinstalled during the reassembly process. Utilizing a screw organizer or a labeled diagram can help you maintain organization and prevent misplacement.
By successfully removing the screws, you have completed a fundamental step in accessing the internal components of the iPhone 12, paving the way for the subsequent stages of the ear speaker repair.
With the screws safely set aside, you are now prepared to proceed to the next phase of the repair process, inching closer to resolving the ear speaker issue and restoring optimal functionality to your iPhone 12.
Step 3: Lift the Display
After removing the screws, the next critical step is to carefully lift the display of the iPhone 12. This process requires precision and attention to detail to avoid damaging the delicate components. Follow these steps to lift the display:
- Position the suction handle on the lower part of the display, near the home button.
- Gently pull the suction handle upward while applying slight pressure to create a small gap between the display and the frame.
- Insert the edge of the spudger tool into the gap and carefully slide it along the edge to loosen the adhesive securing the display.
- Repeat the process on the other side of the display to further release the adhesive.
- With the adhesive loosened, carefully lift the display to an angle of approximately 90 degrees, ensuring it remains partially open but still connected to the iPhone.
It is crucial to exercise caution and patience during this step, as excessive force or haste can lead to damage to the display or its delicate cables. By methodically following these steps, you can successfully lift the display, gaining access to the internal components of the iPhone 12.
With the display lifted, you have reached a pivotal stage in the repair process, positioning yourself to proceed to the subsequent steps with precision and confidence, ultimately addressing the ear speaker issue effectively.
Step 4: Disconnect the Battery
Before proceeding further with the repair, it is crucial to disconnect the battery to minimize the risk of electrical mishaps and protect the internal components. Follow these steps to safely disconnect the battery of your iPhone 12:
- Locate the battery connector, which is positioned near the bottom edge of the iPhone.
- Using the edge of the spudger tool, carefully pry up the battery connector to disconnect it from the logic board.
- Ensure that the battery connector is fully detached to prevent any power from reaching the device during the repair process.
By disconnecting the battery, you mitigate the risk of electrical damage and create a safer environment for working on the internal components of the iPhone 12. This precautionary measure is essential for safeguarding both the device and the individual performing the repair.
With the battery safely disconnected, you are now prepared to proceed with the subsequent steps, equipped with the assurance that you have taken the necessary precautions to ensure a secure and effective repair process.
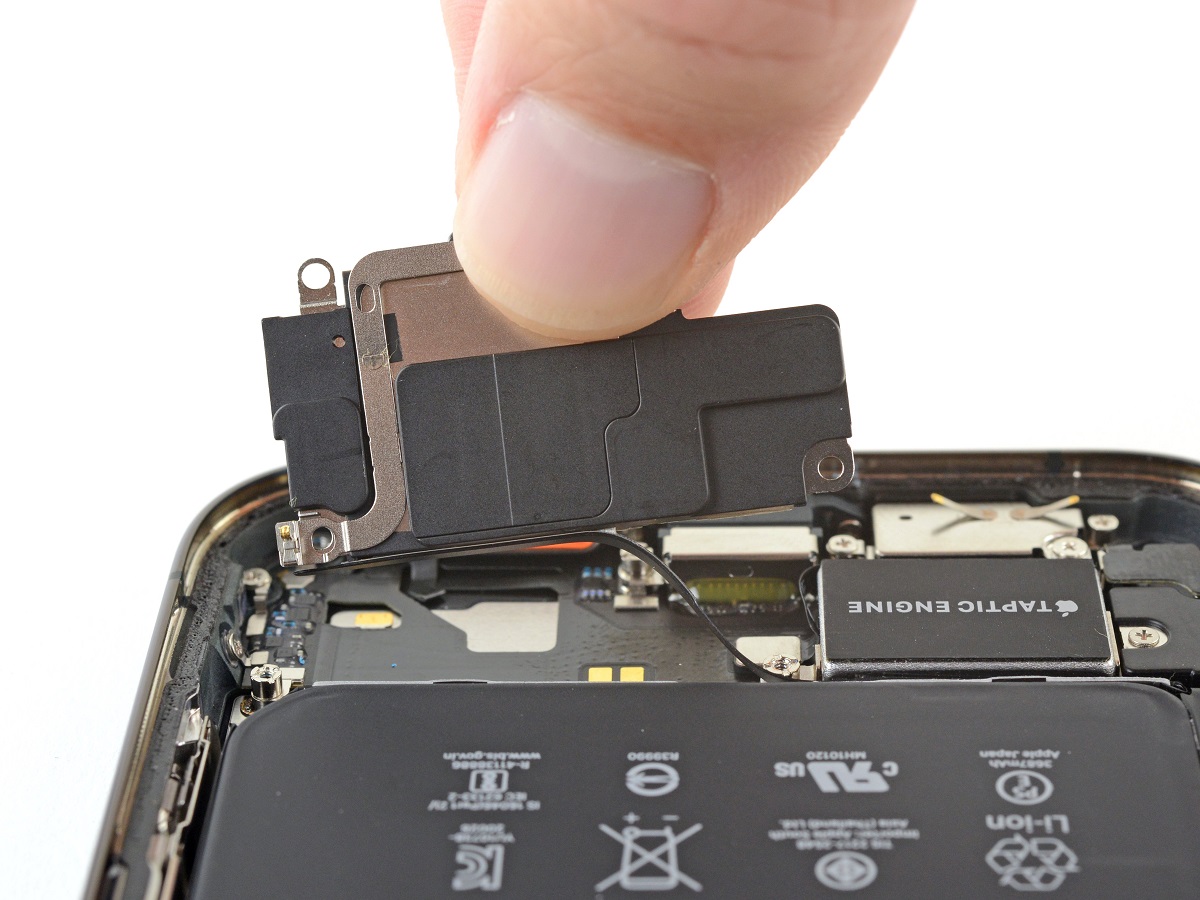
Step 5: Remove the Taptic Engine
The next crucial step in the repair process is to remove the Taptic Engine, which is positioned within the iPhone 12. Follow these steps to safely remove the Taptic Engine:
- Lift the adhesive securing the Taptic Engine using the edge of the spudger tool.
- Carefully detach the connector that links the Taptic Engine to the logic board by gently prying it up with the spudger tool.
- Once the connector is detached, carefully lift and remove the Taptic Engine from its position within the iPhone 12.
It is essential to handle the Taptic Engine with care, ensuring that it is safely set aside during the repair process to prevent damage. By methodically following these steps, you can successfully remove the Taptic Engine, clearing the path for accessing the ear speaker.
With the Taptic Engine removed, you have reached a pivotal stage in the repair process, positioning yourself to proceed to the subsequent steps with precision and confidence, ultimately addressing the ear speaker issue effectively.
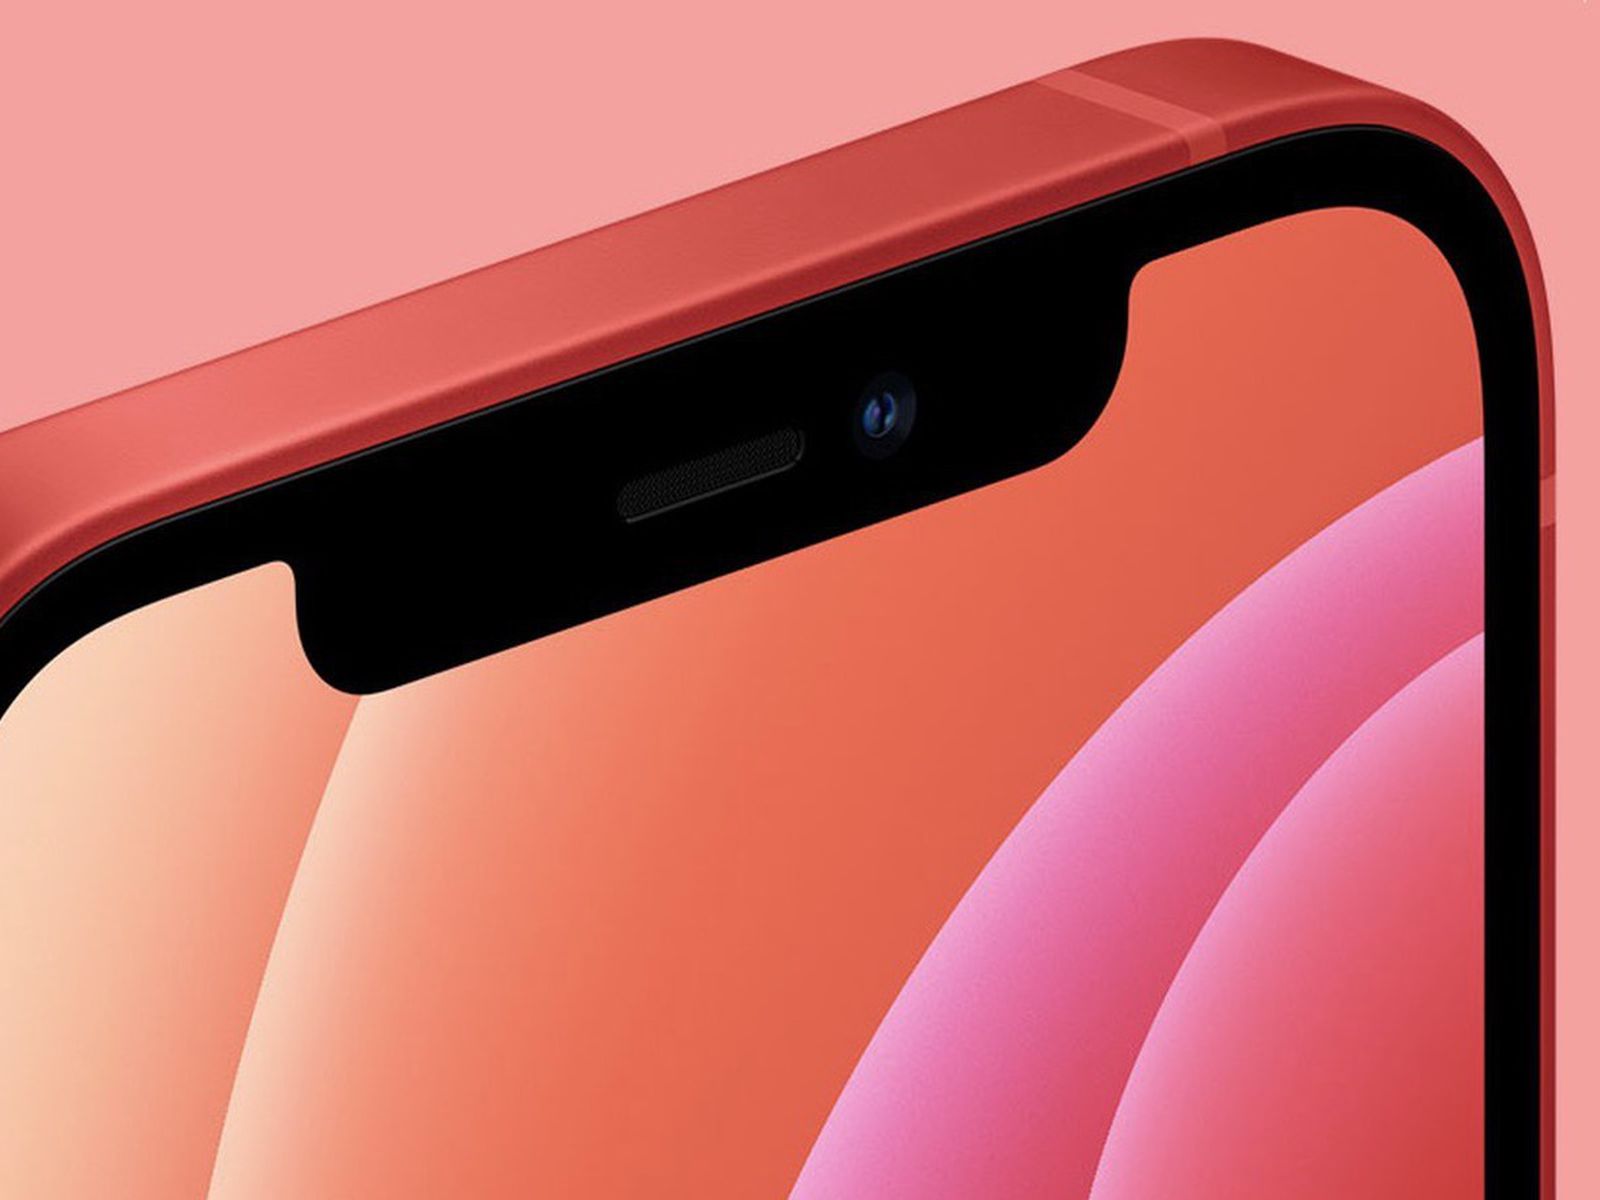
Step 6: Remove the Ear Speaker
Now, it’s time to remove the faulty ear speaker from your iPhone 12. Follow these steps to safely remove the ear speaker:
- Using the edge of the spudger tool, carefully lift the ear speaker connector to detach it from the logic board.
- Gently pry the ear speaker up from its position within the iPhone, ensuring that no cables or components are strained during the removal process.
- Once the ear speaker is detached, set it aside, making sure to keep it in a secure location to prevent damage.
Handling the ear speaker with precision and care is crucial to avoid any potential damage to the delicate component. By following these steps diligently, you can successfully remove the ear speaker, paving the way for the installation of the new component.
With the ear speaker safely removed, you are now poised to proceed to the next phase of the repair process, equipped with the assurance that you have completed a significant step in addressing the ear speaker issue effectively.
Step 7: Install the New Ear Speaker
Now that the old ear speaker has been safely removed, it’s time to install the new ear speaker in your iPhone 12. Follow these steps to ensure a successful installation:
- Take the new ear speaker and carefully position it within the designated area in the iPhone, ensuring that it aligns correctly with the connector on the logic board.
- Gently press the ear speaker into place, ensuring that it is securely seated within the iPhone.
- Reattach the ear speaker connector to the logic board, ensuring a secure and snug connection.
It is crucial to handle the new ear speaker with care and precision during the installation process to prevent any damage to the component. By following these steps meticulously, you can successfully install the new ear speaker, setting the stage for restored audio functionality on your iPhone 12.
With the new ear speaker securely installed, you have completed a significant stage in the repair process, positioning yourself to proceed to the subsequent steps with confidence, ultimately resolving the ear speaker issue effectively.
Step 8: Reassemble the iPhone
With the new ear speaker successfully installed, the final step is to reassemble your iPhone 12. Follow these essential steps to ensure a seamless reassembly process:
- Carefully position the display back onto the iPhone, ensuring that the connectors align with their respective ports on the logic board.
- Gently press the display to secure it in place, ensuring that the edges are flush with the iPhone’s frame.
- Reinsert and tighten the pentalobe screws at the bottom of the iPhone, on either side of the charging port, using the pentalobe screwdriver.
- Power on your iPhone by pressing and holding the side button until the Apple logo appears on the screen.
As you reassemble your iPhone, it is crucial to exercise care and precision to ensure that all components are securely positioned and connected. Taking the time to methodically follow these steps will result in a fully reassembled iPhone 12, ready to deliver optimal performance with the new ear speaker in place.
With the iPhone reassembled and powered on, you have successfully completed the repair process, effectively addressing the ear speaker issue and restoring crystal-clear audio functionality to your iPhone 12.
Conclusion
Congratulations! By following this comprehensive guide, you have successfully repaired the ear speaker on your iPhone 12. Through meticulous steps and careful handling of components, you have restored crystal-clear sound to your device, ensuring an optimal audio experience.
By approaching the repair process with confidence and precision, you have not only resolved the ear speaker issue but also gained valuable insight into the internal components of your iPhone 12. This hands-on experience empowers you to take control of the maintenance and functionality of your device, saving both time and resources.
Remember, the successful repair of your iPhone 12’s ear speaker is a testament to your ability to tackle technical challenges with skill and determination. Whether you are a seasoned tech enthusiast or a novice in the realm of smartphone repairs, this accomplishment showcases your capacity to engage with and resolve intricate device issues.
As you power on your iPhone 12 and revel in the clear, pristine audio emanating from the newly installed ear speaker, take pride in the accomplishment of a successful repair. Your proactive approach to addressing the ear speaker issue exemplifies your commitment to maximizing the performance and longevity of your device.
Armed with the knowledge and experience gained from this repair endeavor, you are well-equipped to tackle future maintenance tasks and address potential issues with confidence. Your newfound expertise in iPhone repairs serves as a valuable asset, allowing you to maintain and optimize the functionality of your device with ease.
With the ear speaker issue resolved, your iPhone 12 stands ready to deliver an exceptional audio experience, ensuring that you can fully immerse yourself in calls, music, and multimedia without any hindrance. Your dedication to maintaining the peak performance of your device reflects a proactive and resourceful approach to technology.
As you continue to explore the capabilities of your iPhone 12, rest assured that your ability to troubleshoot and resolve issues positions you as a proficient and empowered user, capable of unlocking the full potential of your device.