Introduction
Welcome to the digital age, where our browsing activities leave behind a trail of digital footprints. While this can be convenient for revisiting past searches and websites, it also raises privacy concerns. Google Chrome, one of the most popular web browsers, keeps a record of your search history to enhance your browsing experience. However, if you value your privacy and wish to prevent Chrome from storing your search history, you've come to the right place.
In this guide, we'll walk you through the process of turning off your search history on Chrome. Whether you're using Chrome on your computer, smartphone, or tablet, the steps are relatively straightforward. By the end of this tutorial, you'll have the knowledge and tools to take control of your browsing privacy and ensure that your search history remains confidential.
Let's embark on this journey to safeguard your online privacy and gain a deeper understanding of Chrome's settings. Whether you're a tech enthusiast or a casual user, taking charge of your search history is a crucial step in securing your digital footprint. So, without further ado, let's dive into the steps to turn off search history on Chrome and reclaim your browsing privacy.
Step 1: Open Chrome Browser
To begin the process of turning off your search history on Chrome, the first step is to open the Chrome browser on your device. Whether you're using a computer, smartphone, or tablet, launching Chrome is the initial action that sets the stage for customizing your browsing privacy settings.
On a computer, simply click on the Chrome icon located on your desktop or in your taskbar. Alternatively, you can access Chrome from your Start menu or applications folder, depending on your operating system. Once the browser is launched, you'll be greeted by the familiar interface, complete with the omnibox for entering web addresses and search queries.
For mobile devices, locating and tapping the Chrome app icon on your home screen or app drawer will open the browser. As the app launches, you'll be presented with the mobile version of Chrome, designed to provide a seamless browsing experience on smaller screens.
Upon opening Chrome, take a moment to familiarize yourself with the user interface. The omnibox, which serves as both the address bar and search bar, is where you'll enter website URLs and search terms. Additionally, you'll find the menu icon, typically represented by three vertical dots or lines, which grants access to Chrome's settings and features.
By successfully opening Chrome, you've taken the crucial first step in the process of managing your search history. With the browser at your fingertips, you're now ready to delve into the settings and take control of your browsing privacy. Let's move on to the next step and continue our journey toward safeguarding your online privacy.
Step 2: Access Settings
Now that you have Chrome open, the next step is to access the settings where you can customize your browsing preferences, including your search history settings. Chrome offers a user-friendly interface that allows you to easily navigate and modify various aspects of your browsing experience.
On a computer, you can access the settings by clicking on the menu icon, typically represented by three vertical dots, located in the top-right corner of the browser window. Upon clicking the icon, a dropdown menu will appear, presenting you with a range of options. From this menu, navigate to the "Settings" option and click on it to proceed to the settings page.
For mobile devices, the process is slightly different. After opening Chrome, tap on the menu icon, usually located in the top-right or bottom-right corner of the screen, depending on your device. This will reveal a menu with several options. Look for and select the "Settings" option to access the settings page.
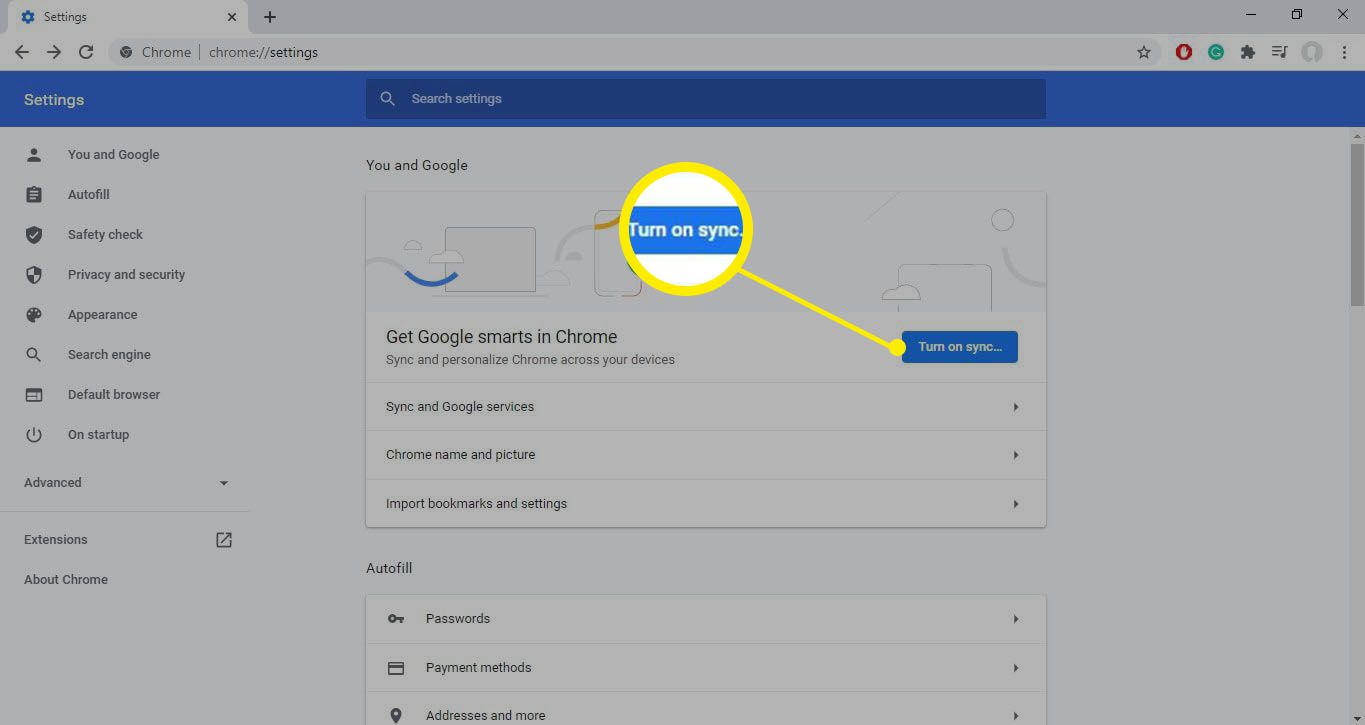
Once you've accessed the settings, you'll be presented with a plethora of customization options to tailor your browsing experience. From managing your passwords and autofill settings to customizing your privacy and security preferences, the settings page is your gateway to fine-tuning Chrome to suit your needs.
In the settings page, take a moment to explore the various sections and familiarize yourself with the available options. You'll find categories such as "Privacy and security," "Autofill," "Advanced," and more, each offering specific settings and controls. To proceed with turning off your search history, we'll delve into the "Privacy and security" section, where you can manage your browsing data and history settings.
By successfully accessing the settings, you've unlocked the door to a multitude of customization options within Chrome. The settings page serves as a hub for tailoring your browsing experience, and it's where you'll find the tools to manage your search history and enhance your privacy. With the settings at your disposal, you're now ready to progress to the next step and continue on your journey to safeguarding your online privacy.
Step 3: Clear Browsing Data
Clearing your browsing data is an essential step in managing your search history on Chrome. By removing this data, you can ensure that your past searches and browsing activity are no longer stored on your device. This process not only enhances your privacy but also frees up storage space and can improve browser performance.
To clear your browsing data in Chrome, follow these steps:
-
Accessing the Settings: As mentioned in the previous step, navigate to the settings page in Chrome. Once there, look for the "Privacy and security" section, which houses the tools for managing your browsing data.
-
Selecting Browsing Data: Within the "Privacy and security" section, locate the "Clear browsing data" option. This is where you can initiate the process of removing your browsing history, cookies, cached images, and other site data from your device.
-
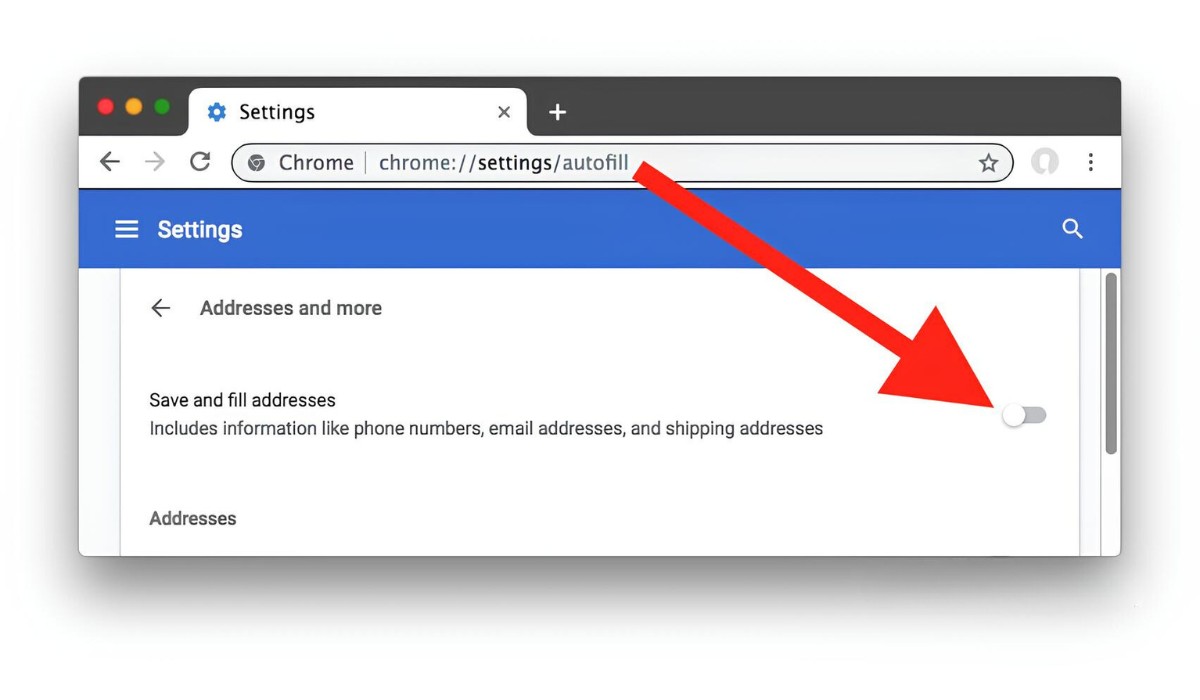
Customizing Data Removal: Upon selecting the "Clear browsing data" option, you'll be presented with a window that allows you to customize the data you wish to remove. Chrome provides checkboxes for "Browsing history," "Cookies and other site data," and "Cached images and files," giving you the flexibility to choose which data to clear.
-
Choosing Time Range: Additionally, you can specify the time range for which you want to clear the data. Chrome offers options to clear data from the past hour, day, week, month, or all time. This level of control enables you to tailor the data removal process to your specific needs.
-
Initiating Data Removal: After customizing your data removal preferences, click on the "Clear data" button to initiate the process. Chrome will then proceed to remove the selected browsing data from your device, effectively clearing your search history and related information.
By clearing your browsing data, you can effectively erase your search history from your device, enhancing your privacy and ensuring that your past browsing activity remains confidential. This proactive approach to managing your browsing data empowers you to take control of your online privacy and maintain a clutter-free browsing experience.
With your browsing data successfully cleared, you've taken a significant step toward managing your search history on Chrome. This sets the stage for the next crucial step in our journey to turn off search history on Chrome. Let's proceed to the next step and continue our exploration of Chrome's privacy settings.
Step 4: Customize Browsing History Settings
Customizing your browsing history settings in Chrome provides you with granular control over how your browsing activity is recorded and stored. By tailoring these settings to align with your privacy preferences, you can ensure that your search history is managed according to your specific needs. Let's delve into the process of customizing your browsing history settings in Chrome.
-
Accessing Browsing History Settings: To begin customizing your browsing history settings, navigate to the settings page in Chrome. Within the settings, locate and click on the "Privacy and security" section, which houses the tools for managing your browsing data and history settings.
-
Configuring History Settings: Within the "Privacy and security" section, look for the "Site settings" option. This is where you can customize various permissions and content settings for websites. Click on "Site settings" to proceed to the configuration page.
-
Managing Browsing Permissions: In the "Site settings" menu, you'll find a range of permissions that you can manage, including access to your camera, microphone, and location. Additionally, you'll find the "Permissions" section, where you can configure settings related to cookies, JavaScript, and more.
-
Exploring Additional Settings: As you navigate through the "Site settings," take the opportunity to explore the available options. You'll find settings related to notifications, pop-ups, and ads, each offering customization options to tailor your browsing experience.
-
Customizing Content Settings: Within the "Site settings," you can delve into the "Content" section, where you can manage settings such as images, JavaScript, and Flash. These settings allow you to control the display of certain types of content on websites, contributing to a personalized browsing experience.
By customizing your browsing history settings, you can fine-tune Chrome to align with your privacy preferences and browsing habits. This level of control empowers you to manage how your search history is recorded and stored, ensuring that your browsing experience is tailored to your specific needs.
With your browsing history settings successfully customized, you've gained a deeper understanding of Chrome's privacy and security features. This sets the stage for the next crucial step in our journey to turn off search history on Chrome. Let's proceed to the next step and continue our exploration of Chrome's privacy settings.
Step 5: Turn Off Search History
Turning off your search history in Chrome is a pivotal step in safeguarding your online privacy and ensuring that your browsing activity remains confidential. By disabling the storage of your search history, you can take control of your digital footprint and prevent Chrome from retaining a record of your past searches. Let's explore the process of turning off your search history in Chrome, empowering you to manage your browsing privacy with ease.
To disable the storage of your search history, follow these steps:
-
Accessing Search History Settings: Begin by navigating to the settings page in Chrome. Within the settings, locate and click on the "Privacy and security" section, which houses the tools for managing your browsing data and history settings.
-
Managing Search History: Within the "Privacy and security" section, look for the "Clear browsing data" option. This is where you can initiate the process of removing your browsing history, cookies, cached images, and other site data from your device.
-
Customizing Data Removal: Upon selecting the "Clear browsing data" option, you'll be presented with a window that allows you to customize the data you wish to remove. Chrome provides checkboxes for "Browsing history," "Cookies and other site data," and "Cached images and files," giving you the flexibility to choose which data to clear.
-
Choosing Time Range: Additionally, you can specify the time range for which you want to clear the data. Chrome offers options to clear data from the past hour, day, week, month, or all time. This level of control enables you to tailor the data removal process to your specific needs.
-
Initiating Data Removal: After customizing your data removal preferences, click on the "Clear data" button to initiate the process. Chrome will then proceed to remove the selected browsing data from your device, effectively clearing your search history and related information.
By following these steps, you can effectively turn off the storage of your search history in Chrome, enhancing your privacy and ensuring that your browsing activity remains confidential. This proactive approach to managing your search history empowers you to take control of your online privacy and maintain a clutter-free browsing experience.
With your search history successfully turned off, you've taken a significant step toward managing your browsing privacy on Chrome. This marks the culmination of our journey to turn off search history on Chrome, equipping you with the knowledge and tools to safeguard your online privacy effectively.
Conclusion
Congratulations on successfully navigating the process of turning off your search history on Chrome. By following the steps outlined in this guide, you've taken a proactive approach to managing your online privacy and ensuring that your browsing activity remains confidential. As you've discovered, Chrome offers a range of tools and settings that empower you to tailor your browsing experience to align with your privacy preferences.
By accessing the settings, clearing your browsing data, and customizing your browsing history settings, you've gained a deeper understanding of Chrome's privacy and security features. These actions not only enhance your privacy but also contribute to a clutter-free and optimized browsing experience. Whether you're using Chrome on your computer, smartphone, or tablet, the steps to manage your search history are relatively straightforward, putting you in control of your digital footprint.
Turning off your search history in Chrome is a pivotal step in safeguarding your online privacy. By disabling the storage of your search history, you've taken a proactive stance in managing your digital footprint and preventing Chrome from retaining a record of your past searches. This level of control empowers you to navigate the digital landscape with confidence, knowing that your browsing activity remains confidential and secure.
As you continue to explore the vast expanse of the internet, armed with the knowledge and tools to manage your search history, remember that your privacy is a priority. Chrome's flexibility and user-friendly interface make it possible to tailor your browsing experience to suit your specific needs, ensuring that your online interactions are conducted on your terms.
In a world where digital privacy is of paramount importance, taking charge of your search history is a proactive step toward safeguarding your online presence. By implementing the steps outlined in this guide, you've not only turned off your search history on Chrome but also gained valuable insights into managing your browsing privacy effectively.
So, as you venture forth into the boundless realm of the internet, may your browsing experience be secure, your digital footprint be managed with care, and your online interactions be conducted with confidence. With your search history under your control, you're well-equipped to navigate the digital landscape while safeguarding your privacy every step of the way.