Introduction
Welcome to the world of Google Chrome, where browsing the internet is a seamless and enjoyable experience. As you navigate through the vast digital landscape, your browser accumulates a treasure trove of data, including images, cookies, and website files. This accumulation, known as the cache, is designed to enhance your browsing speed and performance by storing frequently accessed information.
However, over time, this cache can become cluttered, leading to potential issues such as slow loading times, outdated content, and even security concerns. Fortunately, Google Chrome provides a simple yet powerful solution to address these challenges: clearing the cache.
In this article, we will delve into the importance of clearing the cache on Google Chrome and provide you with a comprehensive guide on how to accomplish this task. Whether you're a tech-savvy enthusiast or a casual internet user, understanding the ins and outs of clearing the cache can significantly improve your browsing experience and keep your digital journey smooth and secure.
So, fasten your seatbelt, as we embark on a journey to uncover the hidden gems of Google Chrome's cache-clearing capabilities. By the end of this guide, you'll be equipped with the knowledge and tools to declutter your browser and unleash its full potential. Let's dive in!
Why Clearing the Cache is Important
Clearing the cache on Google Chrome is a crucial maintenance task that can significantly impact your browsing experience. The cache serves as a temporary storage location for various elements of websites you visit, including images, scripts, and other resources. While this feature is designed to enhance browsing speed and performance, it can also lead to several issues if not managed effectively.
1. Improved Performance
As you traverse the digital realm, the cache accumulates a plethora of data from websites you visit. While this can expedite the loading of frequently accessed content, an overloaded cache may hinder performance. Clearing the cache periodically allows Chrome to fetch the latest versions of web elements, resulting in improved loading times and a smoother browsing experience.
2. Updated Content
Websites are dynamic entities, constantly evolving to deliver fresh and relevant content. However, an excessively populated cache may store outdated versions of web elements, leading to the display of stale content. By clearing the cache, you ensure that Chrome retrieves the most recent versions of web resources, enabling you to stay abreast of the latest updates and changes across the digital landscape.
3. Enhanced Privacy and Security
The cache stores a wide array of data, including cookies and other site-specific information. While these elements can enhance your browsing convenience, they also pose potential privacy and security risks. Clearing the cache helps mitigate these concerns by removing stored data, thereby reducing the likelihood of unauthorized access to sensitive information and enhancing your overall digital security.
4. Troubleshooting Website Issues
In some instances, a corrupted or outdated cache can lead to website malfunctions, such as broken images, unresponsive scripts, or erratic behavior. By clearing the cache, you can troubleshoot these issues effectively, as Chrome fetches fresh resources from the web servers, potentially resolving compatibility and display problems.
In essence, clearing the cache on Google Chrome is akin to decluttering a digital workspace, ensuring that your browsing experience remains swift, secure, and up-to-date. By understanding the importance of this maintenance task, you empower yourself to harness the full potential of Chrome while mitigating potential performance and security concerns.
How to Clear the Cache on Google Chrome
Clearing the cache on Google Chrome is a straightforward process that can be accomplished in just a few simple steps. Whether you're using Chrome on a desktop or mobile device, the cache-clearing procedure remains consistent, offering a seamless experience across various platforms. Here's a comprehensive guide to help you declutter your browser and optimize your browsing experience:
Clearing the Cache on Desktop
-
Accessing the Clear Browsing Data Menu
- Begin by launching Google Chrome on your desktop or laptop.
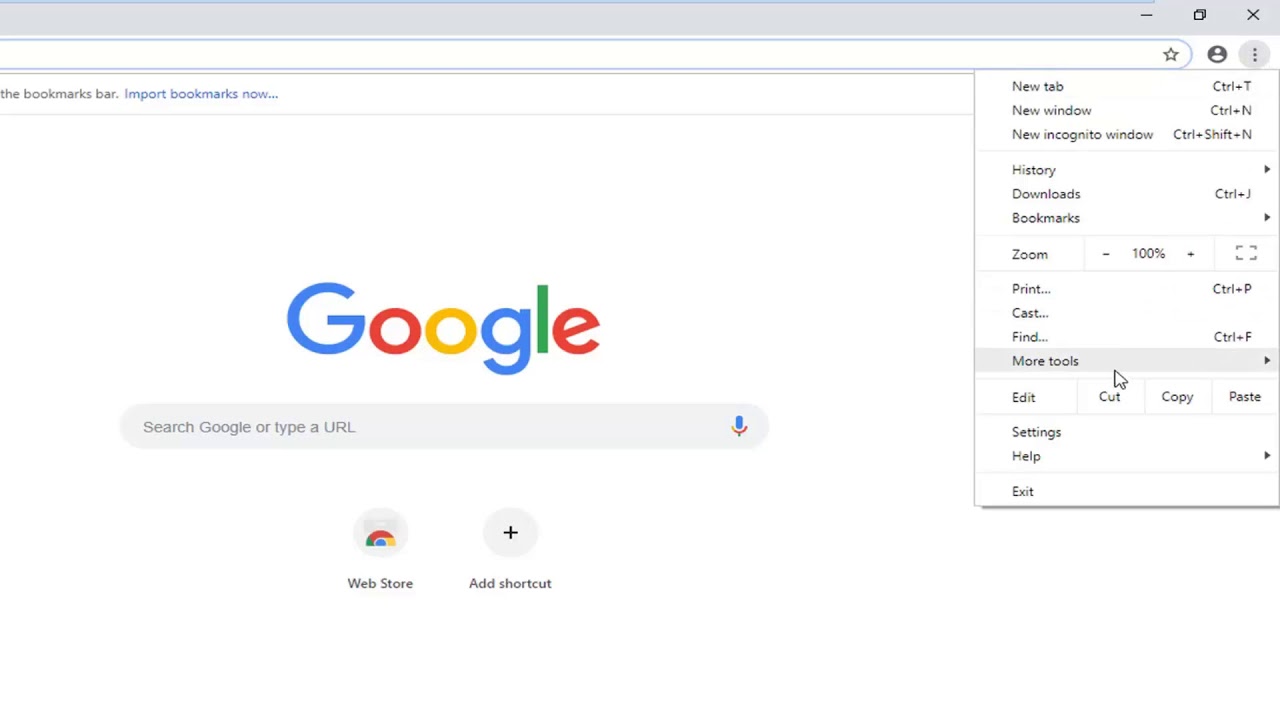
- Next, click on the three-dot menu icon located in the top-right corner of the browser window. This will open a dropdown menu.
-
Navigating to the Clear Browsing Data Settings
- From the dropdown menu, hover your cursor over the "More tools" option to reveal a secondary menu.
- Within this menu, select "Clear browsing data." This action will direct you to the "Clear browsing data" settings page.
-
Selecting the Data to Clear
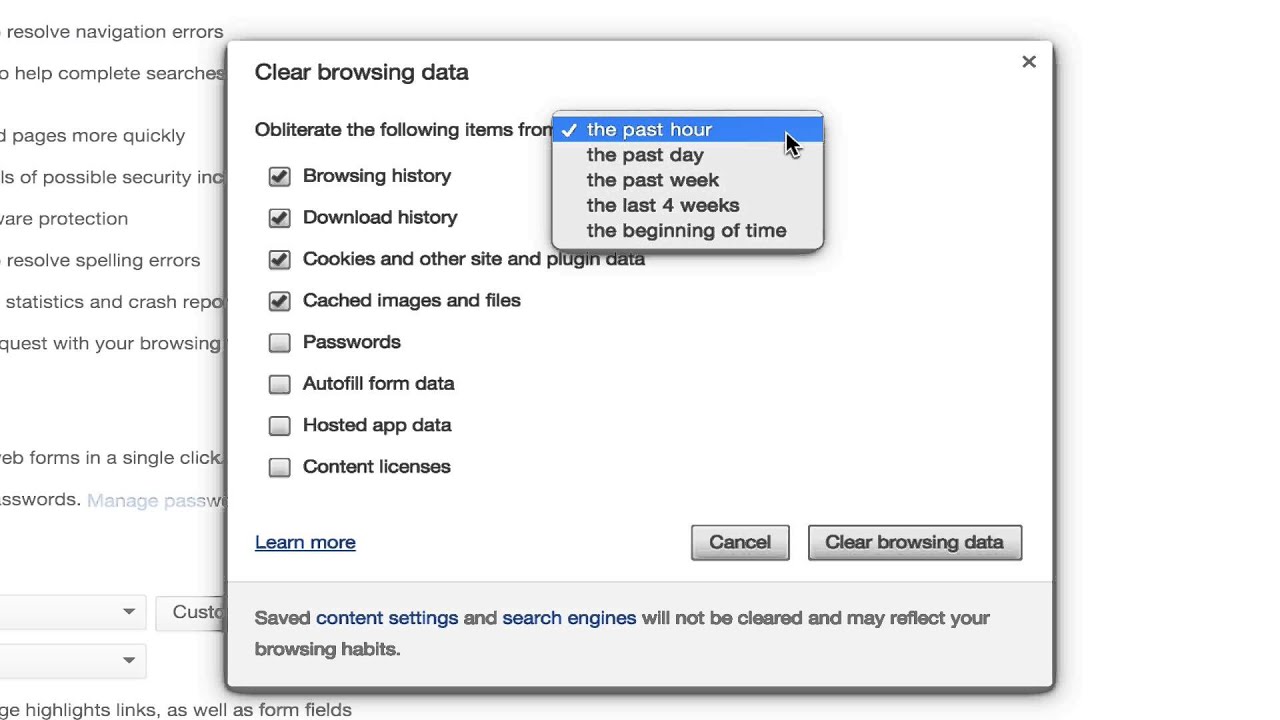
- Upon reaching the "Clear browsing data" settings page, you will encounter a list of data categories to clear, including browsing history, cookies, and cached images and files.
- Ensure that the "Cached images and files" option is checked, indicating that you intend to clear the cache.
-
Choosing the Time Range
- Chrome provides the flexibility to specify the time range for which you wish to clear the cache. You can opt to clear data from the past hour, day, week, month, or all time, based on your preferences.
-
Initiating the Clearing Process
- Once you've configured your preferences, click on the "Clear data" button to initiate the cache-clearing process. Chrome will promptly remove the cached images and files based on your selected criteria.
Clearing the Cache on Mobile
-
Accessing the Chrome Menu
- Open the Google Chrome app on your mobile device.
-
Navigating to the Settings
- Tap on the three-dot menu icon located in the top-right corner of the browser interface to reveal the Chrome menu.
-
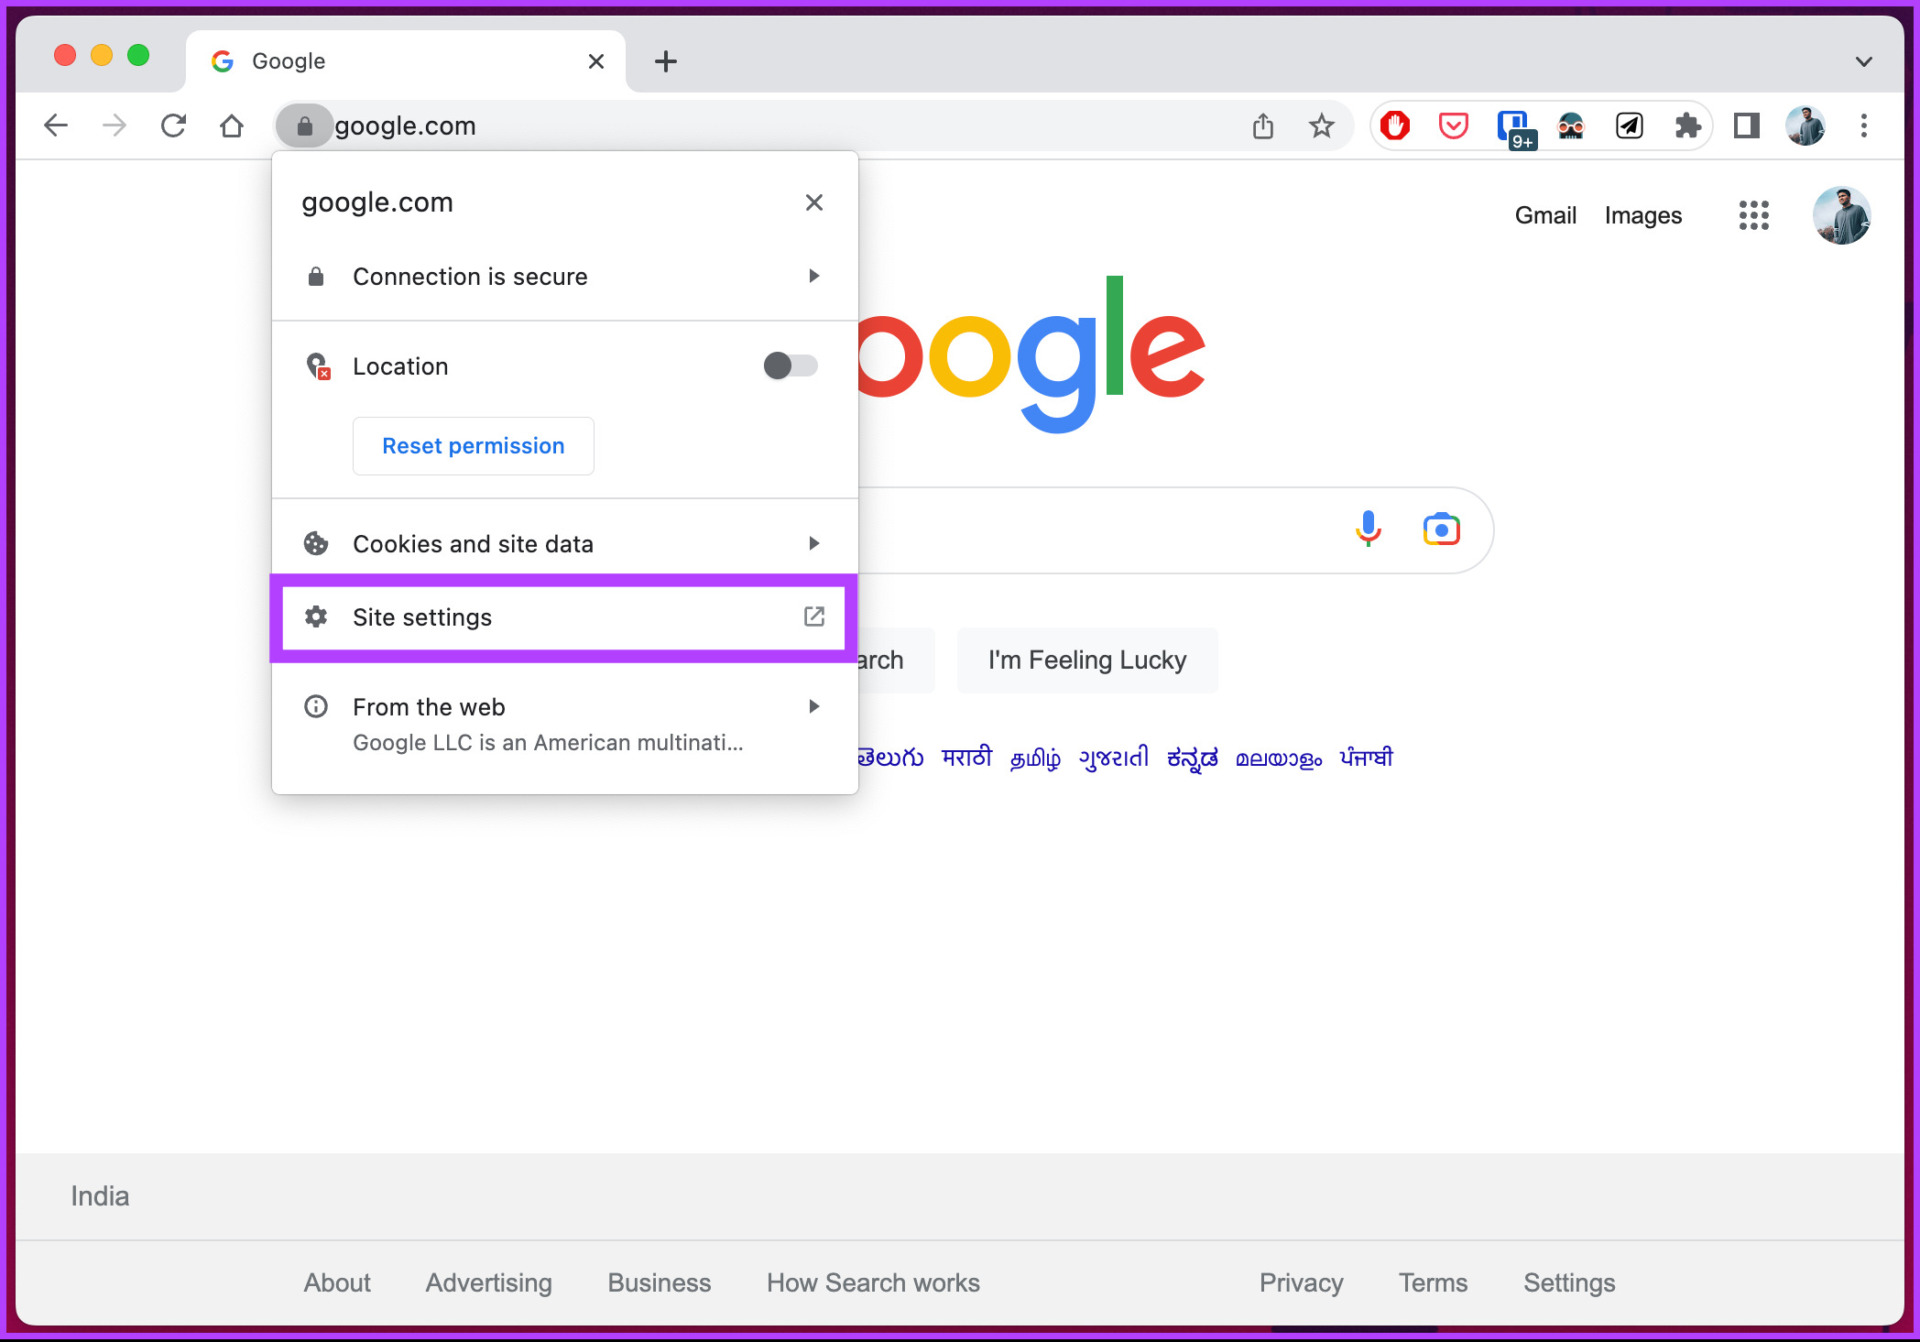
Accessing the Privacy Settings
- Within the Chrome menu, scroll down and select "Settings" to access the browser's configuration options.
-
Clearing Browsing Data
- Under the "Advanced" section of the Settings menu, tap on "Privacy" to reveal additional privacy-related settings.
-
Selecting the Data to Clear
- Tap on "Clear browsing data" to access the data-clearing options. Ensure that the "Cached images and files" option is selected.
-
Initiating the Clearing Process
- Once you've confirmed your preferences, tap on the "Clear data" button to commence the cache-clearing process.
By following these steps, you can effectively clear the cache on Google Chrome, ensuring that your browsing experience remains optimized and free from unnecessary clutter. Whether you're using Chrome on your desktop or mobile device, the cache-clearing process empowers you to maintain a streamlined and secure browsing environment, allowing you to explore the digital landscape with confidence and efficiency.
Conclusion
In the ever-evolving realm of digital exploration, Google Chrome stands as a beacon of innovation, offering a seamless and feature-rich browsing experience. As we conclude our journey into the intricacies of clearing the cache on Google Chrome, it's essential to reflect on the significance of this maintenance task and its profound impact on the browsing landscape.
By understanding the importance of clearing the cache, users can harness the full potential of Google Chrome while mitigating potential performance and security concerns. The cache, although designed to enhance browsing speed and performance, can inadvertently lead to issues such as slow loading times, outdated content, and privacy risks if left unattended. Through the simple yet powerful act of clearing the cache, users can unlock a myriad of benefits, including improved performance, updated content, enhanced privacy and security, and effective troubleshooting of website issues.
Moreover, the process of clearing the cache on Google Chrome is remarkably straightforward, offering a consistent experience across desktop and mobile platforms. By following a few simple steps, users can declutter their browsers, ensuring that their digital journey remains swift, secure, and up-to-date.
As we bid adieu to this guide, armed with the knowledge and tools to optimize our browsing experience, it's imperative to embrace the practice of regular cache clearance as a cornerstone of digital hygiene. By integrating this maintenance task into our browsing routine, we empower ourselves to navigate the digital landscape with confidence, efficiency, and peace of mind.
In essence, clearing the cache on Google Chrome is not merely a technical chore; it's a proactive step towards cultivating a streamlined and secure browsing environment. It's a testament to our commitment to embracing the best practices of digital maintenance and ensuring that our online escapades are characterized by speed, security, and relevance.
So, as you embark on your next digital odyssey, armed with the knowledge gleaned from this guide, remember the transformative power of clearing the cache. Embrace it as a digital ritual, a testament to your dedication to a seamless and secure browsing experience. With each cache-clearing endeavor, you pave the way for a smoother, more secure digital journey, ensuring that Google Chrome remains your trusted companion in the vast expanse of the internet.
As the digital landscape continues to evolve, let us navigate it with confidence, armed with the wisdom of cache clearance and the unwavering spirit of digital exploration. Here's to a clutter-free, secure, and exhilarating browsing experience on Google Chrome. Happy browsing!