Introduction
Adobe Flash Player has long been a staple for delivering rich multimedia content on the web. From interactive games to animated videos, Flash Player has been an integral part of the online experience for many years. However, with the evolution of web technologies, the use of Flash has declined, and many modern browsers, including Google Chrome, have moved away from supporting it by default.
If you've encountered issues with Adobe Flash Player not working on Google Chrome, you're not alone. The good news is that there are several troubleshooting steps you can take to address this issue and get Flash Player up and running seamlessly in your Chrome browser.
In this guide, we'll explore various methods to troubleshoot and resolve Adobe Flash Player issues on Google Chrome. Whether you're encountering error messages, experiencing playback problems, or simply finding that Flash content isn't loading as expected, we'll walk you through the steps to help you get Adobe Flash Player working smoothly on your Chrome browser.
By following the steps outlined in this guide, you can ensure that you have the necessary settings configured to enable Adobe Flash Player and allow it to function properly within the Chrome browser. From checking for updates to clearing browser cache and cookies, we'll cover a range of solutions to address common issues related to Adobe Flash Player on Google Chrome.
So, if you're ready to dive into the troubleshooting process and unlock the full potential of Adobe Flash Player on Google Chrome, let's get started with the first step: checking for updates.
Checking for Updates
Ensuring that your Google Chrome browser and Adobe Flash Player are up to date is crucial for resolving issues related to Flash content not working as expected. Outdated software can often lead to compatibility issues and security vulnerabilities, which may impact the functionality of Adobe Flash Player within the browser. Here's how you can check for updates and ensure that both Chrome and Flash Player are running the latest versions:
Checking Chrome for Updates
- Accessing the Chrome Menu: Start by opening Google Chrome and locating the three-dot menu icon in the top-right corner of the browser window.
- Navigating to Settings: Click on the menu icon to reveal a dropdown menu, then select "Settings" from the list. This will open the Chrome Settings page in a new tab.
- Checking for Updates: Scroll down the Settings page and click on "About Chrome" in the left-hand sidebar. Chrome will automatically check for updates and initiate the download and installation process if a new version is available.
Verifying Adobe Flash Player Updates
- Accessing Chrome's Flash Settings: In the address bar, type "chrome://components" and press Enter. This will take you to Chrome's internal components page.
- Locating Adobe Flash Player: Scroll down the components list to find "Adobe Flash Player." If an update is available, you will see an "Check for update" button next to it.
- Updating Adobe Flash Player: Click on the "Check for update" button to initiate the update process for Adobe Flash Player within Chrome.
Automatic Updates
It's worth noting that both Google Chrome and Adobe Flash Player typically have automatic update mechanisms enabled by default. However, manually checking for updates can ensure that you have the latest versions installed, especially if automatic updates are disabled or if you want to verify the current status of your software.
By regularly checking for updates and ensuring that both Google Chrome and Adobe Flash Player are running the latest versions, you can mitigate potential compatibility issues and security vulnerabilities, thereby improving the overall performance and functionality of Adobe Flash Player within the Chrome browser.
Enabling Flash Player
Enabling Adobe Flash Player within Google Chrome is a crucial step in ensuring that Flash content can be accessed and utilized seamlessly. While modern web standards have shifted away from relying on Flash, there are still instances where enabling Flash Player is necessary to interact with specific websites and applications. Here's a detailed guide on how to enable Flash Player in Google Chrome:
Accessing Chrome's Site Settings
- Opening Chrome Settings: Start by launching Google Chrome and clicking on the three-dot menu icon in the top-right corner of the browser window.
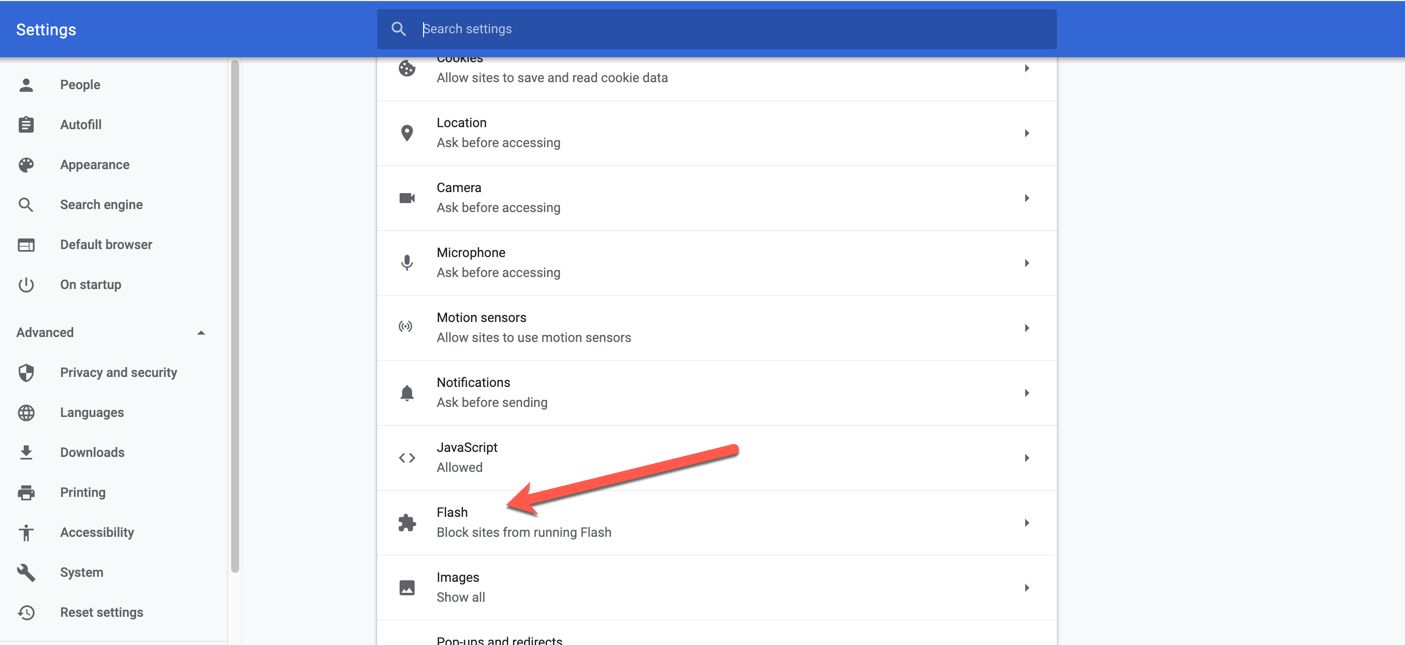
- Navigating to Site Settings: From the dropdown menu, select "Settings" to access the Chrome Settings page. Scroll down and click on "Privacy and security" in the left-hand sidebar, then select "Site settings."
Enabling Flash Player
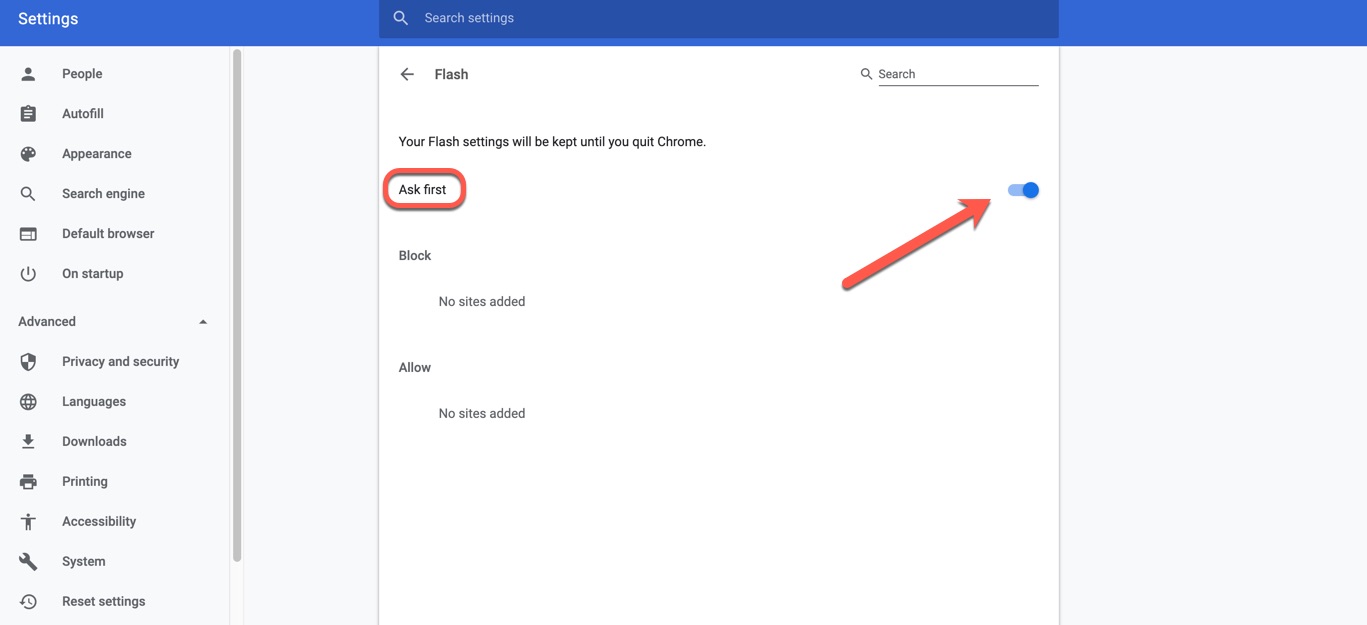
- Locating Flash Settings: Within the Site settings, scroll down to find the "Flash" option under the "Permissions" section.
- Enabling Flash: Click on "Flash" to access the Flash settings. Toggle the switch to enable "Ask first (recommended)" or "Block sites from running Flash" to "Allow sites to run Flash."
Managing Exceptions
- Adding Site Exceptions: If you want to allow Flash to run on specific websites, click on "Add" under the "Allow" section within the Flash settings. Enter the URL of the website and click "Add" to create an exception for Flash Player on that site.
Verifying Flash Player Status
- Checking Flash Content: After enabling Flash Player, visit a website or application that utilizes Flash content to verify that it is functioning correctly within Google Chrome.
- Addressing Security Warnings: Keep in mind that enabling Flash Player may prompt security warnings due to its potential vulnerabilities. Exercise caution and only enable Flash on trusted websites.
By following these steps, you can effectively enable Adobe Flash Player within Google Chrome, allowing you to access and interact with Flash-based content as needed. It's important to note that while enabling Flash Player can address compatibility issues, it's advisable to use it judiciously and consider alternative technologies for a more secure and efficient web browsing experience.
Allowing Flash on Specific Sites
Enabling Adobe Flash Player on specific websites can be essential for accessing Flash-based content while maintaining a secure browsing environment. Google Chrome provides the flexibility to manage Flash settings on a per-site basis, allowing users to grant permissions selectively. Here's a detailed exploration of the process for allowing Flash on specific sites within the Chrome browser:
Accessing Chrome's Site Settings
- Opening Chrome Settings: Launch Google Chrome and click on the three-dot menu icon in the top-right corner of the browser window.
- Navigating to Site Settings: From the dropdown menu, select "Settings" to access the Chrome Settings page. Scroll down and click on "Privacy and security" in the left-hand sidebar, then select "Site settings."
Allowing Flash on Specific Sites
- Locating Flash Settings: Within the Site settings, scroll down to find the "Flash" option under the "Permissions" section.
- Managing Flash Permissions: Click on "Flash" to access the Flash settings. Here, you can toggle the switch to enable "Ask first (recommended)" or "Block sites from running Flash" to "Allow sites to run Flash."
Managing Exceptions
- Adding Site Exceptions: To allow Flash to run on specific websites, click on "Add" under the "Allow" section within the Flash settings. Enter the URL of the website and click "Add" to create an exception for Flash Player on that site.
Verifying Flash Player Status
- Checking Flash Content: After adding site exceptions, visit the specific websites where you've enabled Flash Player to ensure that the Flash-based content functions as intended within Google Chrome.
- Addressing Security Warnings: It's important to note that allowing Flash on specific sites may trigger security warnings due to the potential vulnerabilities associated with Flash Player. Exercise caution and only enable Flash on trusted websites.
By following these steps, users can effectively manage Flash permissions on specific sites, allowing them to interact with Flash content when necessary while maintaining control over the security implications. This granular approach to enabling Flash on selected websites empowers users to strike a balance between accessing essential Flash-based content and safeguarding their browsing environment. It's important to consider the evolving landscape of web technologies and prioritize the adoption of more secure and efficient alternatives to Flash whenever feasible.
Clearing Browser Cache and Cookies
Clearing the browser cache and cookies in Google Chrome can effectively address various issues related to Adobe Flash Player not working as expected. Over time, the cache and cookies stored by the browser can accumulate, leading to potential conflicts and hindering the proper functioning of Flash content. By clearing these temporary data, users can refresh their browsing environment and potentially resolve Flash-related issues. Here's a detailed guide on how to clear the browser cache and cookies in Google Chrome:
Accessing Chrome's Clear Browsing Data
- Opening Chrome Settings: Launch Google Chrome and click on the three-dot menu icon in the top-right corner of the browser window.
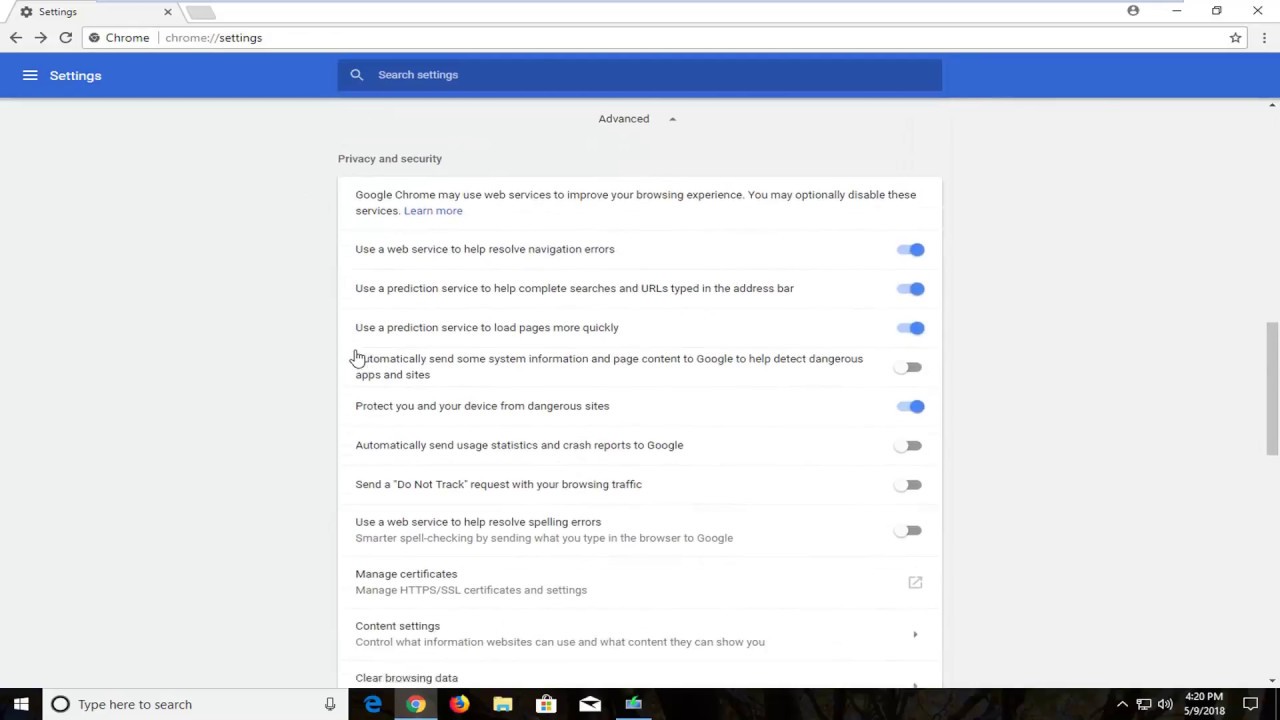
- Navigating to Clear Browsing Data: From the dropdown menu, select "Settings" to access the Chrome Settings page. Scroll down and click on "Privacy and security" in the left-hand sidebar, then select "Clear browsing data."
Clearing Cache and Cookies
- Selecting Data Types: Within the Clear browsing data menu, ensure that the checkboxes for "Cookies and other site data" and "Cached images and files" are selected. These options represent the cache and cookies stored by the browser.
- Choosing Time Range: Users can choose the time range for which they want to clear the data. Selecting "All time" ensures that all cached data and cookies are cleared from the beginning of Chrome's usage.
- Initiating Clearing Process: Once the desired options are selected, click on the "Clear data" button to initiate the clearing process.
Verifying the Results
- Reloading Web Pages: After clearing the cache and cookies, users can reload the web pages that previously exhibited issues with Adobe Flash Player to verify if the problems have been resolved.
- Testing Flash Content: Visit websites or applications that utilize Flash content to ensure that it now functions as intended within Google Chrome.
By following these steps, users can effectively clear the browser cache and cookies in Google Chrome, potentially resolving issues related to Adobe Flash Player. This process can help refresh the browsing environment, eliminate conflicting data, and improve the overall performance of Flash content within the browser. It's important to note that clearing the cache and cookies may log users out of websites and remove site-specific preferences, but it can often provide a fresh start for addressing Flash-related issues.
Disabling Chrome's Built-in Flash Player
Google Chrome comes with a built-in version of Adobe Flash Player, which is integrated directly into the browser. However, as the web ecosystem continues to transition away from Flash in favor of more modern and secure technologies, users may encounter scenarios where disabling Chrome's built-in Flash Player becomes necessary. Disabling the integrated Flash Player not only aligns with the industry-wide shift away from Flash but also allows users to rely on external installations of Flash for specific use cases. Here's a comprehensive guide on how to disable Chrome's built-in Flash Player:
Accessing Chrome's Flash Settings
- Opening Chrome Settings: Launch Google Chrome and click on the three-dot menu icon in the top-right corner of the browser window.
- Navigating to Site Settings: From the dropdown menu, select "Settings" to access the Chrome Settings page. Scroll down and click on "Privacy and security" in the left-hand sidebar, then select "Site settings."
Disabling Built-in Flash Player
- Locating Flash Settings: Within the Site settings, scroll down to find the "Flash" option under the "Permissions" section.
- Disabling Built-in Flash Player: Click on "Flash" to access the Flash settings. Here, users can toggle off the switch for "Block sites from running Flash" to effectively disable Chrome's built-in Flash Player.
Verifying the Changes
- Testing Flash Content: After disabling the built-in Flash Player, users can visit websites or applications that previously relied on Chrome's integrated Flash to ensure that external installations of Flash are being utilized.
- Addressing Compatibility: It's important to note that disabling Chrome's built-in Flash Player may impact the functionality of certain websites or applications that exclusively rely on the integrated Flash. Users should consider alternative solutions or external Flash installations for such scenarios.
By following these steps, users can effectively disable Chrome's built-in Flash Player, aligning with the evolving web standards and security best practices. This approach allows users to manage their Flash Player installations externally while embracing the transition to more modern and secure web technologies within the Chrome browser.