Introduction
Welcome to the world of web browsing, where the seamless integration of multimedia content enriches our online experiences. Adobe Flash, a versatile and widely used multimedia platform, has been an integral part of this digital landscape for many years. Its ability to render interactive content, animations, and videos has made it a cornerstone of web development.
However, as technology evolves, so do the tools we use to access the web. In recent years, HTML5 has emerged as a more secure and efficient alternative to Adobe Flash, leading to a gradual shift away from the latter. Despite this transition, many websites still rely on Adobe Flash to deliver multimedia content, making it essential for users to ensure that their browsers are equipped with the latest version of the plugin.
In this article, we will focus on Google Chrome, one of the most popular web browsers, and explore the process of updating Adobe Flash within its framework. By staying up to date with the latest version of Adobe Flash, users can not only enjoy a smoother browsing experience but also mitigate potential security risks associated with outdated software.
So, if you've ever wondered how to keep Adobe Flash current on your Google Chrome browser, you've come to the right place. Whether you're an avid gamer, a video enthusiast, or simply someone who appreciates interactive web content, understanding the process of updating Adobe Flash on Google Chrome is crucial for maximizing your online enjoyment and security.
In the following sections, we'll delve into the steps for checking the current version of Adobe Flash, updating the plugin on Google Chrome, and verifying the successful update. By the end of this guide, you'll be equipped with the knowledge and confidence to ensure that Adobe Flash remains a reliable and secure component of your browsing experience. Let's embark on this journey to keep your web adventures vibrant and secure!
Checking the Current Version of Adobe Flash
Before diving into the process of updating Adobe Flash on Google Chrome, it's essential to first determine the current version of the plugin installed on your browser. This step is crucial as it provides a baseline for assessing whether an update is necessary and ensures that you are equipped with the most recent features and security enhancements.
To check the current version of Adobe Flash on Google Chrome, follow these simple steps:
-
Accessing Chrome Settings: Begin by opening Google Chrome on your computer or device. In the top-right corner of the browser window, click on the three vertical dots to access the Chrome menu.
-
Navigating to Settings: From the dropdown menu, select "Settings." This will open a new tab displaying various options and preferences for customizing your browsing experience.
-
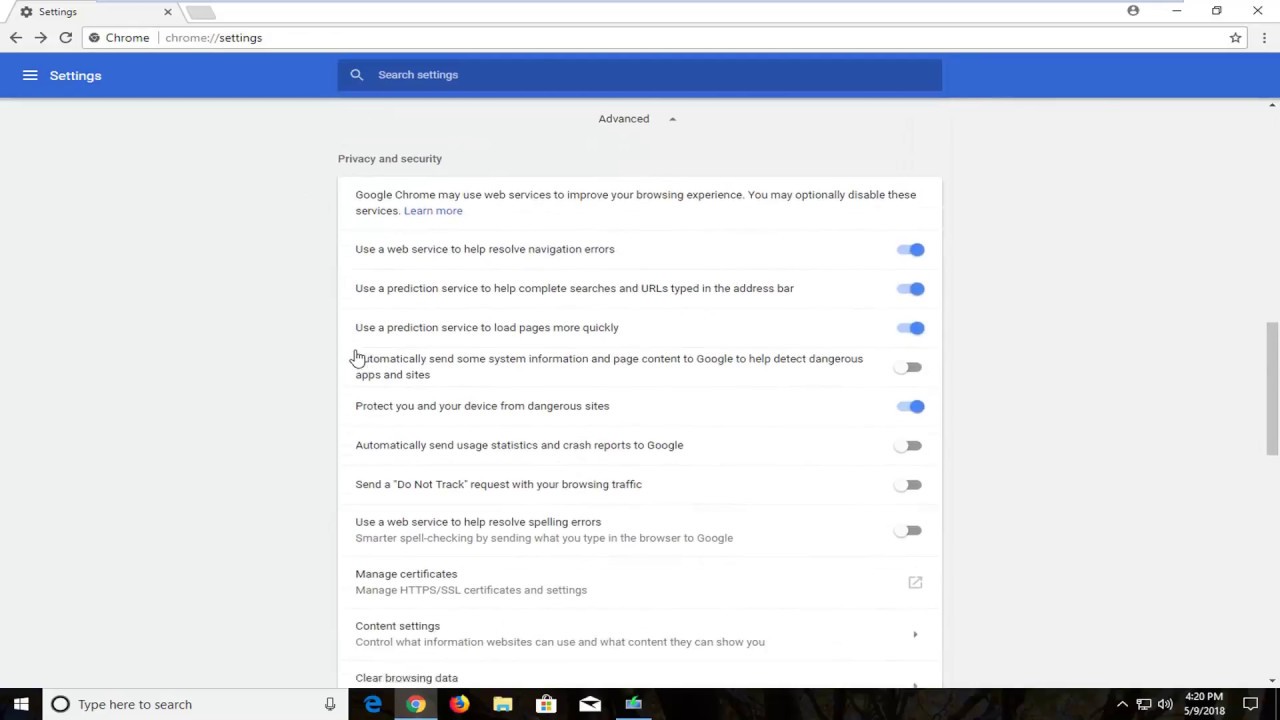
Locating Content Settings: Within the Settings tab, scroll down and click on "Privacy and security" in the left-hand menu. This will expand a list of additional settings related to privacy, security, and content management.
-
Accessing Flash Settings: Under the "Privacy and security" section, locate and click on "Site Settings." This will open a new page with a range of site-specific settings and permissions.
-
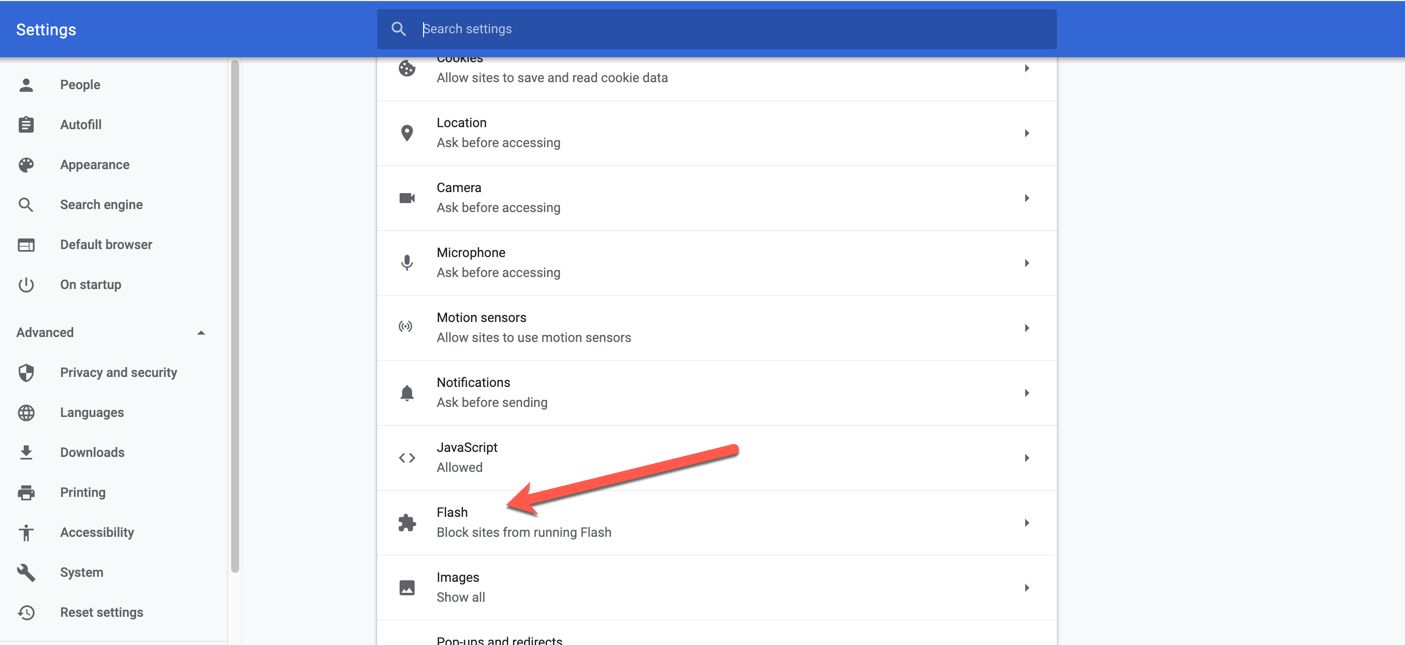
Verifying Flash Player: Within the Site Settings, scroll down to find the "Flash" option. Click on it to access the Flash settings for Google Chrome.
-
Checking the Version: Once you are in the Flash settings, you will find the current version of Adobe Flash displayed under the "Allow" section. The version number will be listed next to the website URL or as a global setting, depending on your configuration.
By following these steps, you can easily determine the current version of Adobe Flash installed on your Google Chrome browser. This information serves as a valuable reference point for evaluating whether an update is required to ensure optimal performance and security.
Now that we have established the process for checking the current version of Adobe Flash, let's move on to the next step: updating the plugin on Google Chrome to ensure that you are equipped with the latest features and security enhancements.
Updating Adobe Flash on Google Chrome
Now that you have identified the current version of Adobe Flash on your Google Chrome browser, it's time to ensure that you are equipped with the latest iteration of the plugin. Updating Adobe Flash on Google Chrome is a straightforward process that involves a few simple steps to ensure that your browsing experience remains seamless and secure.
To update Adobe Flash on Google Chrome, follow these steps:
-
Accessing Chrome Settings: Open Google Chrome on your computer or device. In the top-right corner of the browser window, click on the three vertical dots to access the Chrome menu.
-
Navigating to Settings: From the dropdown menu, select "Settings." This will open a new tab displaying various options and preferences for customizing your browsing experience.
-
Locating Content Settings: Within the Settings tab, scroll down and click on "Privacy and security" in the left-hand menu. This will expand a list of additional settings related to privacy, security, and content management.
-
Accessing Flash Settings: Under the "Privacy and security" section, locate and click on "Site Settings." This will open a new page with a range of site-specific settings and permissions.
-
Updating Flash Player: Within the Site Settings, scroll down to find the "Flash" option. Click on it to access the Flash settings for Google Chrome.
-
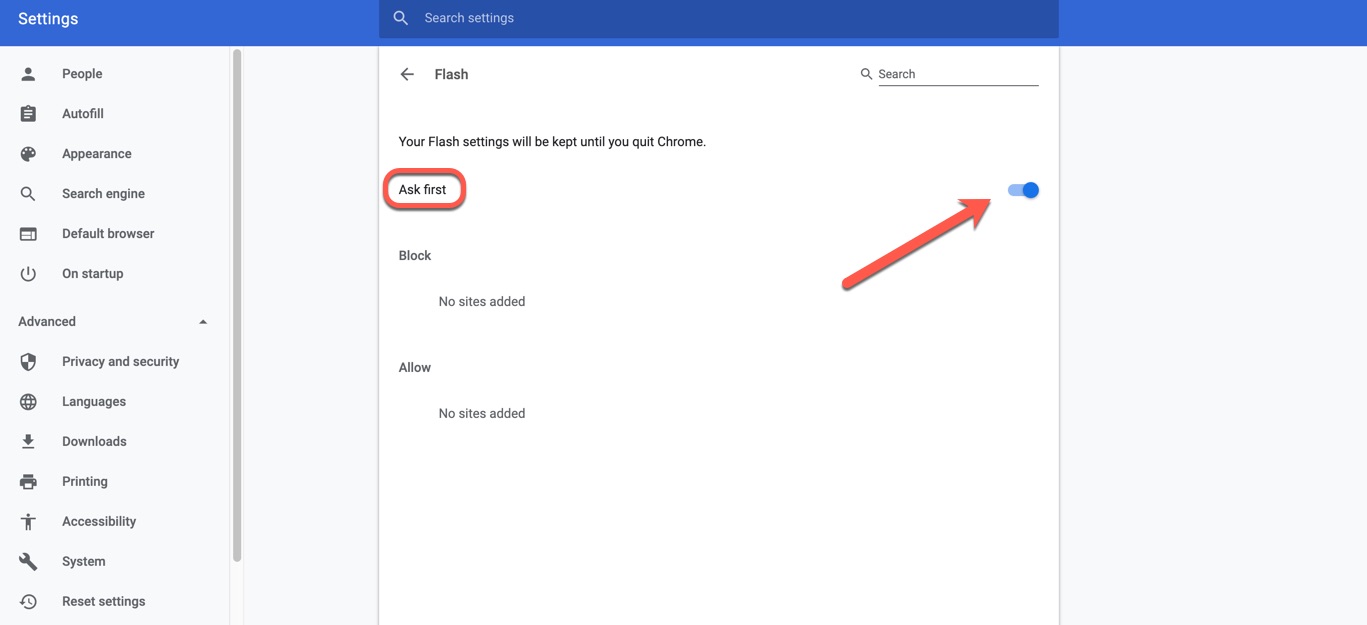
Enabling Automatic Updates: In the Flash settings, ensure that the toggle switch for "Ask first" is turned on. This setting allows Google Chrome to automatically update Adobe Flash whenever new versions are released, ensuring that you are always equipped with the latest features and security patches.
By enabling automatic updates for Adobe Flash, you can rest assured that your Google Chrome browser will seamlessly manage the plugin's updates, keeping your browsing experience optimized and secure.
In addition to enabling automatic updates, it's important to stay vigilant and proactive about the security of your browser and its plugins. Keeping your browser and plugins up to date is a crucial aspect of maintaining a secure online environment, as updates often include patches for known vulnerabilities and security threats.
By following these steps and enabling automatic updates for Adobe Flash on Google Chrome, you can ensure that your browsing experience remains smooth, secure, and equipped with the latest features and security enhancements. With Adobe Flash updated to the latest version, you can continue to enjoy interactive web content without compromising on performance or security.
Now that you have updated Adobe Flash on Google Chrome, the next step is to verify the successful update, ensuring that the latest version of the plugin is seamlessly integrated into your browsing experience. Let's proceed to the next section to verify the update and confirm that Adobe Flash is up to date on your Google Chrome browser.
Verifying the Update
After updating Adobe Flash on Google Chrome, it's essential to verify that the process was successful and that the latest version of the plugin is seamlessly integrated into your browsing experience. Verifying the update ensures that you can confidently enjoy multimedia content while benefiting from the latest features and security enhancements.
To verify the update of Adobe Flash on Google Chrome, follow these simple steps:
-
Accessing Chrome Settings: Open Google Chrome on your computer or device. In the top-right corner of the browser window, click on the three vertical dots to access the Chrome menu.
-
Navigating to Settings: From the dropdown menu, select "Settings." This will open a new tab displaying various options and preferences for customizing your browsing experience.
-
Locating Content Settings: Within the Settings tab, scroll down and click on "Privacy and security" in the left-hand menu. This will expand a list of additional settings related to privacy, security, and content management.
-
Accessing Flash Settings: Under the "Privacy and security" section, locate and click on "Site Settings." This will open a new page with a range of site-specific settings and permissions.
-
Verifying Flash Player: Within the Site Settings, scroll down to find the "Flash" option. Click on it to access the Flash settings for Google Chrome.
-
Confirming the Version: Once you are in the Flash settings, verify that the version number displayed corresponds to the latest version of Adobe Flash. The version number should reflect the most recent update, indicating that the plugin has been successfully updated on your browser.
By following these steps, you can ensure that the update of Adobe Flash on Google Chrome has been successfully verified. This confirmation provides peace of mind, knowing that your browsing experience is equipped with the latest version of Adobe Flash, thereby maximizing performance and security.
Verifying the update of Adobe Flash on Google Chrome is a crucial step in maintaining a secure and seamless browsing experience. By confirming that the latest version of the plugin is in place, you can confidently explore multimedia content, interact with web-based applications, and enjoy a dynamic online experience without concerns about outdated software.
With the update of Adobe Flash successfully verified, you can navigate the web with confidence, knowing that your Google Chrome browser is equipped with the latest features and security enhancements. By staying proactive about updating Adobe Flash and verifying the success of the process, you can ensure that your online adventures remain vibrant and secure.