Introduction
Welcome to the world of do-it-yourself portable power solutions! In this guide, we will walk you through the process of creating your very own USB charger using a humble Altoids tin. This project is not only practical but also a great way to repurpose materials and exercise your creativity. Imagine having a compact, portable USB charger that fits snugly in your pocket or bag, ready to power up your devices whenever you need it. Whether you're an outdoor enthusiast, a frequent traveler, or simply someone who appreciates a handy gadget, this DIY Altoids USB charger is sure to pique your interest.
As we delve into the step-by-step process, you'll discover just how straightforward and rewarding it can be to assemble your own portable power solution. Not only will you gain a deeper understanding of the inner workings of a USB charger circuit, but you'll also have the satisfaction of knowing that you crafted a useful device with your own hands. This project is an excellent opportunity to learn about electronics, soldering, and practical problem-solving, all while creating a functional and stylish accessory.
So, gather your tools and let's embark on this exciting journey of crafting a portable power solution from an ordinary Altoids tin. By the end of this guide, you'll be equipped with the knowledge and skills to impress your friends with your DIY prowess and enjoy the convenience of having a reliable USB charger at your fingertips. Let's roll up our sleeves and bring this ingenious project to life!
Materials Needed
Before we dive into the construction process, it’s essential to gather the necessary materials and tools for this DIY project. Here’s a rundown of what you’ll need to create your very own Altoids USB charger:
- Altoids Tin: The star of the show! An empty Altoids tin will serve as the compact and stylish housing for your USB charger.
- USB Charger Circuit: You’ll require a USB charger circuit, which can be salvaged from an old USB power bank or purchased online. This circuit will be the heart of your portable power solution.
- USB Cable: A standard USB cable with a connector that matches your devices, such as micro-USB or USB-C.
- Double-Sided Foam Tape: This will be used to secure the USB charger circuit inside the Altoids tin.
- Wire and Solder: Essential for connecting the components and assembling the circuit. Make sure to use insulated wire for safety.
- Wire Cutters and Strippers: These tools will come in handy for preparing the wires used in the assembly process.
- Soldering Iron and Soldering Station: To solder the connections between the components with precision.
- Hot Glue Gun (Optional): If you prefer, a hot glue gun can be used for additional securing of components.
- Decorative Materials (Optional): If you want to personalize your Altoids USB charger, consider decorative elements such as stickers, paint, or decals to give it a unique touch.
With these materials at your disposal, you’re well-equipped to embark on this DIY journey and create a portable USB charger that perfectly blends functionality and style.
Step 1: Disassembling the Altoids Tin
The first step in creating your DIY Altoids USB charger is to carefully disassemble the Altoids tin. Begin by prying open the lid of the tin using a flathead screwdriver or a similar tool. Take your time and work around the edges to avoid bending or damaging the lid. Once the lid is removed, set it aside for later use.
Next, empty the contents of the tin and clean out any remaining residue to ensure a tidy workspace. You may choose to repurpose the mints for later enjoyment or set them aside for disposal. With the tin now empty and clean, you’re ready to move on to the next phase of the project.
Inspect the interior of the tin to ensure that it’s free of any sharp edges or protrusions that could potentially interfere with the placement of the USB charger circuit. If necessary, use sandpaper or a file to smooth out any rough areas and create a safe and accommodating environment for the electronic components.
By disassembling the Altoids tin with precision and care, you’re setting the stage for the successful integration of the USB charger circuit in the upcoming steps. This initial phase sets the foundation for a well-prepared housing that will encase the essential components of your portable power solution.
With the Altoids tin now prepped and ready, you’ve completed the first crucial step in the creation of your DIY Altoids USB charger. The stage is set for the exciting process of assembling the USB charger circuit within this iconic and versatile container.
Step 2: Preparing the USB Charger Circuit
With the Altoids tin disassembled and ready for its new role as a portable power hub, it’s time to focus on preparing the USB charger circuit that will bring this project to life. The USB charger circuit is the vital component that will convert the tin into a functional and convenient power source for your devices.
Begin by carefully examining the USB charger circuit to familiarize yourself with its layout and components. If you salvaged the circuit from an old USB power bank, take a moment to assess its condition and ensure that all the necessary elements, such as the voltage regulator, charging controller, and input/output ports, are intact and operational. If you purchased a USB charger circuit, review the provided documentation to understand its specifications and capabilities.
Before proceeding, it’s crucial to determine the optimal placement of the USB charger circuit within the Altoids tin. Consider the positioning of the input and output ports, as well as any additional components such as LED indicators or power switches. This thoughtful planning will ensure that the circuit fits snugly and functions seamlessly within the confines of the tin.
Once you’ve identified the ideal placement, use double-sided foam tape to secure the USB charger circuit inside the Altoids tin. The foam tape provides a reliable and shock-absorbing mounting solution, safeguarding the circuit from movement and impact during everyday use. Ensure that the circuit is firmly affixed in place, taking care to position it away from the edges to prevent contact with the tin’s exterior.
By meticulously preparing the USB charger circuit and positioning it within the Altoids tin, you’re laying the groundwork for a robust and reliable portable power solution. This strategic approach sets the stage for the seamless integration of the circuit into the tin’s housing, bringing you one step closer to completing your DIY Altoids USB charger.
Step 3: Mounting the USB Charger Circuit
With the USB charger circuit prepared and positioned within the Altoids tin, the next critical step is to securely mount the circuit to ensure stability and functionality. Proper mounting is essential for safeguarding the circuit and preventing unwanted movement or damage, especially when the portable USB charger is in use or being transported.
Before proceeding with the mounting process, reconfirm the placement of the USB charger circuit within the tin to ensure optimal positioning. Verify that the input and output ports align with the designated openings in the tin, allowing for convenient access and seamless connectivity. This careful attention to detail will contribute to the overall functionality and aesthetics of the finished USB charger.
Once the placement is finalized, use the double-sided foam tape to affix the USB charger circuit firmly to the interior of the Altoids tin. Apply the tape strategically, ensuring that it provides comprehensive support to the circuit while allowing for proper heat dissipation and electrical insulation. Take care to avoid obstructing any vents or heat sinks on the circuit board that facilitate efficient operation.
As you secure the circuit in place, consider the orientation of any indicator lights or status LEDs on the circuit. Ensure that these elements are visible through the openings of the Altoids tin, providing a clear indication of the charger’s operational status without compromising the structural integrity of the housing.
By mounting the USB charger circuit with precision and attention to detail, you’re enhancing the durability and functionality of your DIY Altoids USB charger. This crucial step ensures that the circuit is securely integrated into the tin’s housing, setting the stage for the final wiring and assembly processes that will bring your portable power solution to fruition.
Step 4: Wiring the USB Charger Circuit
As you progress through the assembly of your DIY Altoids USB charger, the next pivotal step involves wiring the USB charger circuit to establish the necessary connections for power input and output. This phase is crucial for ensuring that the circuit can effectively harness the energy from a power source and deliver it to your devices, all within the confines of the compact Altoids tin.
Begin by identifying the input and output terminals on the USB charger circuit. The input terminals are where the power source, such as a USB wall adapter or a power bank, will be connected to supply electricity to the circuit. The output terminals, on the other hand, will be linked to the USB cable that interfaces with your devices, providing a reliable power transfer mechanism.
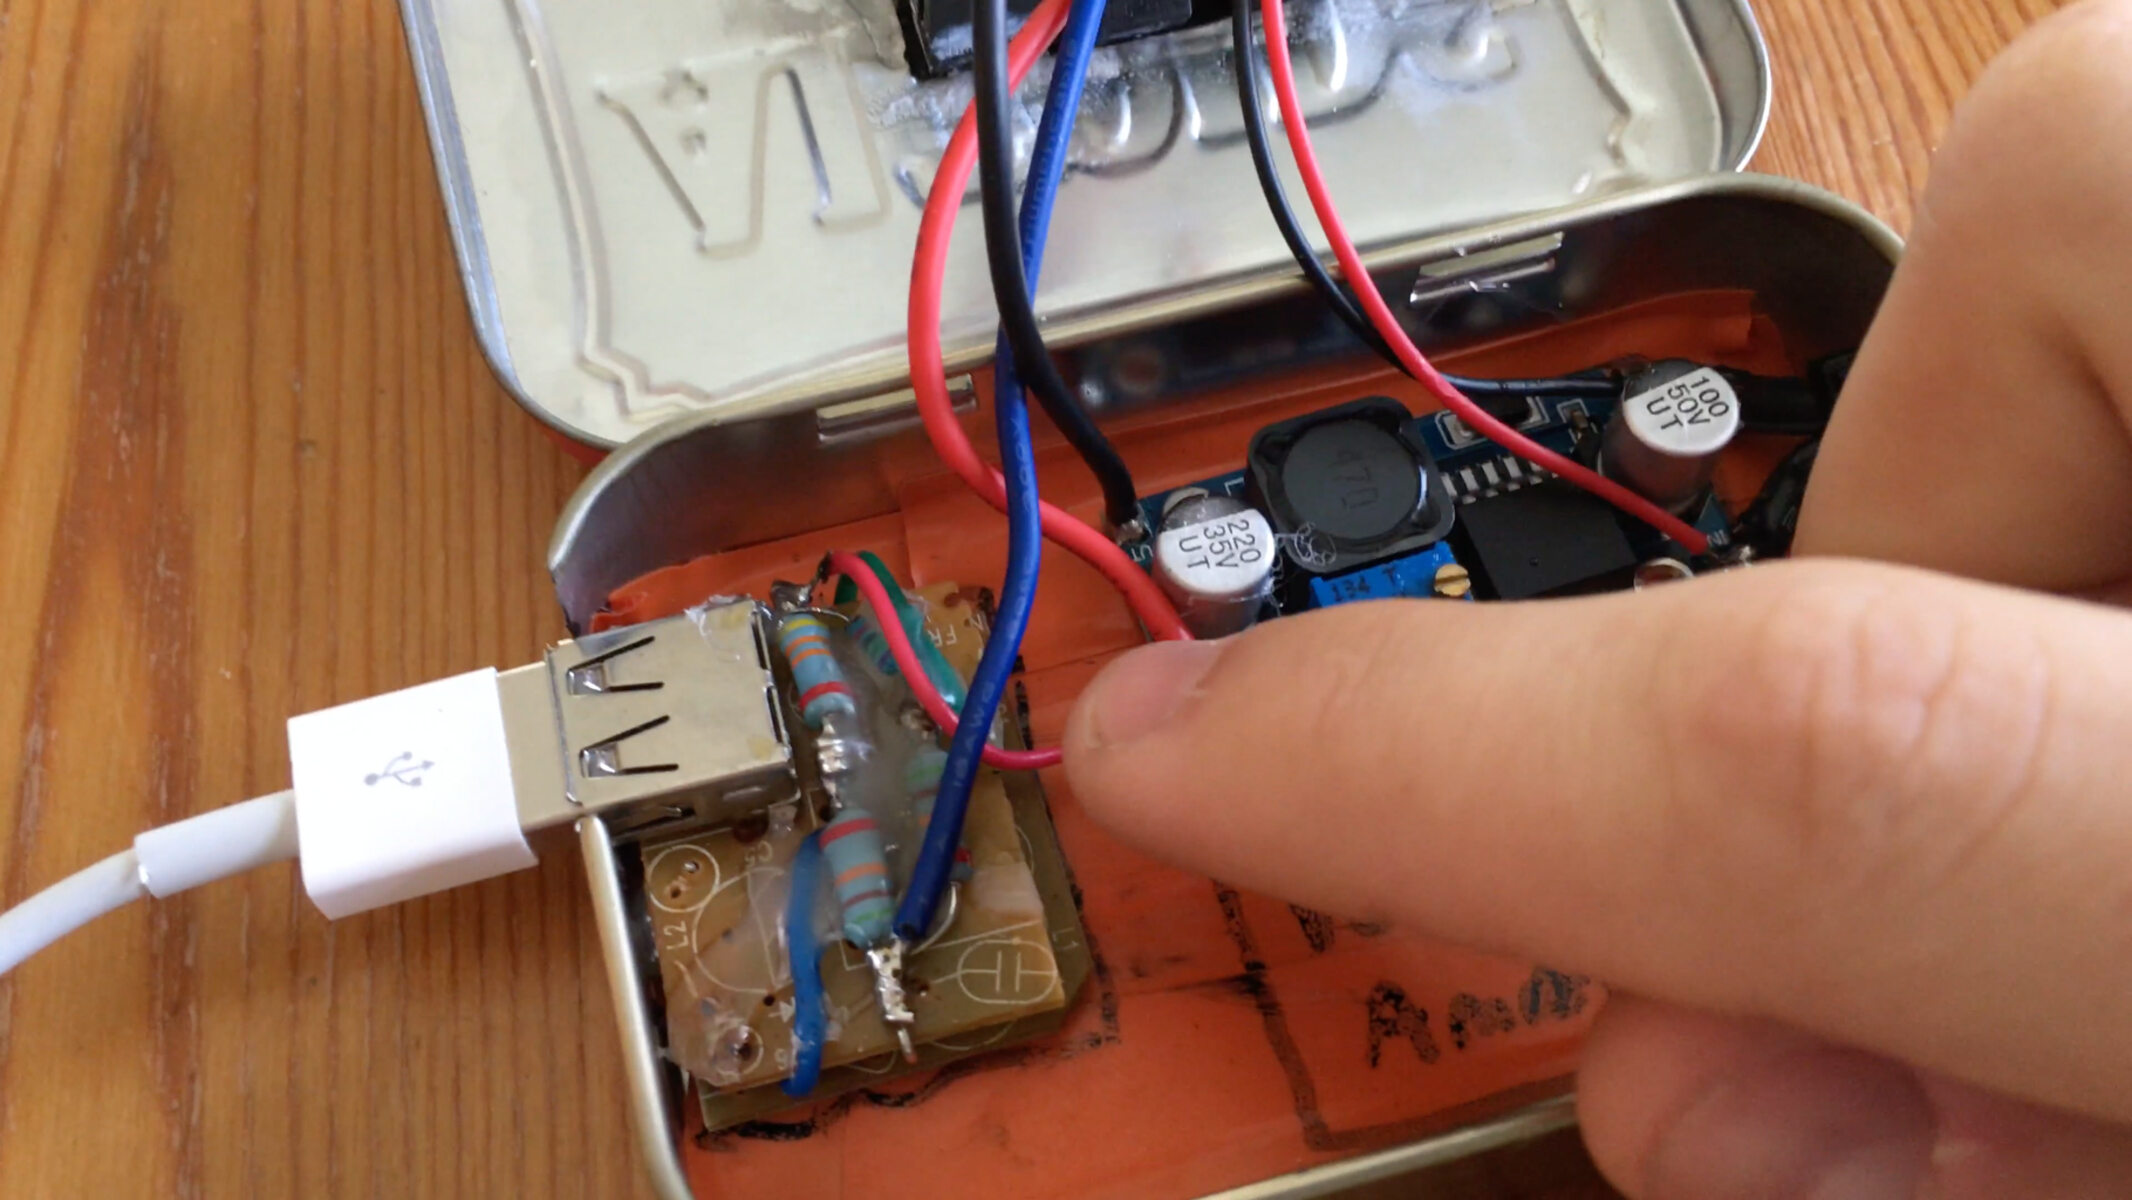
Using insulated wire and a soldering iron, carefully establish the necessary connections between the input and output terminals of the USB charger circuit. Exercise precision and caution during the soldering process to ensure secure and reliable electrical joints. It’s essential to maintain a tidy and organized wiring layout within the Altoids tin to facilitate efficient assembly and future maintenance.
When wiring the USB charger circuit, consider the length and routing of the cables to optimize the internal space of the Altoids tin. Avoid excessive cable clutter and ensure that the wiring does not obstruct the placement of the circuit or impede the closing of the tin’s lid. Neat and well-organized wiring contributes to the overall functionality and visual appeal of your portable USB charger.
As you complete the wiring process, conduct a thorough inspection of the connections to verify their integrity and stability. Ensure that there are no exposed wires or unintended shorts that could compromise the performance or safety of the USB charger. This meticulous attention to detail will result in a professionally executed wiring configuration that forms the backbone of your DIY portable power solution.
Step 5: Assembling the Altoids Tin
With the USB charger circuit wired and securely mounted within the Altoids tin, the final step in creating your DIY Altoids USB charger is to assemble the tin, enclosing the circuit in its new compact and stylish housing. This phase marks the culmination of your meticulous efforts, transforming an ordinary mint tin into a functional and visually appealing portable power solution.
Begin by carefully routing the USB cable through the designated opening in the Altoids tin, ensuring that it aligns with the output terminals of the USB charger circuit. This strategic placement allows for seamless connectivity between the USB charger and your devices, providing a convenient and unobtrusive power transfer mechanism.
Before closing the tin, take a moment to inspect the interior and ensure that the wiring and components are neatly arranged and free from any potential obstructions. This visual check ensures that the USB charger circuit is well-positioned and that the wiring is organized and secured, setting the stage for a successful assembly.
Gently place the lid of the Altoids tin back into position, taking care to align it accurately with the base. Apply even pressure to the edges to secure the lid, ensuring a snug and secure closure that encapsulates the USB charger circuit within the tin’s iconic housing. The satisfying click of the lid signals the completion of the assembly process, heralding the transformation of the tin into a fully functional USB charger.
As a final touch, consider personalizing the exterior of the Altoids tin to reflect your unique style and creativity. Whether it’s adding decorative stickers, custom paint, or a distinctive label, infusing a touch of individuality into the design enhances the visual appeal of your DIY Altoids USB charger and sets it apart as a one-of-a-kind creation.
With the Altoids tin now assembled and housing the fully integrated USB charger circuit, you’ve successfully brought your portable power solution to life. This transformative process has not only repurposed a humble mint tin but also empowered you to craft a practical and stylish accessory that’s ready to power up your devices wherever your adventures take you.
Conclusion
Congratulations on completing the journey of crafting your very own DIY Altoids USB charger! Through meticulous disassembly, preparation, mounting, wiring, and assembly, you’ve transformed a simple mint tin into a compact and functional portable power solution that’s ready to accompany you on your adventures.
As you reflect on the process, consider the invaluable skills and knowledge you’ve gained along the way. From understanding the inner workings of a USB charger circuit to honing your soldering and assembly techniques, this project has provided a hands-on learning experience that extends beyond the realm of electronics and into the realm of creativity and resourcefulness.
Not only have you repurposed materials and exercised your DIY prowess, but you’ve also embraced the spirit of innovation and practical problem-solving. The result is a unique and personalized USB charger that reflects your ingenuity and attention to detail, ready to serve as a reliable power source for your devices whenever the need arises.
Furthermore, the journey of creating a DIY Altoids USB charger extends beyond the tangible outcome. It’s a testament to the satisfaction and empowerment that come from crafting something with your own hands—a tangible manifestation of creativity and capability that resonates with every use of your portable power solution.
As you embark on future DIY projects and creative endeavors, carry forward the lessons and experiences gained from this endeavor. Embrace the opportunity to repurpose materials, exercise your ingenuity, and create practical and stylish accessories that enrich your daily life and inspire those around you.
With your DIY Altoids USB charger in hand, you’re equipped not only with a functional and portable power solution but also with the confidence and knowledge to embark on new and exciting projects. Embrace the spirit of innovation, and continue to infuse your world with the creativity and resourcefulness that define the DIY spirit.