Introduction
Welcome to the world of do-it-yourself USB charger construction! In this comprehensive guide, you will embark on a journey to unlock the secrets of building your very own USB charger from scratch. Whether you are a tech enthusiast, a hobbyist, or simply someone who loves to tinker with electronics, this guide is designed to equip you with the knowledge and skills needed to create a functional and reliable USB charger.
As the demand for portable electronic devices continues to soar, the need for efficient and accessible charging solutions has become more pronounced than ever. While commercial USB chargers are readily available, constructing your own USB charger not only provides a sense of accomplishment but also allows you to customize the charger to suit your specific needs. From selecting the right components to assembling the circuit and troubleshooting any issues, this guide will walk you through each step with clarity and precision.
By delving into the intricacies of USB charger construction, you will gain a deeper understanding of the underlying principles of power supply and circuitry. Whether you are a novice or an experienced DIY enthusiast, this guide is tailored to accommodate various skill levels, ensuring that you can follow along and successfully build your own USB charger.
Throughout this guide, you will discover the fundamental building blocks of power and learn how to harness them to create a reliable USB charger. With detailed explanations, practical tips, and troubleshooting techniques, you will be empowered to take on this exciting DIY project with confidence.
So, roll up your sleeves, gather your tools, and get ready to embark on a rewarding journey of DIY USB charger construction. Let's dive into the world of electronics and unleash your creativity as we explore the art and science of building a USB charger from the ground up. Get ready to power up your devices in style with a USB charger that you've built with your own hands!
Understanding USB Chargers
Before delving into the construction process, it’s essential to grasp the fundamental principles of USB chargers. USB, which stands for Universal Serial Bus, has become the ubiquitous standard for connecting and charging electronic devices. USB chargers, also known as power adapters, are designed to provide a reliable source of power to a wide array of gadgets, including smartphones, tablets, and other portable devices.
USB chargers typically consist of a power supply circuit that converts AC (alternating current) from a wall outlet to DC (direct current) suitable for charging electronic devices. Understanding the voltage and current requirements of different devices is crucial when designing and building a USB charger. The USB standard specifies different charging protocols, such as USB 2.0, USB 3.0, and the latest USB-C, each with distinct power delivery capabilities.
Furthermore, USB chargers may feature multiple ports to accommodate simultaneous charging of multiple devices. It’s important to consider the total power output and distribution across the ports to ensure efficient and safe charging. Additionally, the design of the charger should incorporate safety features, such as overcurrent protection, overvoltage protection, and short-circuit protection, to safeguard both the charger and the connected devices.
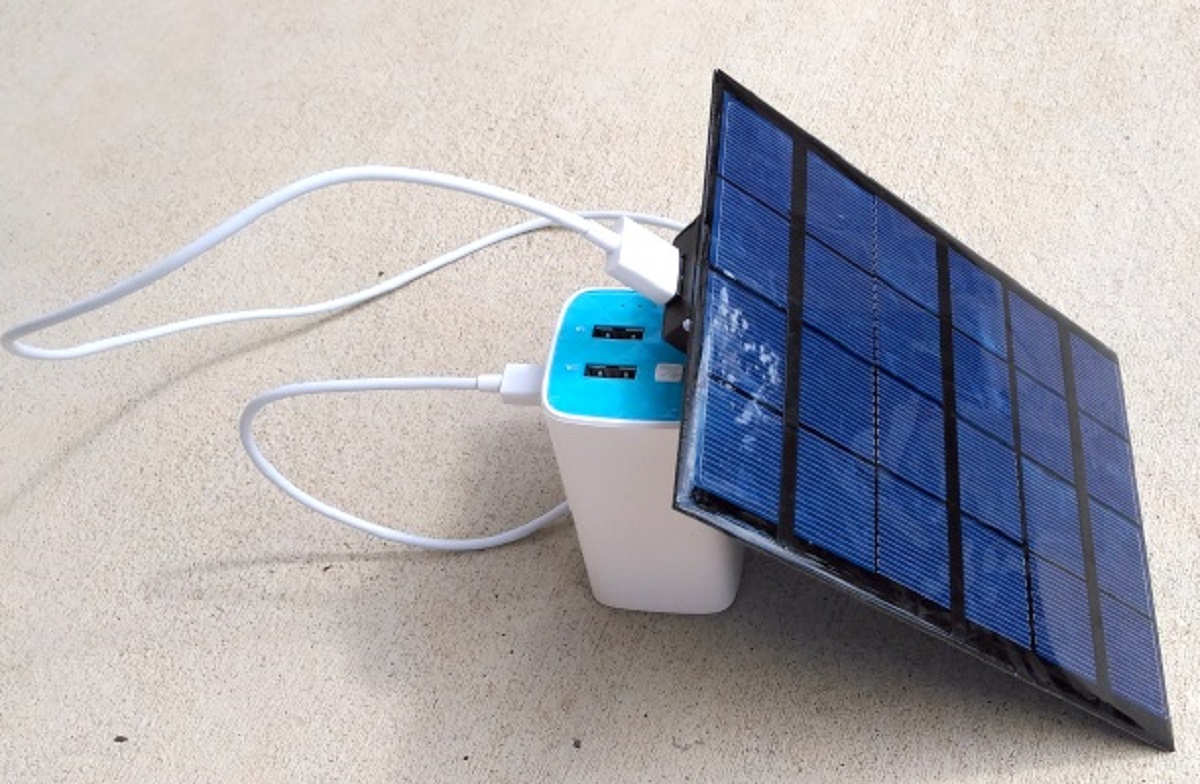
As technology continues to evolve, USB chargers have adapted to support fast-charging capabilities, enabling rapid replenishment of device batteries. Understanding the intricacies of fast-charging protocols and compatibility with different devices is essential for constructing a versatile and future-proof USB charger.
By comprehending the inner workings of USB chargers, including voltage regulation, current output, and compatibility with various devices, you will be better equipped to design and build a USB charger that meets your specific requirements. Whether you aim to create a compact travel charger or a high-power charging station, a solid understanding of USB charger functionality is the cornerstone of a successful DIY construction project.
Choosing the Right Components
When embarking on the journey of building a DIY USB charger, selecting the appropriate components is paramount to the success of your project. The key components of a USB charger include the power supply circuit, USB ports, voltage regulators, capacitors, resistors, and safety features. Understanding the role of each component and choosing high-quality parts is essential for ensuring the performance, reliability, and safety of the USB charger.
The power supply circuit forms the heart of the USB charger, responsible for converting the incoming AC voltage to the DC voltage required for charging devices. Selecting a reliable and efficient transformer, along with diodes and capacitors for rectification and smoothing, is crucial for stable and clean power output. Additionally, integrating voltage regulators, such as linear regulators or switching regulators, ensures that the output voltage remains within the specified range, preventing damage to connected devices.
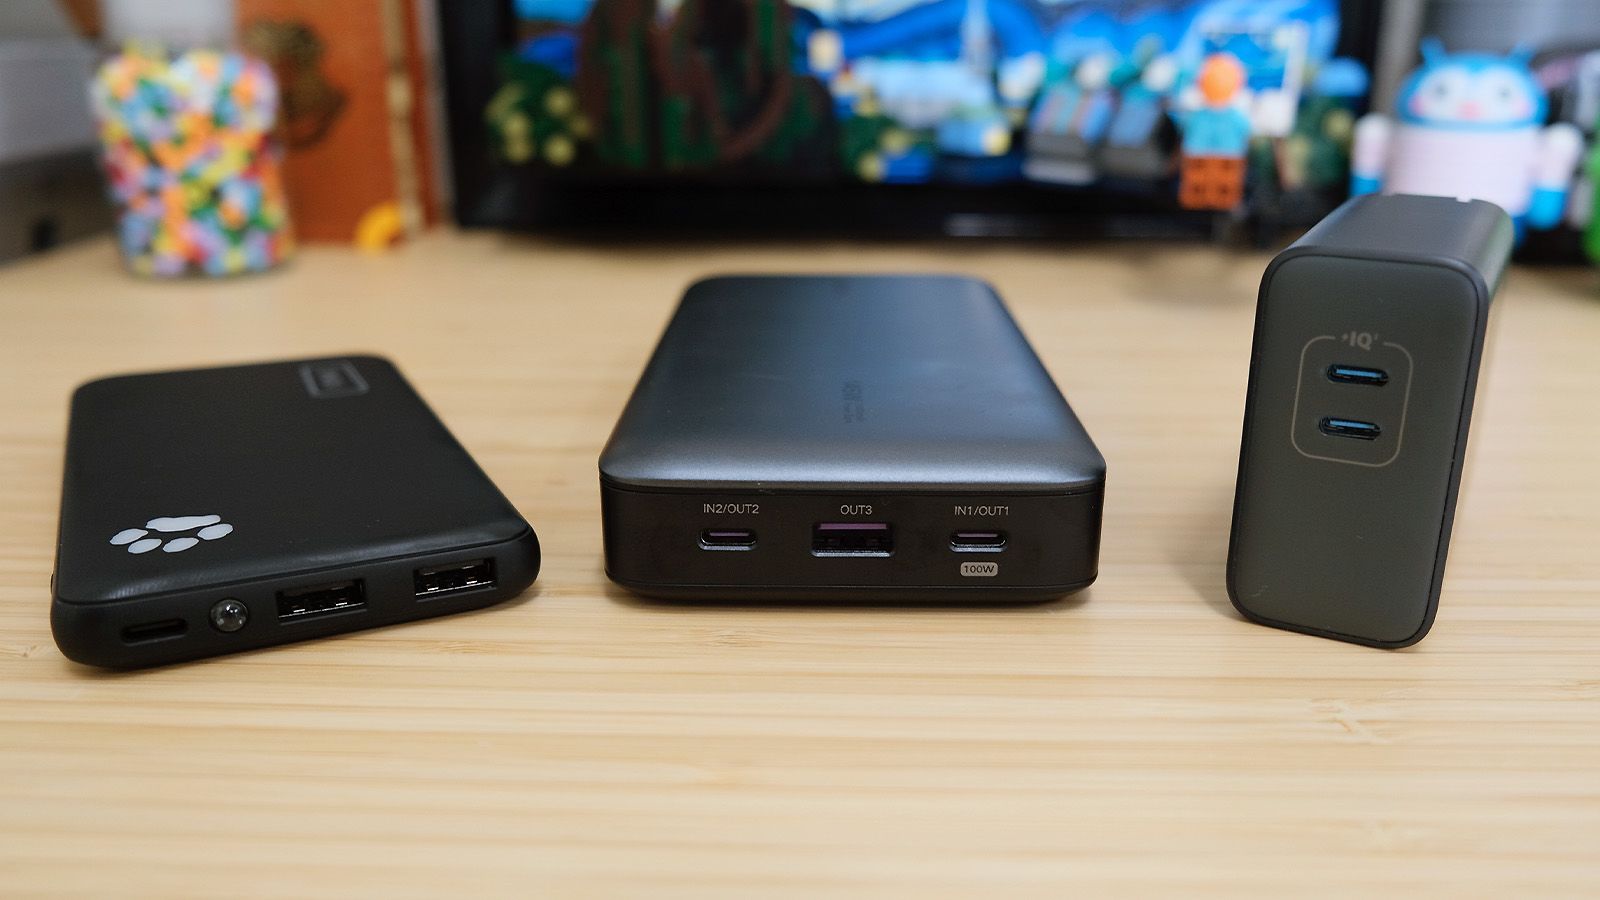
USB ports, including standard USB-A ports and the newer USB-C ports, serve as the interface for connecting devices to the charger. Choosing high-quality, durable USB ports with proper soldering or mounting techniques is essential to withstand repeated use and ensure a secure connection for charging. Moreover, considering the total power output and distribution across multiple ports is vital for accommodating simultaneous charging of multiple devices without compromising charging speed.
Furthermore, incorporating safety features, such as overcurrent protection using fuses or polymeric positive temperature coefficient (PPTC) devices, safeguards the charger and connected devices from potential electrical faults. Overvoltage protection circuits and transient voltage suppressors protect against voltage spikes, while short-circuit protection prevents damage in the event of a short circuit.
Choosing high-quality capacitors and resistors with the appropriate capacitance and resistance values ensures stable operation and filtering of electrical noise within the charger circuit. Additionally, selecting components rated for the expected current and voltage levels, along with considering temperature and environmental factors, contributes to the longevity and reliability of the USB charger.
By meticulously selecting the right components and paying attention to their specifications and quality, you can lay a solid foundation for constructing a robust, efficient, and safe DIY USB charger. The careful consideration of each component ensures that your custom-built USB charger will deliver reliable performance while prioritizing the safety of the connected devices.
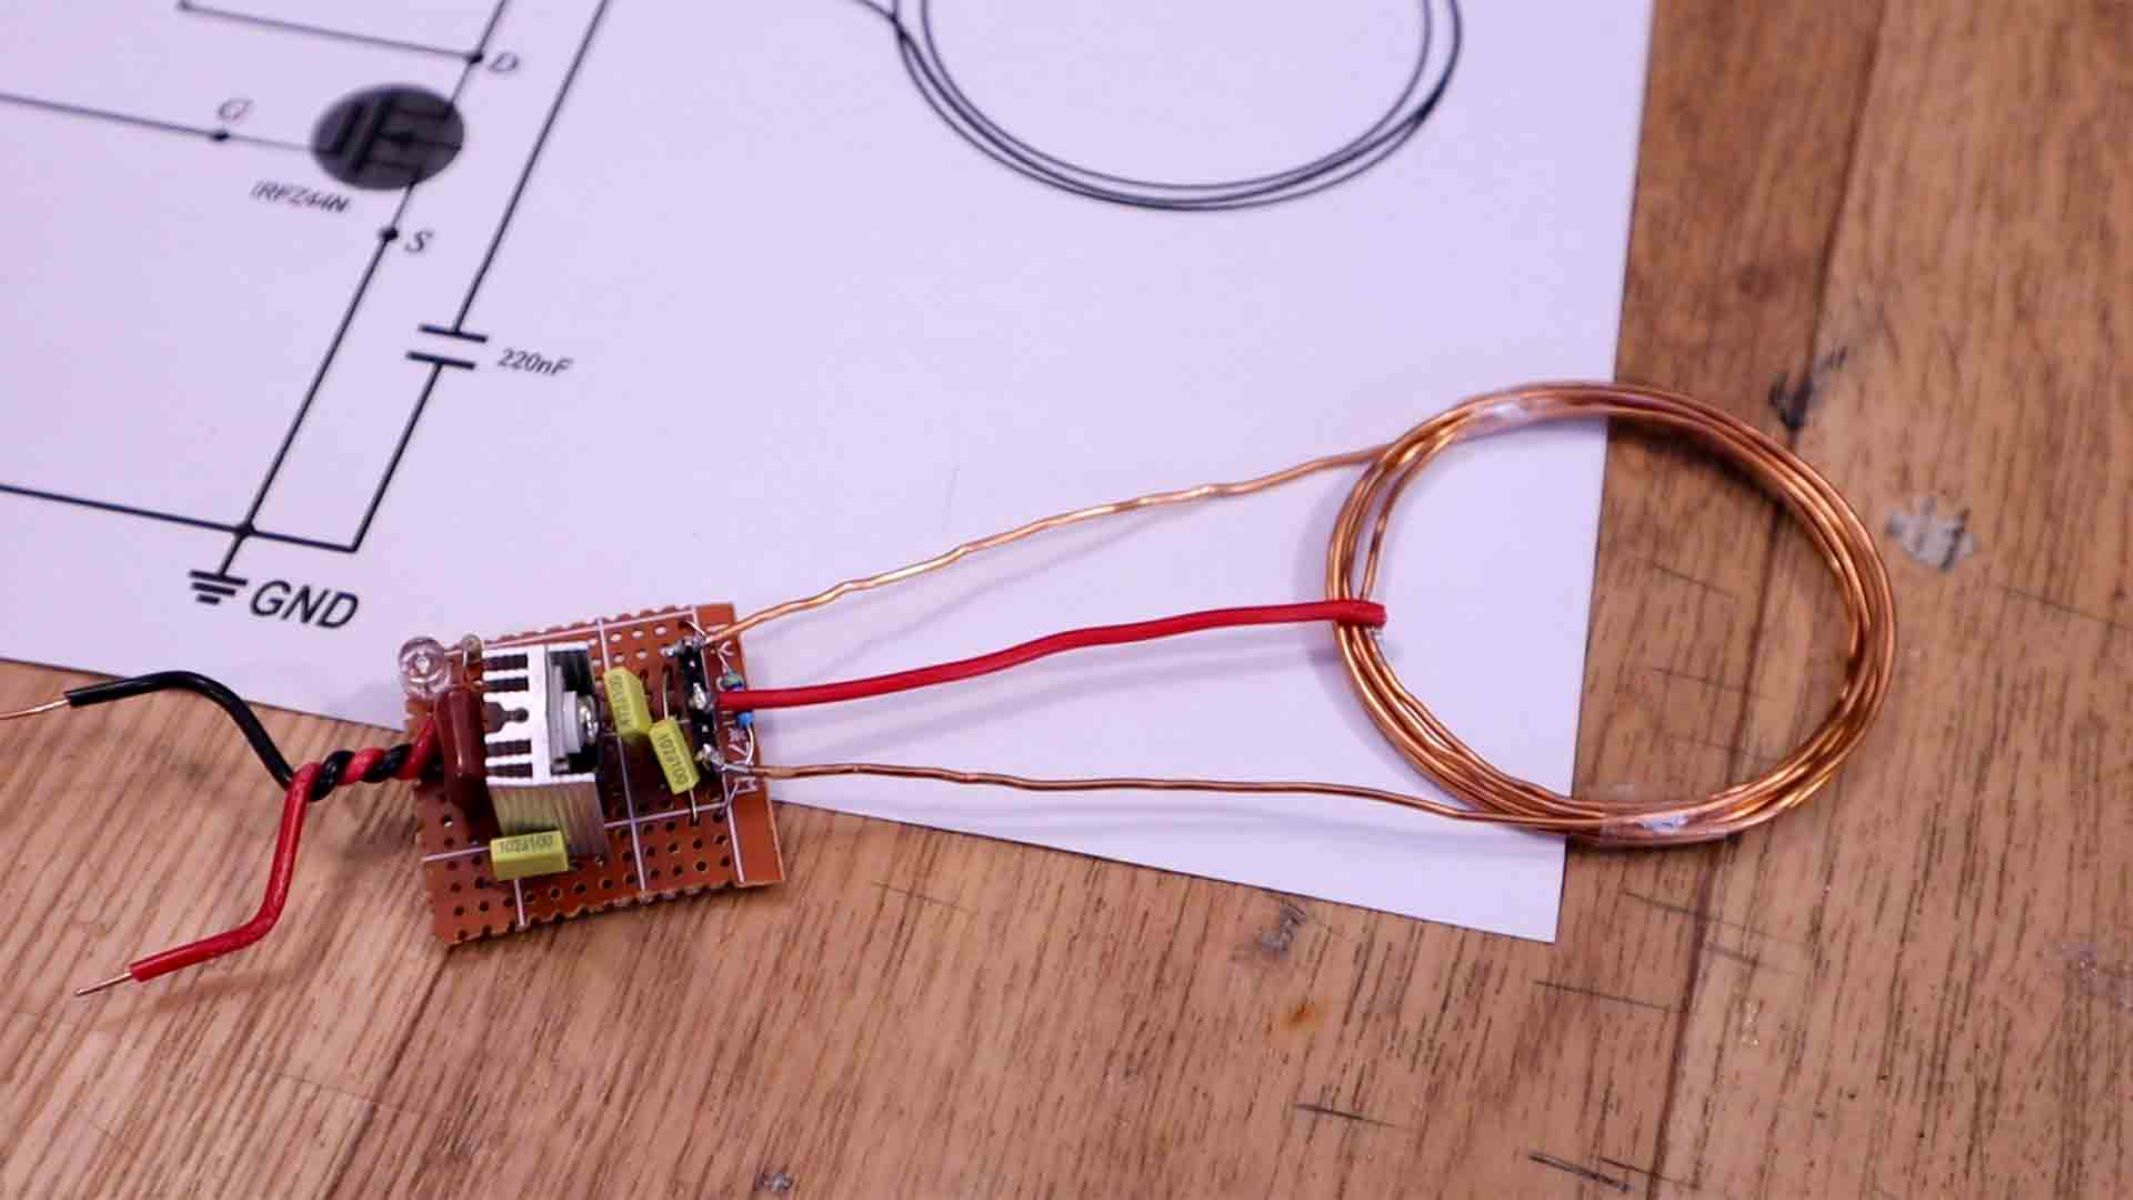
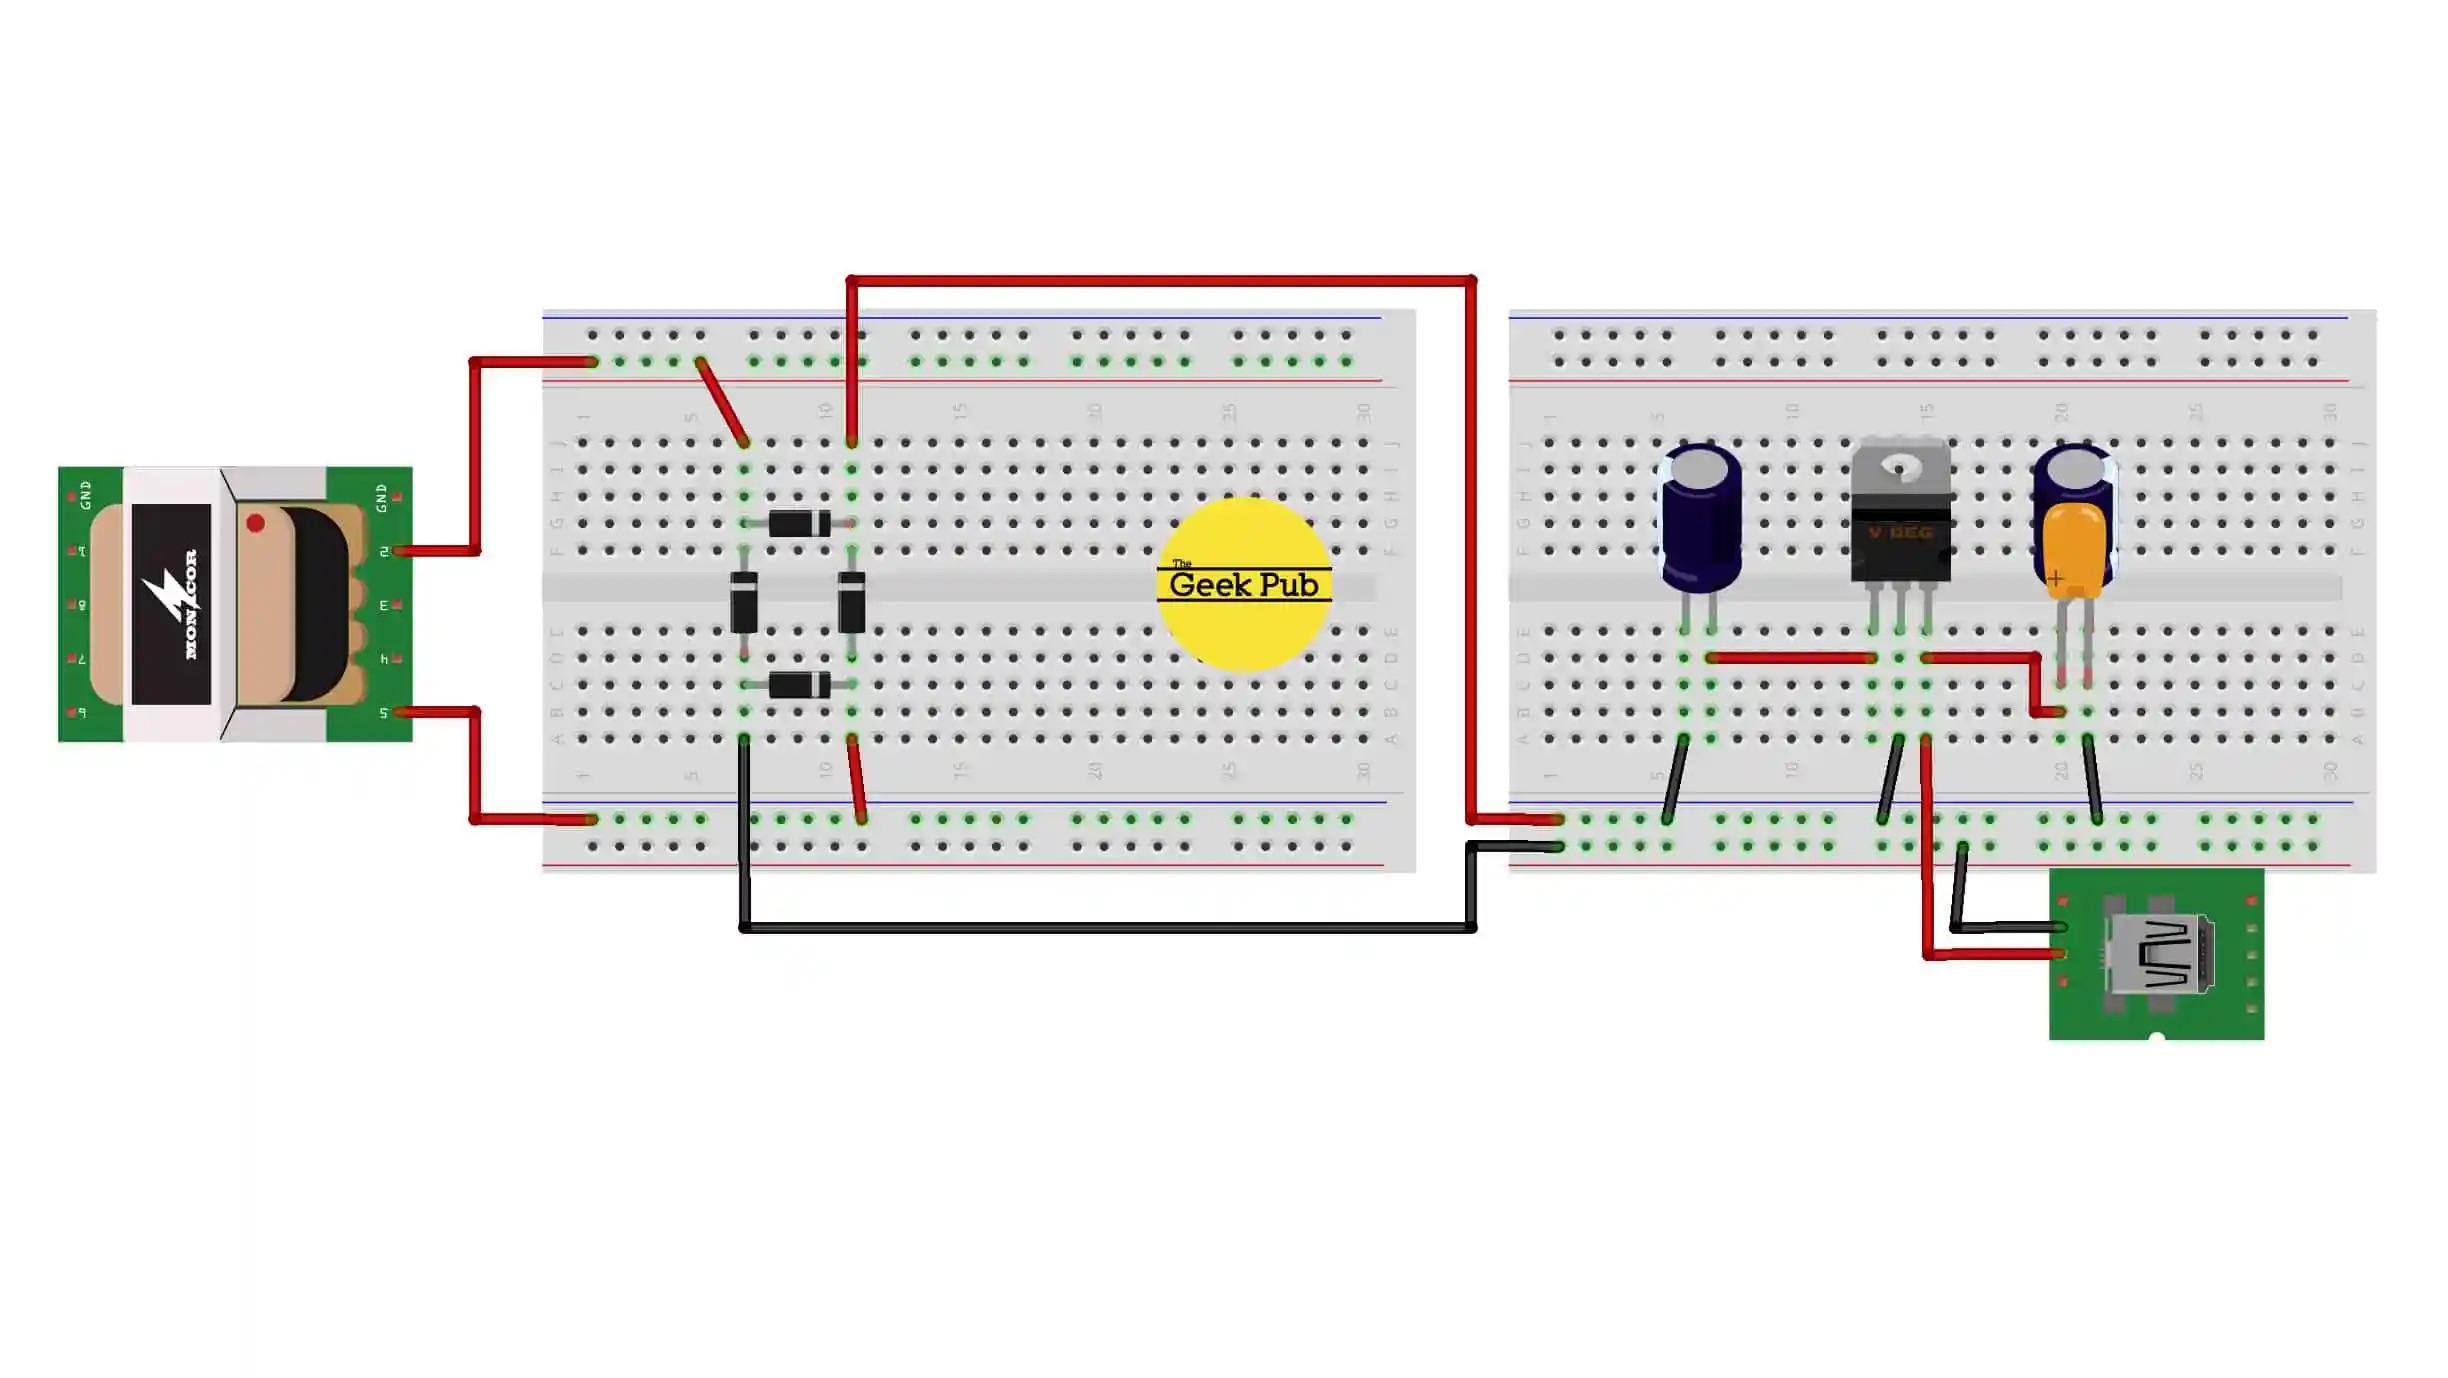
Building the Power Supply Circuit
The power supply circuit is the core element of a USB charger, responsible for converting the incoming alternating current (AC) from a wall outlet into the direct current (DC) required for charging electronic devices. Building a robust and efficient power supply circuit involves several key steps, from selecting the transformer and rectifier components to integrating voltage regulation and safety features.
The first step in constructing the power supply circuit is selecting an appropriate transformer that matches the input voltage of the wall outlet and provides the desired output voltage for charging devices. The transformer is essential for stepping down the voltage to a suitable level, ensuring compatibility with the USB charging standards. Additionally, diodes are employed for rectification, converting the AC voltage into pulsating DC, which is then smoothed using capacitors to produce a stable DC output.
Integrating voltage regulation is crucial for maintaining a consistent output voltage, regardless of fluctuations in the input voltage or load variations. Linear voltage regulators or switching regulators can be employed to achieve this, providing a stable and regulated DC output for charging devices. Careful consideration of the voltage regulator’s specifications, including input and output voltage ranges, maximum current output, and thermal considerations, is essential for optimal performance.
Furthermore, incorporating safety features within the power supply circuit is imperative to protect both the charger and the connected devices from potential electrical faults. Overcurrent protection, typically implemented using fuses or polymeric positive temperature coefficient (PPTC) devices, safeguards against excessive current flow, preventing damage to the circuit and the devices. Overvoltage protection circuits, along with transient voltage suppressors, shield the charger from voltage spikes, ensuring the safety of the connected devices.
Assembling the power supply circuit with meticulous attention to detail and adherence to safety standards is essential to ensure reliable and safe operation of the USB charger. Proper insulation, secure connections, and adherence to electrical codes contribute to the overall safety and longevity of the charger. Testing the power supply circuit under varying load conditions and voltage inputs is crucial to validate its performance and safety features before proceeding to the next phase of construction.
By mastering the art of building a robust power supply circuit, you lay the foundation for a reliable and efficient DIY USB charger. The careful selection of components, precise assembly techniques, and integration of safety features culminate in a power supply circuit that delivers stable, regulated power for charging a variety of electronic devices.
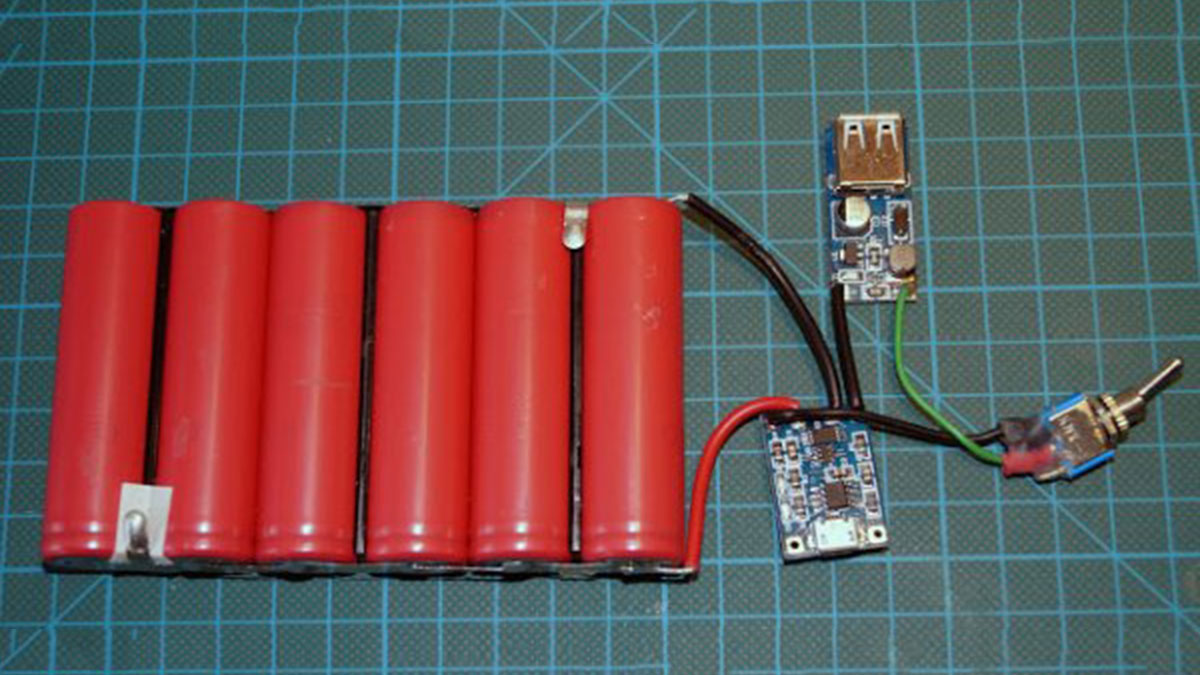
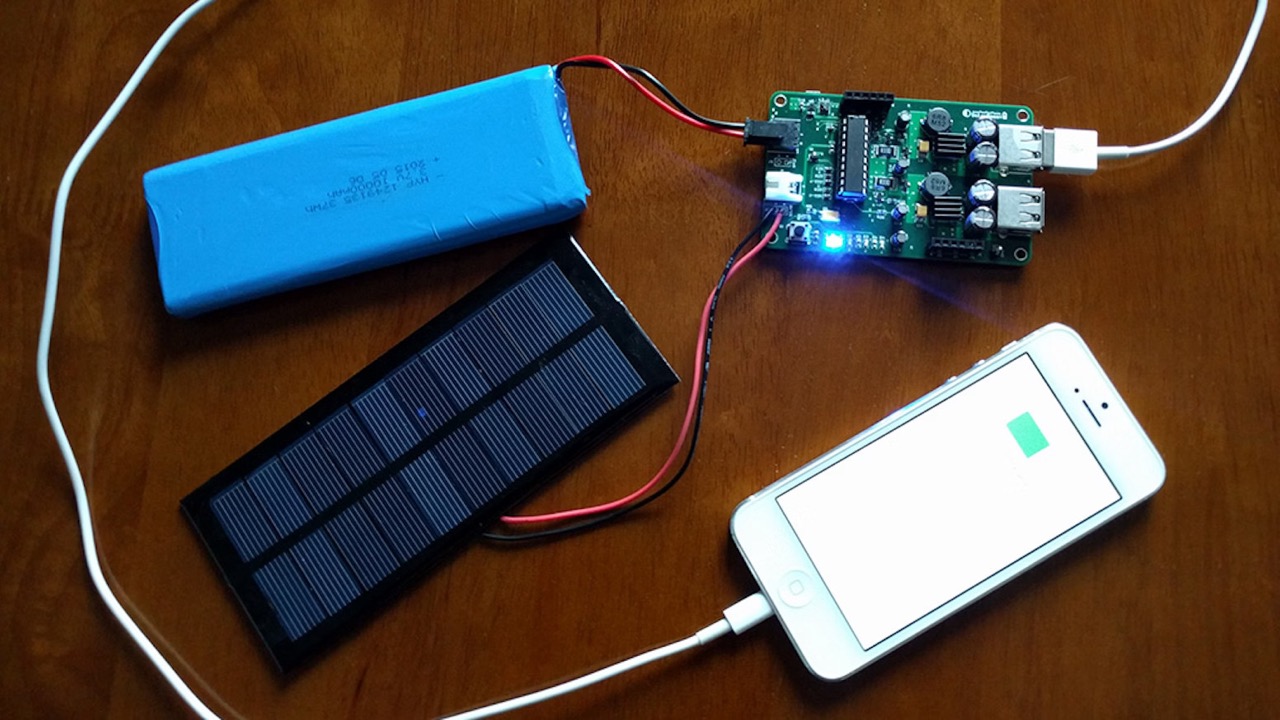
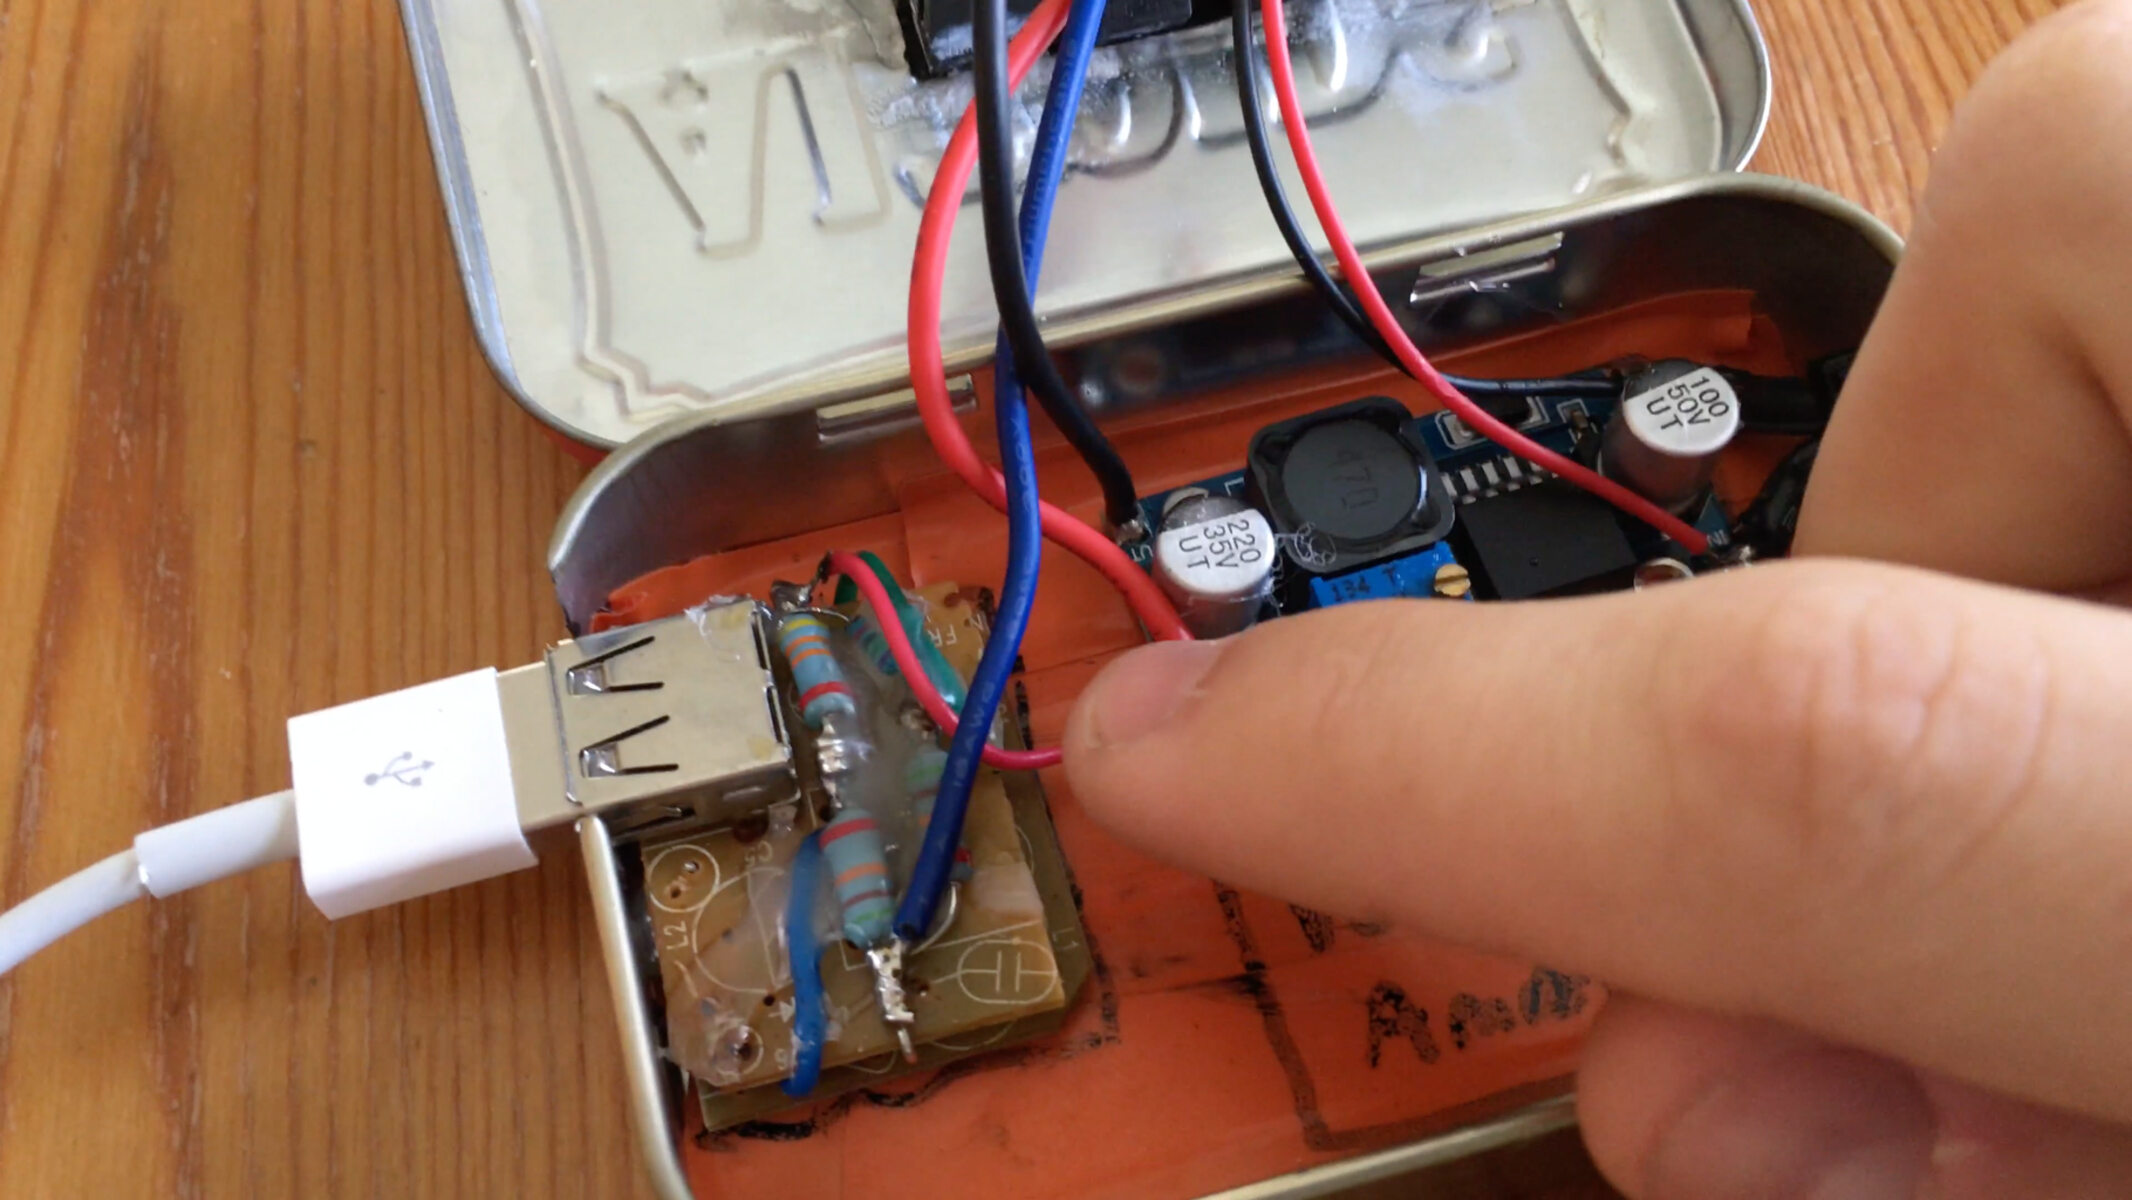
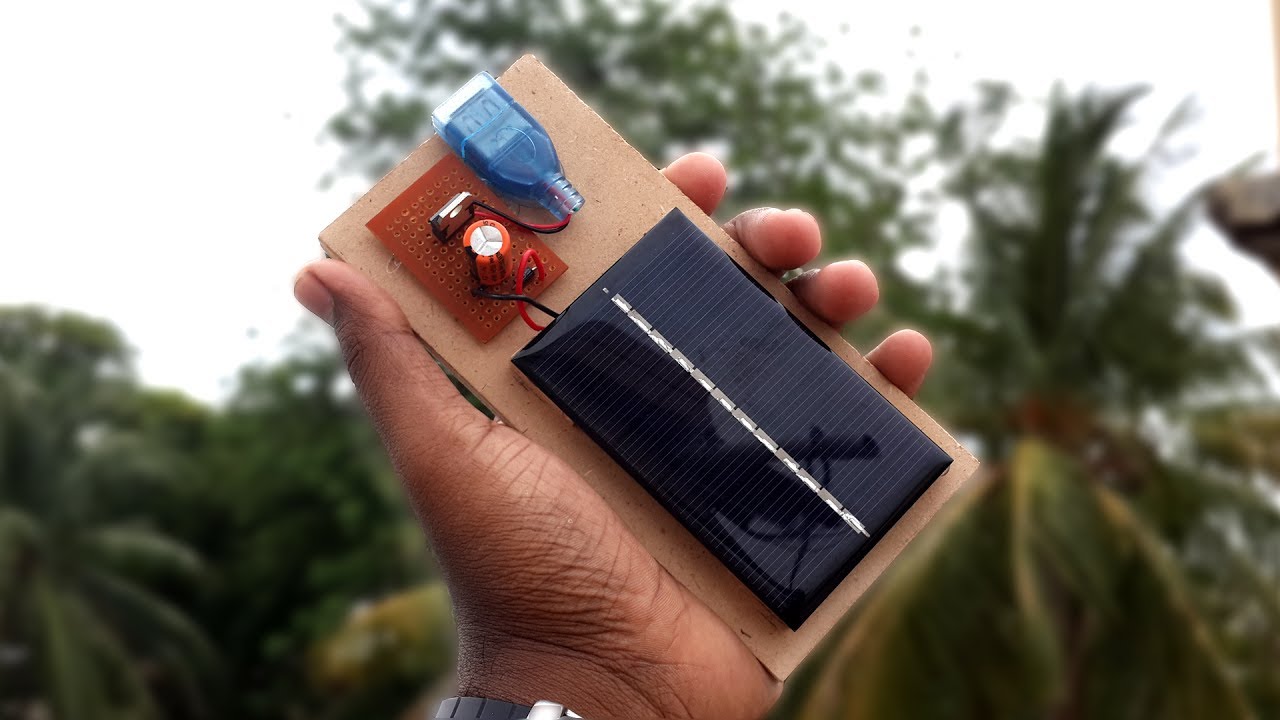
Assembling the USB Charger
With the power supply circuit in place, the next phase of constructing a DIY USB charger involves assembling the components into a cohesive and functional unit. This process encompasses integrating the USB ports, voltage regulators, capacitors, resistors, and safety features into a well-organized and secure layout within the charger enclosure.
The USB ports serve as the interface for connecting devices to the charger, and their proper integration is crucial for ensuring reliable and secure connections. Whether incorporating standard USB-A ports or the newer USB-C ports, attention to detail in soldering or mounting the ports is essential to withstand repeated use and provide a stable connection for charging devices. Ensuring proper insulation and strain relief for the USB port connections enhances the overall durability and safety of the charger.
Integrating voltage regulators within the charger circuit is essential for maintaining a stable output voltage, regardless of variations in the input voltage or load conditions. Proper placement of voltage regulators, along with adequate heat dissipation measures, contributes to the efficiency and longevity of the charger. Careful attention to thermal management and the use of heat sinks, if necessary, ensure that the voltage regulators operate within their specified temperature limits.
Furthermore, the strategic placement of capacitors and resistors within the charger circuit contributes to stable operation and noise filtering, enhancing the overall performance of the charger. Selecting high-quality capacitors with the appropriate capacitance values and low equivalent series resistance (ESR) is crucial for minimizing ripple and ensuring a clean output voltage. Similarly, employing resistors with precise resistance values contributes to accurate current limiting and voltage division within the circuit.
Integrating safety features, such as overcurrent protection, overvoltage protection, and short-circuit protection, within the charger assembly ensures the safety of both the charger and the connected devices. Proper placement of fuses, PPTC devices, transient voltage suppressors, and other protective components within the circuit contributes to a robust and reliable safety mechanism.
Assembling the USB charger involves meticulous attention to detail, including proper insulation, secure connections, and adherence to safety standards. Carefully routing and organizing the internal wiring, along with securing components within the charger enclosure, contribute to the overall reliability and safety of the charger. Thorough testing of the assembled charger, including connectivity checks, voltage measurements, and functional tests, is imperative to validate its performance and safety features before proceeding to the final phase.
By skillfully assembling the USB charger with precision and attention to safety, you bring together the essential components into a cohesive and functional unit. The seamless integration of USB ports, voltage regulators, capacitors, resistors, and safety features within the charger enclosure results in a reliable and efficient DIY USB charger that is ready to power a variety of electronic devices.
Testing and Troubleshooting
Upon assembling the DIY USB charger, thorough testing is essential to ensure its functionality, safety, and compliance with the desired specifications. The testing phase involves a series of checks and measurements to validate the charger’s performance, identify potential issues, and troubleshoot any anomalies that may arise.
One of the primary tests involves measuring the output voltage of the charger under various load conditions to ensure that it falls within the specified range and remains stable. This validation is crucial for verifying that the charger can provide the required voltage for charging different devices while maintaining consistent performance. Additionally, testing the charger’s output current capability ensures that it can deliver the necessary charging current without exceeding its rated capacity.
Conducting connectivity checks for the USB ports, ensuring proper polarity and secure connections, is vital to guarantee reliable and stable connections for charging devices. Verifying the integrity of the wiring, solder joints, and insulation within the charger assembly contributes to the overall safety and durability of the device.
Furthermore, functional tests involving the actual charging of various devices, such as smartphones, tablets, or other USB-powered gadgets, provide real-world validation of the charger’s performance. Observing the charging behavior, including the charging speed and the stability of the output voltage during the charging process, offers valuable insights into the charger’s compatibility and efficiency.
If any issues or anomalies are identified during the testing phase, troubleshooting becomes paramount to pinpoint and resolve the underlying causes. Troubleshooting techniques may involve systematic checks of individual components, such as voltage regulators, capacitors, and resistors, to identify potential failures or deviations from expected values. Additionally, thermal imaging or temperature measurements can help identify hotspots or overheating components that may indicate inefficiencies or potential safety hazards.
Conducting continuity tests, insulation resistance measurements, and insulation breakdown tests can uncover potential wiring or insulation issues within the charger assembly. Identifying and rectifying any short circuits, open circuits, or insulation failures is crucial for ensuring the safety and reliability of the charger.
In the event of persistent issues that defy initial troubleshooting efforts, revisiting the assembly process and inspecting the solder joints, component placements, and wiring connections can reveal potential assembly errors or mechanical issues. Addressing any assembly-related issues and ensuring proper mechanical integrity is essential for the overall functionality and safety of the charger.
By diligently testing and troubleshooting the DIY USB charger, you can validate its performance, identify and address potential issues, and ensure that it meets the desired specifications. Thorough testing and systematic troubleshooting contribute to the reliability, safety, and functionality of the charger, ultimately providing a satisfying and rewarding outcome for your DIY construction project.
Conclusion
Congratulations on successfully navigating the intricate process of constructing your very own DIY USB charger! Throughout this comprehensive guide, you’ve delved into the essential aspects of USB charger construction, from understanding the underlying principles to meticulously selecting components, building the power supply circuit, assembling the charger, and conducting thorough testing and troubleshooting.
By immersing yourself in the art and science of DIY electronics, you’ve not only gained valuable insights into the fundamental building blocks of power but also honed your skills in circuit design, component integration, and safety considerations. The hands-on experience of assembling and testing the USB charger has empowered you to take on complex electronic projects with confidence and precision.
As you reflect on your journey through the construction process, it’s important to acknowledge the fusion of creativity and technical expertise that culminated in the creation of a functional and reliable USB charger. The careful selection of components, meticulous assembly, and rigorous testing have collectively contributed to the realization of a custom-built charger that embodies your ingenuity and dedication.
Furthermore, the DIY USB charger you’ve constructed represents more than just a practical charging solution. It serves as a testament to your passion for innovation, your willingness to embrace challenges, and your commitment to mastering new skills. The knowledge and experience gained from this endeavor will undoubtedly fuel your future explorations in the realm of DIY electronics and empower you to embark on even more ambitious projects.
As you marvel at the completed USB charger, envision the countless devices it will power and the convenience it will bring to your daily life. Whether it’s charging your smartphone, tablet, or any USB-powered gadget, the charger stands as a testament to your ability to transform raw components into a functional and indispensable device.
Embrace the sense of achievement that comes with creating something truly remarkable from scratch. Your DIY USB charger not only embodies your technical prowess but also reflects the boundless potential that awaits as you continue to explore the captivating world of electronics and innovation.
So, as you bask in the glow of your DIY triumph, remember that the skills, knowledge, and determination acquired throughout this journey will continue to propel you toward new horizons of creativity and discovery. With each project, you reaffirm your position as a proficient and resourceful creator in the realm of DIY electronics.