Introduction
Steam Workshop is a popular platform for gamers to discover and download additional content for their favorite games. While it is straightforward to subscribe to and download mods directly through the Steam client, there might be instances where you want to manually download a mod from the Steam Workshop. This could be due to compatibility issues, the need to modify the mod files, or simply wanting to have more control over the installation process.
In this guide, we will walk you through the steps to manually download a mod from the Steam Workshop. By following these steps, you can save the mod files to your computer and install them into your game without relying on the Steam client. Whether you are a seasoned gamer or just getting started with mods, this guide will help you get the mod files you need for a more customized gaming experience.
Before we delve into the step-by-step process, it’s important to note that manually downloading mods from the Steam Workshop should only be done for personal use and within the bounds of the mod’s terms and conditions. Mod creators put in a lot of effort to develop these mods, and it’s crucial to respect their intellectual property rights and follow any licensing requirements they may have specified.
Now, let’s get started with the process of manually downloading a mod from the Steam Workshop!
Understanding Steam Workshop
Steam Workshop is a community-driven platform that allows gamers to discover, share, and download mods, maps, and other user-generated content for their favorite games. It is built into the Steam client, making it incredibly convenient for users to find and install mods for their games with just a few clicks.
One of the advantages of using Steam Workshop is its integration with the Steam client. This means that you can easily browse and subscribe to mods directly from the game’s Steam Workshop page. Once subscribed, the mods will automatically download and update whenever the creator makes changes or releases updates. This seamless integration makes managing mods a hassle-free experience, ensuring that you always have the latest version of your favorite mods.
On the Steam Workshop page, you can find a vast array of mods for various games, ranging from cosmetic changes to gameplay-altering modifications. The community aspect of Steam Workshop allows users to rate and provide feedback on mods, giving you valuable insights into the quality and compatibility of different mods.
When you download mods through the Steam Workshop, the mod files are stored in a specific location on your computer. The Steam client takes care of the installation and management of these mod files, making it easy to enable or disable them as per your preference when launching the game.
While the convenience of using Steam Workshop for downloading and installing mods is undeniable, there may be cases where you want to have more control over the mod files or need to troubleshoot compatibility issues. In such situations, manually downloading mods from the Steam Workshop becomes a viable option.
Next, we will walk you through the steps to manually download a mod from the Steam Workshop and guide you on how to install the mod into your game. This process will give you the flexibility to customize the installation and better understand the files that make up the mod.
Step 1: Find the Mod on Steam Workshop
The first step in manually downloading a mod from the Steam Workshop is to find the mod you want to download. To do this, open the Steam client and navigate to the game’s store page.
Once on the store page, look for a tab or section labeled “Steam Workshop” or “Community Hub.” Clicking on this tab will take you to the game’s dedicated Steam Workshop page.
On the Steam Workshop page, you will find a variety of mods available for the game. You can browse through popular mods, search for specific keywords, or use the filtering options to narrow down your search based on categories, ratings, or time of release.
When you find a mod that catches your interest, click on its title or thumbnail to open its individual page. Here, you will find more detailed information about the mod, including its description, screenshots, videos, and user reviews.
It’s important to carefully read the mod’s description and reviews to get a sense of its features and compatibility with your game version. Checking the comments section can also provide valuable insights and user feedback on the mod’s stability, performance, and any known issues.
If you have any questions or concerns about the mod, you can often reach out to the creator or other users through the comments section or the discussion forum associated with the mod.
Once you have thoroughly reviewed the mod and are satisfied with its features and compatibility, you are ready to proceed to the next step of subscribing to the mod in order to download it manually.
Step 2: Subscribe to the Mod
After finding the mod you want to download from the Steam Workshop, the next step is to subscribe to the mod. Subscribing to a mod allows you to download and receive automatic updates for that particular mod through the Steam client.
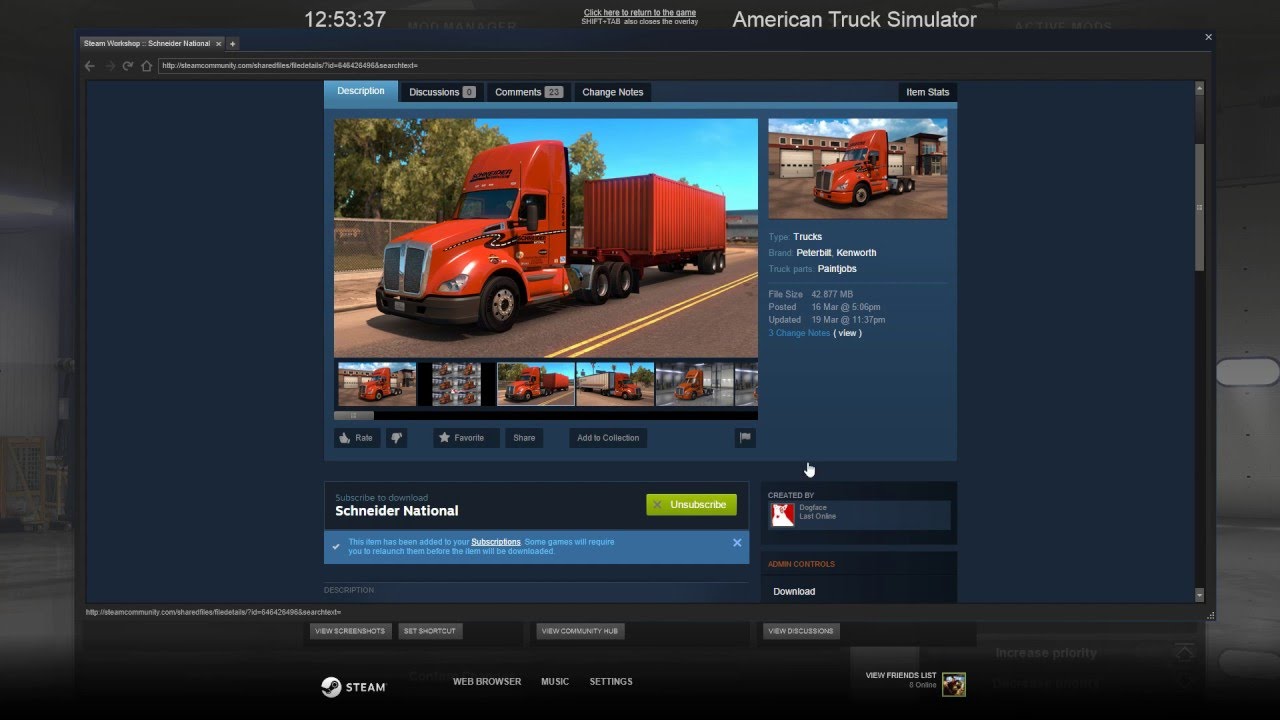
To subscribe to a mod, locate the “Subscribe” button on the mod’s individual page. This button is usually located near the top or in a prominent position, clearly indicating its purpose. Click on the “Subscribe” button, and the mod will be added to your subscribed list.
Keep in mind that when you subscribe to a mod, it will be automatically downloaded and updated whenever the creator releases new versions or updates. This ensures that you always have the latest version of the mod without having to manually search for updates.
Once you have successfully subscribed to the mod, you can manage your subscriptions by clicking on the “Workshop” tab in the Steam client. Here, you will find a list of all your subscribed mods categorized by the games they belong to.
If you ever want to unsubscribe from a mod, simply go to the mod’s page on the Steam Workshop and click the “Unsubscribe” button. This will remove the mod from your subscribed list, and it will no longer receive updates through the Steam client.
It’s worth noting that subscribing to a mod does not automatically install it in your game. It simply manages the download and update process. In the next steps, we will guide you through the process of locating the mod files on your computer and manually installing them into your game directory.
With the mod subscribed, let’s move on to step three and learn how to locate the mod folder on your computer to access the mod files.
Step 3: Locate the Mod Folder
After subscribing to your desired mod on the Steam Workshop, the next step is to locate the mod folder on your computer. This is where the mod files are stored after they are downloaded through the Steam client.
To find the mod folder, you will need to navigate to the Steam directory on your computer. By default, the Steam directory is located in the following file path:
C:\Program Files (x86)\Steam\
Once you have found the Steam directory, navigate to the following folder path:
steamapps\workshop\content\
Within the “content” folder, you will see a list of numbered folders. Each numbered folder corresponds to a specific game on your Steam library.
Locate the folder that corresponds to the game for which you subscribed to the mod. For example, if you subscribed to a mod for “The Elder Scrolls V: Skyrim,” find the numbered folder specific to Skyrim.
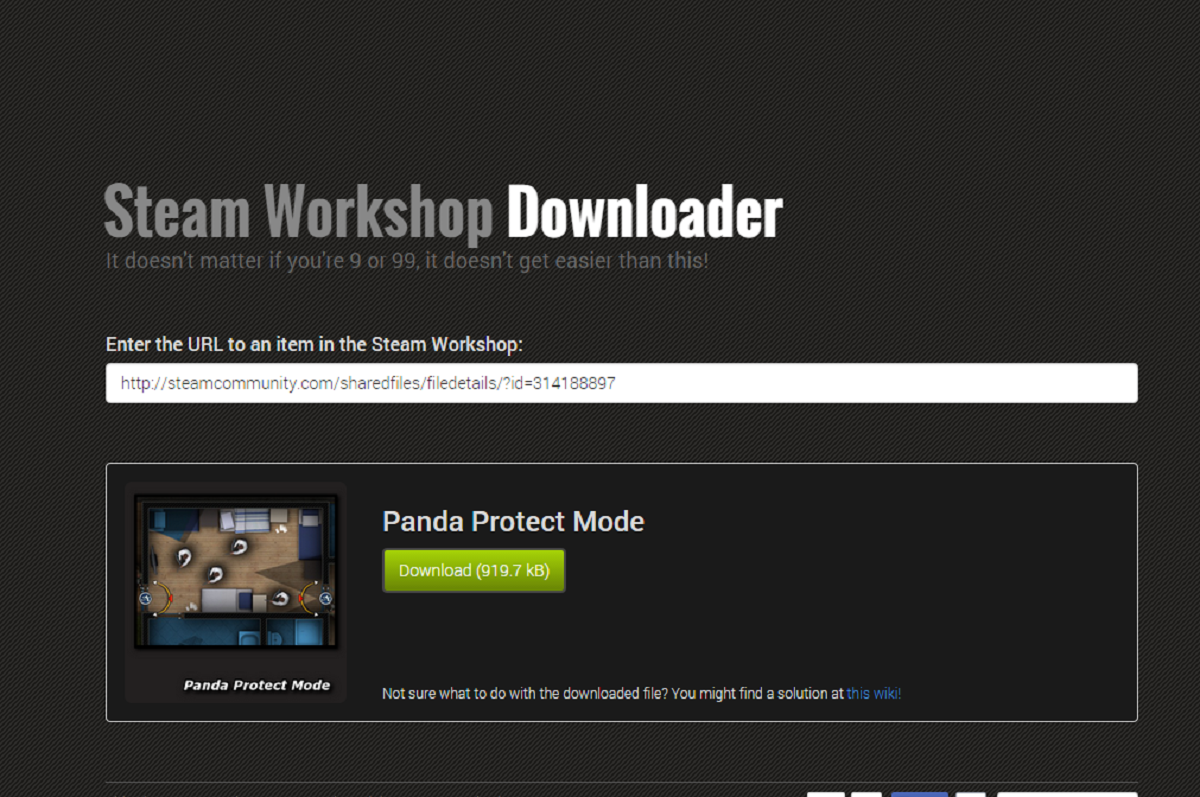
Inside the numbered folder, you will find another folder with a long number assigned to it. This number is the unique identifier for the mod you subscribed to on the Steam Workshop.
Access the folder with the unique identifier, and you will find the mod files within. These files typically include textures, scripts, models, and other assets that make up the mod.
It’s important to note that the mod files may be organized differently depending on the mod and the game. Some mods may have multiple folders or subfolders containing specific files for different aspects of the mod.
Once you have located the mod folder, you can proceed to the next step to copy the mod files and prepare them for manual installation into your game directory.
Step 4: Copy the Mod Files
Now that you have located the mod folder containing the downloaded files, the next step is to copy these files to prepare for manual installation into your game directory.
Open the mod folder and select all the files and folders within it. You can do this by pressing Ctrl+A (Windows) or Command+A (Mac) to highlight everything in the folder.
With the files and folders selected, right-click and choose the “Copy” option from the context menu. Alternatively, you can use the shortcut Ctrl+C (Windows) or Command+C (Mac) to copy the files.
Next, navigate to the directory where your game is installed. The precise location may vary depending on the game, but it is typically found in the local files of your Steam library.
Once you have found the game directory, open it and locate the folder designated for mods or custom content. This folder may have a name like “Mods,” “Custom,” or “Data,” depending on the game or modding conventions.
Open the mods folder, right-click within it, and choose the “Paste” option from the context menu. Alternatively, you can use the shortcut Ctrl+V (Windows) or Command+V (Mac) to paste the copied mod files into the folder.
During the copying process, you may encounter a prompt asking if you want to replace any existing files with the same name. If prompted, select the option to replace the files. This ensures that you have the most up-to-date version of the mod files in your game directory.
Once the files have been successfully pasted into the mods folder, you have completed the process of copying the mod files. The next step is to activate the mod within the game to enable its features and content.
With the mod files copied into the appropriate folder, you are now ready to proceed to step five and learn how to activate the mod in your game.
Step 5: Paste the Mod Files into the Game Directory
After successfully copying the mod files, the next step is to paste them into the game directory. By doing so, you will integrate the mod into your game, allowing you to access its features and content.
Open the game directory on your computer. This is the location where the game’s files are stored. The game directory can vary depending on the game and how it was installed, but it is usually located within the Steam directory or in a dedicated folder associated with the game.
Navigate to the appropriate folder within the game directory where mods or custom content should be placed. Look for folders with names like “Mods,” “Custom,” “Data,” or any other folder specified by the game or modding conventions.
Open the mods or custom content folder, and then right-click within the folder. Choose the “Paste” option from the context menu to paste the copied mod files into the game directory.
During the pasting process, you may encounter prompts asking if you want to replace any existing files with the same name. If prompted, select the option to replace the files. This ensures that you have the most up-to-date version of the mod files in your game directory.
Once the mod files have been successfully pasted into the game directory, you have completed the process of integrating the mod into your game. The mod is now ready to be activated and utilized within the game.
It’s important to note that some mods may require additional steps or specific instructions for installation. Make sure to read any documentation or accompanying instructions provided by the mod creator to ensure the mod is installed correctly and functioning as intended.
With the mod files successfully pasted into the game directory, you are ready for the final step, which is to activate the mod within the game itself. This step enables the mod’s features and allows you to experience the changes and enhancements it brings to your gameplay.
Step 6: Activate the Mod in the Game
After pasting the mod files into the game directory, the final step is to activate the mod within the game. Activating the mod allows the game to recognize and utilize the mod’s features and content during gameplay.
Launch the game and access the game’s main menu or options menu. Look for a section or tab related to “Mods,” “Add-ons,” or “Custom Content.” The exact location and naming of this section may vary depending on the game.
Within the mods section, you should see a list of installed mods or a button to enable or activate mods. Locate the mod you want to activate and ensure that it is enabled or selected.
In some cases, the game may require you to manually enable the mod by ticking a checkbox or sliding a toggle switch. Follow any on-screen instructions or prompts to successfully activate the mod.
After activating the mod, you may need to restart the game for the changes to take effect. Follow any instructions provided by the game or mod creator to ensure a smooth activation process.
Once the game has restarted, you can start a new game or load an existing save file to experience the mod’s effects and content. The mod should be fully integrated into the game, providing the enhancements, modifications, or additional features as intended by the mod creator.
Keep in mind that some mods may have additional configuration options or settings within the game. These settings can usually be accessed through the mods section or a dedicated mod menu.
It’s important to note that not all mods are guaranteed to work perfectly or be compatible with your specific game version or other mods. If you encounter any issues or conflicts with the mod, you may need to troubleshoot, consult the mod creator, or seek support from the game’s community.
With the mod successfully activated, you can now enjoy the changes, enhancements, or additional content provided by the mod. Explore the game and experience the creative ideas and improvements brought to you by the modding community.
Congratulations! You have completed all the steps necessary to manually download a mod from the Steam Workshop, paste the mod files into the game directory, and activate the mod within the game. Enjoy your newly customized gameplay experience!
Conclusion
Manually downloading mods from the Steam Workshop allows you to have more control over the installation process and customize your gaming experience. By following the steps outlined in this guide, you can easily find, subscribe to, download, and activate mods outside of the Steam client.
During the process, it’s important to respect the intellectual property rights and licensing requirements set by the mod creators. Ensure that you only download and use mods for personal use and within the boundaries defined by the mod’s terms and conditions.
Understanding the Steam Workshop and its integration with the Steam client is key to navigating and discovering a vast array of mods available for various games. The community aspect of the Steam Workshop allows you to read and provide feedback on mods, ensuring that you choose the best mods for your gaming needs.
The step-by-step process covered in this guide, including finding the mod, subscribing to it, locating the mod folder, copying the mod files, pasting them into the game directory, and activating the mod within the game, enables you to successfully install and enjoy the mods of your choice.
Remember that installing mods can sometimes lead to compatibility issues or conflicts. If you encounter any problems, reference the mod’s documentation, seek help from the mod’s community, or consult the game’s support forums for possible solutions.
Have fun exploring the countless mods available on the Steam Workshop and discovering new ways to enhance your gameplay. Whether you’re adding visuals, adjusting gameplay mechanics, or expanding the content of your favorite games, mods bring a whole new level of creativity and personalization to the gaming experience.
Now that you have the knowledge and the steps to manually download mods, go ahead and dive into the exciting world of modding. Happy gaming!