Introduction
In the digital age, the ability to convert different file formats has become essential. Whether you’re a student, professional, or simply someone who frequently works with documents, being able to convert a Word document into a PDF can be incredibly useful. PDFs are widely accepted and easily shareable, and they preserve the formatting and layout of the original document, making them ideal for presentations, sending important documents, or simply archiving files.
For Mac users, the process of converting a Word document into a PDF is straightforward and hassle-free. In this article, we will guide you through the steps to download a Word document as a PDF on your Mac. You don’t need to be a tech expert or have any specialized software – all you need is your trusty Mac and Microsoft Word.
By following these simple steps, you will be able to convert your Word documents into PDFs in no time. So, let’s get started on this handy process, which will undoubtedly prove useful in your daily work or personal life.
Step 1: Open the Word document
The first step in converting a Word document into a PDF on your Mac is to open the document you wish to convert. Locate the Word file on your computer and double-click on it to launch it in Microsoft Word. You can also open the document directly from the Microsoft Word application by selecting “File” from the top menu and choosing “Open” to navigate to the desired file.
Once the document is opened, take a moment to review its content and ensure it is the correct file you want to convert. It’s always a good idea to check for any spelling or formatting errors before proceeding with the conversion process.
If you have multiple Word documents open, make sure to select the specific document you want to convert by clicking on its tab at the top of the Word window. Confirming that the correct file is open will prevent any confusion and ensure a seamless conversion process.
Now that you have your Word document open and ready, let’s move on to the next step in the process of downloading it as a PDF.
Step 2: Click on ‘File’ in the menu bar
Once you have your Word document open on your Mac, the next step is to click on the ‘File’ option in the menu bar at the top of the screen. The ‘File’ option is located on the left side of the menu bar and is denoted by the traditional folder icon.
Clicking on ‘File’ will open a drop-down menu with various options for managing your document. This menu provides access to essential functions such as saving, printing, and, in our case, converting the document into a different file format.
By clicking on ‘File,’ you are instructing Microsoft Word to display the available options and tools for managing your document. This action essentially acts as a gateway to further customization and manipulation of your Word document.
Take a moment to familiarize yourself with the other options within the ‘File’ menu. While our focus is on converting the document to a PDF, you may discover other useful features that can enhance your document editing experience.
Now that you’ve successfully located and clicked on ‘File,’ it’s time to move onto the next step and select the appropriate option to initiate the conversion process.
Step 3: Select ‘Save As’
After clicking on ‘File’ in the menu bar, a drop-down menu will appear with various options. From this menu, locate and select the ‘Save As’ option. ‘Save As’ allows you to save the Word document in a different file format while preserving the original file.
Selecting ‘Save As’ will open a new window or prompt where you can specify the location and format for saving the document. This step ensures that you have control over how and where the converted file will be saved on your Mac.
When you select ‘Save As,’ it’s essential to double-check that the correct document is open and selected for conversion. Once you proceed with saving the document in a different format, the original Word document will remain unchanged, providing you with the flexibility to have both versions readily accessible.
The ‘Save As’ option opens up a world of possibilities with your document, allowing you to convert it to various formats, such as PDF or even different versions of Word if needed. This flexibility ensures compatibility across different devices and software.
Take a moment to consider which format is appropriate for your needs. PDF is often the preferred format for sharing and printing, as it ensures that the document retains its formatting and can be easily viewed on any device or operating system.
Now that you’ve selected ‘Save As,’ let’s move on to the next step, where you will specify the format in which you want to save your document – in this case, PDF.
Step 4: Choose the location to save the PDF file
Once you have selected ‘Save As’ in the previous step, a dialog box will open, allowing you to choose the location where you want to save the PDF file. This step is crucial as it determines where the converted document will be stored on your Mac.
By default, the dialog box will display the current file location as the suggested save location. However, you have the option to save the PDF file in a different folder or directory if desired. To do this, simply navigate to the desired location by using the folder tree or typing in the file path manually.
Consider choosing a location that is easily accessible and organized to help you locate the converted PDF file quickly when needed. It’s also a good practice to keep your files well-organized to avoid clutter and confusion on your computer.
If you already have a specific folder where you store your PDF files or documents, navigate to that folder to maintain consistency and easy access to your files. Alternatively, you can create a new folder specifically for your PDF files to keep them separate from other types of documents.
Once you have selected the desired location to save the PDF file, proceed to the next step to specify the file format for conversion.
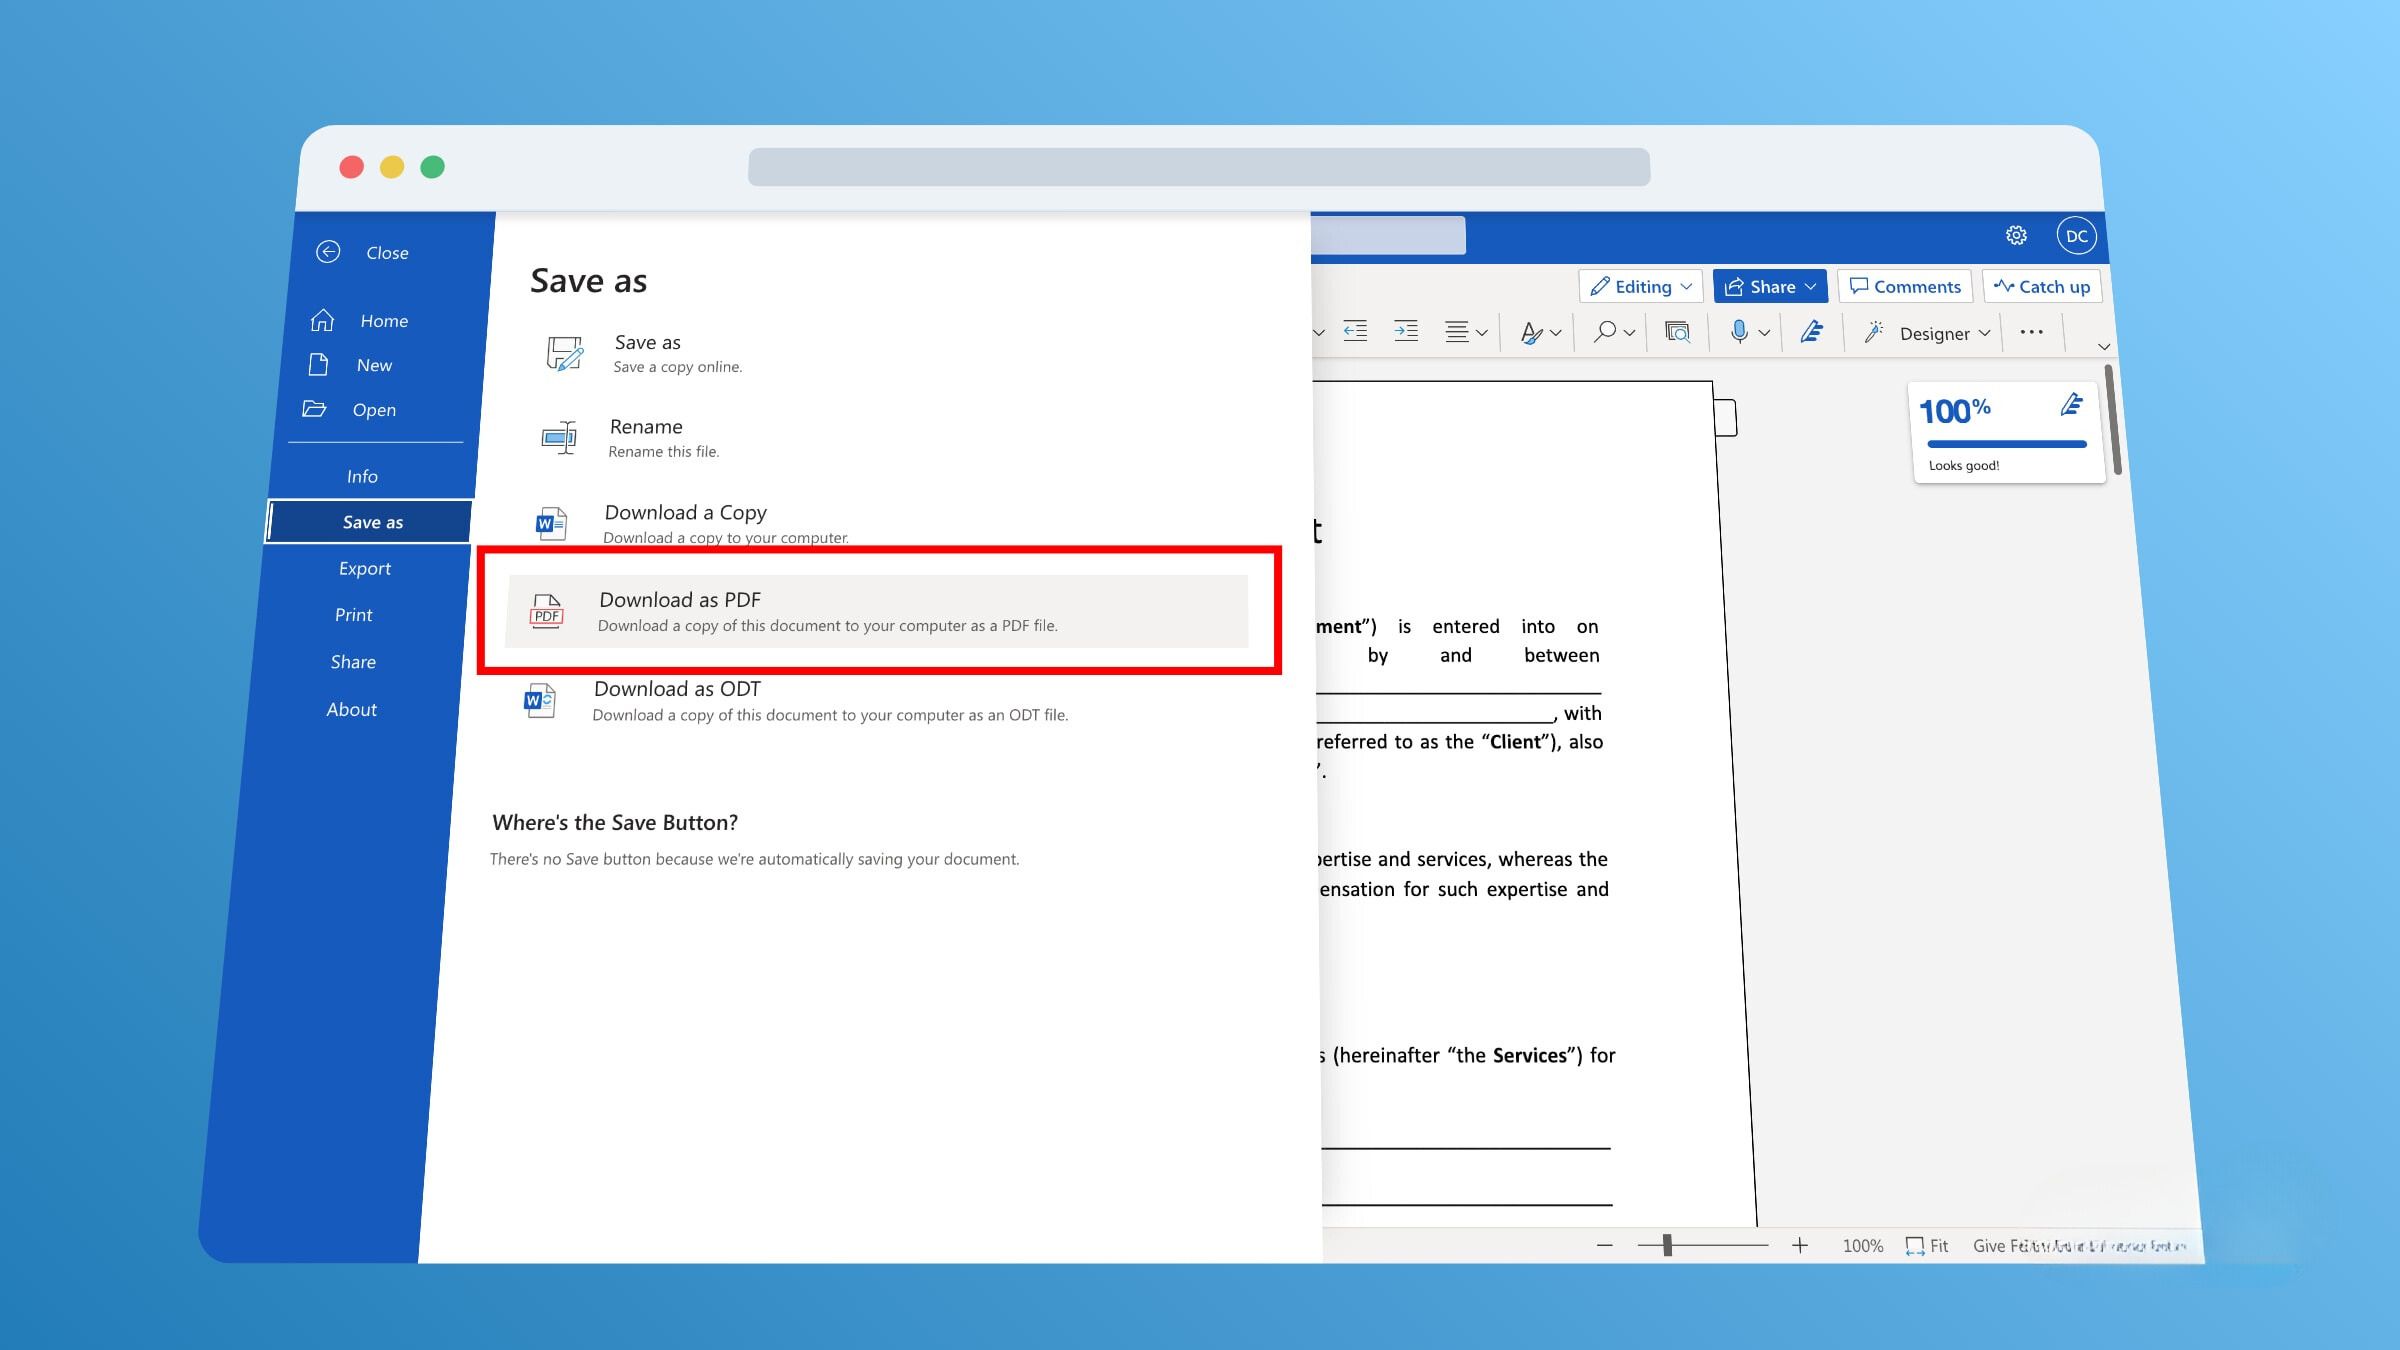
Step 5: Select ‘PDF’ as the file format
After choosing the location to save the document in the previous step, the next crucial step is to select ‘PDF’ as the file format for conversion. By choosing ‘PDF’, you ensure that your Word document will be saved as a PDF file.
Once you have the ‘Save As’ dialog box open, locate the ‘Format’ dropdown menu or the ‘File Format’ option. Click on the dropdown menu or the option and scroll through the available formats until you find ‘PDF’.
Choosing the ‘PDF’ format is particularly useful if you want to share the document with others who may not have access to Microsoft Word. PDF files are universally compatible, meaning that anyone with a PDF viewer can access and view your document without needing specific software.
When selecting the ‘PDF’ format, take note of any other options or settings that appear. Some applications provide additional options for optimizing the PDF, such as controlling the file size, password protection, and other security features. If desired, customize these settings to suit your requirements.
Once you have selected ‘PDF’ as the file format and made any necessary adjustments to the settings, you are ready to proceed and convert your Word document into a PDF.
Step 6: Customize the PDF settings (optional)
Customizing the PDF settings is an optional step but can be beneficial if you want to have more control over the conversion process. Some applications provide additional options for optimizing the PDF, such as adjusting the file size, including metadata, or setting password protection.
Depending on the application you are using to convert the Word document to PDF, you may have access to various settings or preferences. These settings allow you to tailor the PDF to your specific needs and requirements.
For instance, if you are concerned about the file size of the PDF, you can typically select an option to optimize or compress the document. This reduces the file size without compromising the overall quality of the PDF. This can be particularly useful when sharing the document via email or uploading it to online platforms.
Additionally, you might have the option to include document properties or metadata, such as the title, author, date, or keywords. This provides additional information about the PDF and can make it easier to organize and search for the document in the future.
If you want to restrict access to the PDF or ensure its confidentiality, you may find options to set a password to open or modify the document. This adds an extra layer of security, ensuring that only authorized individuals can access or make changes to the PDF.
Once you have customized the PDF settings to your preference (if desired), proceed to the next step to complete the conversion process and save the document as a PDF.
Step 7: Click on ‘Save’
After customizing the PDF settings (if desired), you are now ready to finalize the conversion process. The final step is to click on the ‘Save’ button to save the Word document as a PDF on your Mac.
Locate the ‘Save’ button within the ‘Save As’ dialog box, typically located at the bottom or the right side. Clicking on ‘Save’ will initiate the conversion process, taking your Word document and transforming it into a PDF file.
As the conversion process takes place, a progress indicator may appear to show the status of the conversion. This is especially useful for larger documents or if you have made specific optimizations to the PDF settings that can affect the conversion time.
When the conversion is complete, you will see a confirmation message or the PDF file will be saved in the location you specified earlier. Congratulations! You have successfully converted your Word document to a PDF file on your Mac.
Take a moment to verify the converted file by navigating to the location you saved it. Open the PDF file using a PDF viewer application to ensure that the formatting, layout, and content have been preserved from the original Word document.
Now that you have completed the conversion process and have your PDF file, you can easily share or distribute it as needed. PDF files are widely accepted and can be opened on various devices and operating systems, ensuring that your document can be accessed by a wide range of individuals.
Remember to save any changes to your original Word document and close both the Word document and the PDF file to keep your workspace organized.
Conclusion
Converting a Word document into a PDF on your Mac is a straightforward process that can be accomplished using the built-in features of Microsoft Word. By following the seven steps outlined in this guide, you can easily transform your Word document into a universally readable and shareable PDF file.
Whether you need to send important documents, share presentations, or store files for archiving purposes, PDFs offer a reliable and standardized format. They preserve the formatting and layout of your original document, ensuring that it appears the same on any device or operating system.
Remember to take the time to review and customize the conversion settings, such as optimizing file size, adding metadata, or setting password protection. These additional options allow you to tailor the PDF file to your specific needs and enhance the security or accessibility of your document.
Once you have successfully converted your Word document into a PDF, make sure to save any changes you made to the original Word document and properly manage your files to ensure organizational efficiency.
By being able to convert Word documents into PDFs on your Mac, you have gained a valuable skill that will undoubtedly prove useful in both personal and professional contexts. So, the next time you need to share or store a document, remember that you can easily convert it into a PDF with just a few simple clicks.

![18 Best Online PDF Readers and Editors in 2022 [100% Working]](https://robots.net/wp-content/uploads/2020/06/PDF-image-300x196.jpg)