Introduction
Welcome to the world of Microsoft OneNote, an incredibly versatile and feature-rich digital notebook that allows you to take notes, create to-do lists, collaborate with others, and organize your thoughts in a seamless and efficient manner. With its robust capabilities and user-friendly interface, it’s no wonder that OneNote has become a favorite tool for students, professionals, and individuals alike.
While using OneNote online or on your device is convenient, there may be times when you want to access your notebooks offline or share them with others who don’t have OneNote installed. In such cases, downloading your OneNote notebooks becomes crucial. Whether you want to back up your valuable information or simply have a copy of your notebooks on hand, downloading OneNote notebooks allows you to have full control and access to your notes even without an internet connection.
In this tutorial, we will guide you through the steps to download your OneNote notebooks. Whether you’re using OneNote on your PC, Mac, or mobile device, the process is straightforward and can be done in just a few simple steps. By the end of this guide, you’ll be well-equipped to download your OneNote notebooks and ensure that your valuable notes are available to you whenever and wherever you need them.
So, without further ado, let’s dive into the step-by-step instructions on how to download your OneNote notebooks!
Why Download OneNote Notebook?
Downloading your OneNote notebook offers numerous benefits and advantages that can enhance your productivity and ensure that your important information is accessible at all times. Here are a few key reasons why you might consider downloading your OneNote notebook:
- Offline Access: By downloading your OneNote notebook, you can access your notes even when you don’t have an internet connection. This is particularly useful when you’re traveling, working in areas with limited connectivity, or attending meetings in locations with restricted internet access.
- Backup and Recovery: Downloading your OneNote notebook provides you with a backup copy of your valuable notes. In case of any data loss or system failure, you can rest assured knowing that your important information is safely stored on your device or in your chosen export location.
- Sharing Convenience: Downloading your OneNote notebook allows you to easily share your notes with others who might not have access to the OneNote application. Whether you’re collaborating on a project or sharing meeting minutes, exporting your notebook makes it effortless to distribute your content in a format that can be opened and viewed by anyone.
- Flexible Viewing Options: With a downloaded version of your OneNote notebook, you can open and view your notes using different applications or devices. This flexibility ensures that you can access your information using the tools that suit your preferences and work environment.
- Independence from Platform Limitations: Downloading your OneNote notebook liberates you from any platform limitations. Whether you’re using a PC, Mac, or mobile device, you can access your downloaded notebook on any compatible device without being tied to a specific operating system or device requirement.
Downloading your OneNote notebook offers you the freedom, convenience, and peace of mind to access your notes whenever and wherever you need them. Whether it’s offline access, backup and recovery, sharing convenience, flexible viewing options, or independence from platform limitations, the benefits of downloading your OneNote notebook are invaluable for individuals who rely on their notes for work, study, or personal organization.
Now that we understand the advantages, let’s explore the step-by-step process of downloading your OneNote notebook.
Step 1: Sign in to your Microsoft account
Before you can download your OneNote notebook, you’ll need to sign in to your Microsoft account. This is the same account you use to access various Microsoft services, such as Outlook, Office 365, or Xbox Live. If you don’t have a Microsoft account, you can easily create one by visiting the Microsoft account creation page and following the prompts.
Once you have your Microsoft account credentials at hand, follow these steps to sign in:
- Open your preferred web browser and go to the Microsoft account sign-in page.
- Enter your email address or phone number associated with your Microsoft account in the provided field.
- Click on the “Next” button.
- Enter your account password in the required field. If you have trouble remembering your password, you can click on the “Forgot my password” link to initiate the account recovery process.
- Click on the “Sign in” button to proceed.
Once you’ve successfully signed in to your Microsoft account, you’re ready to proceed with the next steps to download your OneNote notebook. It’s important to note that signing in ensures that you have the necessary permissions and access to your notebooks, as they are associated with your account.
Now that you’re signed in, let’s move on to the next step of launching OneNote.
Step 2: Launch OneNote
Once you’re signed in to your Microsoft account, the next step is to launch the OneNote application. OneNote is available on various platforms, including Windows, Mac, iOS, and Android. Follow the instructions below based on your device or operating system:
- Windows: If you’re using a Windows computer, you can find OneNote in the Start menu by searching for “OneNote” or browsing through the Microsoft Office folder. Once you locate the OneNote application, click on it to launch the program.
- Mac: On a Mac, you can find OneNote in the Applications folder. Go to Finder, select “Applications” in the left sidebar, and search for “OneNote.” Double-click on the OneNote icon to open the application.
- iOS: For iOS devices, locate the App Store on your device’s home screen and tap on it. In the App Store, search for “OneNote” and select the official OneNote app from Microsoft Corporation. Tap the “Get” or “Install” button to download and install the application on your iOS device.
- Android: On an Android device, open the Google Play Store from the app drawer or home screen. Search for “OneNote” and select the official OneNote app from Microsoft Corporation. Tap the “Install” button to download and install the application.
Once you have launched the OneNote application, you’re ready to proceed to the next step of opening the notebook you want to download. Whether you’re using a Windows computer, Mac, iOS device, or Android device, the functionality and interface of OneNote remain consistent across platforms, ensuring a seamless user experience.
Now that you have OneNote up and running, let’s move on to the next step of opening the notebook you want to download.
Step 3: Open the notebook you want to download
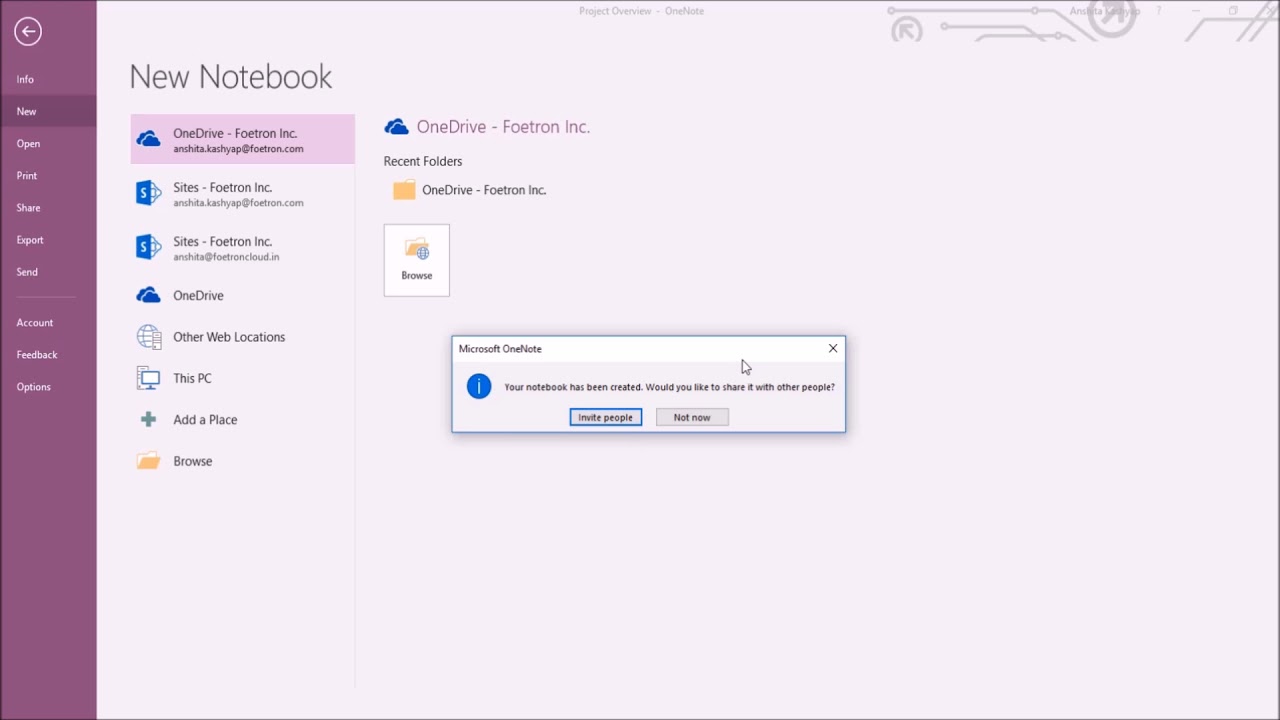
Now that you have OneNote launched on your device, it’s time to open the specific notebook that you want to download. OneNote provides a user-friendly interface that allows you to organize your notebooks and easily access the one you need. Follow these steps to open the notebook:
- In the OneNote application, look for the list of notebooks on the left-hand side of the screen. This list may be displayed as a collapsed sidebar or a separate panel, depending on your device and display settings.
- Locate the notebook you want to download from the list. Note that the notebooks are categorized under different sections, such as “Recent,” “Personal,” or “Shared.” You might need to expand the corresponding section or scroll through the list to find the desired notebook.
- Click or tap on the name of the notebook to open it. The notebook will open in a new window or tab, depending on your device and application settings.
Once you have successfully opened the desired notebook, you’ll have access to all the sections, pages, and content within it. Review the notebook to ensure that it’s the correct one you want to download, as it’s essential to select the right notebook before proceeding with the download process.
Now that you have opened the notebook you want to download, it’s time to proceed to the next step of exporting the notebook in the desired format.
Step 4: Export the notebook
Once you have the desired notebook open in OneNote, it’s time to export it so that you can download a copy onto your device. OneNote offers several export options to cater to different needs and preferences. Follow the steps below to export your notebook:
- Click on the “File” menu at the top-left corner of the OneNote application. On some devices or operating systems, this may also be represented by a three-dot or three-line icon.
- In the File menu, select the “Save As” or “Export” option. This will open a submenu with various export options.
- Choose the export format that suits your requirements. OneNote provides multiple file formats, such as PDF, Word document, HTML, and more. Select the format that is most suitable for your intended use and compatibility with other applications.
- Customize the export settings if applicable. Depending on the selected file format, you may have the option to adjust settings such as page range, resolution, or layout. Modify these settings according to your preferences or leave them as default.
- Specify the export location on your device or in your preferred storage location. Choose a folder or directory where you want the exported notebook file to be saved. You can create a new folder or select an existing one.
- Click on the “Save” or “Export” button to start the export process. The OneNote application will generate the file in the selected format and save it to the specified location.
It’s worth noting that the time taken to export the notebook may vary depending on the size of the notebook and the export format chosen. Larger notebooks or file formats that require additional processing, such as PDF with embedded images, may take longer to generate.
Once the export process is complete, you will have a copy of your notebook saved on your device or in the chosen export location. This allows you to have offline access to your notebook and share it with others who may not have OneNote installed.
Now that you have exported your notebook, let’s move on to the next step of accessing the downloaded notebook.
Step 5: Choose export format
Once you have decided to export your OneNote notebook, the next step is to choose the export format that best suits your needs. OneNote offers a variety of export formats, each with its own advantages and considerations. Follow the steps below to select the export format:
- After selecting the “Save As” or “Export” option from the File menu, a submenu will appear with several export format options.
- Assess your requirements and consider the purpose of exporting your notebook. Are you looking to create a portable document for easy sharing? Or do you need a file format that allows for further editing or customization?
- Consider the compatibility of the chosen format with other applications or platforms that you or your intended recipients may use. If you’re uncertain, choose a widely accepted format such as PDF or Word document to ensure broader compatibility.
- Review the available export formats provided by OneNote. Some common options include:
- PDF (Portable Document Format): This format is widely used for creating secure, fixed-layout documents that can be viewed on various devices and operating systems. PDFs retain the formatting and layout of your notebook and are ideal for sharing or printing.
- Word Document: Choosing this format will export your notebook as a Microsoft Word document (.docx). Word documents offer the flexibility of editing and further customization, making them suitable for collaboration or additional formatting.
- HTML (HyperText Markup Language): Exporting your notebook as HTML creates a web-friendly version of your notebook that can be viewed in any web browser. HTML format allows for easy sharing and online publishing.
- XPS (XML Paper Specification): XPS is a fixed-layout file format that preserves the visual appearance of your notebook, similar to PDF. It is primarily used on Windows-based systems and can be viewed using the XPS Viewer application.
- Notebook Package: This format exports your notebook as a compressed file that includes all the sections, pages, and embedded resources. Notebook packages allow for easy backup, sharing, or importing into another OneNote application.
- Select the export format that most closely aligns with your requirements and preferences by clicking or tapping on it in the submenu.
By carefully choosing the export format, you can ensure that your exported notebook meets your specific needs, whether it’s for sharing, editing, or viewing purposes. Once you have selected the appropriate format, you can proceed to the next step of choosing the export location.
Now that you have chosen the export format, let’s move on to the next step of selecting the export location.
Step 6: Select export location
After choosing the export format for your OneNote notebook, the next step is to select the export location where the downloaded notebook will be saved. OneNote gives you the flexibility to choose the storage location that best suits your needs and preferences. Follow the steps below to select the export location:
- When you click on the export format, a dialog box or file browser will open, prompting you to choose the destination where you want to save the exported notebook.
- Browse through your device’s directories or folders to find the desired location. You can either select a pre-existing folder or create a new one in which to save the exported notebook.
- Consider the accessibility and organization of the chosen export location. Ensure that it is easily accessible for future reference and that it aligns with your preferred file management system.
- If you are unsure where to save the exported notebook, consider creating a dedicated folder specifically for OneNote exports. This will help keep your exported notebooks organized and easily identifiable.
By selecting an appropriate export location, you ensure that the downloaded notebook is saved in a convenient and accessible location on your device. This makes it easier to find and retrieve the exported notebook when needed.
Having selected the export location, you can now proceed to the next step of starting the export process.
Please note that the specific steps may vary slightly depending on your device, operating system, or version of OneNote. However, the overall process of choosing the export location should remain similar across platforms.
Step 7: Start the export process
Once you have chosen the export format and selected the desired export location for your OneNote notebook, it’s time to start the export process. Initiating the export process will generate the file in the chosen format and save it to the specified location on your device. Follow these steps to begin the export:
- Review the export settings and options if applicable. Depending on the chosen export format, you may have additional settings to customize, such as page range, resolution, or layout. Modify these settings according to your preferences or leave them as default.
- Double-check that you have selected the correct export format and export location. Ensure that the export format suits your needs and that the export location is easily accessible and organized for future reference.
- Click on the “Save” or “Export” button to start the export process. The OneNote application will begin generating the file in the selected format and saving it to the specified location.
- Wait for the export process to complete. The time taken to export the notebook may vary depending on the size of the notebook and the export format chosen. Larger notebooks or file formats that require additional processing, such as PDF with embedded images, may take longer to generate.
Be patient while the export process is ongoing, especially if you have a large notebook or have selected a complex export format. Avoid interrupting the process or closing the OneNote application until the export is complete.
Once the export process finishes, you will have successfully created a downloadable copy of your OneNote notebook in the specified format. The exported file will now be available in the chosen export location on your device.
With the export process completed, you can proceed to the final step: accessing the downloaded notebook.
Note that the specific steps and options may vary slightly depending on your device, operating system, or version of OneNote. However, the overall process of starting the export should be similar across platforms.
Step 8: Access the downloaded notebook
Congratulations! You have successfully exported and downloaded your OneNote notebook. Now, it’s time to access the downloaded file and reap the benefits of having a copy of your notebook readily available on your device. Follow these steps to access the downloaded notebook:
- Navigate to the export location where you saved the downloaded notebook. This could be a specific folder you created or a default location you selected during the export process.
- Locate the exported notebook file in the chosen export location. Depending on the export format, it may have a corresponding file extension such as .pdf, .docx, or .html.
- Click or tap on the exported notebook file to open it. The file will open in the default program or application associated with that file format on your device.
- Depending on the file format, you may be able to view, edit, or print the downloaded notebook. For example, if the file is in PDF format, you can use a PDF reader to view and annotate the notebook. If the file is in Word document format (.docx), you can open and edit it using Microsoft Word.
- Enjoy offline access and the convenience of having your OneNote notebook available on your device. You can refer to your notes, make changes, or share the downloaded notebook as needed, even without an internet connection.
By accessing the downloaded notebook, you can utilize your OneNote content in various ways, such as reviewing information, collaborating with others, or presenting your notes during meetings or presentations. Take advantage of the flexibility and convenience provided by the downloaded notebook to enhance your productivity and stay organized.
Congratulations once again on successfully accessing the downloaded notebook. Take full advantage of this offline resource to bolster your productivity and access your OneNote content conveniently.
Please note that the accessibility of the downloaded notebook may depend on the capabilities and applications available on your device. Ensure that you have the necessary software or apps installed to open and view the exported file.
Conclusion
Downloading your OneNote notebook is a valuable capability that provides you with offline access, backup & recovery, sharing convenience, flexible viewing options, and independence from platform limitations. Through the easy-to-follow steps outlined in this guide, you’ve learned how to download your OneNote notebook and access it on your device.
By signing in to your Microsoft account, launching OneNote, opening the desired notebook, exporting it in the desired format, selecting the export location, starting the export process, and accessing the downloaded notebook, you have gained the ability to have your notes available offline and share them with others who may not have OneNote installed.
Remember, downloading your OneNote notebook empowers you to stay organized, productive, and in control of your valuable information. Whether you’re traveling, working in areas with limited connectivity, or simply want to have a backup of your notes, downloading your notebook ensures that you can access your information whenever and wherever you need it.
So, go ahead and start downloading your OneNote notebooks to unlock the full potential of this powerful note-taking and organization tool. Explore the various export formats, choose the best export location, and enjoy the convenience of having your notes at your fingertips.
Embrace the flexibility and versatility that OneNote offers, and let it be your trusted digital companion as you navigate your personal and professional endeavors.


