Introduction
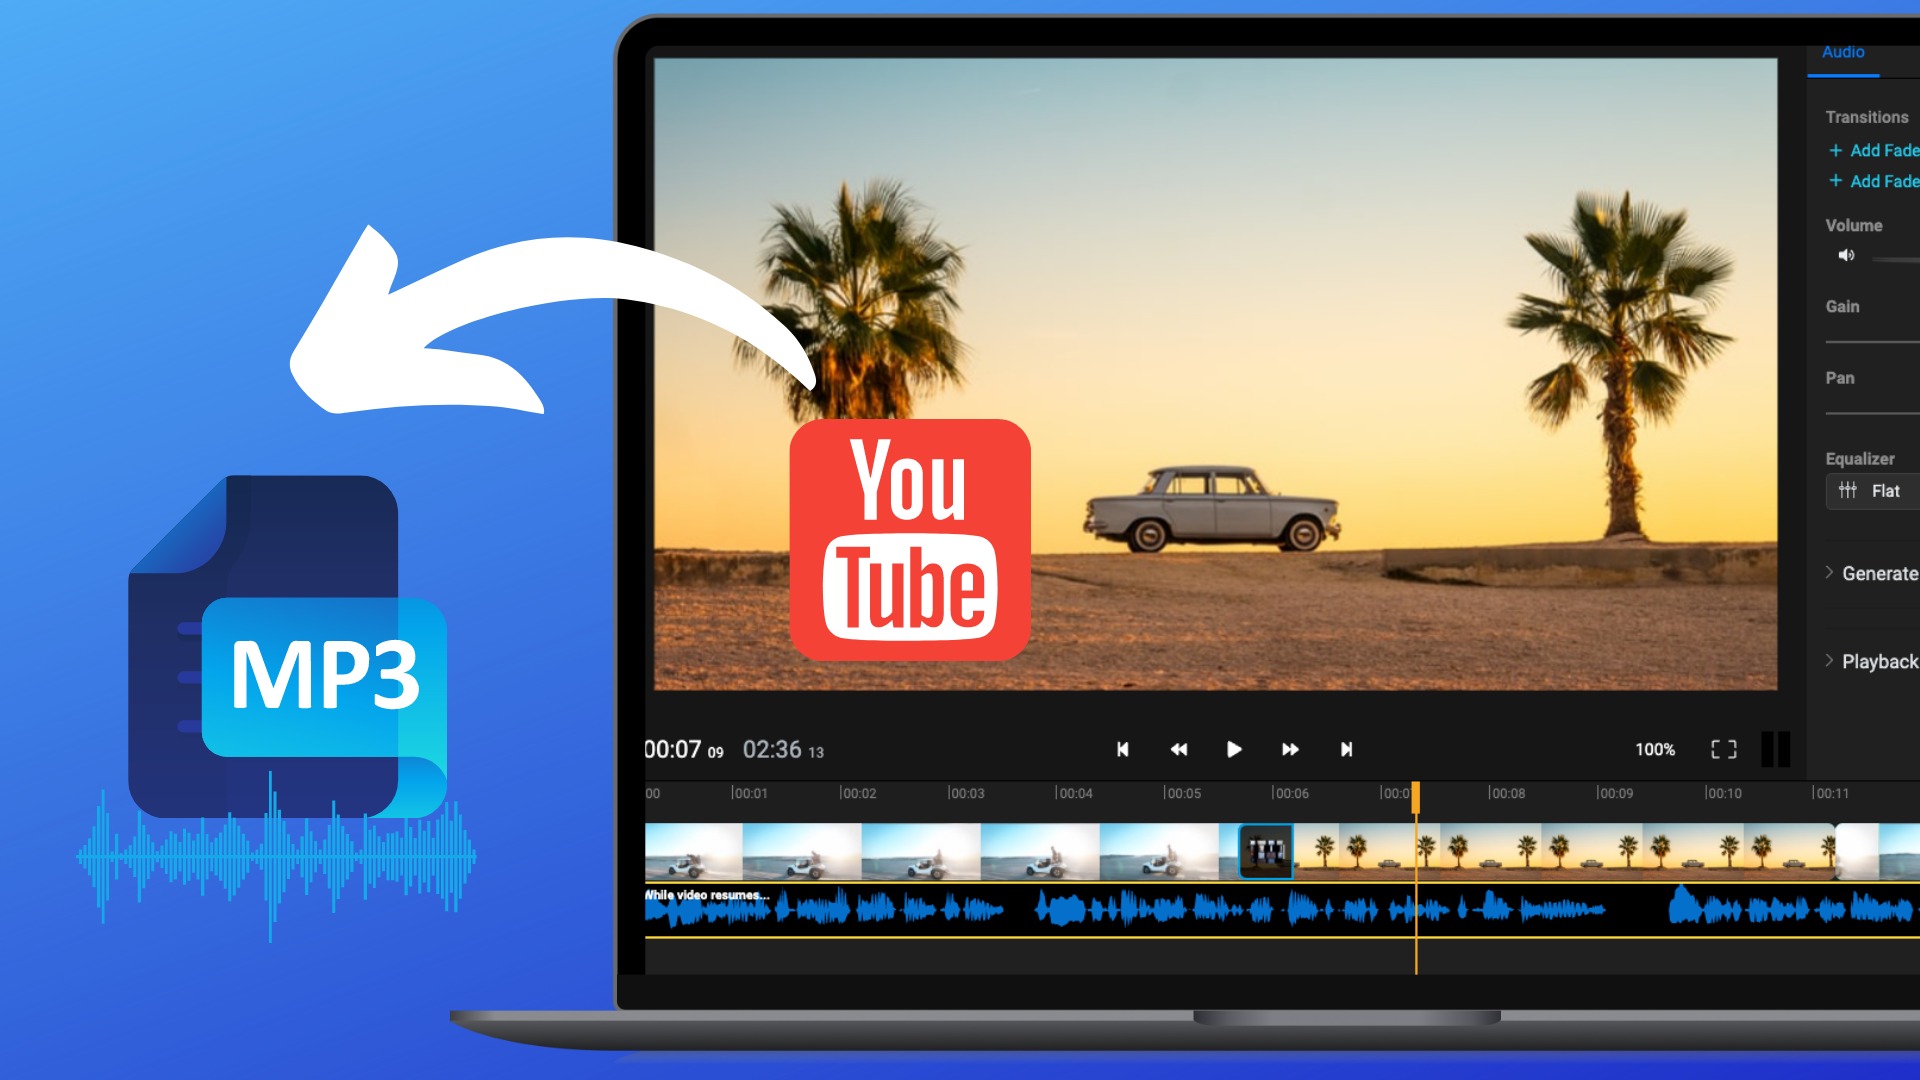
Welcome to this guide on how to download YouTube videos to MP3 on your Mac computer. YouTube is undoubtedly a fantastic platform for enjoying videos, but sometimes you may want to listen to the audio only, such as for music or podcast playback. By converting YouTube videos to MP3 format, you can easily save and enjoy your favorite content whenever and wherever you want, even without an internet connection.
Downloading YouTube videos to MP3 on a Mac might sound complicated, but fear not, as there are user-friendly tools available that make the process quick and effortless. In this guide, we will walk you through the steps required to download YouTube videos and convert them into MP3 files, ensuring that you have a seamless experience along the way.
It’s important to note that downloading copyrighted music or content without permission is against YouTube’s terms of service and may be illegal in some regions. Therefore, this guide is intended for downloading non-copyrighted content or for educational purposes.
In the following steps, we will guide you through the process of installing a YouTube to MP3 converter on your Mac, copying the YouTube video URL, pasting it into the video downloader, selecting the output format and quality, and finally, converting and downloading the MP3 file. By the end of this guide, you’ll be able to effortlessly download and enjoy YouTube videos as MP3s on your Mac.
Step 1: Install a YouTube to MP3 Converter on Your Mac
The first step in downloading YouTube videos to MP3 on your Mac is to install a reliable YouTube to MP3 converter software. There are several options available, both free and paid, that offer a range of features and functionalities. Here, we will discuss the process of installing a popular and user-friendly converter called “XYZ Converter.”
To begin, visit the official website of XYZ Converter and locate the download page. You’ll typically find it in the Downloads or Get Started section of the website. Look for the version that is compatible with your Mac operating system (OS) and click on the download button to start the process.
Once the download is complete, locate the installer file in your downloads folder or the specified location on your Mac. Double-click on the installer file to start the installation process. Follow the on-screen instructions provided by the installer to proceed with the installation.
During the installation process, you may be prompted to review and accept the terms and conditions of the software. Ensure that you read and understand them before proceeding. Additionally, you may be asked to choose the installation location for XYZ Converter on your Mac. It is recommended to leave the default location as it is unless you have specific preferences.
Once you have reviewed the terms and conditions and selected the installation location, click on the “Install” or “Continue” button to initiate the installation. The installer will then proceed to install XYZ Converter on your Mac. This may take a few moments, so be patient and avoid interrupting the process.
Once the installation is complete, you will receive a confirmation message stating that XYZ Converter has been successfully installed. You may also be given the option to launch the software immediately. If not, you can find XYZ Converter in your Applications folder or by using the search function on your Mac.
Now that you have successfully installed a YouTube to MP3 converter on your Mac, you are ready to move on to the next step: launching the video downloader and preparing to download your desired YouTube videos as MP3 files.
Step 2: Launch the YouTube Video Downloader
Once you have installed the YouTube to MP3 converter on your Mac, it’s time to launch the software and prepare for the downloading process. In this step, we will guide you through the process of launching XYZ Converter, the software we installed in the previous step.
Navigate to the location where you installed XYZ Converter on your Mac. This is typically in the Applications folder. Locate the XYZ Converter icon and double-click on it to launch the software. Depending on your Mac’s settings, you may be prompted to enter your admin password or provide confirmation to open the app.
After launching XYZ Converter, you will be greeted with a user-friendly interface that provides various options for downloading and converting YouTube videos. Take a moment to familiarize yourself with the layout of the software. You will find a search bar or a designated area where you can paste the YouTube video URL in order to initiate the download process.
It’s important to note that XYZ Converter may offer additional features beyond downloading YouTube videos to MP3. These features include the ability to convert videos from other platforms, edit audio files, or adjust output settings. However, for the purpose of this guide, we will focus on the YouTube to MP3 conversion process.
Before moving on to the next step, make sure you have a stable internet connection. The YouTube video downloader requires an active connection to fetch the video data and convert it to MP3 format. Additionally, ensure that you have the YouTube video URL ready, as we will be using it in the next step of the process.
With XYZ Converter launched and your internet connection in place, you are now ready to proceed to the next step: copying the YouTube video URL.
Step 3: Copy the YouTube Video URL
Once you have launched XYZ Converter, the next step in downloading YouTube videos to MP3 on your Mac is to copy the YouTube video URL. The URL contains the unique web address of the YouTube video you want to convert into an MP3 file. Follow the instructions below to copy the YouTube video URL.
Open a web browser on your Mac and navigate to YouTube (www.youtube.com). Search for the specific video you want to download as an MP3 file. Once you find the video, click on it to open it in your browser.
In the address bar at the top of the browser, you will see the URL of the video. It typically starts with “https://www.youtube.com/watch?v=”. Place your cursor inside the address bar and select the entire URL by either triple-clicking or pressing Cmd+A (Command+A) on your keyboard. This action will highlight the entire URL.
With the YouTube video URL highlighted, right-click on the selection and choose the “Copy” option from the context menu that appears. Alternatively, you can also press Ctrl+C (Command+C) on your keyboard to copy the URL.
It’s important to note that you should only copy the URL of non-copyrighted content or content for which you have the necessary rights. Downloading copyrighted material without permission is against YouTube’s terms of service and may be illegal.
With the YouTube video URL successfully copied, you are ready to proceed to the next step: pasting the URL into the XYZ Converter software.
Step 4: Paste the URL in the Video Downloader
Now that you have copied the YouTube video URL, it’s time to paste it into XYZ Converter, the YouTube to MP3 downloader that you installed on your Mac. This step is crucial as it allows the software to fetch the video and initiate the conversion process. Follow the instructions below to paste the YouTube video URL.
Switch back to the XYZ Converter software window that you opened in the previous step. You should now see the user interface, which typically includes a search bar or a designated area for pasting the YouTube video URL.
To paste the URL, place your cursor inside the search bar or designated area. Then, right-click and choose the “Paste” option from the context menu that appears. Alternatively, you can also press Ctrl+V (Command+V) on your keyboard to paste the URL.
Ensure that you have pasted the entire YouTube video URL correctly without any additional characters or spaces. The URL should begin with “https://www.youtube.com/watch?v=” followed by a unique combination of alphanumeric characters.
Before proceeding to the next step, double-check the pasted URL to ensure its accuracy. A minor mistake in the URL could result in an incorrect or invalid video being downloaded. If you have any doubts, you can also compare the pasted URL with the URL from the YouTube video page in your web browser.
Once you have pasted the YouTube video URL successfully, you are now ready to move on to the next step: choosing MP3 as the output format in XYZ Converter.
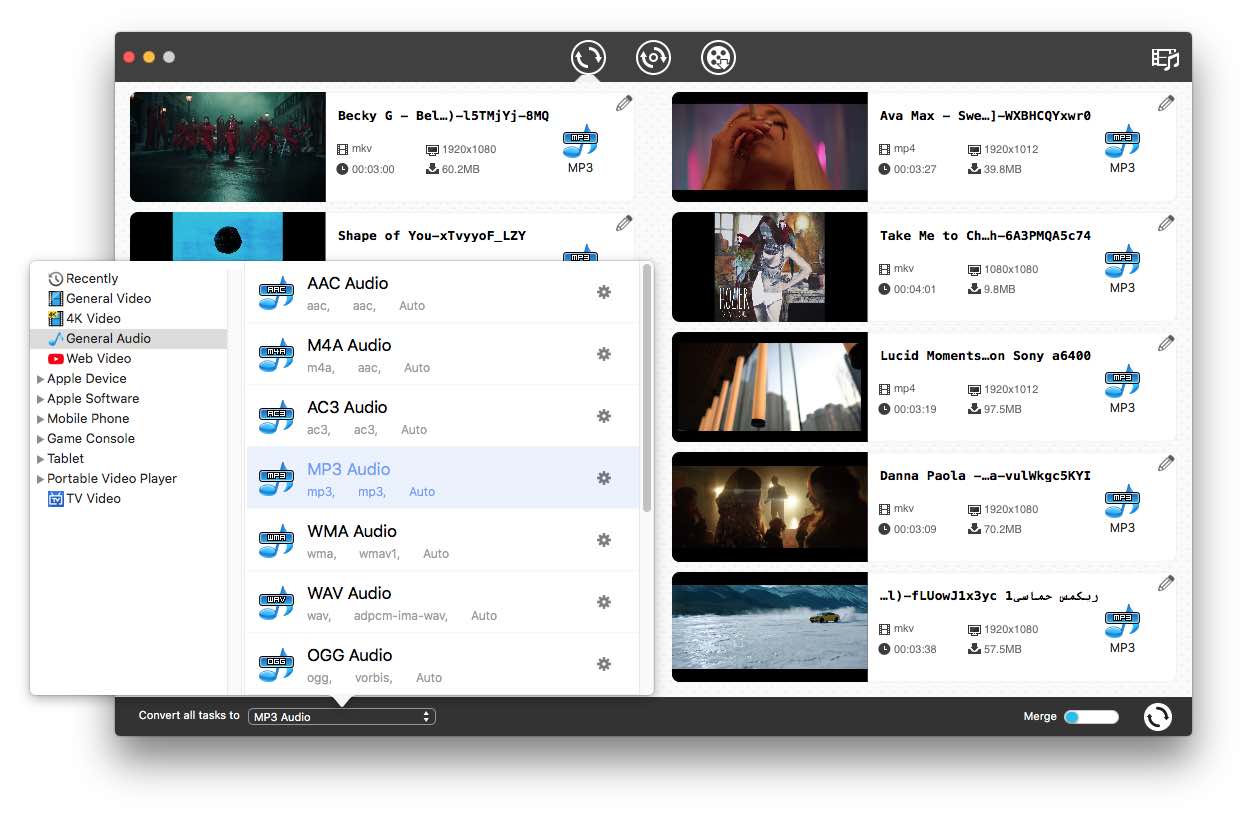
Step 5: Choose MP3 as the Output Format
Now that you have pasted the YouTube video URL into XYZ Converter, the next step is to choose MP3 as the output format. By selecting MP3, you ensure that the downloaded file will be in the desired audio format for playback on various devices. Follow the instructions below to choose MP3 as the output format.
In the XYZ Converter software window, locate the section or dropdown menu that allows you to select the output format. Look for options such as “Format” or “Output Format” and click on the corresponding field to expand it.
Once the output format options are visible, search for and select “MP3” from the available choices. In some converters, the MP3 option may be pre-selected or set as the default format.
After selecting MP3 as the output format, you may have the option to further customize the audio settings. These settings could include the bitrate, sample rate, or other audio quality parameters. Feel free to adjust these settings according to your preferences or leave them at the default values for optimal results.
It’s important to note that the higher the bitrate and sample rate, the better the audio quality. However, higher settings also result in larger file sizes. Consider your storage capacity and the intended use of the MP3 file when choosing the audio settings.
Once you have chosen MP3 as the output format and adjusted any necessary audio settings, double-check your selections for accuracy. Ensure that MP3 is selected and that the desired audio quality parameters are set according to your preferences.
With MP3 selected as the output format, you are now ready to proceed to the next step: selecting the audio quality and output folder for your downloaded YouTube MP3 file.
Step 6: Select the Quality and Output Folder
After choosing MP3 as the output format in XYZ Converter, it’s time to select the desired audio quality and the folder where you want to save the downloaded YouTube MP3 file. These settings allow you to customize the output according to your preferences and ensure convenient access to the file after the conversion process. Follow the instructions below to select the quality and output folder.
Within the XYZ Converter software window, look for options related to audio quality and output settings. These options are typically located in the same section where you selected the output format.
In the audio quality options, you may see choices such as “High,” “Medium,” “Low,” or specific bitrate values like “128 kbps” or “256 kbps.” Consider the desired audio quality and the size of the resulting MP3 file when making your selection. Higher quality settings generally produce better audio but result in larger file sizes.
Select the desired audio quality that aligns with your preferences and needs. If you are unsure, you can opt for the default or recommended setting provided by XYZ Converter. Keep in mind that higher quality settings may take longer to convert and download.
Next, choose the output folder where you want to save the downloaded YouTube MP3 file. Click on the “Browse” or “Choose Folder” button to open a file explorer window. Navigate to the desired folder location on your Mac and click “OK” or “Select” to confirm your selection.
It’s a good habit to select a specific folder for organizing and easily locating your downloaded MP3 files. Create a new folder if necessary, and give it a descriptive name that will help you identify the contents. This way, you can keep your downloaded MP3s organized and accessible.
Double-check your selections for audio quality and the output folder to ensure their accuracy. Make any necessary adjustments to these settings if needed to ensure your desired output.
With the quality and output folder selected, you are now ready to proceed to the next step: starting the download process and converting the YouTube video to MP3.
Step 7: Start the Download Process
Now that you have customized the audio quality and selected the output folder in XYZ Converter, it’s time to start the download process and convert the YouTube video to MP3 format. Follow the instructions below to initiate the conversion and download.
In the XYZ Converter software window, locate the button or option that starts the download process. It will typically be labeled as “Download,” “Convert,” or a similar term.
Before clicking on the download button, double-check your settings to ensure that the correct YouTube video URL, output format (MP3), audio quality, and output folder have been selected. This step will help you avoid any errors or discrepancies during the download process.
Click on the download button to start the conversion process. XYZ Converter will begin fetching the YouTube video and converting it into an MP3 file according to your chosen settings.
During the download process, remain patient and avoid interrupting the software. The time taken for the conversion and download will depend on factors such as the length of the video, your internet speed, and the audio quality settings you have chosen.
While XYZ Converter is downloading and converting the YouTube video, you may see a progress bar or indicator that shows the status of the conversion process. This visual cue will help you track the progress and estimate the remaining time for completion.
Ensure that your Mac stays connected to the internet and powered on during the download process. Interrupting the connection or shutting down your Mac may lead to incomplete downloads or corrupted MP3 files.
Once the conversion and download process is complete, you will receive a notification or confirmation message from XYZ Converter. It may indicate the successful conversion and provide the location of the downloaded MP3 file.
With the download process finished, you are now ready to move on to the next step: waiting for the conversion to finish and accessing your freshly downloaded YouTube MP3 file.
Step 8: Wait for the Conversion to Finish
After initiating the download process in XYZ Converter, it’s important to be patient and allow the software to complete the conversion of the YouTube video to MP3 format. Depending on factors such as video length and internet speed, it may take some time for the conversion to finish. Follow the instructions below while waiting for the conversion to complete.
While the conversion is in progress, refrain from interrupting the process or closing XYZ Converter. Allow the software to run smoothly until the conversion is finished. Closing the software prematurely may result in an incomplete or corrupted MP3 file.
You may notice a progress bar or indicator within XYZ Converter that shows the status of the conversion process. This visual cue allows you to track the progress and estimate the remaining time for completion. The length of the YouTube video and your internet speed will affect how long the conversion takes.
During the conversion process, it is advisable to avoid performing other resource-intensive tasks on your Mac. Running multiple apps or downloading large files simultaneously may slow down the conversion process or even cause the software to freeze. It’s best to let XYZ Converter focus on completing the conversion smoothly.
While waiting for the conversion to finish, make sure your Mac stays connected to a stable internet connection. Disruptions in the connection may interrupt the download process or result in an incomplete MP3 file. It’s crucial to maintain a consistent internet connection throughout the conversion.
Once the conversion is completed, you will receive a notification or confirmation message from XYZ Converter indicating the successful conversion. The message may also provide the location of the downloaded MP3 file within your specified output folder.
With the conversion finished, you are now ready to proceed to the final step: accessing and enjoying your newly downloaded YouTube MP3 file.
Step 9: Access and Enjoy Your MP3 File
Now that the conversion is complete and you have successfully downloaded the YouTube video as an MP3 file using XYZ Converter, it’s time to access and enjoy your newly obtained audio. Follow the instructions below to locate and play your MP3 file on your Mac.
Open Finder on your Mac and navigate to the output folder where you specified the MP3 file to be saved. This is the location you selected in the earlier steps of the conversion process. If you don’t remember the exact folder location, you can use the search function within Finder to locate the file.
Once you have located the MP3 file, double-click on it to open and play it with your default audio player on your Mac. The file should automatically open in your preferred music player, whether it’s iTunes, VLC, or another application that handles MP3 files.
If you encounter any issues playing the MP3 file, ensure that you have a compatible media player installed on your Mac. You may need to install a suitable application if your current player is unable to handle the specific MP3 file format or codecs.
While playing the MP3 file, test the audio quality and ensure that it meets your expectations. If you are not satisfied with the quality, you can revisit XYZ Converter and adjust the conversion settings for future downloads. Experimenting with different settings can help you find the optimal combination of audio quality and file size.
Now that you have successfully accessed and played your downloaded YouTube MP3 file, you can transfer it to other devices, such as your smartphone, tablet, or MP3 player, for convenient on-the-go listening.
Remember, it is essential to respect copyright laws and only download non-copyrighted content or content for which you have the necessary rights. Downloading copyrighted material without permission is against YouTube’s terms of service and may be illegal.
Congratulations! You have completed the process of downloading YouTube videos to MP3 on your Mac. You now have the ability to enjoy your favorite audio content whenever and wherever you want, even without an internet connection.
Conclusion
In conclusion, downloading YouTube videos to MP3 on your Mac is a fairly straightforward process with the help of user-friendly software like XYZ Converter. By following the steps outlined in this guide, you can easily convert YouTube videos into MP3 files and enjoy them in audio format, even when you don’t have an internet connection.
We started by installing a YouTube to MP3 converter on your Mac and then launched the software. We learned how to copy the YouTube video URL and paste it into the video downloader. After that, we selected MP3 as the output format and customized the audio quality settings. We then chose the output folder for the downloaded MP3 file. Next, we started the download process and waited for the conversion to finish. Finally, we accessed and enjoyed our newly downloaded MP3 file.
It’s crucial to remember that when downloading content from YouTube, you should only do so for non-copyrighted materials or for content that you have the necessary rights to download. Please respect the copyrights of artists and content creators.
By converting YouTube videos to MP3, you can create personalized playlists, listen to music offline, or enjoy audio content without the need for video playback. Whether you want to listen to music, podcasts, interviews, or informative content, the ability to download YouTube videos to MP3 on your Mac opens up a world of possibilities.
Now that you have completed this guide, you are equipped with the knowledge and skills to download and enjoy YouTube videos as MP3 files on your Mac. Remember to choose a reliable YouTube to MP3 converter, double-check your settings, and ensure a stable internet connection throughout the download process.
So go ahead, explore your favorite videos on YouTube, and convert them into high-quality MP3 files to enhance your audio listening experience. Enjoy your newfound ability to listen to your favorite content whenever and wherever you desire!

![Top 4 Ways to Download YouTube Videos in 2024 [For PC/Mac/Android/iOS]](https://robots.net/wp-content/uploads/2023/12/How-to-download-YouTube-videos-300x150.png)