Introduction
Razer Synapse is a powerful software suite developed by Razer Inc. that allows users to customize and optimize their Razer gaming peripherals. Whether you own a Razer mouse, keyboard, or headset, Razer Synapse provides a centralized hub to manage your devices, create macros, adjust RGB lighting effects, and fine-tune performance settings.
With Razer Synapse, you can unleash the full potential of your Razer hardware and elevate your gaming experience. It offers an intuitive user interface that simplifies the customization process, making it accessible to both novice and experienced users alike.
Downloading Razer Synapse is the first step toward unlocking an array of advanced features and functionalities. In this guide, we will walk you through the process of downloading Razer Synapse, ensuring that you have the software up and running in no time.
Before we dive into the steps, it’s important to note that Razer Synapse is compatible with Windows operating systems, including Windows 7, 8, and 10. Additionally, you’ll need a stable internet connection to download the software from the official Razer website.
Now, without further ado, let’s get started with the download process and unleash the full potential of your Razer gaming peripherals.
Step 1: Go to the Razer Synapse website
The first step in downloading Razer Synapse is to visit the official Razer website. Open your preferred web browser and enter “www.razer.com” in the address bar. Press Enter to navigate to the Razer homepage.
Once you have arrived at the Razer homepage, you will find an intuitive and user-friendly interface. Take a moment to explore the various options available, such as gaming gear, software, and more.
To proceed with the download, locate the top navigation menu on the homepage. Here, you will find a tab labeled “Software & Services.” Click on this tab to access the software section of the Razer website.
By selecting the “Software & Services” tab, you will be taken to a dedicated page where you can find all the latest software offerings from Razer. It includes firmware updates, driver downloads, and of course, Razer Synapse.
Scroll down through the options until you find the section specifically dedicated to Razer Synapse. This section will include information about the software, its features, and compatibility requirements.
Once you have located the Razer Synapse section, you will notice a button labeled “Download Now.” Clicking on this button will initiate the download process, allowing you to acquire the Razer Synapse installer file onto your computer.
With Step 1 completed, you have successfully navigated to the Razer Synapse website and are ready to move on to the next step: downloading the software onto your computer. Keep following the subsequent steps to ensure a smooth installation process.
Step 2: Click on “Software & Services”
Once you have reached the Razer Synapse website, the next step in the download process is to access the “Software & Services” section. This section will provide you with a comprehensive range of software options and updates offered by Razer.
Look for the navigation menu at the top of the webpage. You will find various tabs, including “Products,” “Gaming,” “Community,” and others. Locate and click on the “Software & Services” tab to proceed to the software section.
Upon clicking on the “Software & Services” tab, you will be redirected to a dedicated page that offers a selection of software options. These options extend beyond Razer Synapse and include firmware updates and other essential downloads for your Razer devices.
Take some time to explore the “Software & Services” page. Here, you will find a list of available downloads, along with descriptions and details about each software option. This page serves as a hub for all the software-related needs associated with your Razer gaming peripherals.
In the midst of the software list, you will find the Razer Synapse section. This is where you can find all the information about Razer Synapse, its features, and compatibility requirements. It is essential to familiarize yourself with this information to ensure that Razer Synapse will work seamlessly with your Razer hardware.
Take note that Razer Synapse is a versatile software suite that supports a wide range of Razer peripherals, including keyboards, mice, headsets, and more. It offers advanced customization options and performance settings tailored to enhance your gaming experience.
By reaching the “Software & Services” section and finding the Razer Synapse information, you have completed Step 2 in the download process. Proceed to the next step to initiate the actual download of Razer Synapse onto your computer.
Step 3: Select “Razer Synapse”
Now that you have arrived at the Razer Synapse download page, the next step is to locate and select the specific option for Razer Synapse. This will allow you to access the download link for the software and proceed further with the installation process.
On the “Software & Services” page, scroll down to find the section dedicated to Razer Synapse. Here, you will find detailed information about the software, highlighting its features, compatibility, and benefits.
Within the Razer Synapse section, there will be a button or link that says “Razer Synapse.” Click on this button or link to proceed to the download page specifically for Razer Synapse.
By selecting “Razer Synapse,” you will be directed to a page that provides additional details about the software. This page may contain information such as the current version of Razer Synapse, important updates, and any specific instructions or system requirements you need to be aware of.
Take a moment to review the information on this page to ensure that you understand the software’s functionality and compatibility with your system. It’s important to have the necessary requirements in place to ensure a smooth installation process and optimal performance.
Once you have familiarized yourself with the information and confirmed that Razer Synapse is the software you need, locate the download button or link on the page. It may be labeled as “Download Now” or something similar.
Clicking on the download button or link will initiate the downloading of the Razer Synapse installer file. The file will be saved to your designated download location on your computer, ready for the next step of the installation process.
With Step 3 completed, you have successfully selected “Razer Synapse” and accessed the download page for the software. You are now one step closer to harnessing the full potential of your Razer gaming peripherals. Move on to the next step to download and start using Razer Synapse on your computer.
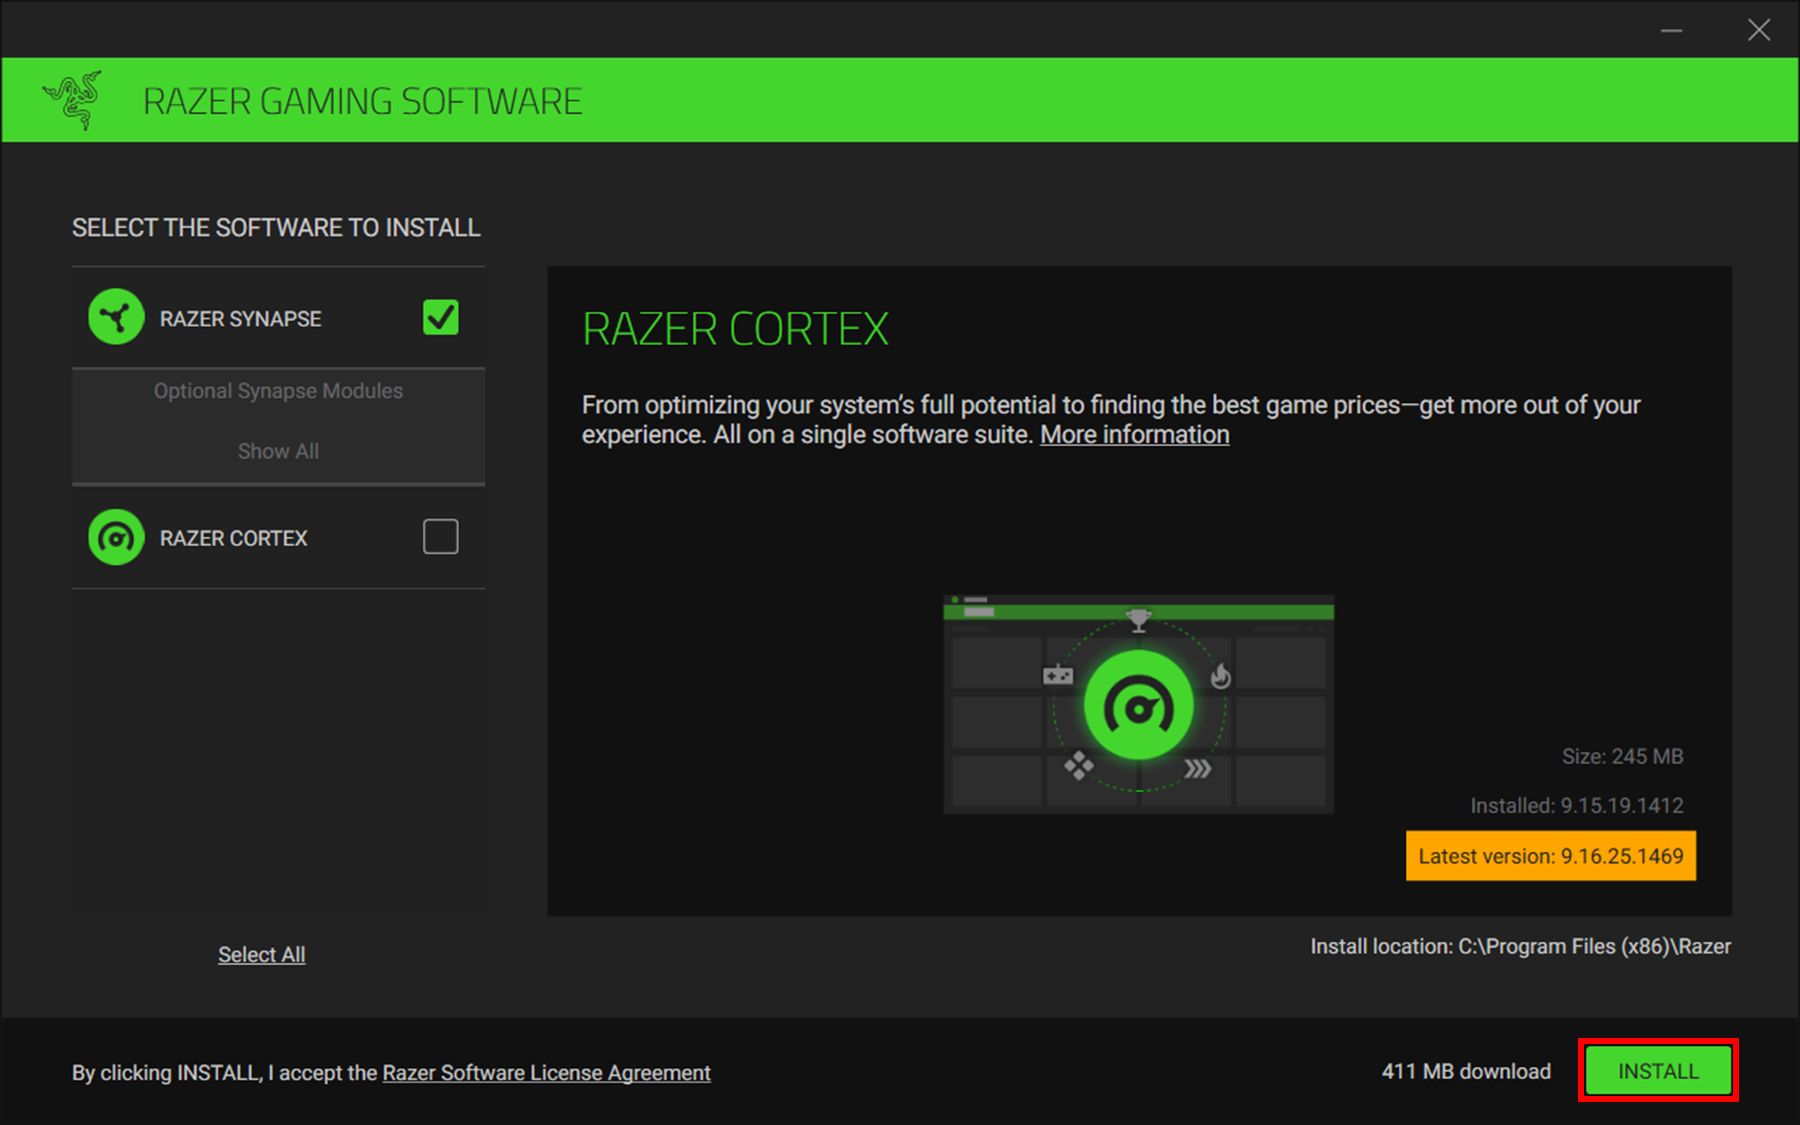
Step 4: Click on the “Download Now” button
After selecting “Razer Synapse” and reaching the dedicated download page, the next step is to locate and click on the “Download Now” button. This will begin the process of downloading the Razer Synapse installer to your computer.
On the Razer Synapse download page, you will find a clear and prominent button labeled “Download Now.” Clicking on this button will initiate the download process and prompt your browser to save the Razer Synapse installer file.
Before proceeding with the download, ensure that you have a stable internet connection. A high-speed connection is recommended to ensure a faster download process and minimize any interruptions.
When you click on the “Download Now” button, a pop-up window may appear, asking you to confirm the download. This is a security measure to prevent unintentional downloads. Confirm the download by clicking “Save” or “OK” to proceed.
Depending on your browser settings, the installer file may automatically save to your designated downloads folder, or you may be prompted to choose a location to save the file. Make a note of the location where the file will be saved for easy access when proceeding to the installation stage.
Once the download is complete, you will have the Razer Synapse installer file ready on your computer. It is important to note that the size of the file may vary depending on the version of Razer Synapse you are downloading, so the download duration can differ as well.
With Step 4 completed, you have successfully clicked on the “Download Now” button and obtained the Razer Synapse installer file. The next step is to run the installer and follow the installation wizard, which we will cover in the next section.
Step 5: Run the downloaded file
After successfully downloading the Razer Synapse installer file, the next step is to run the file on your computer. This will initiate the installation process and allow you to set up Razer Synapse for use with your Razer gaming peripherals.
Locate the downloaded file on your computer. Depending on your browser settings and preferences, the file may be saved to your designated downloads folder or a location that you specified during the download process.
Once you have located the downloaded file, double-click on it to run the installer. This action will start the installation wizard, guiding you through the necessary steps to install Razer Synapse on your system.
When you run the file, your operating system may display a security warning or ask for your permission to proceed with the installation. This is a standard security measure to protect your computer from potentially harmful software. Confirm the action and grant any necessary permissions to continue.
The installation wizard will appear on your screen, prompting you to follow the on-screen instructions. It may ask you to choose a language, agree to the terms and conditions, and select a destination folder for the software installation.
Read each step carefully and make any necessary selections or modifications based on your preferences. It is recommended to leave the default settings unless you have specific requirements or preferences.
Once you have completed the installation wizard, click on the “Finish” or “Complete” button to finalize the installation process. Razer Synapse will then be installed on your computer and ready to be used.
With Step 5 completed, you have successfully run the downloaded file and completed the installation of Razer Synapse. Now, you are one step closer to optimizing your Razer gaming peripherals and customizing your gaming experience to suit your preferences.
Step 6: Follow the installation wizard
After running the downloaded file, you will be guided through an installation wizard that will help you complete the setup process for Razer Synapse. It is important to carefully follow the instructions provided by the wizard to ensure a successful installation.
Once the installation wizard appears on your screen, you will be presented with a series of steps that need to be followed. These steps may include selecting the language for the software, accepting the terms and conditions, and choosing the installation location.
Start by selecting your preferred language from the options provided. This will ensure that Razer Synapse is displayed in a language that you are comfortable with. Click on the appropriate language option and proceed to the next step.
Next, you may be asked to review and accept the terms and conditions of the software. It is important to read through the terms carefully and ensure that you agree to them before proceeding with the installation. If you agree, check the box or click on the “Accept” button.
After accepting the terms and conditions, you may be prompted to choose the location where Razer Synapse will be installed on your computer. The default location is usually recommended, but you have the option to change it if desired. Click on the “Browse” button to select a different location if necessary.
Once you have made any necessary selections, click on the “Next” or “Install” button to proceed with the installation. The installation process may take a few moments as the necessary files are copied to your computer.
During the installation process, you may see a progress bar indicating the status of the installation. It is important to allow the process to complete without interrupting it. Avoid closing the installation wizard or shutting down your computer until the installation is finished.
Once the installation is complete, you will be presented with a message indicating the successful installation of Razer Synapse. At this point, you may be asked if you want to launch the software immediately. If you are ready to start using Razer Synapse, click on the “Launch” or “Finish” button.
With Step 6 completed, you have followed the installation wizard and successfully installed Razer Synapse on your computer. You are now ready to open the software, connect your Razer gaming peripherals, and start customizing your gaming experience to your preferences.
Conclusion
Congratulations! You have successfully downloaded and installed Razer Synapse, unlocking a world of customization and optimization for your Razer gaming peripherals. By following the step-by-step guide outlined in this article, you can ensure a smooth and hassle-free installation process.
Razer Synapse serves as a centralized hub for managing your Razer devices, allowing you to create macros, customize RGB lighting effects, and fine-tune performance settings. With its user-friendly interface and powerful features, Razer Synapse empowers you to tailor your gaming experience to your unique preferences.
Remember, Razer Synapse is compatible with Windows operating systems and requires a stable internet connection to download. By visiting the official Razer website, navigating to the “Software & Services” section, and selecting “Razer Synapse,” you can easily initiate the download and installation process.
Once the Razer Synapse installer file is running, follow the installation wizard diligently, making language selections, accepting terms and conditions, and choosing the installation location. By following these steps, you can ensure a successful installation of Razer Synapse onto your computer.
Now that Razer Synapse is installed, take some time to explore the extensive customization options and fine-tune your Razer gaming peripherals to suit your individual style and gaming preferences. From adjusting mouse sensitivity to creating complex macros, Razer Synapse offers a plethora of features to enhance your gaming performance.
Make sure to regularly check for updates within Razer Synapse to ensure you are running the latest version of the software and benefiting from any new enhancements or features that Razer releases.
With Razer Synapse at your disposal, you can unleash the true potential of your Razer gaming peripherals and elevate your gaming experience to new heights. Enjoy the remarkable customization and performance optimization offered by Razer Synapse, and happy gaming!