Introduction
Welcome to the world of macOS Sierra, the latest operating system released by Apple for Mac computers. This highly anticipated update brings a host of exciting new features and enhancements to improve your Mac experience. Whether you’re a long-time Mac user or new to the platform, this guide will walk you through the process of downloading and installing macOS Sierra on your Mac.
Before diving into the steps, it’s important to note that macOS Sierra brings significant improvements in terms of performance, security, and compatibility. It introduces a sleek and intuitive interface, as well as new features like Siri integration, iCloud Drive enhancements, and optimized storage. With these advancements, macOS Sierra sets a new standard for efficiency and productivity on Mac computers.
Upgrading to macOS Sierra is a relatively straightforward process that can be done through the Mac App Store. However, to ensure a smooth and successful installation, it’s crucial to prepare your Mac and follow the necessary steps. This guide will take you through each step in detail, from checking your Mac’s compatibility to setting up macOS Sierra.
It’s worth mentioning that before proceeding with any major system upgrade, it’s advisable to backup your Mac to prevent any potential data loss. While the upgrade process is generally safe, unforeseen issues can arise, and having a recent backup gives you peace of mind in case something goes wrong. Taking the time to back up your data is a small precaution that can save you from headaches down the line.
So, if you’re ready for a fresh and enhanced Mac experience, let’s dive into the steps to download and install macOS Sierra!
Step 1: Check your Mac’s compatibility
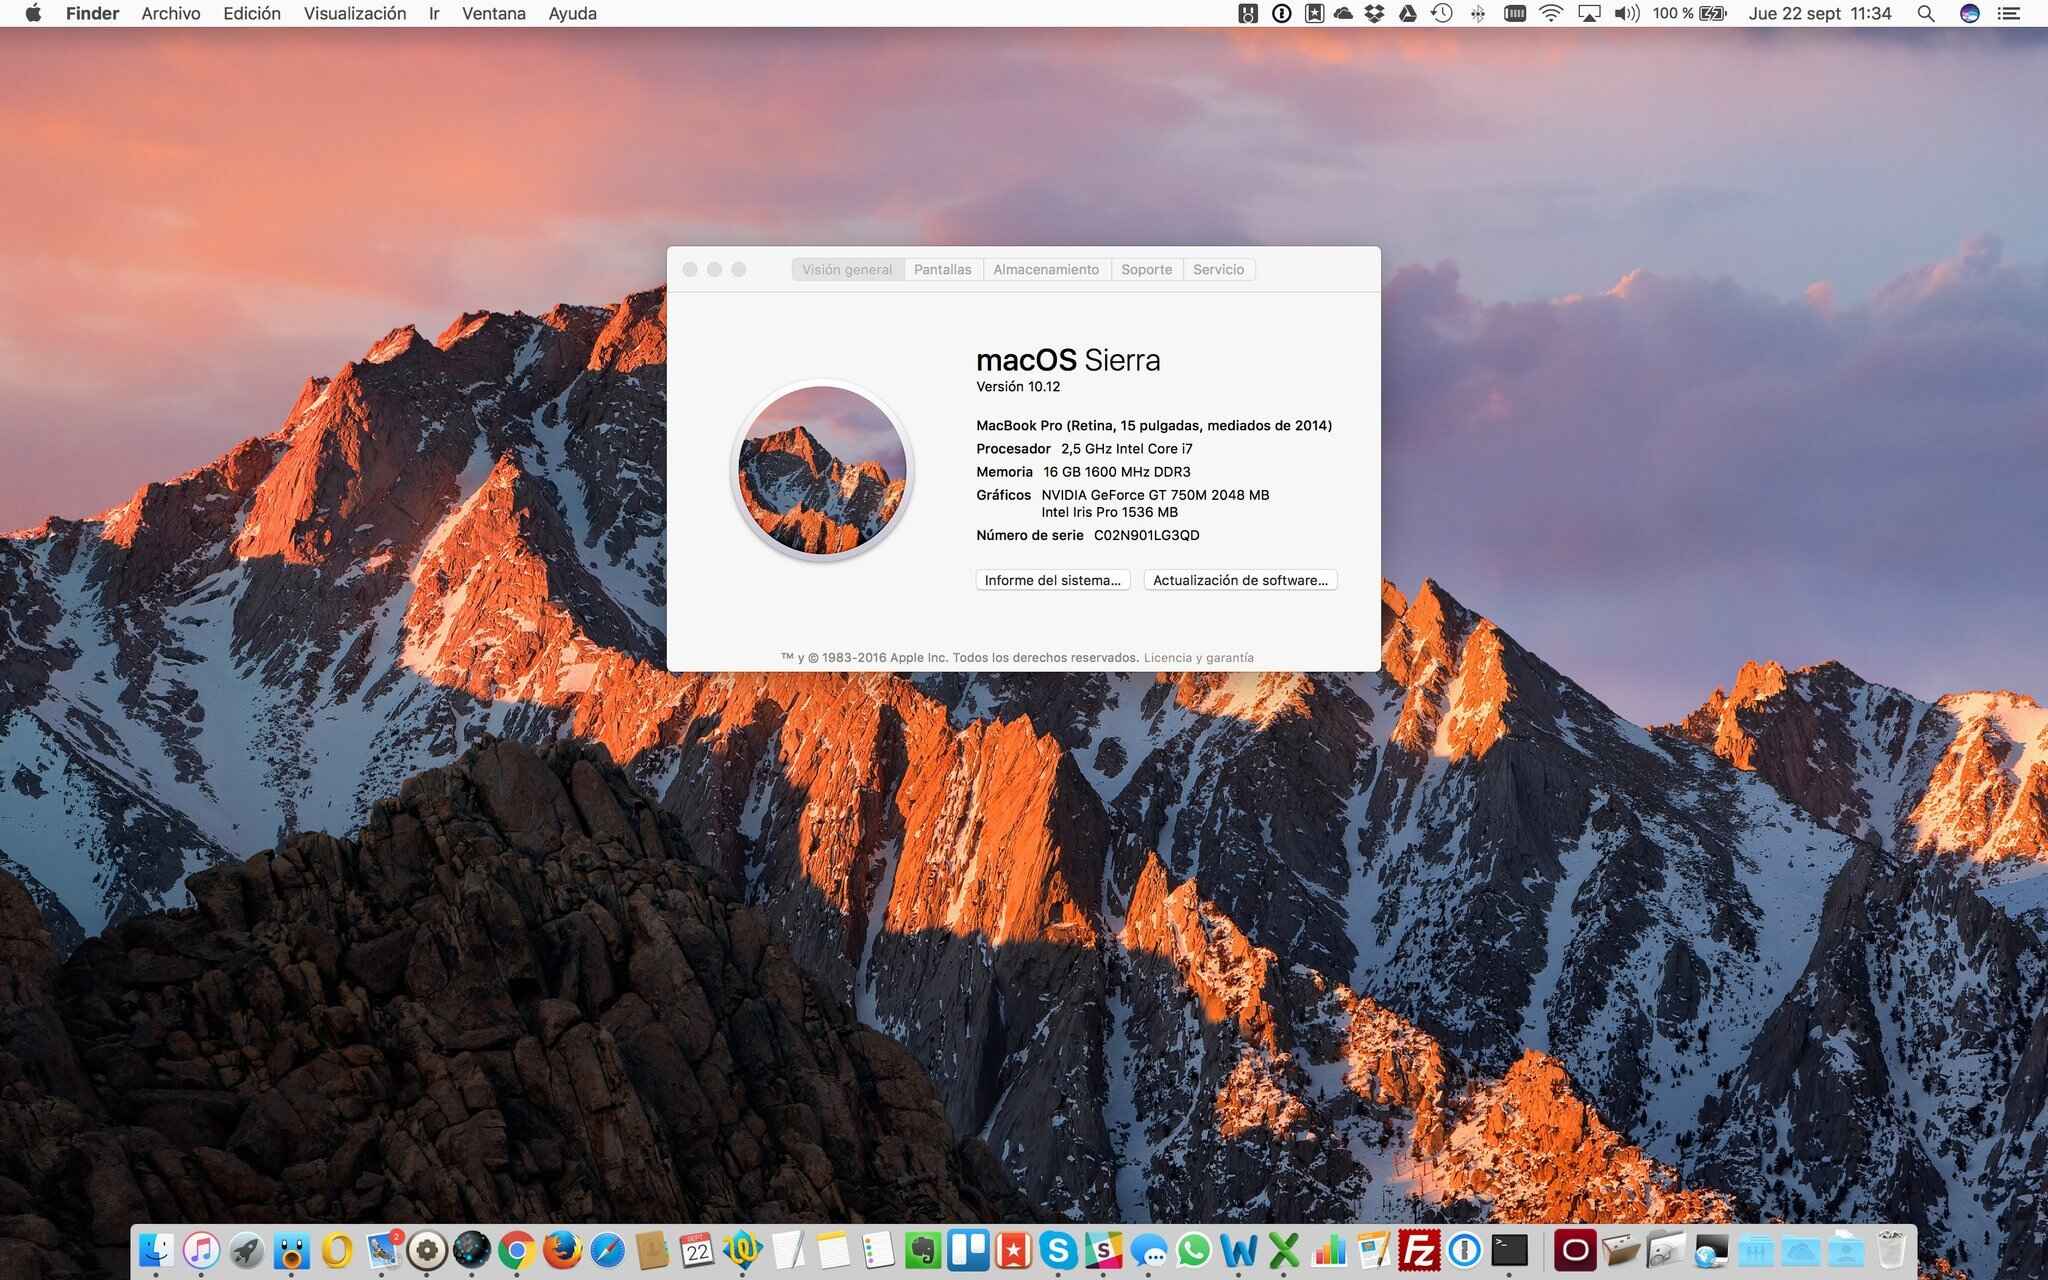
Before you begin the process of downloading and installing macOS Sierra, it’s important to ensure that your Mac is compatible with this operating system. Not all Mac models support macOS Sierra, so it’s crucial to check if your device meets the requirements.
To check your Mac’s compatibility, follow these steps:
- Click on the Apple menu in the top left corner of your screen and select “About This Mac”.
- In the “Overview” tab, you’ll find information about your Mac’s model and year.
- Compare your Mac’s model and year to the list of supported models for macOS Sierra. You can find this information on Apple’s official website or by doing a quick internet search.
If your Mac is compatible with macOS Sierra, you’re good to go! You can proceed to the next step. However, if your Mac is not compatible, don’t worry. There are still options available for you. You can consider upgrading your Mac to a newer model that supports macOS Sierra, or you can continue using your current operating system.
It’s worth mentioning that even if your Mac meets the compatibility requirements, it’s always a good idea to ensure that you have enough storage space and available memory. macOS Sierra requires a certain amount of disk space and RAM to run smoothly. If you’re running low on either, consider freeing up some space or upgrading your hardware before proceeding.
Checking your Mac’s compatibility may seem like a simple step, but it’s an essential one to avoid any potential issues during the installation process. Now that you’ve confirmed that your Mac is ready for macOS Sierra, let’s move on to the next step: backing up your Mac.
Step 2: Backup your Mac
Before proceeding with any major system update, it’s crucial to back up your Mac to ensure the safety of your data. While the installation process is generally safe, there’s always a small chance that something could go wrong, resulting in potential data loss. By creating a backup, you’ll have peace of mind knowing that your important files and documents are safely stored.
There are several methods you can use to back up your Mac:
- Time Machine: Apple’s built-in backup solution, Time Machine, makes it easy to create automatic backups. Simply connect an external hard drive or use a network storage device, and Time Machine will handle the rest. It will back up your entire Mac, including system files, applications, and personal data. To set up Time Machine, go to System Preferences > Time Machine and follow the instructions.
- Cloud Storage: Another option is to use cloud storage services such as iCloud, Dropbox, or Google Drive. These services allow you to store your files and folders in the cloud, providing an extra layer of protection. Simply upload your important files to the cloud storage of your choice to ensure they’re safe and accessible from anywhere.
- External Hard Drive: If you prefer a manual backup method, you can use an external hard drive to manually copy and save your important files. Connect the external hard drive to your Mac and drag and drop the files you want to back up. Make sure to organize your files in a way that you can easily restore them after the macOS Sierra installation.
Whichever method you choose, make sure to verify that your backup was successful and that you can access your files. It’s also a good idea to create a separate bootable backup using tools like Carbon Copy Cloner or SuperDuper. This will allow you to quickly restore your Mac to its previous state if needed.
Remember, backing up your Mac is an essential step before any major system update. It only takes a few minutes to set up, but it can save you from potential data loss and headaches. With your Mac backed up, you’re now ready to proceed to the next step: upgrading to the latest version of OS X.
Step 3: Upgrade to the latest version of OS X
Before you can download and install macOS Sierra, it’s important to ensure that your Mac is running the latest version of OS X. This step ensures that your system is up to date with the latest security patches and bug fixes, providing a smooth transition to macOS Sierra.
Here’s how you can upgrade to the latest version of OS X:
- Click on the Apple menu in the top left corner of your screen and select “App Store”.
- In the App Store, click on the “Updates” tab.
- If there is an update available for your Mac’s operating system, it will be listed here. Click on the “Update” button next to the OS X update to start the installation.
- Follow the on-screen instructions to complete the update. This may involve restarting your Mac, so make sure to save any important work before proceeding.
The time it takes to complete the update will depend on the size of the update and your internet connection speed. It’s recommended to have a stable and fast internet connection to ensure a smooth and quick update process.
Once the update is complete, your Mac will be running the latest version of OS X. This step is essential as it ensures that your Mac is prepared for the installation of macOS Sierra. It also helps in reducing compatibility issues and ensuring a successful upgrade process.
If you encounter any issues during the update process, such as errors or failed installations, it’s recommended to consult Apple support or visit the Apple Support website for troubleshooting guides and solutions. Resolving any issues before moving on to the next step will help prevent potential problems during the installation of macOS Sierra.
Now that you’ve successfully upgraded to the latest version of OS X, you’re ready to move on to the exciting part – downloading macOS Sierra from the App Store.
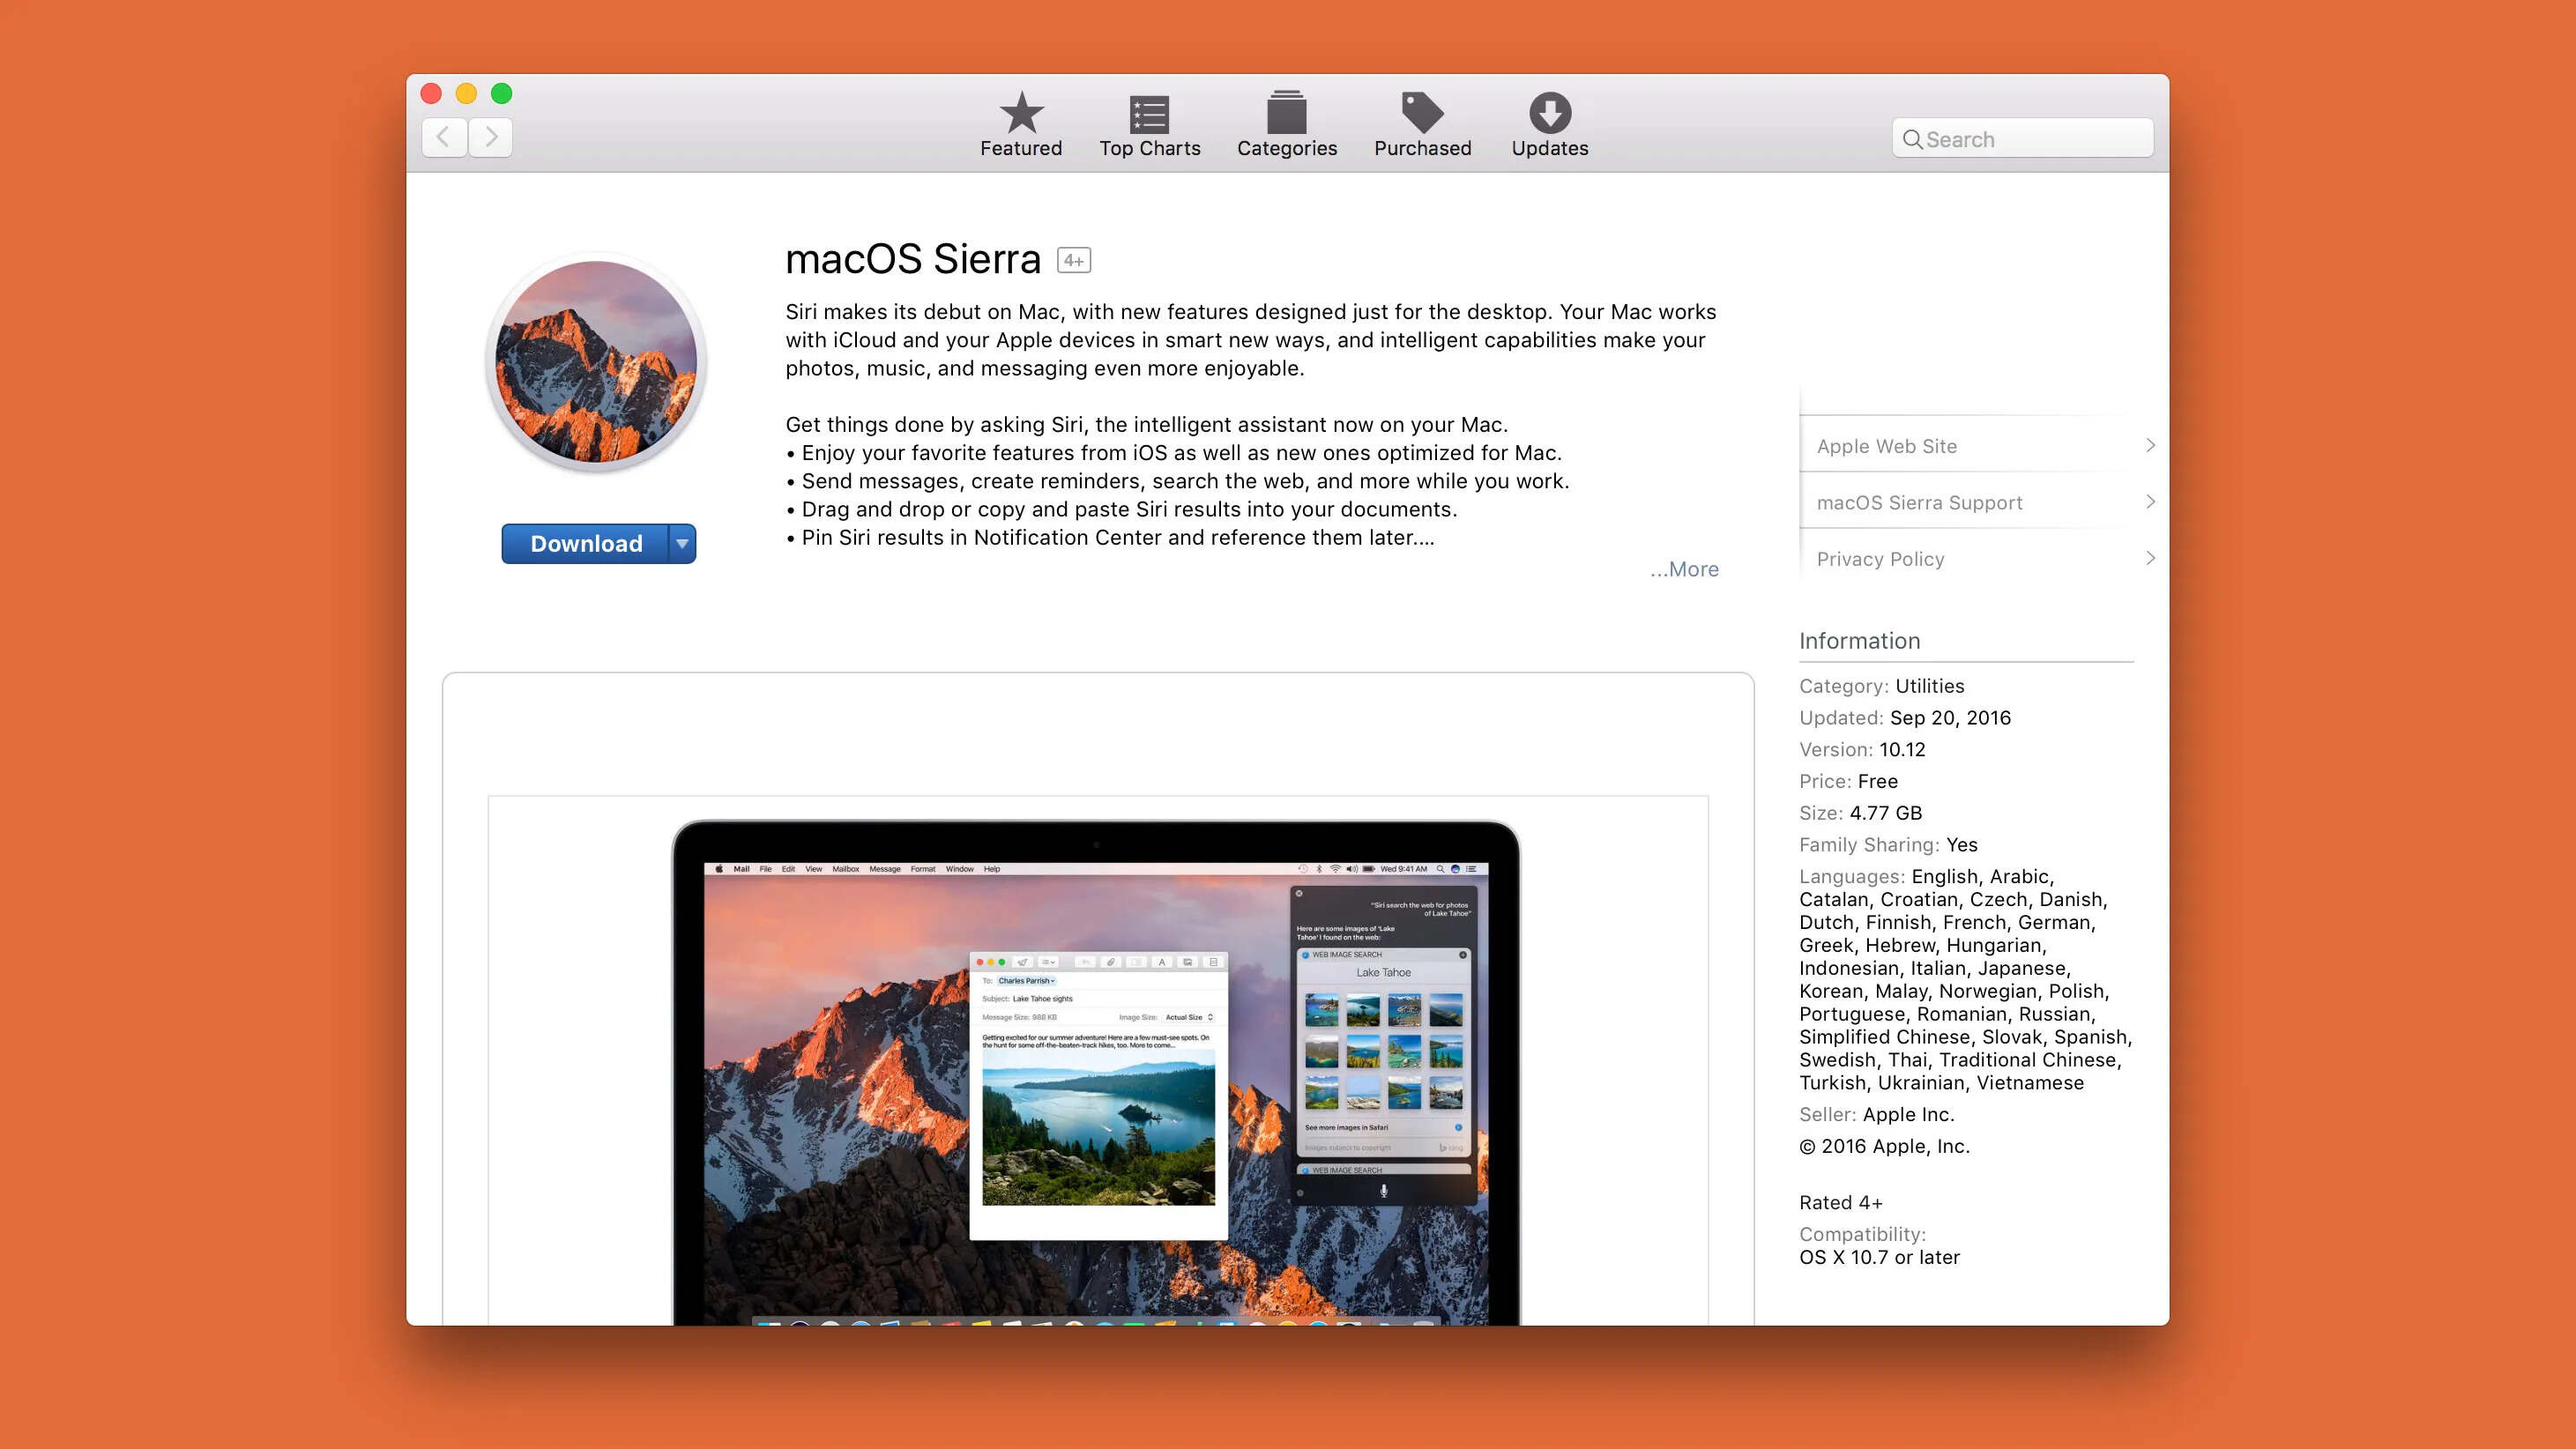
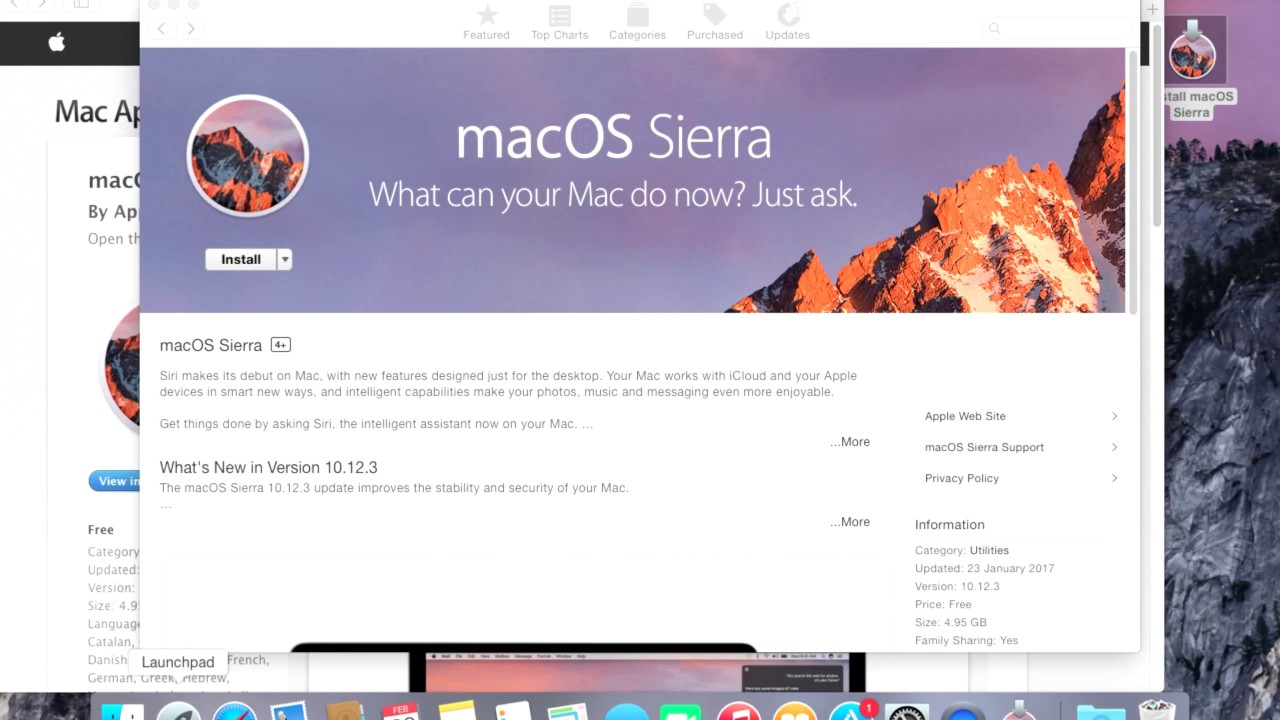
Step 4: Download macOS Sierra from the App Store
After ensuring that your Mac is running the latest version of OS X, it’s time to download macOS Sierra from the App Store. The App Store is the official source for downloading and updating macOS, making it a reliable and secure platform.
Here’s how you can download macOS Sierra:
- Open the App Store by clicking on the Apple menu in the top left corner of your screen and selecting “App Store”.
- In the search bar of the App Store, type “macOS Sierra”.
- Click on the search result that matches your query.
- On the macOS Sierra product page, click on the “Download” button.
- The download process will begin, and a progress bar will indicate the status of the download. The time it takes to download macOS Sierra will depend on your internet connection speed.
- Once the download is complete, you will see a notification that macOS Sierra is ready to be installed.
It’s important to ensure that you have a stable and fast internet connection during the download process to avoid any interruptions. A slow or unstable internet connection could result in a failed or incomplete download.
While downloading macOS Sierra, it’s a good idea to take this time to review the system requirements and read about the new features and improvements that this operating system offers. Familiarize yourself with any changes that may impact your workflow or require adjustments in your Mac usage.
Once the download is complete, you’re one step closer to experiencing the power of macOS Sierra. Now it’s time to move on to the next step: installing macOS Sierra on your Mac.
Step 5: Install macOS Sierra
With the macOS Sierra download complete, it’s time to install this exciting new operating system on your Mac. The installation process is straightforward and will guide you through each step.
Follow these instructions to install macOS Sierra:
- If the macOS Sierra installer does not automatically open after the download is complete, locate it in your Applications folder and double-click to open it.
- A welcome screen will appear, introducing you to macOS Sierra. Click on the “Continue” button to proceed.
- Read and agree to the terms and conditions presented. Click on the “Agree” button to continue.
- Choose the disk on which you want to install macOS Sierra. If you have multiple disks or partitions, select the one where you want to install the operating system and click on the “Install” button.
- Enter your administrator password when prompted. This is required to authorize the installation process.
- The installation process will begin, and a progress bar will show you the status of the installation. The time it takes to install macOS Sierra will vary depending on your Mac’s hardware specifications.
- Once the installation is complete, your Mac will automatically restart.
During the installation, it’s crucial to refrain from turning off or restarting your Mac, as this can interrupt the process and potentially cause issues with your system.
After the restart, your Mac will boot into macOS Sierra. You’ll be prompted to set up a few basic preferences, such as your Apple ID and iCloud settings. Follow the on-screen instructions to complete the initial setup. If you’re upgrading from a previous version of OS X, you’ll also have the option to migrate your data and applications from your previous installation.
Once you’ve completed the initial setup, you’re ready to explore and enjoy the features of macOS Sierra. Take some time to familiarize yourself with the new interface, and don’t forget to customize your settings to suit your preferences.
Now that you’ve successfully installed macOS Sierra, it’s time to move on to the final step: setting up macOS Sierra.
Step 6: Set up macOS Sierra
After successfully installing macOS Sierra on your Mac, it’s time to set up the operating system according to your preferences and needs. This step will guide you through the initial setup process, allowing you to customize various settings and get your Mac ready for optimal use.
Follow these steps to set up macOS Sierra:
- After the initial restart, you’ll be prompted to choose your country or region. Select the appropriate option and click on the “Continue” button.
- You will then be prompted to choose your keyboard layout. Select the layout that matches your keyboard and click on the “Continue” button.
- If you have an existing Apple ID, you can sign in and use it to set up your Mac. If you don’t have an Apple ID, you can create one by clicking on the “Create Your Apple ID” button. Alternatively, you can choose to set up your Mac without an Apple ID by clicking on the “Set Up Later” option.
- Next, you’ll be presented with the option to enable or disable location services. Location services allow applications and services to use your location data to provide relevant information. Choose the option that best suits your preferences and click on the “Continue” button.
- If you opted to sign in with your Apple ID, you’ll be prompted to set up iCloud. iCloud is a cloud-based service that allows you to store and sync your data across multiple devices. Choose the options that suit your needs and click on the “Continue” button.
- You’ll then have the option to set up Siri, Apple’s voice assistant. Siri can perform various tasks and provide information using voice commands. Choose whether to enable or disable Siri and click on the “Continue” button.
- Review the terms and conditions for using macOS Sierra. Click on the “Agree” button to proceed.
- Finally, you’ll have the option to customize the appearance of your Mac by selecting a theme. Choose the theme you prefer and click on the “Continue” button.
Once you’ve completed the set-up process, macOS Sierra will be ready for use. Take some time to explore the system preferences and customize settings such as display, sound, trackpad, and security. Familiarize yourself with the new features and improvements and make adjustments according to your personal preferences.
Remember to periodically check for software updates and install them to ensure that your Mac remains up to date with the latest improvements and security patches.
Congratulations! You’ve now successfully set up macOS Sierra on your Mac. Enjoy exploring the new features, increased performance, and enhanced user experience that macOS Sierra has to offer!
Conclusion
Congratulations! You have completed the process of downloading, installing, and setting up macOS Sierra on your Mac. By following the steps outlined in this guide, you have ensured a smooth and successful transition to this powerful and feature-rich operating system.
macOS Sierra brings numerous improvements and new features to enhance your Mac experience. From Siri integration and iCloud Drive enhancements to optimized storage and improved security, macOS Sierra sets a new standard for efficiency and productivity.
Throughout the process, it’s essential to check your Mac’s compatibility, back up your data, update to the latest version of OS X, and download macOS Sierra from the App Store. The installation process is straightforward, but it’s crucial to follow the steps carefully and avoid any interruptions or errors.
Once macOS Sierra is installed, take the time to personalize your settings, explore the new features, and familiarize yourself with the improvements. Adjust your preferences, enable or disable Siri, set up iCloud, and customize your appearance to suit your needs and preferences.
Remember to keep your Mac up to date by regularly checking for software updates. These updates not only bring new features but also address security vulnerabilities and performance enhancements.
With macOS Sierra on your Mac, you’re ready to take advantage of its powerful capabilities and enjoy a more productive and efficient workflow. Enjoy exploring the new features, increased performance, and enhanced user experience that macOS Sierra offers!
Thank you for following this guide, and we hope you find macOS Sierra to be an exceptional addition to your Mac computing experience.