Introduction
Chromebooks have become increasingly popular due to their affordability, simplicity, and speedy performance. However, one limitation of Chromebooks is that they are designed to primarily run web applications, which means they don’t have the same app library as other operating systems. But fear not! There is a way to download and install APKs (Android application packages) on your Chromebook, expanding its capabilities and allowing you to access a wider range of apps.
By following a few simple steps, you can enable your Chromebook to run Android apps and enjoy the benefits of a more versatile device. In this guide, we will walk you through the process of downloading and installing APKs on your Chromebook, opening up a whole new world of applications for you to explore.
Whether you want to play popular mobile games, use productivity apps, or access other Android-exclusive features, this guide will show you how to make it happen. So, let’s dive in and unlock the full potential of your Chromebook!
Step 1: Enable Developer Mode on your Chromebook
To begin the process of downloading and installing APKs on your Chromebook, you’ll need to enable Developer Mode. This mode allows you to access and modify system files, giving you the freedom to install and run applications from outside the Chrome Web Store. Please note that enabling Developer Mode will erase all local data on your Chromebook, so be sure to back up any important files before proceeding.
To enable Developer Mode, follow these steps:
- Power off your Chromebook.
- Press and hold the Esc and Refresh keys simultaneously.
- While holding these keys, press the Power button.
- When a warning screen appears, release all keys.
- Press Ctrl + D to enable Developer Mode.
- On the next screen, press Enter to confirm.
- Your Chromebook will reboot, and a new Developer Mode warning screen will appear.
- Press Ctrl + D again to proceed.
- Your Chromebook will now transition to Developer Mode. This process may take a few minutes, and the Chromebook will reboot automatically when it’s complete.
Once your Chromebook has rebooted in Developer Mode, you’ll see a warning screen every time you power it on. You can bypass this screen by pressing Ctrl + D. It’s important to note that enabling Developer Mode may void your warranty, so proceed with caution and only if you’re comfortable with the potential risks and implications.
Step 2: Install Linux (Beta) on your Chromebook
Now that you have enabled Developer Mode on your Chromebook, it’s time to install Linux (Beta) to create a Linux environment where you can run Android applications. This will give you access to the tools you need to download and install APKs on your Chromebook. Follow the steps below to install Linux (Beta):
- Open the Settings menu on your Chromebook by clicking on the clock in the bottom-right corner of the screen and selecting the gear icon.
- In the Settings menu, scroll down and click on “Advanced.”
- Under the “Linux (Beta)” section, click on the “Turn On” button.
- Follow the on-screen instructions to set up the Linux environment. This may take some time as the necessary files are downloaded and installed.
- Once the installation is complete, a terminal window will open with a blinking cursor. This indicates that the Linux environment is ready for use.
With Linux (Beta) installed on your Chromebook, you now have the foundation needed to proceed with the downloading and installation of APKs. It’s important to note that Linux (Beta) is still in development and may have some limitations or not be available on all Chromebook models. Make sure to check your Chromebook’s compatibility and consult the official documentation provided by Google for any model-specific instructions.
Step 3: Install a package manager on your Linux environment
Now that you have Linux (Beta) installed on your Chromebook, the next step is to install a package manager. This will allow you to easily manage and install the necessary tools and software for downloading APKs. In this guide, we will be using the popular package manager called “APT” (Advanced Package Tool) to install the required packages. Follow the steps below to install APT:
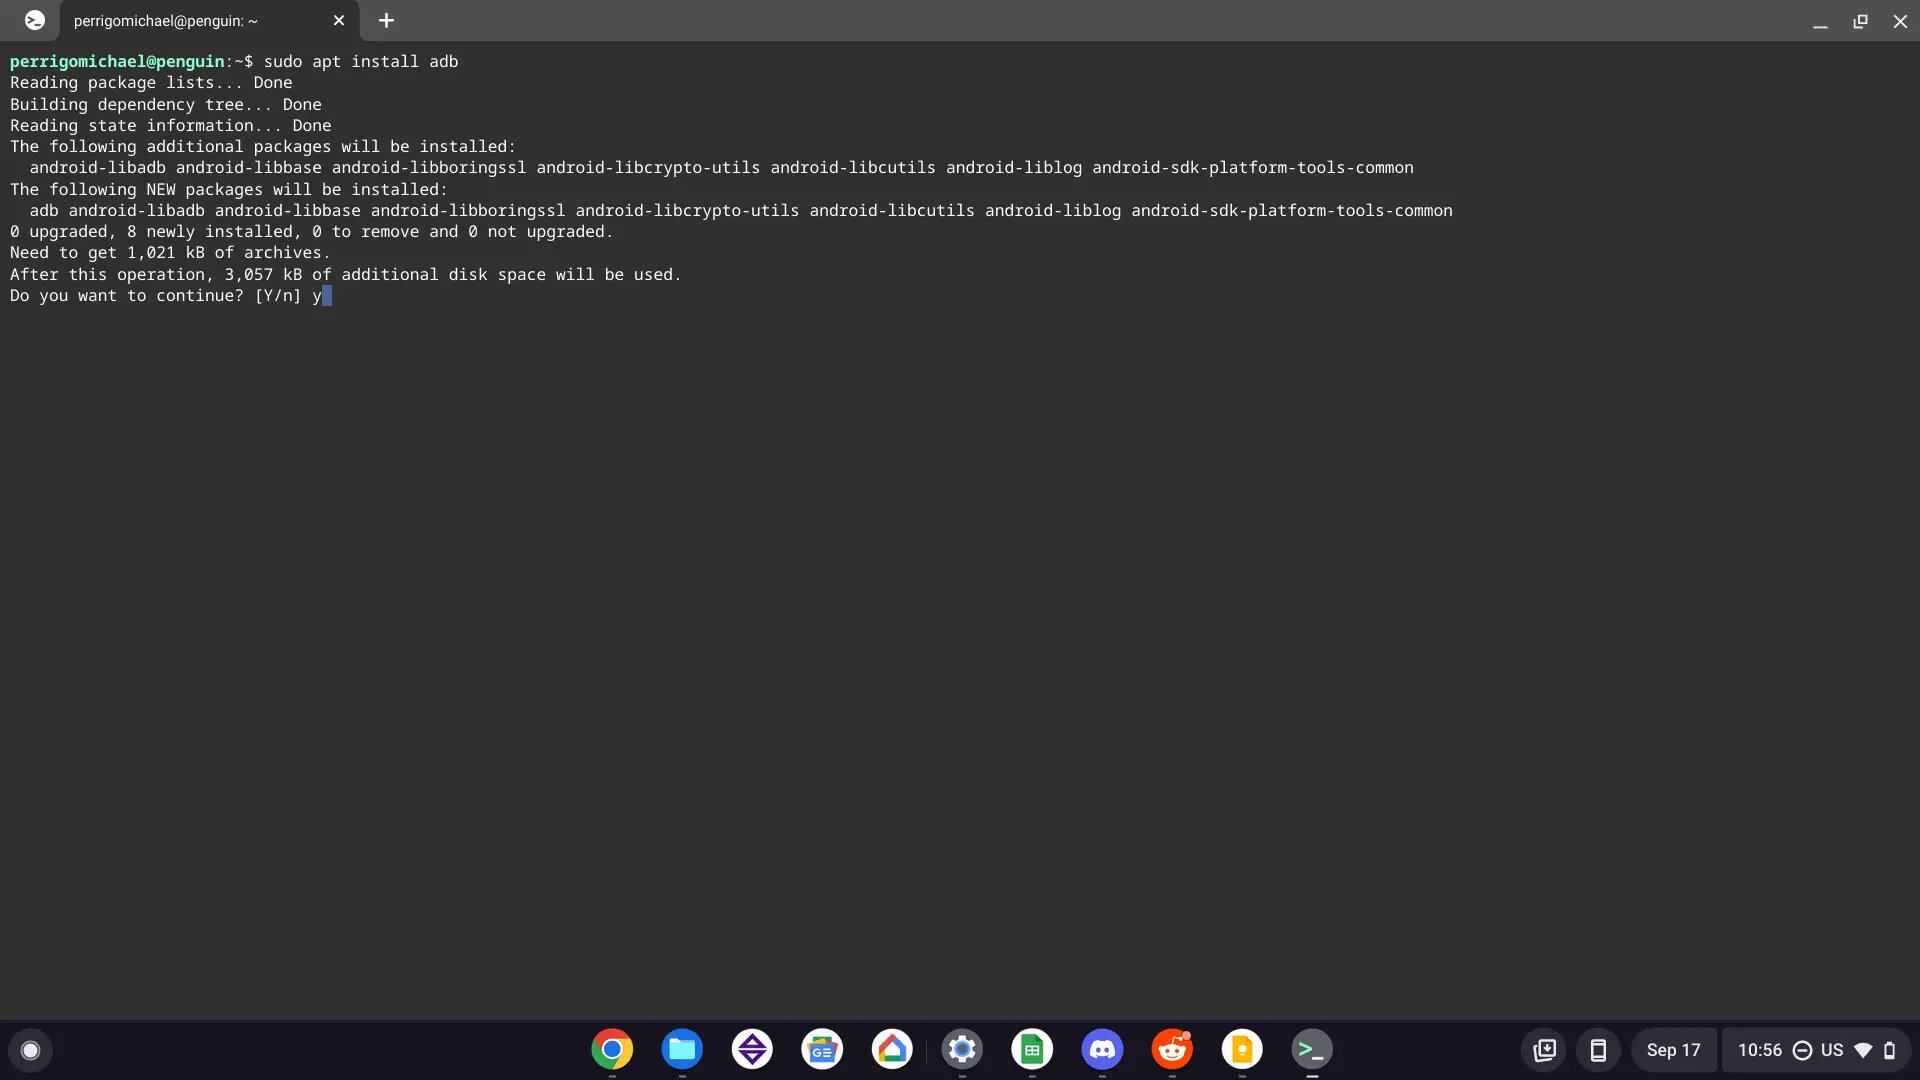
- Open the terminal window in your Linux (Beta) environment. You can do this by clicking on the “Terminal” icon in the app launcher or by pressing Ctrl + Alt + T on your keyboard.
- In the terminal, type the following command and press Enter to update the package lists:
sudo apt update - Once the package lists are updated, type the following command and press Enter to install APT:
sudo apt install apt - Follow the on-screen instructions and enter your password when prompted. The installation process may take a few minutes.
With APT successfully installed on your Chromebook, you now have a package manager in your Linux (Beta) environment. This will facilitate the installation of the APK downloader tool in the next step. APT provides a convenient and reliable way to manage software packages, ensuring that you have the necessary tools at your disposal for downloading and installing APKs.
Step 4: Download and install an APK downloader tool
To successfully download and install APKs on your Chromebook, you will need to use an APK downloader tool. This tool allows you to search for and download APK files directly from the Google Play Store. In this guide, we will use the popular APK downloader tool called “Evozi” as an example. Follow the steps below to download and install the APK downloader tool:
- Open the terminal window in your Linux (Beta) environment. You can do this by clicking on the “Terminal” icon in the app launcher or by pressing Ctrl + Alt + T on your keyboard.
- In the terminal, type the following command and press Enter to download the APK downloader tool:
wget https://git.io/evozi -O evozi.sh - Once the download is complete, type the following command and press Enter to give execute permissions to the script:
chmod +x evozi.sh - Finally, type the following command and press Enter to run the script and install the APK downloader tool:
./evozi.sh
The script will guide you through the installation process of the APK downloader tool. Follow the on-screen instructions, and once the installation is complete, you will have the necessary tool to search for and download APK files directly from the Google Play Store. With this APK downloader tool in your toolkit, you are one step closer to expanding the range of apps available on your Chromebook.
Step 5: Download and install APKs on your Chromebook
Now that you have the APK downloader tool installed on your Chromebook, you can start downloading and installing APK files. Follow the steps below to download and install APKs on your Chromebook:
- Launch the APK downloader tool by opening the terminal in your Linux (Beta) environment and typing the following command:
apkd - Once the APK downloader tool is running, you can search for the desired app by entering its name in the terminal window. The tool will provide a list of matched results from the Google Play Store.
- Use the corresponding number for the app you want to download and press Enter.
- The APK downloader tool will initiate the download of the selected app.
- Once the download is complete, you can find the downloaded APK file in the Downloads folder of your Linux (Beta) environment.
- To install the APK, right-click on the file and select “Open With” followed by “Linux Apps” and then choose “Package Installer.”
- Follow the installation prompts to complete the installation of the app.
Congratulations! You have successfully downloaded and installed an APK on your Chromebook. Repeat these steps for any other APKs you want to install. Remember that not all apps may be fully optimized for Chrome OS, so be aware that some apps may not work as smoothly as others. Additionally, it’s important to only download and install APK files from trusted sources to ensure the security of your device.
Conclusion
Congratulations on successfully downloading and installing APKs on your Chromebook! By enabling Developer Mode, installing Linux (Beta), setting up a package manager, and utilizing an APK downloader tool, you have expanded the capabilities of your Chromebook and gained access to a wider range of applications. Whether you are looking to play popular mobile games, use productivity apps, or explore other Android-exclusive features, you now have the flexibility to do so.
While these steps may require some technical knowledge and carry certain risks, they can greatly enhance the functionality of your Chromebook. It’s important to always be cautious when enabling Developer Mode and installing applications outside of the official Chrome Web Store. Ensure that you only download APK files from trusted sources and exercise good judgment while installing new apps to maintain the security of your device.
Now that you have the know-how to download and install APKs on your Chromebook, feel free to explore the vast world of Android apps and discover new ways to utilize your device. From entertainment and productivity to creativity and communication, there are countless apps waiting for you to explore and enjoy.
Keep in mind that while APK installation expands the capabilities of your Chromebook, it’s still important to use the device within its intended purpose and adhere to your organization’s policies or any applicable rules. By utilizing this newfound functionality responsibly, you can make the most of your Chromebook and enhance your overall computing experience.
Now, go ahead and enjoy the endless possibilities that come with having APKs on your Chromebook. Stay curious, stay connected, and enjoy your Chromebook to the fullest!