Introduction
Photobucket is a popular image hosting and sharing website that allows users to store and manage their photos online. If you have a Photobucket account and want to download all of your photos for safekeeping, organizing, or transferring to another platform, you’ve come to the right place. In this article, we will guide you through the process of downloading all your photos from Photobucket.
With millions of users and countless photos uploaded daily, Photobucket provides a convenient way to store and access your images from anywhere. However, there may come a time when you need to have a local copy of your photos, maybe to free up space on your Photobucket account or to ensure a backup in case anything happens to the platform.
Downloading all your photos from Photobucket might seem like a daunting task, but with the right steps, it can be a simple and straightforward process. In the following sections, we will walk you through the necessary steps to download your photos individually or in bulk, depending on your preference.
Whether you want to download all the photos in a specific album or your entire photo library, we’ve got you covered. So, let’s jump right in and discover how to download all your precious memories from Photobucket.
Step 1: Sign in to your Photobucket Account
The first step to downloading your photos from Photobucket is to sign in to your account. To do this, follow these simple steps:
- Launch your preferred web browser and go to the Photobucket website.
- Click on the “Sign In” button located at the top right corner of the homepage.
- Enter your username and password in the provided fields.
- Click on the “Sign In” button to access your account.
Once you have successfully signed in, you will have access to your Photobucket account and can continue with the process of downloading your photos.
It’s worth noting that if you don’t have a Photobucket account, you will need to create one before proceeding with the download. Simply click on the “Sign Up” button instead and follow the prompts to create your account.
Having a registered account allows you to store and organize your photos, share them with others, and easily download them when needed.
Remember to keep your login credentials secure and confidential to protect your account and the personal photos stored within it. If you have forgotten your password, you can click on the “Forgot your password?” link and follow the instructions to reset it.
Once you have successfully signed in or created your account, you are ready to move on to the next step and begin the process of downloading your photos from Photobucket.
Step 2: Access your Album or Library
After signing in to your Photobucket account, the next step is to access the specific album or library where your photos are stored. Follow these steps to access your desired location:
- Once you are logged in, you will be directed to your Photobucket dashboard.
- Look for the “Albums” or “Library” tab, usually located on the top navigation menu or sidebar.
- Click on the tab to open the album or library page.
- If you want to download all the photos from a specific album, browse through your albums and click on the one you wish to download from the list.
- If you want to download all the photos from your entire library, you can skip this step and proceed to the next section.
By accessing your album or library, you will be able to view all the photos stored in that specific location. This step is important as it allows you to select the photos you want to download.
Organizing your photos into separate albums can make it easier to locate and manage them. If your photos are spread across different albums, make sure to access the specific album where the photos you wish to download are stored.
It’s important to note that if you want to download all the photos from your entire library, you don’t need to access any specific album. You can simply proceed to the next step to learn how to download all photos from your Photobucket library in one go.
Now that you have accessed the album or library where your photos are stored, you are ready to move on to the next step and select the photos you want to download.
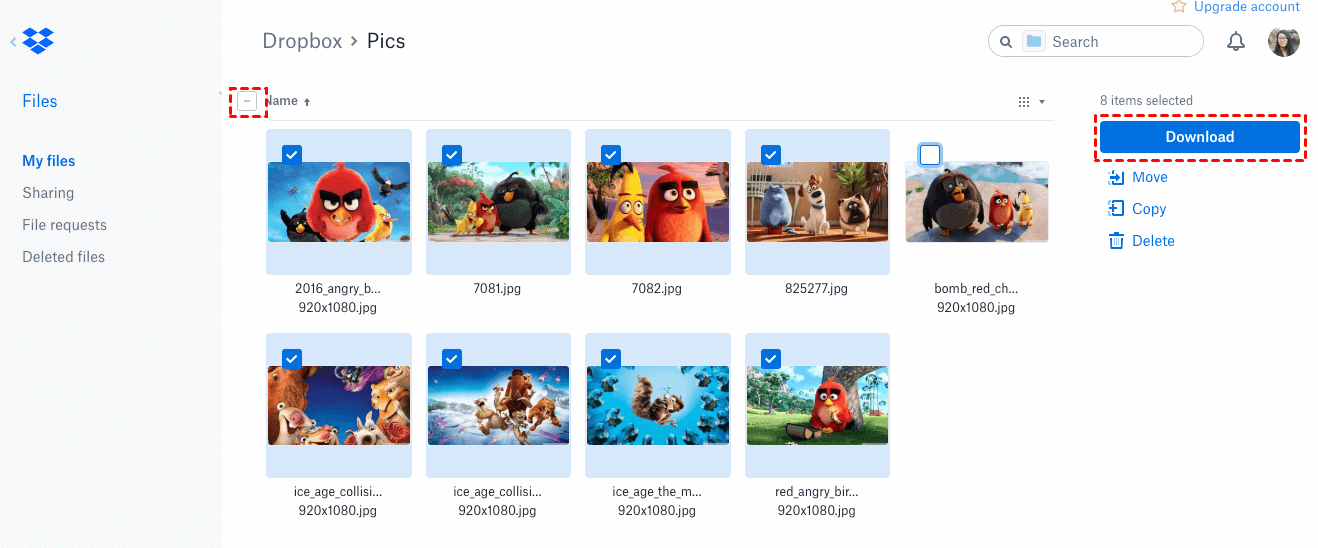
Step 3: Select Multiple Photos
Once you have accessed your desired album or library in Photobucket, it’s time to select the photos you want to download. Follow these steps to select multiple photos:
- On the album or library page, you will see all the photos displayed in thumbnail form.
- Hover your cursor over the first photo you want to download. You will notice a checkbox icon appearing in the top left corner of the photo.
- Click on the checkbox to select the photo. A blue checkmark will indicate that the photo is selected.
- Continue scrolling through the album or library page and select any additional photos you want to download by clicking on their respective checkbox icons. You can select as many photos as you like.
- To deselect a photo, simply click on the checkbox again to remove the blue checkmark.
By selecting multiple photos, you can download them all at once, saving you time and effort compared to downloading them individually.
Photobucket also provides additional options for selecting multiple photos, such as holding down the Ctrl or Command key (depending on your operating system) while clicking on the photos. This allows for non-sequential selection or the ability to select multiple photos scattered throughout the album or library.
Once you have selected all the photos you want to download, you are ready to move on to the next step and proceed with the actual downloading process.
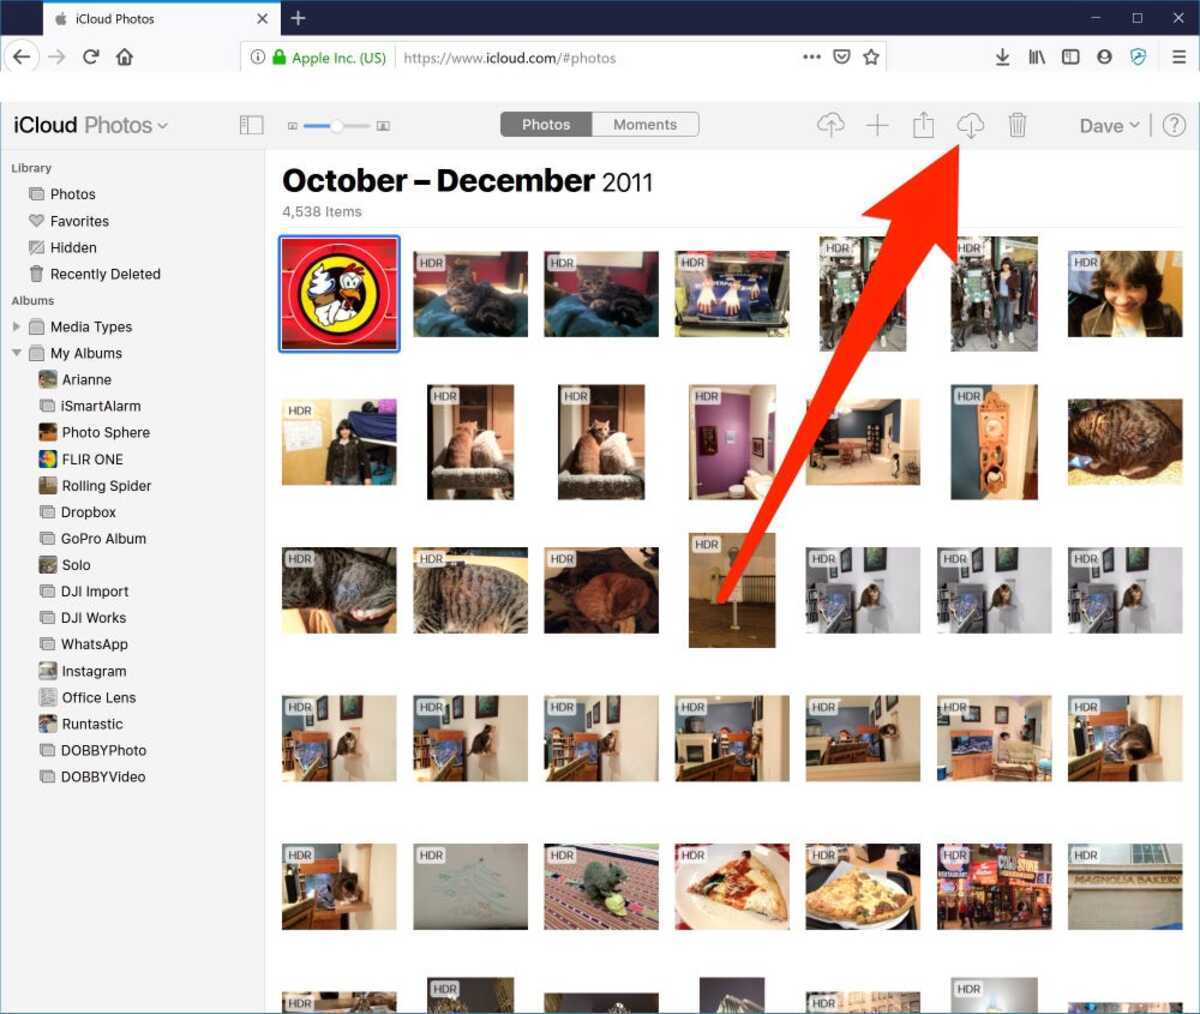
Step 4: Download the Selected Photos
Now that you have selected the photos you want to download from your Photobucket account, it’s time to proceed with the actual downloading process. Follow these steps to download the selected photos:
- With the photos selected, look for the download or download icon/button. It is usually located at the top or bottom of the album or library page.
- Click on the download button to initiate the download process. Some platforms might require you to confirm the download.
- Choose the download location on your computer where you want the photos to be saved. You can create a new folder specifically for the downloaded photos or select an existing folder.
- Click on the “Save” or “Download” button to start downloading the selected photos.
- Wait for the download to complete. The time it takes will depend on the number and size of the photos.
Once the download is complete, you will have a local copy of the selected photos from your Photobucket account.
It’s important to note that the downloaded photos will retain their original file names and formats. If you want to organize them further or rename them, you can do so on your computer after the download is complete.
If you have selected a large number of photos, it’s recommended to double-check the download location to ensure that all the photos are downloaded successfully. In some cases, you may encounter errors or connection issues that prevent some photos from being downloaded. If this happens, you can try the download process again or contact Photobucket support for assistance.
Now that you have successfully downloaded the selected photos, you can proceed to organize, edit, or use them as desired. If you have more photos to download or want to download all the photos from an album or your entire library, continue reading to learn the next steps.
Step 5: Download All Photos in an Album
If you want to download all the photos from a specific album in your Photobucket account, follow these steps:
- Access the desired album by following the steps mentioned in the previous sections.
- Once you are on the album page, look for the option to download all photos. This option is usually located near the top or bottom of the album page.
- Click on the “Download All” or similar button to start the download process.
- Choose the download location on your computer where you want the photos to be saved.
- Click on the “Save” or “Download” button to initiate the download.
- Wait for the download to complete.
Downloading all the photos from an album is a convenient way to have a local copy of all the photos in one go. This can be helpful when you want to backup or transfer the entire album to another platform or device.
It’s important to note that the download process for all photos in an album might take longer compared to downloading individual or selected photos. The time it takes will depend on the number and size of the photos in the album.
Once the download is complete, you will have a complete backup of the photos from the specific album in your Photobucket account.
Remember to choose an appropriate download location on your computer and ensure that you have enough storage space available to accommodate all the photos in the album.
If you have multiple albums with photos you want to download, you can repeat this step for each album to download all the photos from each specific album.
Now that you have successfully downloaded all the photos from a specific album, you can proceed with downloading all the photos from your entire library. Continue reading the next section for the step-by-step process.
Step 6: Download All Photos in Your Library
If you want to download all the photos from your entire library in Photobucket, follow these steps:
- On your Photobucket dashboard or library page, look for the option to download all photos. This option is usually located near the top or bottom of the page.
- Click on the “Download All” or similar button to initiate the download process.
- Choose the download location on your computer where you want the photos to be saved.
- Click on the “Save” or “Download” button to start the download.
- Wait for the download to complete.
Downloading all the photos from your entire library is a convenient way to have a local copy of all the photos stored in your Photobucket account. This can be useful when you want to backup your entire photo collection or if you are planning on transitioning to a new platform or device.
Similar to downloading all photos in an album, the download process for all photos in your library may take longer compared to downloading individual or selected photos. The duration will depend on the number and size of the photos in your library.
Ensure that you have sufficient storage space available on your computer to accommodate all the photos in your library and choose an appropriate download location.
Once the download is complete, you will have a comprehensive backup of all the photos in your Photobucket library.
Downloading all the photos in your library is the most effective way to ensure you have a local copy of your complete collection. It eliminates the need to individually select and download photos from each album.
Now that you have successfully downloaded all the photos from your library, you can proceed to organize, edit, or use them as desired.
Conclusion
Downloading all your photos from Photobucket is a straightforward process that allows you to have a local copy of your precious memories. Whether you want to download individual photos, selected photos, or all the photos in an album or library, the steps outlined in this article will guide you through the process.
By signing in to your Photobucket account, accessing your desired album or library, selecting the photos you want to download, and initiating the download, you can ensure the safety and accessibility of your photos offline.
Remember to choose an appropriate download location on your computer, have enough storage space available, and be patient during the download process, especially when downloading a large number of photos.
Having a local copy of your photos provides peace of mind, whether you are looking to free up space on your Photobucket account, transition to a different platform, or simply have an extra backup for your cherished memories.
So, take the time to download your photos from Photobucket and enjoy the convenience of having them at your fingertips whenever you need them.
Thank you for following this guide, and we hope it has been helpful in assisting you with downloading your photos from Photobucket!