Introduction
Welcome to the world of Microsoft Access! This powerful database management system allows you to organize, analyze, and manage your data with ease. Whether you’re a business professional, a student, or simply interested in exploring the capabilities of this software, you’re in the right place.
Access is a part of the Microsoft Office suite, but by default, it is not available for Mac users. However, with a few simple steps, you can download and install Microsoft Access on your Mac and start utilizing its features.
In this guide, we will walk you through the step-by-step process of downloading and installing Microsoft Access on your Mac. We will also provide helpful tips and precautions to ensure a successful installation. So, let’s get started!
Before proceeding with the installation, it’s important to note that you will need an active Microsoft Office subscription or a standalone Access license. Additionally, make sure your Mac meets the system requirements necessary for running Access smoothly.
Once you have completed the installation process, you will be able to create databases, tables, queries, forms, and reports to efficiently manage your data. Whether you’re a small business owner looking to organize customer information or a student working on a research project, Access has the tools to simplify your data management tasks.
Now, let’s dive into the step-by-step process of downloading and installing Microsoft Access on your Mac. Don’t worry, it’s easier than you might think! Just follow the instructions in the upcoming sections, and you’ll have Access up and running in no time.
Step 1: Check System Requirements
Before downloading and installing Microsoft Access on your Mac, it is crucial to ensure that your system meets the necessary requirements. By checking these requirements in advance, you can avoid any compatibility issues and ensure a smooth installation process.
Here are the system requirements for Microsoft Access on Mac:
- Operating System: Your Mac should be running macOS 10.14 or later versions. It is recommended to have the latest macOS version installed for optimal performance and compatibility.
- Processor: Access requires a 64-bit Intel processor. Ensure that your Mac meets this requirement to run the software effectively.
- Memory (RAM): Microsoft recommends a minimum of 4 GB RAM for Access. However, for larger databases or complex queries, it is advisable to have at least 8 GB RAM or more for better performance.
- Storage Space: Make sure your Mac has sufficient free disk space to accommodate the Access installation and any future database files. A minimum of 10 GB is recommended.
- Display: A screen resolution of 1280 x 800 pixels or higher is required to use Access on your Mac.
- Internet Connection: While not necessary for the installation, having an internet connection is beneficial as it allows you to access updates, online templates, and other resources.
It is essential to remember that these are the minimum requirements. If you plan on working with larger databases or running resource-intensive queries, higher specifications may be necessary.
To check your Mac’s system specifications, follow these simple steps:
- Click on the Apple menu in the top-left corner of your screen.
- Select “About This Mac” from the dropdown menu. A new window will appear displaying information about your Mac’s hardware and software.
- Note down the macOS version, processor, and memory (RAM) details. Ensure that your Mac meets or exceeds the system requirements mentioned earlier.
If your Mac meets all the system requirements, you’re ready to move on to the next step and begin the download process. However, if your system falls short on any of the requirements, you may need to consider an upgrade or alternative options to run Microsoft Access effectively on your Mac.
Step 2: Sign in to your Microsoft Account
To download Microsoft Access on your Mac, you will need to sign in to your Microsoft Account. Your Microsoft Account is associated with your Office subscription or Access license, which grants you the necessary permissions to access and install the software.
If you don’t already have a Microsoft Account, you can easily create one for free. Follow these steps to sign in to your Microsoft Account:
- Open your preferred web browser on your Mac and navigate to the official Microsoft Account sign-in page.
- Click on the “Sign in” button located at the top-right corner of the page.
- Enter your email address associated with your Microsoft Account in the provided field.
- Click on the “Next” button to proceed.
- Enter your password in the designated field. If you have forgotten your password, you can click on the “Forgot my password” link and follow the on-screen instructions to reset it.
- Click on the “Sign in” button to access your Microsoft Account.
Once you have successfully signed in to your Microsoft Account, you will have access to various Microsoft services, including Office and Microsoft Access.
It is essential to have a valid Microsoft Account to download and install Microsoft Access on your Mac. If you are using a personal Office subscription, make sure it includes Access as part of the package. Alternatively, if you have purchased a standalone Access license, ensure that it is linked to your Microsoft Account.
If you encounter any issues while signing in to your Microsoft Account, double-check your credentials and ensure that your internet connection is stable. If problems persist, you can visit the Microsoft Account Support page or contact Microsoft Support for further assistance.
With your Microsoft Account signed in and ready, you’re now prepared to move on to the next step: visiting the Microsoft Access download page.
Step 3: Visit the Microsoft Access Download Page
Once you have successfully signed in to your Microsoft Account, the next step is to visit the official Microsoft Access download page. This is where you will find the download link for Microsoft Access that is compatible with your Mac.
Follow these steps to visit the Microsoft Access download page:
- Open your preferred web browser on your Mac.
- In the search bar, type “Microsoft Access download” or visit the official Microsoft website at www.microsoft.com.
- Once on the Microsoft website, hover over the “Products” or “Office” section to reveal the drop-down menu.
- Scroll down and click on the “Access” option. This will take you to the Access homepage.
- On the Access homepage, click on the “Download” or “Get Access” button. This will direct you to the download page.
Alternatively, you can directly access the download page by entering the URL www.microsoft.com/access in your browser’s search bar.
Once you are on the download page, you will see information and instructions regarding the download process. Take a moment to read through any important details or FAQs provided.
Keep in mind that the download page may have different versions of Microsoft Access available. Make sure to select the version that is compatible with your Mac’s operating system and meets your specific requirements.
Before proceeding with the download, you may also want to explore additional resources available on the download page, such as tutorials, guides, or sample databases. These resources can help you familiarize yourself with Access and its functionalities.
With the Microsoft Access download page open on your web browser, you’re now ready to move on to the next step: choosing the specific version of Access you want to download.
Step 4: Choose the Version of Access
Once you have accessed the Microsoft Access download page, you will be presented with different versions of Access to choose from. It is crucial to select the version that aligns with your requirements and the compatibility of your Mac’s operating system.
Follow these steps to choose the version of Microsoft Access to download:
- On the download page, carefully review the available versions of Microsoft Access. There might be different options, such as Access 2019, Access 365, or earlier versions.
- Consider your specific needs and check the compatibility of each version with your Mac’s operating system.
- Take note of any additional features, enhancements, or limitations mentioned for each version. This information can help you make an informed decision.
- Select the version that best fits your requirements by clicking on the corresponding download button or link.
It is worth noting that as a Microsoft Office subscriber, you may have access to the latest version or the option to choose between different versions. If you are not sure which version to choose, consider opting for the latest version as it tends to have the most up-to-date features and improvements.
Additionally, make sure to check if the version you choose requires an active Office subscription or a standalone Access license. If you are not currently subscribed or licensed, you may need to purchase or activate the necessary Access plan before proceeding with the download.
Once you have made your selection, the download process will begin. Depending on your internet connection speed and the size of the installation file, it may take some time to complete the download.
While the download is in progress, you can continue to the next step and prepare to run the Access installer on your Mac. Make sure to keep an eye on the download progress to ensure a seamless transition to the installation process.
In the next step, we will guide you through running the Access installer and completing the installation process on your Mac.
Step 5: Download Access Installer
Now that you have chosen the appropriate version of Microsoft Access, it’s time to download the installer file onto your Mac. The installer file contains all the necessary files and components required to install Access on your computer.
Follow these steps to download the Access installer:
- Once you have selected the version of Access on the download page, click on the download button or link associated with that version. This will initiate the download process.
- Depending on your web browser settings, a pop-up window may appear, asking you to confirm the download or choose a location to save the installer file. If prompted, click “Save File” to begin the download.
- Alternatively, your web browser may automatically start the download process and save the file in your default download location.
- Monitor the download progress, as it may take some time based on your internet connection speed and the size of the installer file.
- Once the download is complete, you will have the Access installer file saved on your Mac. It is typically saved in the Downloads folder or the location you specified during the download process.
It is important to keep the downloaded installer file in a secure location on your Mac. You will need this file to run the installation process and install Microsoft Access successfully.
Before proceeding with the installation, it is recommended to scan the downloaded installer file using reliable antivirus software. This helps ensure that the file is safe and free from any potential threats.
With the Access installer file downloaded and ready, you are one step closer to getting Access up and running on your Mac. In the next step, we will guide you through running the installer and completing the installation process.
Step 6: Run the Installer
Now that you have downloaded the Microsoft Access installer file, it’s time to run the installer and begin the installation process on your Mac. The installer will guide you through the necessary steps to set up Access on your computer.
Follow these steps to run the Access installer:
- Locate the downloaded Access installer file on your Mac. It is usually saved in the Downloads folder or the location you specified during the download process.
- Double-click on the installer file to launch it. This will start the installation process.
- If prompted, you may be asked to confirm your administrative or user account credentials to authorize the installation. Enter the required information to proceed.
- Read and review the terms and conditions or license agreement presented by the installer. Click on the “Accept” or “Agree” button to continue with the installation.
- Next, you may be asked to choose the installation location for Microsoft Access on your Mac. By default, the installer will suggest a location, but you can choose a different location if desired. Click on the “Install” button once you have selected the appropriate location.
- Now, the installer will begin copying the necessary files and components to your Mac. The installation progress will be displayed, and it may take some time to complete depending on your system’s performance.
- Once the installation is finished, you will see a notification indicating the successful installation of Microsoft Access. Click on the “Finish” or “Close” button to exit the installer.
Congratulations! You have successfully run the Access installer and completed the installation process on your Mac. Microsoft Access is now ready to be launched and used on your computer.
During the installation, it is important to ensure a stable internet connection to allow any necessary updates or additional components to be downloaded and installed.
In the next step, we will guide you through the final steps to complete the installation process and launch Microsoft Access on your Mac.
Step 7: Complete the Installation Process
Now that you have run the Microsoft Access installer on your Mac, it’s time to complete the installation process. In this step, we will guide you through the final steps to ensure that Access is fully installed and ready to use.
Follow these steps to complete the installation process:
- After exiting the Access installer, locate the Microsoft Access app in your Applications folder or wherever you chose to install it.
- Click on the Microsoft Access app icon to launch the software for the first time.
- If prompted, you may be asked for permission to send crash reports and usage data to Microsoft. Choose your preferred option and click “OK” or “Continue.”
- Next, you may be prompted to sign in to your Microsoft Account again. Enter your email address and password to proceed.
- Once signed in, you may be asked for your product key, if applicable. Enter the product key associated with your Access license or Office subscription, and click “Next” or “Continue.”
- Microsoft Access will now complete any necessary updates or configuration settings. This may take a few moments, so please be patient.
- Once the setup process is complete, you will be greeted with the Microsoft Access interface and can start using the software.
It is important to note that the first launch of Microsoft Access may take a bit longer as it prepares the necessary components and sets up the application. Subsequent launches should be faster.
Now that the installation process is complete, you can start utilizing all the features and capabilities of Microsoft Access on your Mac. Create databases, design tables, build queries, and generate reports to effectively manage and analyze your data.
Make sure to explore the various features and options available to you within Access, such as customizing the interface, importing data, and creating relationships between tables. Familiarizing yourself with these features will help you get the most out of the software.
Congratulations on successfully completing the installation process!
In the next step, we will guide you on how to launch Microsoft Access on your Mac.
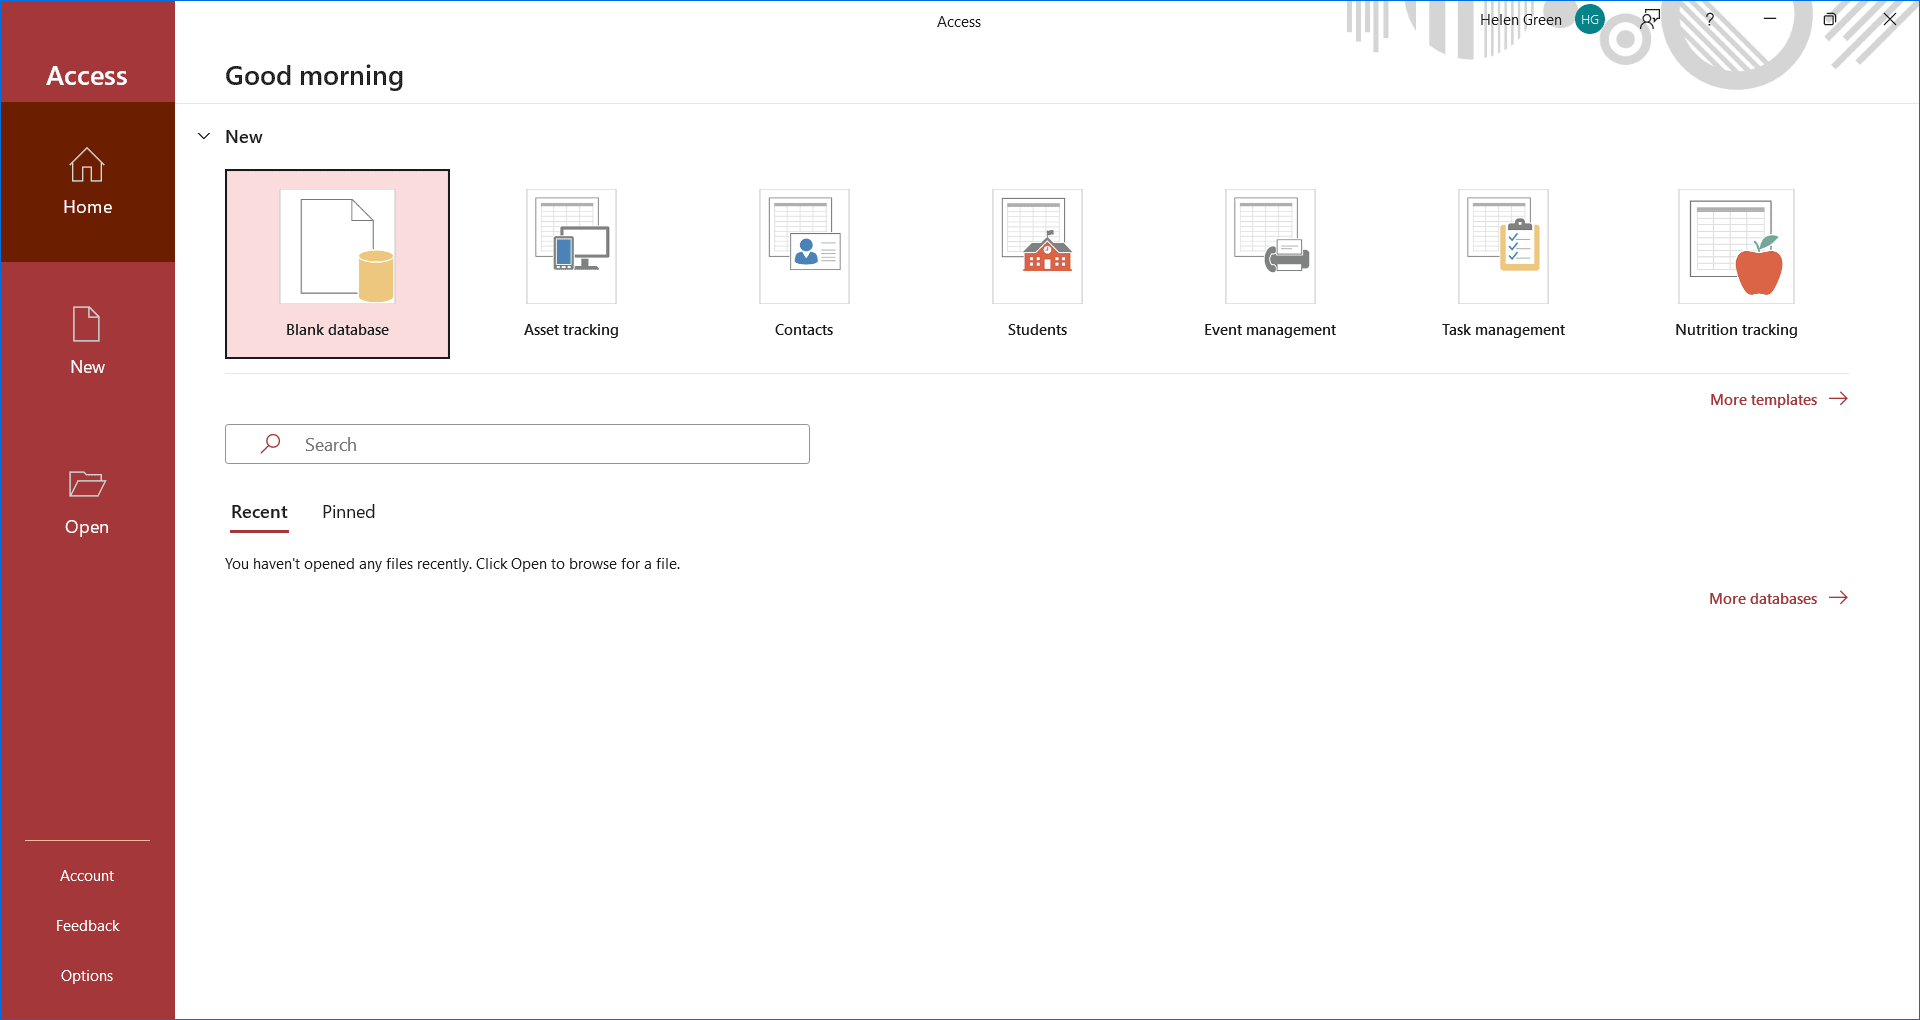
Step 8: Launch Microsoft Access on Mac
With Microsoft Access now installed on your Mac, you’re just a few clicks away from accessing and using the software. In this final step, we will guide you on how to launch Microsoft Access and get started with your database management tasks.
Follow these steps to launch Microsoft Access on your Mac:
- Locate the Microsoft Access app icon in your Applications folder or on your desktop.
- Double-click on the Microsoft Access icon to launch the software. Alternatively, you can also use the Launchpad or Spotlight search to find and open Microsoft Access.
- After launching Access, you may be prompted to sign in to your Microsoft Account. Enter your email address and password associated with your Access license or Office subscription.
- If you have multiple Microsoft Accounts, make sure to select the correct account that is linked to your Access license.
- Once signed in, you will be greeted with the Microsoft Access interface, ready for you to start working on your databases.
Microsoft Access provides a user-friendly interface that allows you to create, edit, and manage your databases with ease. You can create new databases from scratch, import external data, design tables, create relationships, build queries, and generate reports.
Take some time to explore the various options and features within Access to become familiar with its capabilities. For beginners, it may be helpful to refer to official Microsoft Access documentation or online tutorials for guidance on specific tasks and features.
As you start using Microsoft Access, remember to regularly save your work to prevent data loss. Access provides options to save your databases in multiple file formats, including the default “.accdb” format.
Now that you have successfully launched Microsoft Access on your Mac, you can start creating and managing your databases efficiently. Take advantage of the powerful tools and functionalities provided by Access to organize and analyze your data effectively.
Congratulations on successfully launching Microsoft Access on your Mac! Enjoy working with your databases!
This concludes the step-by-step guide on how to download and install Microsoft Access on your Mac. We hope this guide has been helpful in assisting you throughout the installation process. Should you have any questions or encounter any issues, do not hesitate to seek further assistance from official Microsoft support channels or online communities dedicated to Microsoft Access.
Conclusion
Congratulations on successfully downloading and installing Microsoft Access on your Mac! You have now embarked on a journey to efficiently manage and analyze your data using this powerful database management system.
In this guide, we have walked you through the step-by-step process, from checking system requirements to launching Microsoft Access on your Mac. By following these instructions, you have ensured a smooth and successful installation of Access.
Remember that Microsoft Access offers a wide range of features and capabilities to help you organize and manipulate your data effectively. Take some time to explore the various options available within Access to make the most out of this powerful tool.
Whether you are a business professional, a student, or simply an individual seeking to manage your personal data, Microsoft Access provides you with the tools to create customized databases, generate insightful reports, and streamline your data management processes.
It is essential to keep your Microsoft Access up to date by regularly installing updates and patches released by Microsoft. These updates not only enhance the functionality of Access but also offer security improvements to protect your data.
If you encounter any challenges or have additional questions, refer to the official Microsoft support documentation or seek assistance from the Microsoft support team. Additionally, there are numerous online communities and forums where you can connect with other users who may have experienced similar situations.
We hope this guide has been helpful in your journey to download and install Microsoft Access on your Mac. Enjoy exploring the vast possibilities that Access provides, and may it simplify your data management tasks and ensure a more organized and efficient workflow.
Happy Accessing!