Introduction
Having the ability to access and download your iMessages on your Mac can be incredibly convenient. Whether you want to keep a backup of your messages or simply want to view and respond to them on a larger screen, this feature can enhance your overall messaging experience.
In this article, we will guide you through the step-by-step process of downloading iMessages on your Mac. By following these instructions, you will be able to seamlessly sync and access your iMessages across your iPhone and Mac, ensuring that you never miss a beat in your conversations.
Before we begin, it’s important to note that in order to download iMessages on your Mac, you will need to have the latest software updates installed on both your Mac and iPhone. Additionally, you will need to be signed in with the same Apple ID on both devices. With these prerequisites in place, let’s dive into the step-by-step instructions.
Step 1: Make sure your Mac and iPhone are connected
Before you can start downloading iMessages on your Mac, it’s crucial to ensure that your Mac and iPhone are connected to each other. This connection allows for seamless synchronization between the two devices, enabling you to access and download your iMessages on your Mac.
To check if your Mac and iPhone are connected, follow these steps:
- On your Mac, go to the Apple menu in the top-left corner and select “System Preferences.”
- In the System Preferences window, click on “General.”
- Ensure that the option “Allow Handoff between this Mac and your iCloud devices” is enabled.
Once you have confirmed that Handoff is enabled on your Mac, you need to check your iPhone to ensure that it is connected as well. Here’s how to do it:
- On your iPhone, go to “Settings.”
- Tap on your name at the top of the settings menu to access your Apple ID settings.
- Scroll down and select “Find My” and then “Find My iPhone.”
- Make sure that the “Send Last Location” option is turned on.
By ensuring that both your Mac and iPhone have the appropriate settings enabled, you establish a connection that allows for the seamless transfer of iMessages between the two devices. This connection is essential for the next steps in the process of downloading iMessages on your Mac.
Step 2: Enable Messages on iCloud on your iPhone
To enable Messages on iCloud on your iPhone, follow the steps below:
- Open the Settings app on your iPhone.
- Tap on your name at the top of the screen to access your Apple ID settings.
- Select “iCloud” from the list of options.
- Scroll down and locate the “Messages” option.
- Toggle the switch next to “Messages” to enable Messages on iCloud.
Enabling Messages on iCloud ensures that your iMessages are securely stored in iCloud, making them accessible across all your Apple devices, including your Mac. This synchronization allows you to download and view your iMessages on your Mac without any hassle.
Once you’ve enabled Messages on iCloud on your iPhone, you’re one step closer to downloading your iMessages on your Mac. The next step is to sign in with your Apple ID on your Mac, which we will guide you through in the following section.
Step 3: Sign in with your Apple ID on your Mac
Signing in with your Apple ID on your Mac is an essential step in the process of downloading iMessages. Here’s how you can do it:
- Open the Messages app on your Mac. You can find it in the Applications folder or by using Spotlight search.
- In the top menu bar, click on “Messages” and then select “Preferences.”
- In the Preferences window, click on the “Accounts” tab.
- Click on the “+” button at the bottom left corner to add a new account.
- Select “iMessage” as the account type.
- Enter your Apple ID and password in the respective fields.
- Click on the “Sign In” button to sign in with your Apple ID.
- If prompted, enter the two-factor authentication code to verify your identity.
Once you have successfully signed in with your Apple ID, your Messages app on your Mac will be synced with your iCloud account. This means that any iMessages you send or receive will be accessible across your devices, including your iPhone and Mac.
By signing in with your Apple ID on your Mac, you establish a secure connection to your iMessage account, allowing for seamless integration with your iPhone and iCloud. Now, let’s move on to the next step, where you’ll enable Messages to sync with iCloud on your Mac.
Step 4: Allow Messages to sync with iCloud on your Mac
To enable syncing of Messages with iCloud on your Mac, follow these steps:
- Open the Messages app on your Mac.
- In the top menu bar, click on “Messages” and select “Preferences.”
- In the Preferences window, click on the “Accounts” tab.
- Make sure your iCloud account is selected in the left-hand sidebar.
- Check the box next to “Enable Messages in iCloud.”
- Note: If the “Enable Messages in iCloud” option is already checked, you don’t need to make any changes. Your Messages app on your Mac is already syncing with iCloud.
Enabling Messages to sync with iCloud ensures that your iMessages are updated in real-time across all your Apple devices. This means that any new messages or conversations on your iPhone will seamlessly appear on your Mac, and vice versa.
By allowing Messages to sync with iCloud on your Mac, you ensure that your iMessages are securely backed up and easily accessible whenever you need them. Now that your Messages app is synced with iCloud, let’s move on to the next step where you’ll learn how to access your iMessages on your Mac.
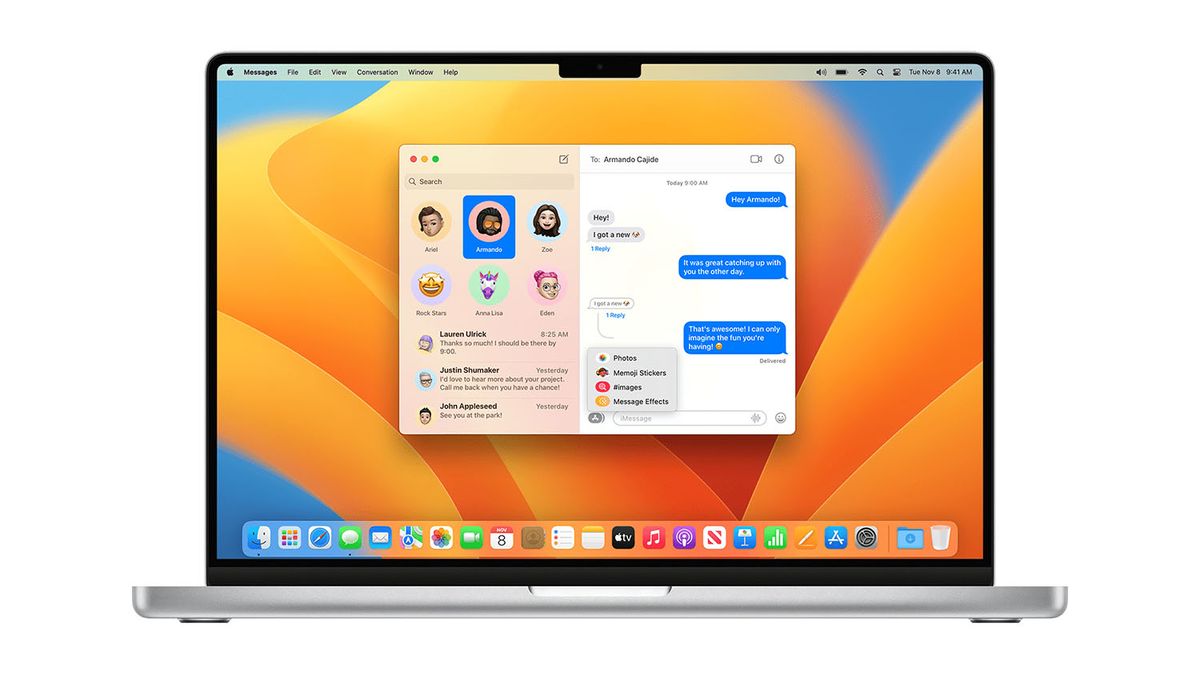
Step 5: Access your iMessages on your Mac
Now that you have set up the necessary sync and authentication settings, you can easily access your iMessages on your Mac. Follow these simple steps:
- Open the Messages app on your Mac.
- You should see all your iMessages conversations listed on the left-hand side of the app, similar to how they appear on your iPhone.
- Click on a conversation to view the entire chat history.
- You can now read, reply to, and send new iMessages directly from your Mac.
By accessing your iMessages on your Mac, you can take advantage of the larger screen and keyboard to type out your messages more comfortably. The syncing of messages between your iPhone and Mac ensures that your conversations are always up to date, regardless of the device you’re using.
Additionally, all the attachments, such as photos, videos, and documents, that are shared through iMessages will also be available to you on your Mac. This integration makes it convenient to view and download any files sent or received through your iMessage conversations.
Now that you’re able to access and interact with your iMessages on your Mac, let’s move on to the final step, where you’ll learn how to download iMessage attachments directly to your Mac.
Step 6: Download iMessage attachments on your Mac
Downloading iMessage attachments on your Mac is a seamless process that allows you to save and access multimedia files directly on your computer. Follow these steps to download iMessage attachments:
- Open the Messages app on your Mac.
- Choose the conversation that contains the iMessage attachment you want to download.
- Click on the attachment within the conversation.
- If it’s an image or document, it will open in a preview window. To download it, click on the download icon in the preview window or right-click on the attachment and select “Save Image” or “Save File.”
- If the attachment is a video, it will play within the Messages app. Right-click on the video and select “Save Video As” or simply drag and drop the video onto your desktop or desired folder.
By downloading iMessage attachments on your Mac, you can easily save and organize multimedia files received through messages. This feature allows for more convenient access, especially if you need to edit or share these files using other applications or platforms.
Remember, the downloaded iMessage attachments are stored on your Mac’s local storage. It’s a good practice to organize and backup these files regularly to avoid clutter and prevent potential data loss.
With the ability to download iMessage attachments directly on your Mac, you have complete control over your multimedia files shared through your iMessage conversations. You can easily access them offline, edit them, or share them with others, all within the comfort of your Mac’s interface.
Conclusion
Congratulations! You have successfully learned how to download iMessages on your Mac. By following the step-by-step instructions outlined in this article, you can now seamlessly sync your iMessages across your iPhone and Mac, ensuring that you never miss a conversation or important attachment.
Accessing and managing your iMessages on your Mac offers a more convenient and efficient way to communicate, especially when you prefer the larger screen and keyboard of your computer. The ability to download iMessage attachments directly onto your Mac gives you greater control and flexibility over your multimedia files.
Remember to keep your devices connected, enable Messages on iCloud, sign in with your Apple ID, and allow Messages to sync with iCloud to ensure a smooth experience. Regularly organizing and backing up downloaded iMessage attachments on your Mac will help you stay organized and protect your valuable files.
Downloading iMessages on your Mac is just one of the many features that Apple provides to enhance your messaging experience. As technology continues to advance, it’s exciting to see how we can seamlessly connect and communicate across our devices, making our digital lives more integrated and intuitive.
So go ahead and enjoy the convenience and flexibility that downloading iMessages on your Mac brings. Stay connected, stay productive, and make the most out of your Apple ecosystem.