Knowing how to annotate on Zoom is a minor skill that may come in handy during your Zoom meetings. The annotation marker allows you to add comments and questions on your screen during video meetings, to facilitate brainstorming and collaboration. Let’s take a closer look at this handy little feature and how you can use it to make your meetings more productive than ever.
What Does Annotation Mean?

An annotation is a small comment, note, or drawing that is placed next to a piece of text or presentation. Annotations normally provide additional information or context to a particular section of a presentation or text. For example, a student can write comments and questions about the different parts of a text on the sidelines of a textbook. Annotations provide viewers additional information on any information subject matter and help to provide context for much-needed discussion and decision-making.
Naturally, annotations are just a small part of what meetings are all about. Meetings should be more about verbal communication than anything, and it’s all about being able to voice your thoughts and listen to what others have to say. In that case, you may need a reliable pair of noise-canceling headphones or wireless headphones to be able to hear and be heard clearly.
How Does Zoom’s Annotation Feature Work?
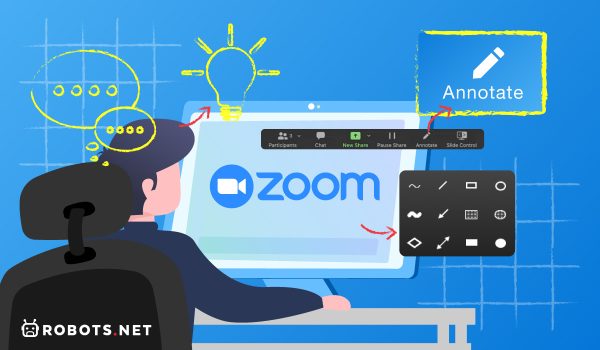
Zoom’ is a highly popular video conferencing platform, and it comes with its own set of annotation tools. However, these tools only become available when you use the Whiteboard feature or whenever you share your desktop/application screen. Once you’re on a whiteboard or sharing your screen through a desktop, many annotation tools will become available on your screen.
Additionally, since most meeting controls lie with the host, so too are the controls for annotation. Of course, this is not to say that the tools are exclusively accessible to the host. Attendees can also access annotation tools, but they can only do so with proper permissions from the host.
Additionally, we also need to note that the Whiteboard and desktop sharing features are only accessible via the desktop version of Zoom. In other words, you cannot annotate when you are presenting using the mobile version of the application.
How to Annotate Zoom Meetings for Productive Meetings
The ability to annotate text on the screen during Zoom meetings is very useful for situations when the topic is highly technical or entirely new to the audience. It’s also very useful when the topic requires a lot of discussion and decision-making. Having said this, you’re going to want to know how to pull up the annotation tools on Zoom, whether or not you are the assigned moderator or not. Here are the steps:
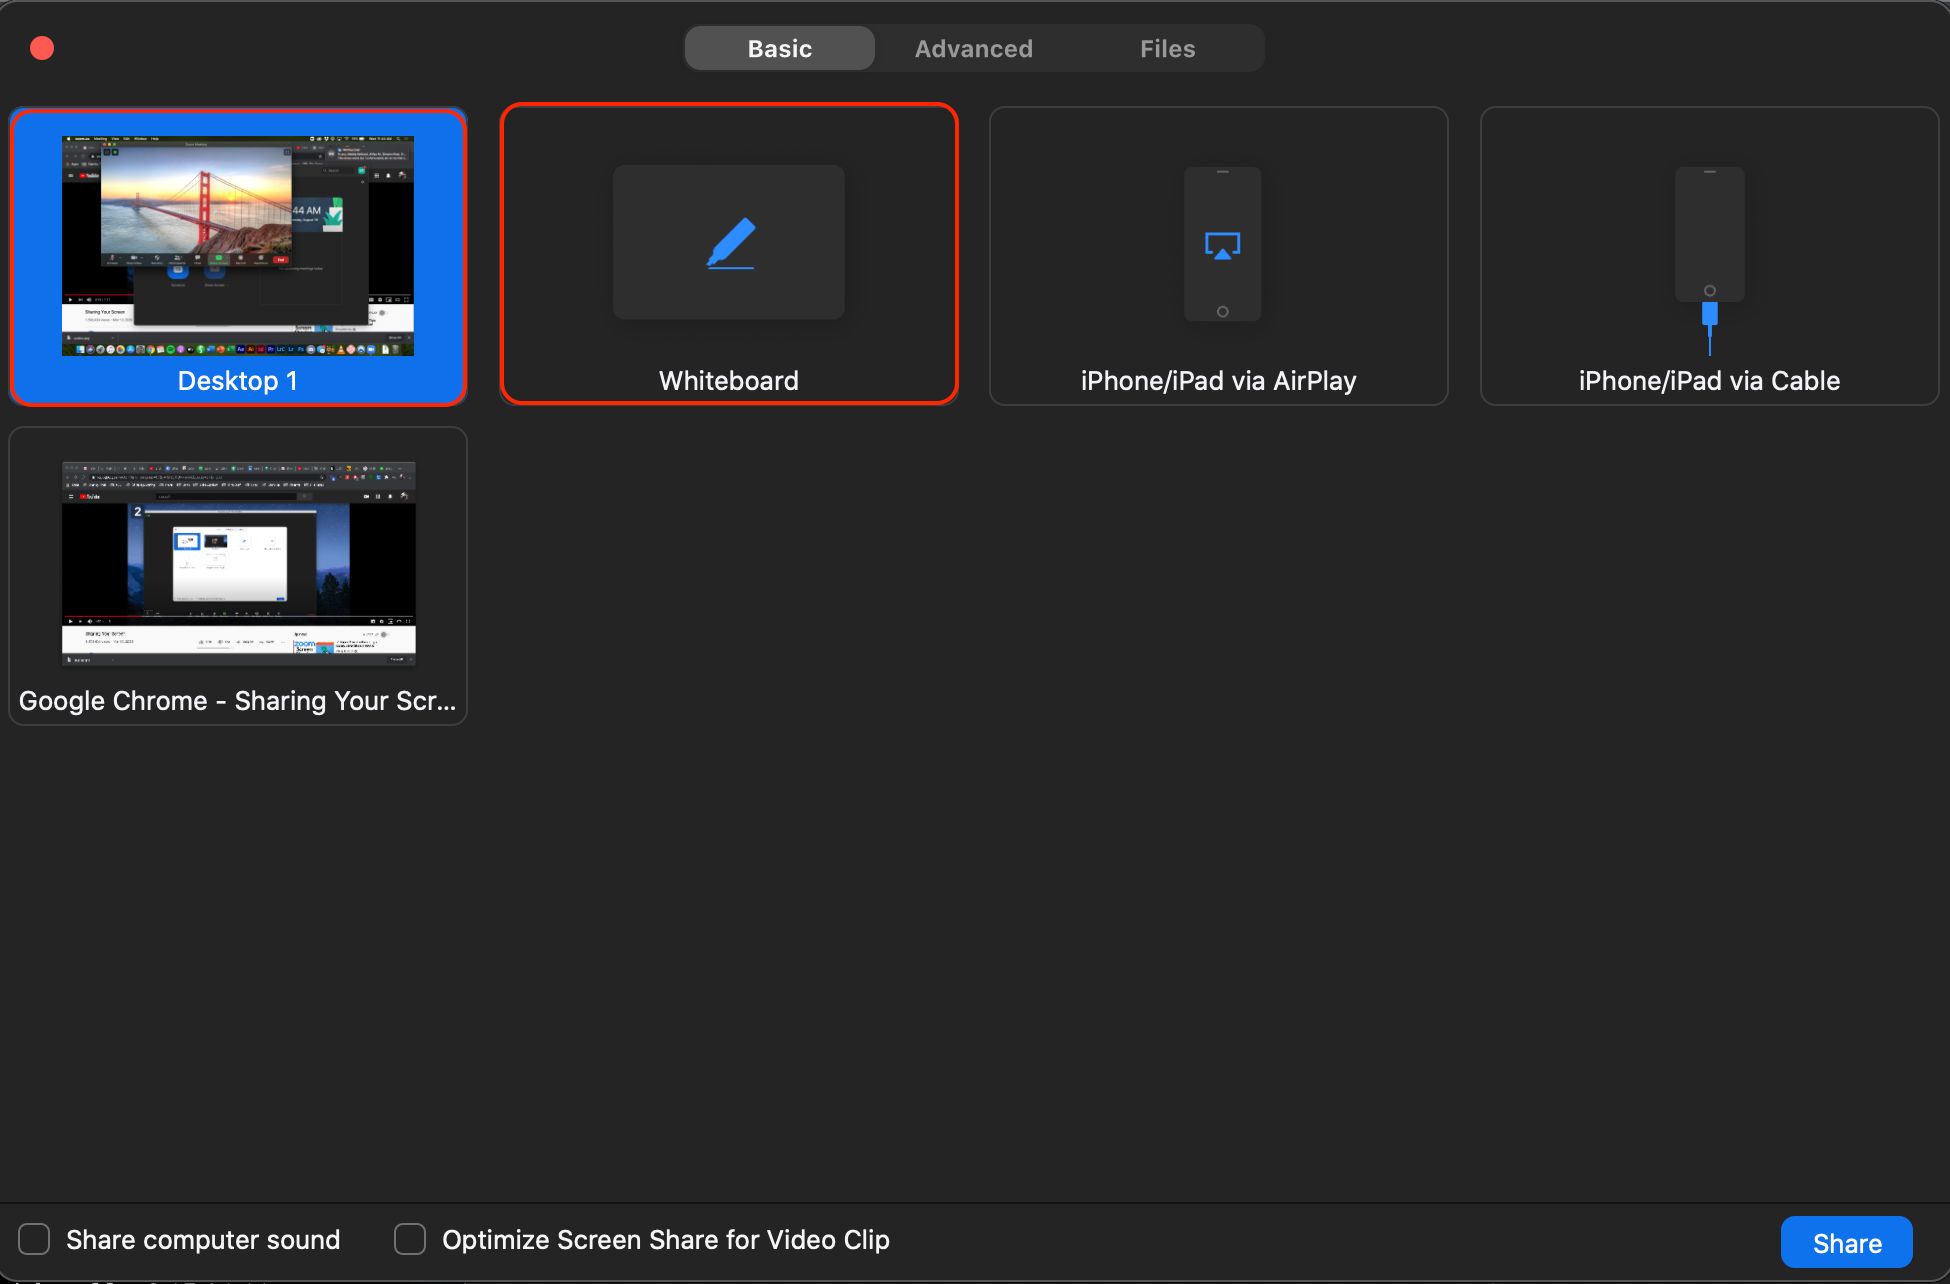
- Look for the “Share Screen” option from the toolkit at the bottom of the screen. If the share screen option doesn’t appear at the bottom of the screen, you may be able to find it through the “More” menu.
- The tab will present you with several options for the presentation of your screen. You need to select one and click on the “Share” button afterward. Note that choosing select windows will only display pre-selected windows with your participants. You’ll know that your screen is being shared when you see a green bar on top.
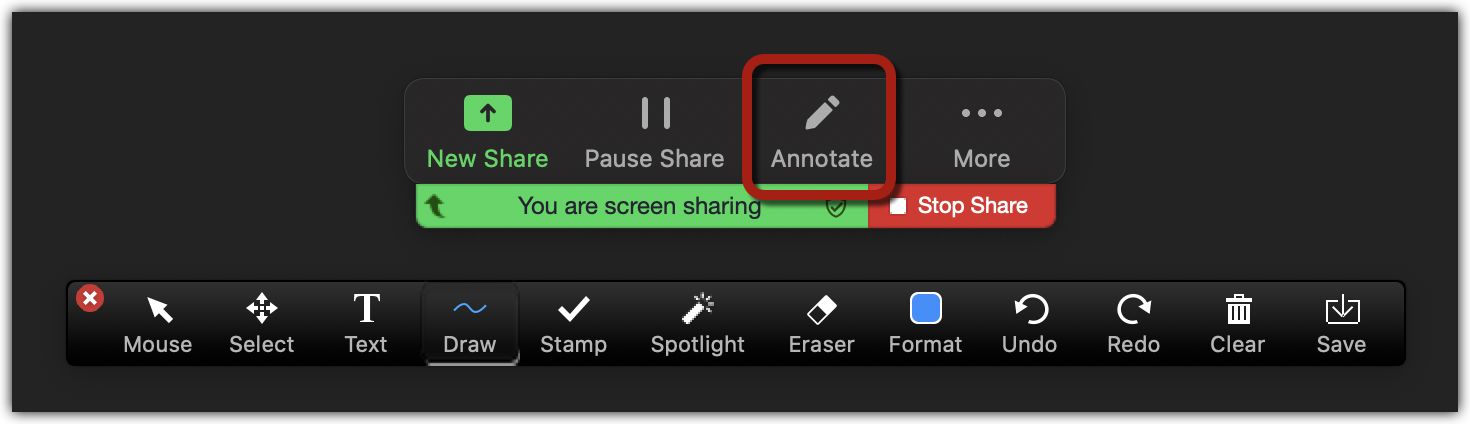
- Look for and select the “Annotate” button at the top of the screen to look for the annotation bar. These controls are automatically displayed when you choose the Whiteboard option.
- If you want to annotate the work of another presenter, you can do so by selecting “View Options” followed by “Annotate” from the top section of the page. The annotation bar will offer you a variety of tools to help you get the job done.
- Once the presentation or meeting is over, click on the “Stop Share” option at the top of the screen.
How to Enable/Disable Annotation for Other Participants

Earlier, we’ve mentioned that only the host can control permissions for the majority of in-meeting tools, including annotation. Giving other members the ability to annotate allows them to point out sections of the presentation they wish to discuss/clarify. In this way, it encourages participation and collaboration among the team members. Here is how you can go about letting other members in on the annotation toolkit:
- While screen sharing mode, select “More” from the floating meeting control panel.
- A menu will pop up, and from there, you can choose to either enable or disable annotation for others. You can also choose to either hide or show the individual annotators for that particular presentation.
- For Android and IOS apps, you’ll find the same options under the “Content Share” tab. This is provided you are currently sharing your screen. Click on the “More” tab followed by “Meeting Settings” under “Content Share.”
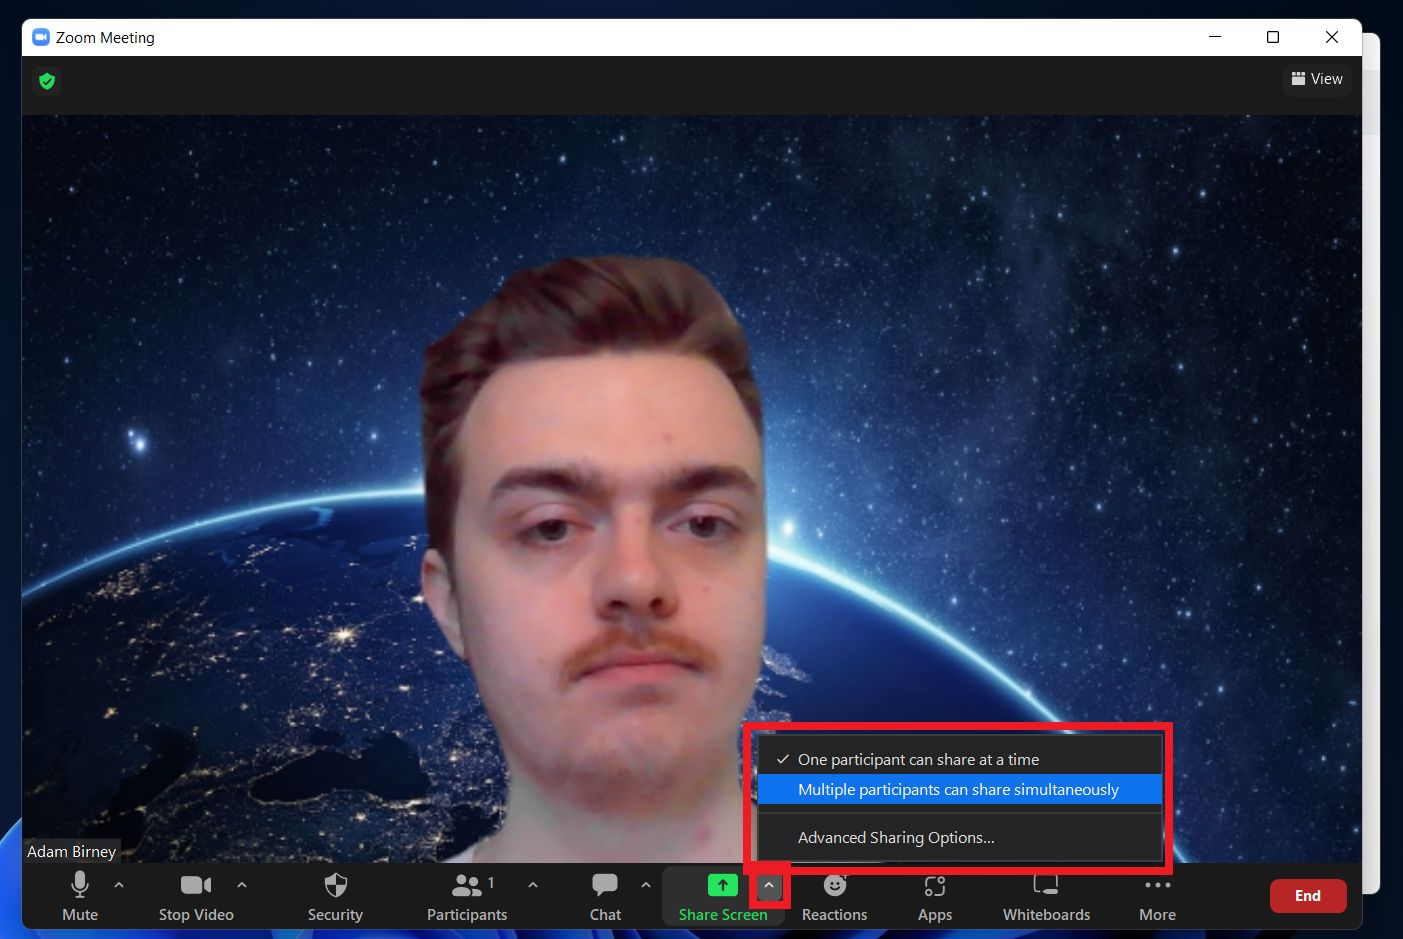
- Take note that the platform gives the host the right to prevent other participants from sharing their screens, to keep the meeting organized.
How to Record and Annotate Meetings with Jumpshare

While Zoom has in-app controls for recording meetings, you can use a screen recorder software like Jumpshare to record and annotate a meeting in progress before sharing. That is, you can record a snippet of the meeting and add annotations via Jumpshare. As an alternative, you can turn to a webcam recording software to record your meeting, though you would have to annotate using Zoom. Afterward, you can already share the files via cloud or email to other people for virtual collaboration.
Here is how you can go about exactly that:
- Open the Jumpshare window by clicking on the Jumpshare icon.
- Click on the “Record” icon. You may also click on the following to start recording: Alt+Shift+2 in Windows and Cmd+Shift+6 on Mac.
- Manipulate the recorder window to capture the exact section of the feed that you want. Once you’re all set, click on the “Record” button to start recording.
- Once the recording starts, click on the “Draw” button at the bottom of the screen. This will allow you to draw over the recording screen in real-time, switching between a selection of colors on the fly. Once you hit “Done,” the screen will be cleared of all annotations.
- Once you’re done, click on the “Finish” button, and you’re all set.
How to Annotate on Zoom for Productive Meetings: Final Thoughts

The annotation marker is one of the more practical tools on Zoom. Or at least, next to the share screen and recording functions on the platform. Using annotations during meetings makes it easy for your audience to understand the information that you are trying to relay. It also helps you hold the attention of your easily-distracted audience from start to finish.
It allows you to present creatively using visual and verbal cues to help get the message through. Surely, the combination of sharing, annotating, and recording your screen should be enough to add that human touch to all of your collaborative efforts online.
If you want to explore your possibilities with other video streaming services, here is a list of the best Zoom alternatives.