Introduction
In today’s digital age, online communication has become a crucial aspect of our personal and professional lives. One platform that has gained immense popularity is Zoom – a video conferencing tool that allows people to connect and collaborate remotely. Whether you’re attending a virtual meeting, participating in an online class, or catching up with friends and family, Zoom offers a seamless and convenient way to communicate face-to-face.
While Zoom provides a range of features to enhance your online experience, one common requirement is the need to capture screenshots during a Zoom session. Whether you want to save important information, document a presentation, or capture a memorable moment, taking screenshots on Zoom can be a valuable tool.
In this article, we will explore various methods to screenshot on Zoom and provide useful tips to ensure you capture clear and high-quality screenshots. Whether you’re using the Zoom desktop app or the web browser version, we’ve got you covered. So, let’s dive in and discover the different ways you can take screenshots on Zoom!
How to Screenshot on Zoom
When it comes to taking screenshots on Zoom, you have multiple options available. Whether you prefer using the Zoom toolbar, keyboard shortcuts, or third-party screen capture tools, you can easily capture the content on your screen during a Zoom session. Let’s explore these methods in detail:
Method 1: Using the Zoom Toolbar
The Zoom toolbar offers a built-in feature that allows you to take screenshots directly within the Zoom application. Here’s how:
- During a Zoom session, navigate to the bottom of the screen to locate the toolbar.
- Click on the “More” button (represented by three dots) to expand the toolbar menu.
- From the expanded menu, select “Save Chat” to capture the chat window, or choose “Suspend Participant Activities” to freeze the screen and capture the entire session.
- A dialog box will appear, prompting you to choose a location on your computer to save the screenshot.
- Select your desired location, and click on the “Save” button to save the screenshot.
Method 2: Using Keyboard Shortcuts
If you’re more comfortable with using keyboard shortcuts, Zoom provides a convenient set of key combinations to take screenshots:
- To capture the entire screen, press the “Alt+PrtScn” keys (Windows) or “Command+Shift+3” keys (Mac).
- If you only want to capture the active Zoom window, press the “Alt+PrtScn” keys (Windows) or “Command+Shift+4” keys (Mac). Your cursor will change to a crosshair, allowing you to select the desired Zoom window to capture.
Method 3: Using Third-Party Screen Capture Tools
If you prefer more advanced screen capture options, you can use third-party tools specifically designed for capturing screenshots. These tools offer additional features such as annotation, editing, and sharing options. Some popular third-party screen capture tools include Snagit, Greenshot, and Lightshot.
Remember, regardless of the method you choose, it’s essential to respect privacy and copyright guidelines when capturing screenshots on Zoom. Always ensure that you have the necessary permissions to capture and share sensitive information.
Method 1: Using the Zoom Toolbar
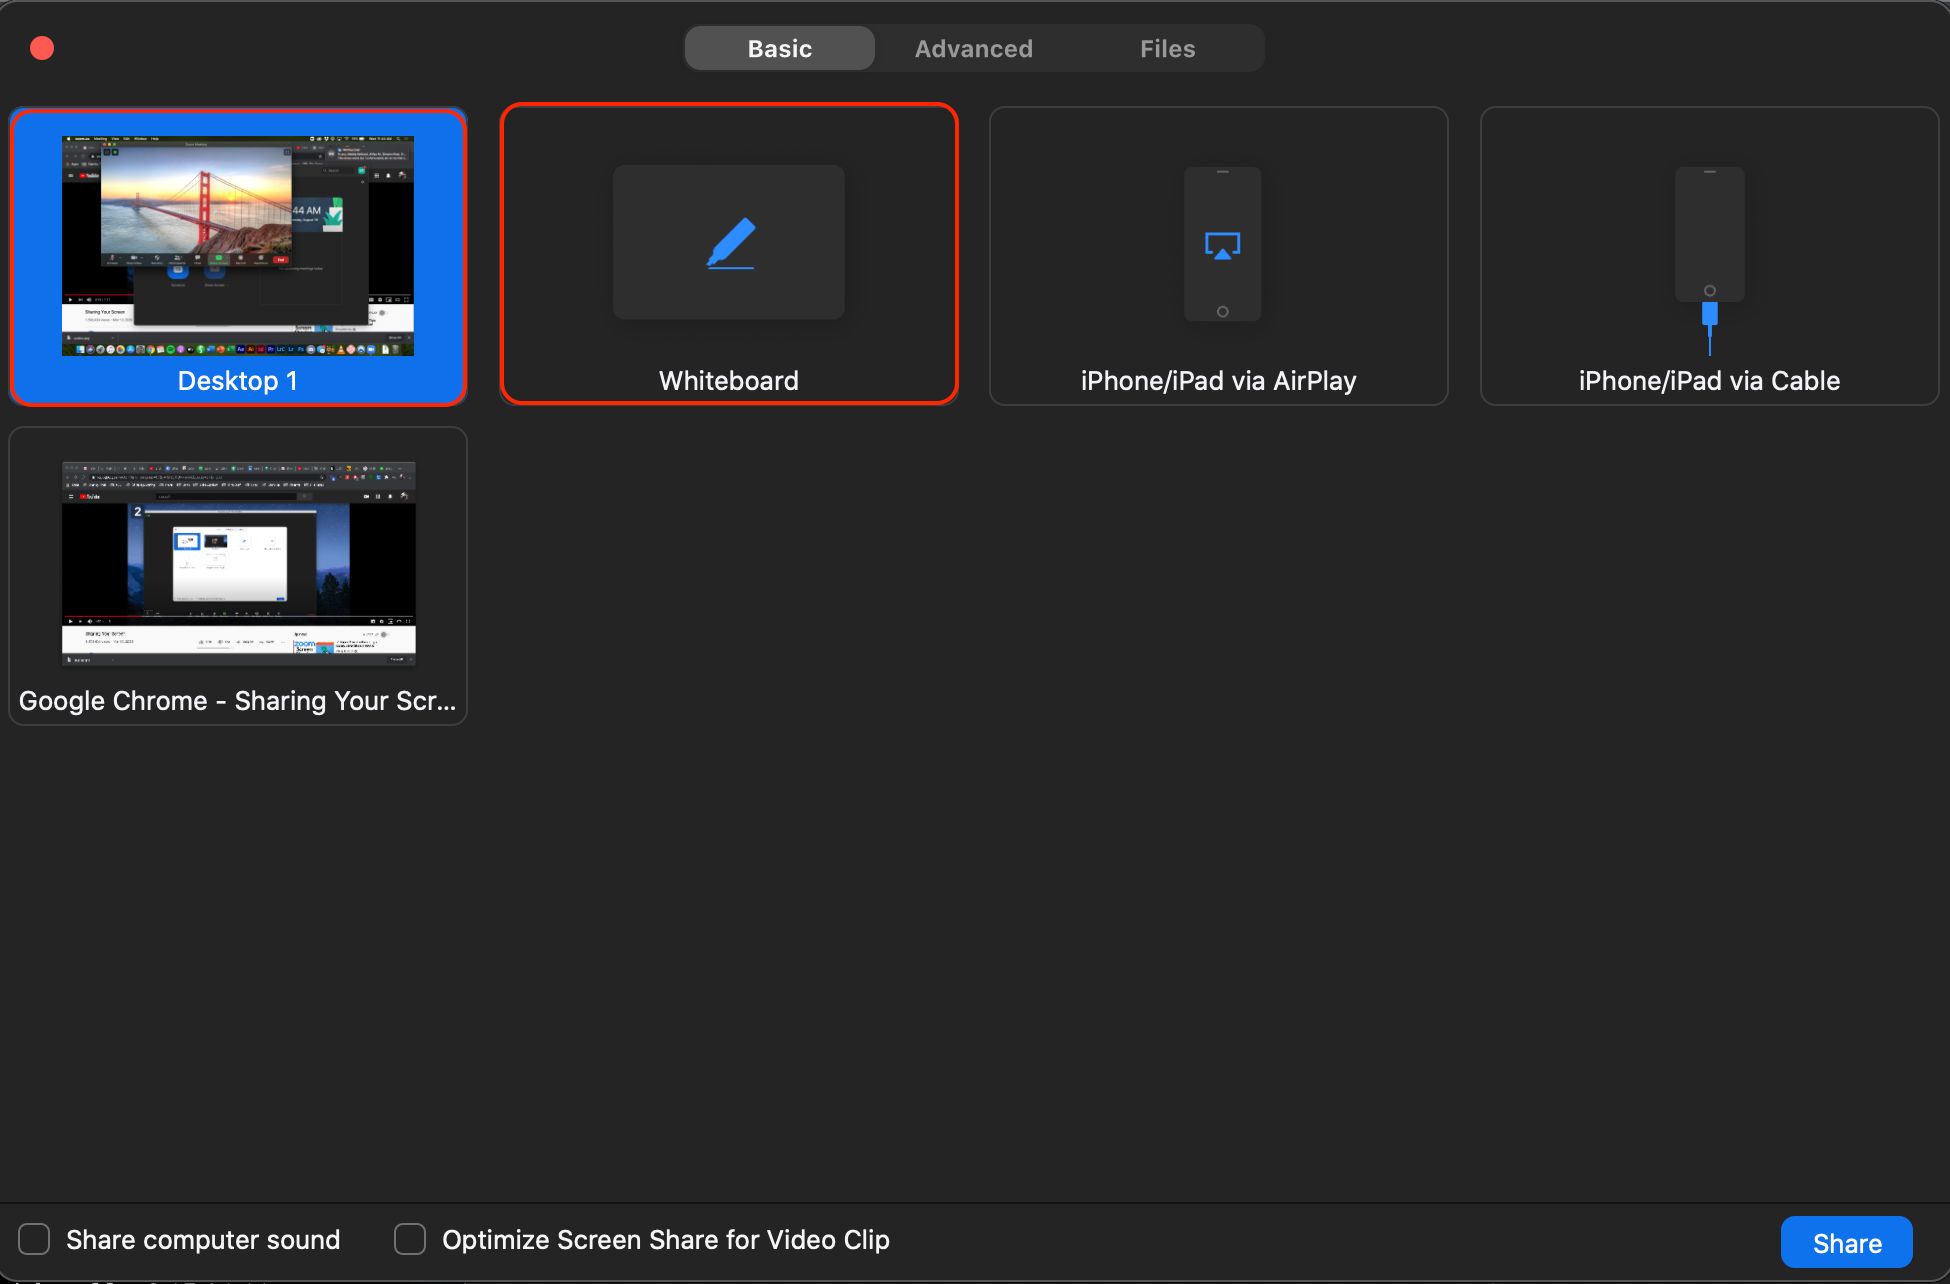
One of the simplest ways to take screenshots on Zoom is by utilizing the built-in screenshot feature available in the Zoom toolbar. The Zoom toolbar provides easy access to various tools and options, including the ability to capture screenshots during a session. Here’s how you can use the Zoom toolbar to take screenshots:
- Start by joining or hosting a Zoom meeting or session.
- Once you are in the Zoom session, locate the toolbar at the bottom of the screen.
- At the right end of the toolbar, you will find the “More” button, represented by three dots. Click on this button to expand the toolbar menu.
- From the expanded menu options, select “Save Chat”. This will capture the chat window and save it as a screenshot.
- If you want to capture the entire session and freeze the screen, select “Suspend Participant Activities” from the menu. This will capture the entire screen during the session.
- After selecting the desired option, a dialog box will appear, allowing you to choose the location on your computer to save the screenshot.
- Once you’ve selected the location, click on the “Save” button to save the screenshot.
By using the Zoom toolbar, you can easily capture important information, messages, or discussions that occur during a Zoom session. Saving the chat or capturing the entire session can be useful for reference purposes, sharing information, or reviewing discussions at a later time.
However, keep in mind that the availability of the screenshot option in the Zoom toolbar might depend on the version and settings of your Zoom application. If you don’t see the screenshot options in the toolbar, you can try using alternative methods such as keyboard shortcuts or third-party screen capture tools.
Method 2: Using Keyboard Shortcuts
If you prefer using keyboard shortcuts for a quick and effortless way to take screenshots on Zoom, you’re in luck. Zoom provides convenient keyboard shortcuts that allow you to capture screenshots with a few simple key commands. Here’s how you can use keyboard shortcuts to take screenshots on Zoom:
- To capture the entire screen during a Zoom session, press the “Alt+PrtScn” keys on Windows or the “Command+Shift+3” keys on a Mac.
- If you want to capture only the active Zoom window and not the entire screen, press the “Alt+PrtScn” keys on Windows or the “Command+Shift+4” keys on a Mac.
- When you use these keyboard shortcuts, the screenshot will be automatically saved to your computer’s clipboard.
After capturing the screenshot using the keyboard shortcuts, you can open an image editing software or a word processing application, such as Microsoft Paint or Microsoft Word, and paste the screenshot from the clipboard using the “Ctrl+V” keys on Windows or the “Command+V” keys on a Mac. This way, you can further edit or save the screenshot as per your requirements.
Using keyboard shortcuts for screenshots on Zoom offers a quick and efficient way to capture specific moments or content during a Zoom session. The ability to capture the entire screen or a specific window provides flexibility, allowing you to focus on the desired area and exclude unnecessary elements.
However, it’s important to note that the availability of these keyboard shortcuts may vary depending on the operating system and software version you are using. It’s recommended to check the Zoom settings or consult the official Zoom documentation for the most up-to-date information on keyboard shortcuts.
Method 3: Using Third-Party Screen Capture Tools
If you’re looking for more advanced screen capture options and additional features, using third-party screen capture tools can be a great solution when taking screenshots on Zoom. These tools offer a wide range of functionalities, such as annotation, editing, and sharing options, allowing you to customize your screenshots according to your needs. Here are some popular third-party screen capture tools that you can use:
1. Snagit: Snagit is a powerful screen capture and image editing software that provides a comprehensive set of features for capturing, annotating, and sharing screenshots. With Snagit, you can capture screenshots of specific windows, regions, or the entire screen during a Zoom session. It also offers handy tools to add text, arrows, and shapes to annotate your screenshots before saving or sharing them.
2. Greenshot: Greenshot is a lightweight yet feature-rich screen capture tool that is free to use. It allows you to capture screenshots of a specific region, window, or the entire screen. Additionally, Greenshot offers basic annotation features, such as adding text and shapes, to highlight specific areas of your screenshots. It supports various image formats, making it easy to save and share your captured screenshots.
3. Lightshot: Lightshot is a user-friendly screen capture tool available for both Windows and Mac platforms. It enables you to capture screenshots of selected areas, full screens, or specific windows. Lightshot also offers basic editing capabilities, such as adding text and arrows, to enhance your screenshots. Moreover, it allows you to instantly share your screenshots via social media or cloud storage services.
These are just a few examples of third-party screen capture tools, but there are many others available, each with its own unique features and functionalities. You can explore different options and choose the one that best suits your requirements and preferences.
Using third-party screen capture tools can provide you with more control and flexibility when taking screenshots on Zoom. These tools often offer advanced editing options, allowing you to enhance and personalize your screenshots before saving or sharing them with others.
Remember to download and install these third-party tools from reputable sources to ensure the safety and security of your computer. Additionally, familiarize yourself with their functionality and features to make the most out of the screen capture experience.
Tips for Taking Clear Screenshots on Zoom
When taking screenshots on Zoom, it’s essential to ensure that your screenshots are clear, legible, and effectively capture the desired content. Here are some tips to help you capture high-quality screenshots during your Zoom sessions:
1. Choose a well-lit environment: Good lighting plays a crucial role in capturing clear screenshots. Try to position yourself in a well-lit area to minimize shadows and ensure that the content on your screen is visible and easy to read.
2. Optimize screen resolution: Set your screen resolution to the optimal settings to ensure that the captured screenshots are of the highest quality. Adjusting the resolution can help to improve the clarity and sharpness of the captured content.
3. Use a stable internet connection: A stable internet connection is essential to prevent blurriness or distortions in the screenshots. When capturing important information or visuals on Zoom, ensure that you have a reliable internet connection to avoid any disruptions during the screenshot process.
4. Frame the content carefully: Before taking a screenshot, make sure to frame the content you want to capture accurately. Zoom allows you to resize and reposition windows and participants’ videos on your screen. Arrange the content in a neat and organized manner to capture only the necessary information.
5. Crop or edit as needed: After capturing the screenshot, you can use image editing software or built-in editing tools to crop or adjust the image as necessary. This can help remove any unnecessary elements and focus on the relevant content.
6. Avoid excessive zooming: While Zoom offers the option to zoom in on specific content during a session, it’s advisable to avoid excessive zooming when taking screenshots. Zooming in too much can result in pixelation and loss of image quality, making the screenshot unclear and difficult to read.
7. Test different methods: Experiment with different methods, such as the Zoom toolbar, keyboard shortcuts, or third-party screen capture tools, to find the one that works best for you. Test each method to understand its functionalities and features, ensuring that you can capture screenshots efficiently and effectively during your Zoom sessions.
8. Respect privacy and permissions: Always obtain the necessary permissions and respect the privacy of participants when capturing screenshots during a Zoom session. Ensure that you have consent from all involved parties if you plan to share the screenshots externally.
By keeping these tips in mind, you can capture clear and high-quality screenshots on Zoom. Whether it’s for documentation, reference, or sharing information, clear screenshots will help you effectively communicate your message and capture important moments during your Zoom sessions.
Conclusion
Taking screenshots on Zoom is a valuable skill that allows you to capture important information, document presentations, and save memorable moments during your Zoom sessions. Whether you prefer using the Zoom toolbar, keyboard shortcuts, or third-party screen capture tools, you now have various methods at your disposal.
Using the Zoom toolbar provides a straightforward and convenient way to capture screenshots, while keyboard shortcuts offer quick and efficient options for capturing the entire screen or specific Zoom windows. Additionally, third-party screen capture tools give you more advanced features and customization options for creating and editing screenshots.
As you explore the different methods, it is essential to ensure that your screenshots are clear and of high quality. By following tips such as optimizing your screen resolution, choosing a well-lit environment, and framing the content carefully, you can capture screenshots that effectively convey the desired information.
Remember to respect privacy and obtain permission from all participants before capturing and sharing screenshots externally. It is crucial to maintain confidentiality and protect sensitive information during your Zoom sessions.
With the knowledge gained from this article, you are now equipped to confidently capture and save screenshots during your Zoom sessions. Whether you are attending virtual meetings, participating in online classes, or connecting with loved ones, the ability to capture screenshots on Zoom will enhance your communication and ensure that you can reference and share important information.