Introduction
Imagine this: you're in the middle of an intense gaming session, fully immersed in the virtual world, when suddenly, disaster strikes. Your game controller slips from your grip and lands in a puddle of water. Panic sets in as you frantically grab the drenched controller, wondering if it's destined for the electronic graveyard. But fear not, as there are steps you can take to potentially salvage your beloved gaming companion.
When a game controller gets wet, whether it's due to a spilled drink, a splash of water, or any other liquid mishap, swift action is crucial to prevent irreversible damage. Water and electronics are not the best of friends, but with the right approach, you may be able to rescue your controller from a watery demise. In this guide, we'll explore the signs of water damage, the steps to take if your game controller gets wet, methods to dry it out, and how to test it afterward. By following these guidelines, you can increase the chances of saving your game controller and getting back to your digital adventures in no time. So, let's dive into the world of wet game controllers and discover the potential solutions to this all-too-common gaming predicament.
Signs of Water Damage
When a game controller comes into contact with water, it’s essential to be vigilant for signs of water damage. These indicators can help you assess the extent of the potential harm and determine the necessary steps for remediation.
1. Unresponsive Buttons: One of the most common signs of water damage in a game controller is unresponsive buttons. If you notice that certain buttons are not registering inputs or feel sticky or sluggish, it could be an indication that water has infiltrated the internal components.
2. Erratic Behavior: A wet controller may exhibit erratic behavior, such as random button inputs, ghost movements, or sudden disconnections. These irregularities can disrupt your gaming experience and point to underlying water-related issues.
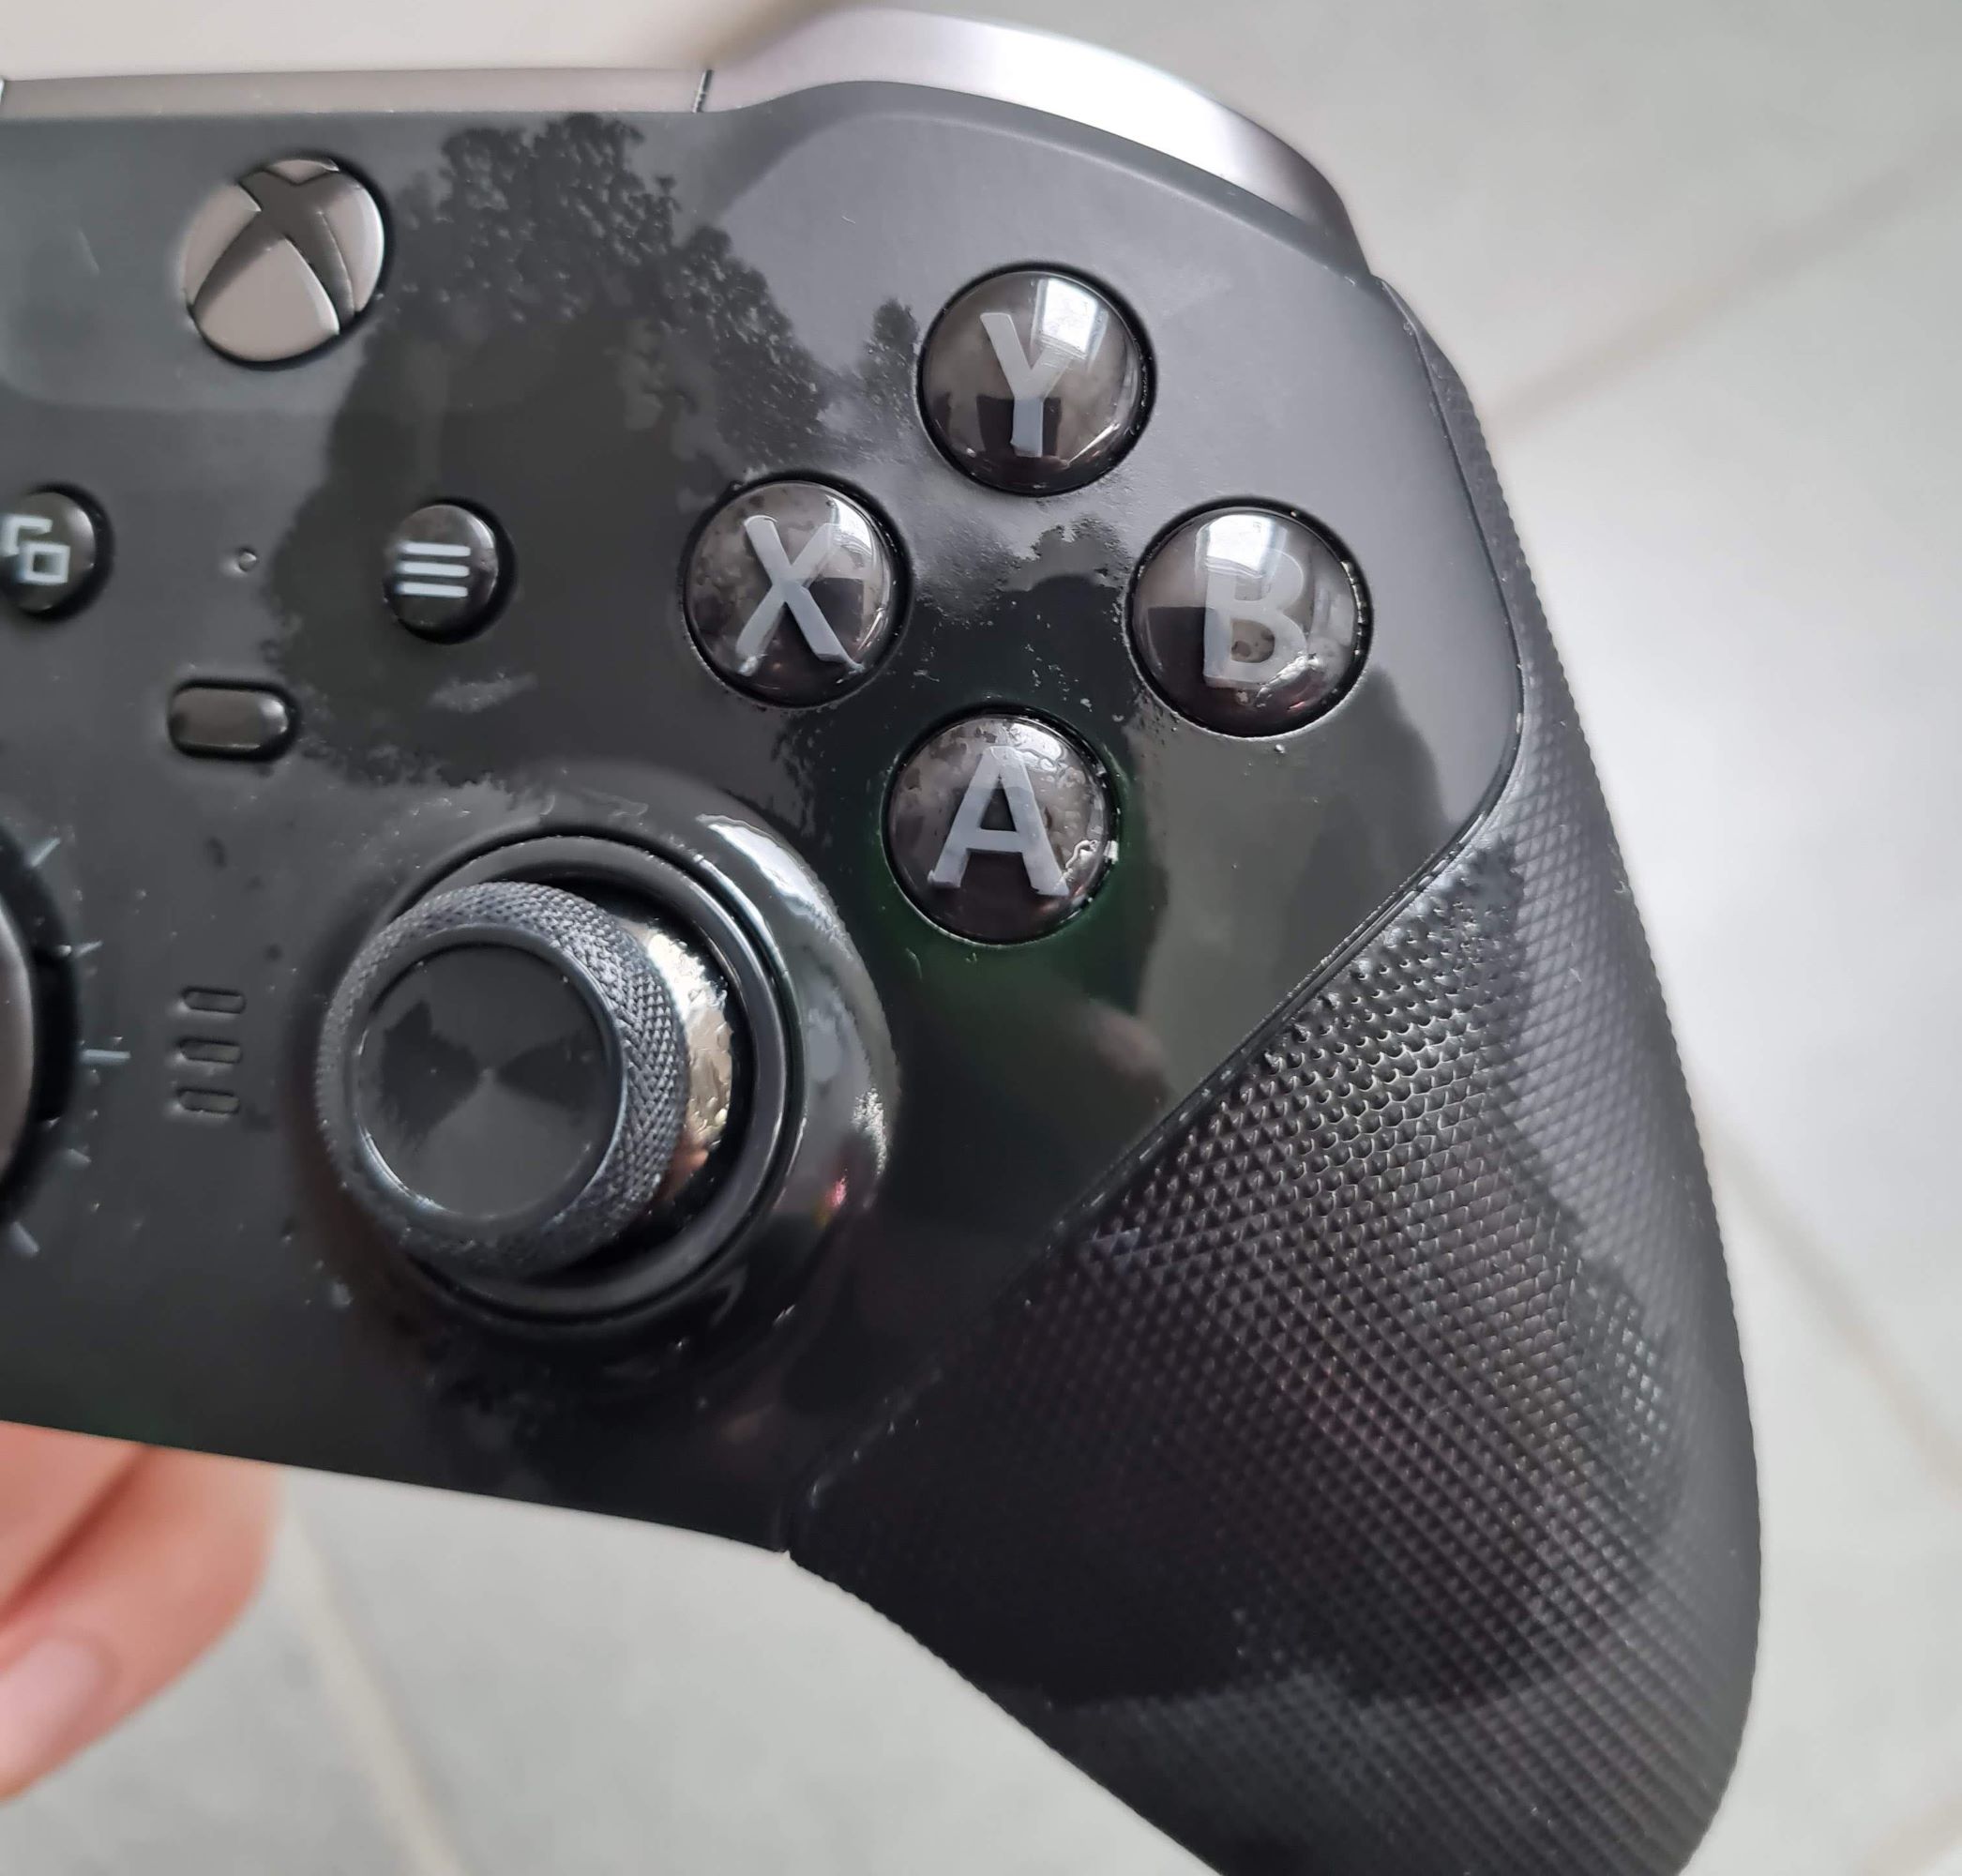
3. Visible Moisture: If water has seeped into the controller, you might observe visible moisture trapped beneath buttons, in crevices, or around the controller’s exterior. This is a clear sign that the device has been compromised by water and requires immediate attention.
4. Corrosion and Rust: Over time, water damage can lead to corrosion and rust on the internal circuitry and electronic components of the controller. Look for any signs of discoloration, especially around battery terminals or exposed metal contacts.
5. Electrical Malfunctions: Water can cause short circuits and electrical malfunctions within the controller, leading to issues such as intermittent connectivity, power failures, or complete unresponsiveness. These symptoms necessitate thorough inspection and remedial action.
Recognizing these signs of water damage is crucial in determining the appropriate course of action to mitigate further harm and restore the functionality of your game controller. By staying attentive to these indicators, you can address water-related issues promptly and improve the chances of salvaging your gaming device.
Steps to Take if Your Game Controller Gets Wet
When your game controller encounters moisture, swift and decisive action is key to preventing irreparable damage. Follow these essential steps to address the situation effectively:
1. Power Off and Disconnect: Immediately power off the game controller and disconnect it from any connected devices, such as gaming consoles or computers. This helps minimize the risk of short circuits and electrical damage.
2. Remove Batteries or Unplug: If your controller is powered by removable batteries, take them out promptly. For rechargeable controllers, disconnect them from the charging cable. This step is crucial to prevent electrical currents from exacerbating the water damage.
3. Dry Exterior: Use a clean, dry cloth to gently pat the exterior of the controller, absorbing any visible moisture. Avoid shaking or tilting the controller excessively, as this may cause water to penetrate further into the device.
4. Disassemble if Possible: If you’re comfortable with disassembling the controller and have experience with electronics, consider carefully opening the device to assess the extent of the water intrusion. Be mindful of warranty implications and seek professional assistance if uncertain.
5. Air Dry: Place the disassembled controller in a well-ventilated area, away from direct heat sources or sunlight. Allow the components to air dry naturally, ensuring that all moisture evaporates before reassembly and testing.
6. Avoid Heat: Refrain from using hairdryers, ovens, or other heat sources to expedite the drying process, as excessive heat can damage the controller’s internal components and exacerbate the water-related issues.
7. Silica Gel or Rice: If available, you can place the disassembled controller in a sealed container with silica gel packets or uncooked rice. These desiccants can help absorb residual moisture from the device.
By following these proactive steps, you can mitigate the immediate impact of water exposure on your game controller and set the stage for effective drying and potential restoration of functionality. Timely intervention and cautious handling are paramount in preserving the integrity of your gaming device.
Methods to Dry Out Your Game Controller
Effectively drying out a wet game controller is essential to prevent long-term damage and restore its functionality. Consider the following methods to facilitate thorough drying:
1. Air Drying: After disassembling the controller, place the components in a well-ventilated area. Ensure that the environment is dry and free from excessive humidity. Allow the controller parts to air dry naturally, as this method helps evaporate moisture without subjecting the device to potentially damaging heat sources.
2. Desiccants: Silica gel packets or uncooked rice can serve as desiccants to expedite the drying process. Place the disassembled controller and its components in a sealed container with the desiccants, which absorb residual moisture. However, it’s important to note that desiccants may not be as effective as air drying in removing moisture from intricate internal components.
3. Low Heat Setting: If your controller has been exposed to minimal moisture and you opt for a controlled drying method, you can use a low heat setting, such as a fan on low speed or a dehumidifier, to aid in the evaporation of moisture. Exercise caution to avoid exposing the controller to excessive heat, which can cause damage.
4. Professional Drying Services: In cases of severe water damage or if you’re uncertain about handling the drying process, consider seeking professional drying services. Experienced technicians can utilize specialized equipment and techniques to effectively dry the controller while minimizing the risk of further harm.
5. Patience: Regardless of the drying method employed, patience is paramount. Rushing the drying process can lead to incomplete evaporation of moisture, potentially exacerbating the damage. Allow the controller to dry thoroughly before reassembly and testing.
By employing these methods, you can facilitate the drying process and improve the prospects of salvaging your game controller. Careful consideration of the drying approach, coupled with patience and attentiveness, can contribute to the successful restoration of your gaming device.
Testing Your Game Controller After Drying
After the drying process, it’s crucial to methodically test your game controller to assess its functionality and ensure that it operates optimally. Follow these steps to conduct a comprehensive post-drying assessment:
1. Reassembly: Carefully reassemble the game controller after ensuring that all components are thoroughly dry. Exercise caution to avoid overlooking any intricate details or misaligning internal parts during reassembly.
2. Battery Reinsertion: If your controller operates on replaceable batteries, reinsert them after confirming that the interior of the controller is completely dry. For rechargeable controllers, reconnect them to the charging cable and allow them to attain a full charge before testing.
3. Button and Joystick Functionality: Test each button, trigger, and joystick on the controller to verify their responsiveness and smooth operation. Pay close attention to any residual stickiness or irregularities in button presses, as these may indicate lingering issues from the water exposure.
4. Connectivity: Reconnect the controller to your gaming console or computer and assess its connectivity. Ensure that the device pairs seamlessly and maintains a stable connection during operation. Look out for any intermittent disconnections or signal disruptions.
5. Function Testing: Engage in a brief gaming session to evaluate the overall performance of the controller. Verify its responsiveness, accuracy, and consistency during gameplay, taking note of any unexpected behavior or performance deviations.
6. Long-Term Monitoring: Even if the controller appears to function normally initially, it’s advisable to monitor its performance over an extended period. Keep an eye out for any latent issues that may manifest after the drying process, as certain problems may only become apparent during prolonged use.
By systematically testing your game controller after the drying process, you can gain valuable insights into its condition and functionality. Thorough testing enables you to identify any persisting issues and take appropriate measures to address them, ultimately ensuring the reliable operation of your gaming device.
Conclusion
Encountering a wet game controller can be a distressing experience for any gamer, but with prompt and methodical intervention, there’s a chance to salvage the device and restore its functionality. By recognizing the signs of water damage, promptly addressing the issue, and employing effective drying methods, you can increase the likelihood of rescuing your beloved gaming companion.
Swift action is paramount when a game controller gets wet. Powering off the device, disconnecting it from power sources, and carefully drying the controller are crucial initial steps. Patience and attentiveness during the drying process can significantly influence the outcome, as hasty measures may lead to further damage.
Testing the controller after drying is equally important, as it allows you to assess its responsiveness, connectivity, and overall performance. Thorough testing provides valuable insights into any lingering issues that may require attention, ensuring the long-term reliability of the device.
While it’s possible to mitigate water damage and restore a wet game controller to working condition, it’s important to exercise caution and consider seeking professional assistance if you’re uncertain about handling the drying process. Additionally, taking preventive measures, such as using controller covers or implementing spill-proof gaming setups, can help minimize the risk of future water-related incidents.
Ultimately, the successful recovery of a wet game controller hinges on proactive measures, careful handling, and a methodical approach to drying and testing. By following the guidelines outlined in this guide, you can enhance the chances of salvaging your game controller and continue immersing yourself in captivating gaming experiences.
Remember, when it comes to wet game controllers, timely intervention and thoughtful care can make all the difference in reviving your gaming gear and embarking on new virtual adventures with confidence.


