Introduction
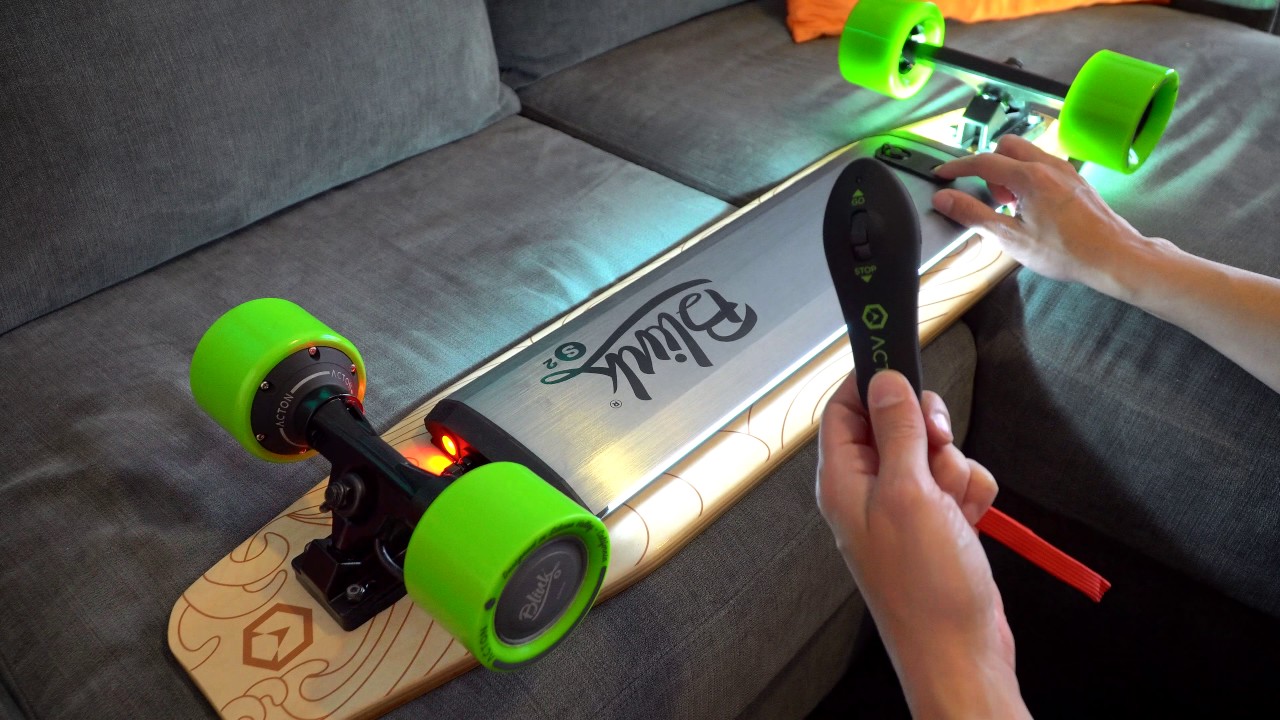
Welcome to the world of electric skateboarding, where the thrill of zipping through the streets at high speeds is matched only by the adrenaline rush of performing mind-boggling tricks. As an electric skateboard enthusiast, you know the importance of keeping your board in top-notch condition for both performance and safety.
One crucial aspect of maintaining an electric skateboard is waterproofing. Whether you live in a rainy climate or simply want to ensure your board is protected from accidental spills or splashes, waterproofing is an essential step to increase the longevity and reliability of your electric skateboard.
Waterproofing an electric skateboard involves safeguarding its electronic components, such as the battery, motor controller, and circuit board, from water damage. By taking the necessary steps to protect these vital parts, you can ride confidently through wet conditions without worrying about malfunctions or short circuits.
In this guide, we will delve into the world of waterproofing electric skateboards, exploring the various materials and techniques you can use to ensure your board remains watertight. From disassembling the skateboard to applying silicone sealant and conformal coating, we will take you through the step-by-step process of waterproofing your electric skateboard.
Before we jump into the technical aspects, it is important to note that waterproofing your electric skateboard requires some level of technical knowledge and expertise. If you are unsure about any step or not confident in your abilities, it is always a good idea to seek professional assistance to ensure proper waterproofing without compromising your board’s functionality.
With that said, let’s dive right in and explore the world of waterproofing electric skateboards, empowering you to ride with confidence in any weather condition!
Why Waterproof an Electric Skateboard?
Electric skateboards are not just a means of transportation; they are also a source of exhilaration and adventure. Whether you are commuting to work or exploring new terrain, riding an electric skateboard can be both fun and practical. However, one challenge that electric skateboard riders face is the risk of water damage.
Rainy weather, puddles, and accidental spills can all pose a threat to the electronic components of an electric skateboard. These sensitive parts, such as the battery, motor controller, and circuit board, are susceptible to short circuits, corrosion, and malfunction when exposed to moisture.
By waterproofing your electric skateboard, you can protect these vital components and ensure the longevity and reliability of your board. Here are a few reasons why waterproofing is a crucial step:
1. Ride in Any Weather: Waterproofing your electric skateboard allows you to ride confidently in various weather conditions. Whether it’s raining, snowing, or even if you accidentally ride through a puddle, your board will remain protected from water damage. This means you won’t have to worry about your skateboard malfunctioning or becoming unsafe to ride during inclement weather.
2. Increased Durability: Electric skateboards are an investment, and you want them to last. By waterproofing your board, you add an extra layer of protection against water damage, increasing its durability and lifespan. This is particularly important if you plan on taking your board off-road or in wet environments frequently.
3. Peace of Mind: When you waterproof your electric skateboard, you gain peace of mind knowing that your board can withstand water exposure. This allows you to focus on enjoying your ride without constantly worrying about potential damage or having to avoid wet areas.
4. Easier Maintenance: Waterproofing your electric skateboard makes maintenance easier and more convenient. With a waterproofed board, you can clean it more thoroughly, removing dirt and debris without fear of damaging the electronic components. This helps to keep your board in optimal condition and ensures a more enjoyable riding experience.
By taking the time to waterproof your electric skateboard, you not only extend the life of your board but also enhance the overall riding experience. Whether you’re a casual rider or a hardcore enthusiast, the benefits of waterproofing your electric skateboard are undeniable.
Choosing the Right Waterproofing Materials
When it comes to waterproofing your electric skateboard, selecting the right materials is crucial to ensuring effective protection against water damage. Here are some key considerations to keep in mind:
1. Silicone Sealant: Silicone sealant is a popular choice for waterproofing electronic components. It creates a protective barrier by filling in any gaps or openings in the housing. Look for a high-quality, non-corrosive silicone sealant that is specifically designed for electrical applications. It should be flexible, durable, and able to withstand various weather conditions.
2. Conformal Coating: Conformal coating is another important material used to protect circuit boards from moisture. It is a thin, protective film that is applied to the circuit board’s surface. The coating acts as a barrier against water, dust, and other contaminants. Opt for a conformal coating that is non-conductive, transparent, and easy to apply evenly on the circuit board.
3. Waterproofing Tape: Waterproofing tape, also known as self-fusing tape, is an excellent additional layer of protection. It is a stretchy, rubber-like tape that tightly adheres to surfaces when wrapped around them. Waterproofing tape can be used to seal connections, cover exposed wires, and provide extra protection to vulnerable areas of the skateboard.
4. Waterproof Enclosures: Consider using waterproof enclosures for the more sensitive electronic components, such as the motor controller and battery pack. These enclosures are specifically designed to protect against water and dust ingress. Look for enclosures that are rated for the appropriate level of water resistance, ensuring they can withstand the conditions in which you will be riding.
5. O-Rings and Gaskets: O-rings and gaskets are essential for creating watertight seals. These rubber rings or strips are placed between two surfaces, forming a barrier against water penetration. They are commonly used for sealing battery compartments, connectors, and other areas prone to water ingress.
6. Corrosion Inhibitor: To further protect the electronic components from corrosion, consider using a corrosion inhibitor. These substances help prevent or slow down the oxidation process that can occur when metals are exposed to moisture. Apply the corrosion inhibitor to metal surfaces before sealing them with waterproofing materials.
As you gather the necessary materials, make sure to read the product specifications and instructions carefully to ensure they are suitable for the specific components of your electric skateboard. Remember, investing in high-quality waterproofing materials will contribute to the effectiveness and durability of the waterproofing process.
Disassembling the Electric Skateboard
Before you can begin the process of waterproofing your electric skateboard, it is essential to disassemble the board carefully. Disassembling allows you to access the electronic components and ensure proper waterproofing. Here are the steps to disassemble your electric skateboard:
1. Gather the necessary tools: To disassemble your electric skateboard, you will need a set of appropriate tools such as a screwdriver, Allen wrench, and possibly a socket wrench. These tools may vary depending on the specific make and model of your skateboard, so refer to the manufacturer’s instructions or online resources for guidance.
2. Disconnect the battery: Begin by disconnecting the battery from the skateboard. It is important to disconnect the battery first to avoid any accidental electrical shocks during the disassembly process. Follow the manufacturer’s instructions to safely disconnect the battery connector from the motor controller.
3. Remove the external components: Start by removing the wheels, trucks, and any other external components that are attached to the board. Use the appropriate tools to loosen and remove the nuts, bolts, or screws that secure these parts. Keep these components aside safely for reassembly later.
4. Unscrew the deck: Depending on your skateboard’s design, you may need to unscrew the deck from the trucks. Use the appropriate tools to remove the screws or bolts securing the deck. Make note of the position of any grip tape or foot pads, as you will need to reapply them later.
5. Access the electronic components: Once the deck is removed, you will have access to the electronic components of the skateboard, such as the motor controller, battery pack, and circuit board. Take care not to damage any wiring or delicate components as you proceed.
6. Label and organize: As you disassemble the skateboard, it is essential to label and organize the various parts and components. This will make reassembling the board easier and ensure that everything goes back into its proper place during the waterproofing process.
7. Inspect for any damage: While disassembling, take the opportunity to inspect the electronic components for any signs of damage or wear. If you notice any loose connections, frayed wires, or worn-out parts, it is advisable to address these issues before proceeding with the waterproofing process.
By following these steps and taking your time during the disassembly process, you can ensure that all the electronic components are accessible and ready for the next stage: preparing the electric skateboard for waterproofing.
Preparing the Electric Skateboard for Waterproofing
Once you have successfully disassembled your electric skateboard, it’s time to prepare the various components for waterproofing. Proper preparation is essential to achieve effective waterproofing and ensure the longevity of your board. Here are the steps to prepare your electric skateboard for waterproofing:
1. Clean the components: Start by thoroughly cleaning all the components of the electric skateboard. Use a soft cloth or brush to remove any dirt, dust, or debris that may have accumulated. Pay close attention to the electronic components, ensuring they are free from any contaminants that may hinder the effectiveness of the waterproofing materials.
2. Dry the components: After cleaning, allow the components to fully dry before proceeding with the waterproofing process. Water or moisture can interfere with the adhesion and effectiveness of the waterproofing materials. You can use a dry cloth or allow the components to air dry naturally before moving on to the next step.
3. Inspect for damage: Take the time to carefully inspect all the components for any signs of damage or wear. Look for cracks, corrosion, or loose connections. It is crucial to address any issues before proceeding with the waterproofing process to ensure the reliability and performance of your electric skateboard.
4. Apply masking tape: Before applying the waterproofing materials, it is a good idea to use masking tape to protect certain areas that you do not want to be waterproofed. Cover any connectors, ports, or sensitive parts that should remain accessible or require periodic maintenance. This will prevent the waterproofing materials from sealing these areas shut.
5. Follow manufacturer’s instructions: When it comes to applying waterproofing materials, it is important to carefully follow the manufacturer’s instructions. Each product may have specific guidelines regarding application techniques, curing time, and recommended number of coats. Adhering to these instructions will ensure the optimal performance and longevity of the waterproofing materials.
6. Work in a well-ventilated area: When applying the waterproofing materials, make sure you are working in a well-ventilated area. Some waterproofing products may have strong odors or emit fumes during application. Proper ventilation will help ensure your safety and allow for the proper curing of the materials.
7. Take your time: Waterproofing your electric skateboard is not a task to be rushed. Take your time to apply the waterproofing materials carefully and precisely. This will help ensure thorough coverage and effective protection against water damage. Good craftsmanship during this preparation stage will contribute to a successful waterproofing outcome.
By following these steps and taking the necessary precautions, you can prepare your electric skateboard for waterproofing, laying the foundation for effective protection against water damage. Once the preparation is complete, you can proceed with applying the waterproofing materials to the various components of the skateboard.
Applying Silicone Sealant to the Electronic Components
Once you have prepared the electronic components of your electric skateboard, it’s time to apply silicone sealant to ensure their protection against water damage. Silicone sealant creates a waterproof barrier, sealing any gaps or openings in the housing. Here’s a step-by-step guide on how to apply silicone sealant to the electronic components of your electric skateboard:
1. Start with a clean surface: Make sure the components are clean and dry before applying the silicone sealant. Any dirt, dust, or moisture on the surface may compromise the effectiveness of the sealant.
2. Identify the gaps and openings: Inspect the components to identify any gaps, openings, or areas where water may enter. Common areas include cable entry points, connectors, and seams in the housing. These are the areas that require a thorough application of silicone sealant.
3. Apply the silicone sealant: Squeeze a small amount of silicone sealant onto a disposable applicator or your finger. Start applying the sealant to one area at a time, filling in the gaps and covering the openings. Use a smooth and even motion to ensure full coverage. Avoid applying excessive sealant, as this may lead to messy looking results and interfere with the reassembly process later on.
4. Pay attention to delicate components: Take care when applying the sealant around delicate components, such as connectors or small circuitry. Ensure that these areas are adequately covered but avoid getting excess sealant on them to prevent interference with their functionality.
5. Smooth out the sealant: Once you’ve applied the sealant, use a small tool or your finger (gloved or with a protective barrier) to smooth out the sealant carefully. This helps create an even layer and ensures that there are no rough or excess areas that could potentially cause issues during reassembly or later use of the electric skateboard.
6. Let the sealant cure: Allow the silicone sealant to cure completely according to the manufacturer’s instructions. The curing time may vary depending on the product used, so refer to the packaging for specific guidance.
7. Re-check for any gaps: After the silicone sealant has cured, inspect the components again for any missed gaps or areas that may need additional sealant. It’s better to address any potential weak points now rather than risk water infiltration later on.
By carefully applying silicone sealant to the electronic components of your electric skateboard, you create a protective barrier against water damage. This step is essential for maintaining the functionality and longevity of your board, ensuring you can ride confidently in various weather conditions without worrying about water-related issues.
Applying Conformal Coating to the Circuit Board
One of the crucial steps in waterproofing an electric skateboard is applying conformal coating to the circuit board. Conformal coating is a protective film that shields the electronic components from moisture, dust, and other contaminants. Here is a step-by-step guide on how to apply conformal coating to the circuit board:
1. Choose the right conformal coating: Select a conformal coating that is specifically designed for use on circuit boards. Look for a coating that is transparent, non-conductive, and suitable for your particular board’s components.
2. Prepare the circuit board: Ensure the circuit board is clean and free of any debris or contaminants. If needed, use a gentle solvent or electronics-specific cleaning agent to remove any residue or flux from previous soldering processes. Allow the board to dry completely before proceeding.
3. Set up the work area: Work in a well-ventilated area with good air circulation to prevent the inhalation of fumes from the conformal coating. You may also want to lay down a protective layer or use a designated work mat to catch any excess coating or spills.
4. Apply the conformal coating: Use a small, clean brush or a specialized conformal coating application brush to apply a thin and even layer of the coating to the circuit board. Start from one end and work your way across the board, taking care to cover all the exposed components and traces. Ensure that the coating covers the entire area without pooling or excessive build-up.
5. Coat both sides of the board (if appropriate): Depending on the construction and design of your circuit board, you may need to apply conformal coating on both sides. If this is the case, allow the first side to fully cure before flipping the board and applying the coating to the other side. Follow the manufacturer’s recommendations for curing time.
6. Allow the coating to cure: After applying the conformal coating, let it cure according to the manufacturer’s directions. Curing times can vary depending on the type of coating and environmental conditions. It is essential to allow sufficient time for the coating to harden and form a protective barrier on the circuit board.
7. Inspect for complete coverage: Once the coating has fully cured, carefully inspect the circuit board to ensure that all components and traces are adequately covered. Look for any missed areas or thin spots, and apply additional coating as needed to achieve complete coverage and protection.
By applying conformal coating to the circuit board, you provide a vital layer of protection against moisture and contaminants. This safeguard will increase the longevity and reliability of your electric skateboard, ensuring that it can withstand the elements and operate optimally in various riding conditions.
Sealing the Battery Compartment
One of the critical areas to focus on when waterproofing an electric skateboard is sealing the battery compartment. The battery compartment houses the power source of your board and is susceptible to water damage if not adequately protected. Here are the steps to effectively seal the battery compartment:
1. Remove the battery: Before sealing the battery compartment, disconnect and remove the battery from the electric skateboard. This ensures that you have full access to the compartment and can properly seal it without any obstructions.
2. Clean the battery compartment: Thoroughly clean the battery compartment to remove any dirt, dust, or debris. Use a soft cloth or brush to ensure the surface is clean and dry. Removing any contaminants will help create a stronger seal.
3. Inspect the compartment for gaps: Carefully inspect the battery compartment for any gaps or areas where water could potentially enter. Check for loose screws, openings, or gaps between the compartment and the rest of the skateboard’s structure. Identifying these areas is crucial to ensure a proper seal.
4. Apply silicone sealant: Use a high-quality silicone sealant to seal the gaps and openings in the battery compartment. Apply a thin and even layer of sealant, making sure to cover all the areas susceptible to water ingress. Smooth out the sealant with a tool or your finger to create a consistent and watertight barrier.
5. Seal around wiring and connectors: Pay special attention to the wiring and connectors inside the battery compartment. Apply silicone sealant around the wiring entry points and connectors to prevent water from seeping in. Take care not to block any necessary wiring or connections, ensuring the functionality of the electric skateboard.
6. Allow the sealant to cure: Follow the manufacturer’s instructions for the curing time of the silicone sealant. It is important to let the sealant fully cure to achieve the desired waterproofing properties. Avoid subjecting the sealant to any moisture or extreme conditions during the curing process.
7. Reinstall the battery: Once the sealant has fully cured, carefully reinstall the battery back into the sealed compartment. Ensure all connections are secure and properly aligned. Double-check that the battery compartment is tightly sealed and that no gaps or openings are present.
By effectively sealing the battery compartment of your electric skateboard, you provide an essential layer of protection for the power source. This step is crucial in maintaining the integrity of the battery and ensuring its safe operation, even in wet or damp riding conditions.
Reassembling the Electric Skateboard
After successfully waterproofing the electronic components and sealing the battery compartment, it’s time to reassemble your electric skateboard. Ensuring proper reassembly is crucial to restoring the functionality and performance of the board. Here’s a step-by-step guide on reassembling your electric skateboard:
1. Refer to documentation: If you have any documentation or manufacturer’s instructions for your specific skateboard model, consult them during the reassembly process. This will help ensure that you correctly follow the recommended assembly steps.
2. Start with the circuit board: Begin by placing the circuit board back into its designated position. Ensure that all connectors and wires are properly aligned and plug them in according to the manufacturer’s instructions. Take care not to apply excessive force or strain on any delicate components.
3. Attach the electronic components: Proceed to attach the other electronic components, such as the motor controller, sensors, and any additional modules. Follow the proper connection procedure and secure them in their designated locations. Check for any loose connections and make any necessary adjustments.
4. Reinstall the battery: Carefully insert the battery back into the sealed compartment, ensuring proper alignment and connection to the motor controller and wiring. Follow any specific instructions provided by the battery manufacturer for a secure and reliable connection.
5. Reassemble external components: Put back the wheels, trucks, and other external components that were removed during the disassembly process. Use the appropriate tools to securely fasten them. Check that the skateboard’s structure is stable and aligned.
6. Apply grip tape or foot pads: If you had to remove the grip tape or foot pads from the deck, now is the time to reapply them. Ensure that they are properly aligned and securely adhered to the deck’s surface. Smooth out any wrinkles or bubbles for a comfortable riding experience.
7. Test the skateboard: Once the reassembly is complete, perform a thorough test of the electric skateboard. Check that all components are functioning correctly, including the motor, remote control connection, and any additional features. Take a short test ride in a controlled environment to ensure everything is in working order.
8. Make any necessary adjustments: If you notice any issues or irregularities during the testing phase, make the necessary adjustments. Check for any loose screws or components, ensure proper alignment, and address any functional discrepancies before taking the skateboard on a full ride.
By following these steps and taking your time during the reassembly process, you can ensure that your electric skateboard is properly put back together. This will enable you to enjoy the benefits of a fully functional and waterproofed board, providing optimal performance and peace of mind during your rides.
Testing the Waterproofing
After waterproofing and reassembling your electric skateboard, it’s important to thoroughly test its waterproofing to ensure that the protective measures were effectively implemented. Testing the waterproofing will give you confidence in riding your board in various weather conditions. Here are the steps to properly test the waterproofing:
1. Visual Inspection: Conduct a visual inspection of the components and their connections. Ensure that all access points, such as connectors and openings, are properly sealed with silicone sealant or conformal coating. Look for any signs of water ingress or areas that may require additional protection.
2. Dry Test: Perform a dry test by using a dry cloth or paper towel to wipe down the entire skateboard, paying particular attention to the sealed areas. Inspect the cloth for any signs of moisture. If the cloth remains dry, it indicates that the waterproofing measures are effective in preventing water from penetrating the components.
3. Splash Test: Fill a sink or basin with water, ensuring that it’s deep enough to submerge the wheels and lower parts of the skateboard. Gently submerge the skateboard, avoiding any electrical components, for a short period of time. Carefully watch for any signs of water penetration or damage to the components.
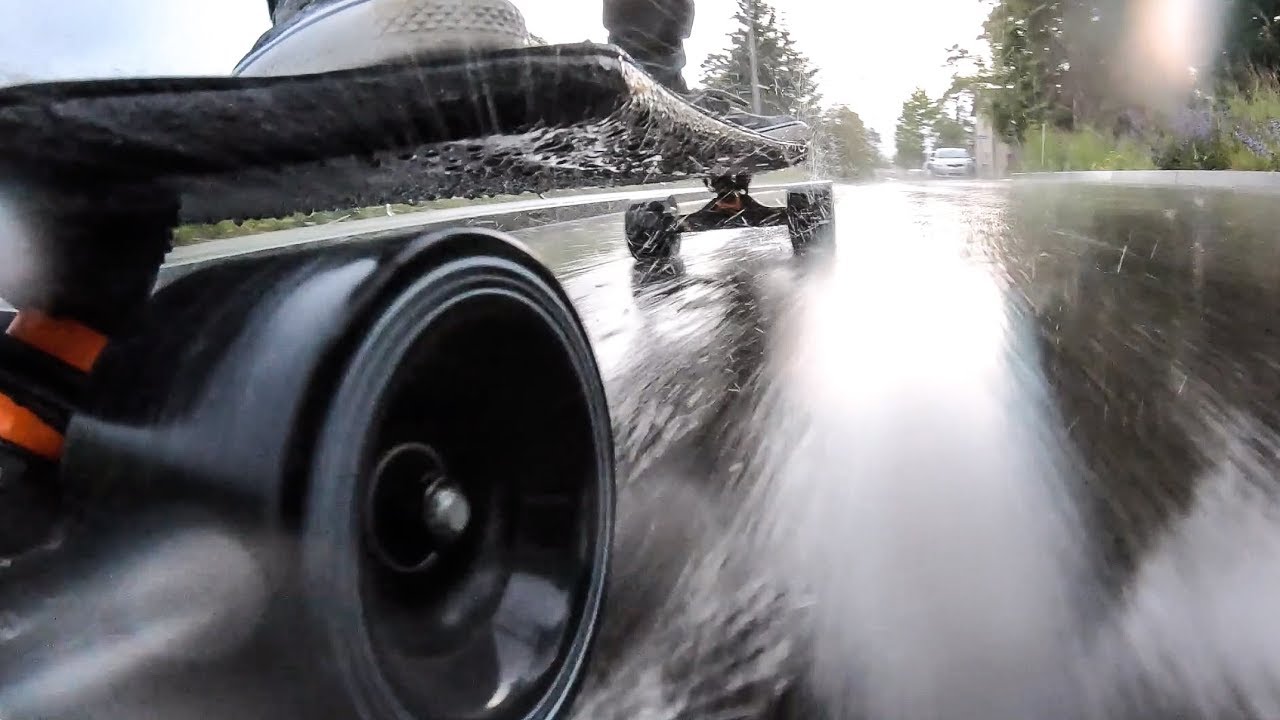
4. Rain Test: Choose a rainy day (or create artificial rain using a hose or sprinkler system) to test the waterproofing. Ride the skateboard in wet conditions, ensuring water splashes onto the board’s surface and components. Pay attention to the overall performance and any signs of water ingress during the ride.
5. Battery Compartment Test: Monitor the battery compartment for any signs of water intrusion after the wet tests. Carefully check for any moisture or condensation inside the sealed compartment. If there are indications of water ingress, address the issue by resealing the compartment or improving the waterproofing measures.
6. Repeat the Tests: Repeat the splash test and rain test multiple times to ensure consistent and reliable waterproofing. Take note of any difficulties or limitations encountered during the tests, allowing you to make any necessary improvements or adjustments to the waterproofing measures.
7. Regular Maintenance: Incorporate regular maintenance into your routine to ensure the ongoing effectiveness of the waterproofing. Periodically check the sealing materials, connectors, and any exposed areas for signs of wear, damage, or deterioration. Address any issues promptly to maintain the integrity of the waterproofing.
By following these steps, you can thoroughly test the waterproofing of your electric skateboard and ensure that it is reliable and effective. Achieving a successful waterproofing outcome will provide you with the confidence to ride in wet conditions and enjoy the thrill of electric skateboarding without worrying about water damage or component malfunctions.
Tips for Maintaining Waterproofing
Once you have successfully waterproofed your electric skateboard, it’s essential to maintain the waterproofing to ensure long-lasting protection against water damage. Proper maintenance will help extend the life of your board and keep it in optimal condition. Here are some tips for maintaining the waterproofing of your electric skateboard:
1. Regularly inspect the waterproofing: Conduct regular inspections of the waterproofing materials and components. Check for any signs of wear, damage, or deterioration. Look for cracks, peeling sealant, or areas where water could potentially penetrate. Address any issues promptly to maintain the effectiveness of the waterproofing.
2. Avoid submerging the board: Although the waterproofing provides protection against splashes and light rain, it is best to avoid fully submerging the electric skateboard in water. This includes avoiding riding through deep puddles, streams, or flooded areas. Excessive exposure to water can compromise the integrity of the waterproofing and lead to potential damage.
3. Properly store your electric skateboard: When not in use, store your electric skateboard in a dry and protected area. Avoid leaving it outside in harsh weather conditions or exposing it to extreme temperatures. Storing the board correctly will help preserve the waterproofing materials and prevent unnecessary wear and tear.
4. Clean your electric skateboard regularly: Regularly clean your electric skateboard to remove dirt, grime, and other debris that can accumulate on the surface. Use a soft cloth or brush and water to gently clean the board. Avoid using harsh chemicals or excessive amounts of water, as this may compromise the effectiveness of the waterproofing materials.
5. Address any damage promptly: If you notice any damage to the waterproofing or other components of your electric skateboard, such as cracks or loose connections, address these issues promptly. Repair or replace damaged parts, and reapply the necessary waterproofing materials to ensure the continued protection of your board.
6. Follow the manufacturer’s recommendations: Always follow the manufacturer’s instructions and recommendations when it comes to maintaining your electric skateboard’s waterproofing. They may provide specific guidelines on cleaning, maintenance, and the lifespan of the waterproofing materials used. Adhering to these recommendations will help maximize the durability and effectiveness of the waterproofing.
7. Stay vigilant during rides: While riding, be mindful of the conditions and areas you are traversing. Avoid riding through deep water, puddles, or areas with excessive moisture whenever possible. Being cautious and proactive during your rides will help minimize the chances of water damage and prolong the effectiveness of the waterproofing.
By incorporating these tips into your maintenance routine, you can ensure that the waterproofing of your electric skateboard remains intact and effective. Regular inspections, proper storage, and attentive care will help you enjoy the benefits of a waterproofed board for many rides to come.
Conclusion
Waterproofing your electric skateboard is a crucial step for protecting its electronic components and ensuring a long-lasting and reliable riding experience. By following the steps outlined in this guide, including disassembling the board, preparing the components, applying silicone sealant and conformal coating, sealing the battery compartment, and reassembling the skateboard, you can achieve effective waterproofing.
Choosing the right waterproofing materials, such as silicone sealant, conformal coating, waterproof tape, enclosures, o-rings, and corrosion inhibitors, is key to achieving optimal protection against water damage. And by incorporating regular maintenance, visual inspections, and proper storage, you can maintain the waterproofing integrity of your electric skateboard for an extended period of time.
Remember, the process of waterproofing your electric skateboard requires attention to detail and some technical knowledge. If you’re unsure about any step or lack the confidence to carry out the waterproofing yourself, it’s always advisable to seek professional assistance to ensure proper application and protection without compromising the functionality of your board.
With the waterproofing measures in place, you can ride with confidence in various weather conditions, knowing that your board is protected against water damage. Whether you’re cruising through rain-soaked streets or tackling wet terrains, your electric skateboard will remain reliable, durable, and ready for any adventure.
So, take the time and effort to properly waterproof your electric skateboard. By doing so, you’ll not only increase its longevity but also enhance your overall riding experience, allowing you to fully enjoy the thrill and freedom that electric skateboarding can bring.