Introduction
A mechanical keyboard is a beloved tool for many, offering a tactile and satisfying typing experience. However, encountering a broken key can be a frustrating setback. Whether it's due to a spill, excessive wear and tear, or a manufacturing defect, a malfunctioning key can disrupt your workflow and diminish the overall usability of your keyboard. The good news is that many mechanical keyboard issues, including broken keys, can be resolved with some simple troubleshooting and maintenance.
In this guide, we will walk through the steps to fix a broken mechanical keyboard key. By following these instructions, you can potentially save the cost of a professional repair or the need to replace the entire keyboard. From assessing the damage to cleaning the switch and replacing the keycap, we will cover each step in detail to help you restore your mechanical keyboard to its optimal functionality. With a bit of patience and the right approach, you can breathe new life into your keyboard and enjoy a seamless typing experience once again. Let's dive into the process of reviving your broken mechanical keyboard key.
Assessing the Damage
Before diving into the repair process, it’s crucial to assess the extent of the damage to your mechanical keyboard key. Start by identifying the specific issue that is causing the key to malfunction. Common problems include unresponsiveness, sticking, or a complete lack of tactile feedback when pressing the key. Additionally, if the issue is due to a spill, it’s important to determine the severity of the liquid exposure and whether it has affected the key switch.
Begin by carefully examining the affected key and its surroundings. Look for any visible signs of damage, such as debris, dust, or residue that may be interfering with the key’s movement or electrical contacts. If the issue is related to a spill, assess whether the liquid has seeped into the switch and potentially damaged the internal components. Take note of any unusual sounds or sensations when pressing the key, as these can provide valuable clues about the nature of the problem.
Next, consider the history of the keyboard’s usage. If the malfunctioning key has been subjected to heavy and prolonged use, it’s possible that the switch mechanism has worn out over time. In contrast, if the issue arose suddenly after a specific incident, such as a spill or impact, it’s likely that the cause of the problem can be traced back to that event.
By thoroughly evaluating the nature of the damage, you can gain a clearer understanding of the underlying issue and determine the appropriate course of action. This initial assessment will guide the subsequent steps in the repair process, allowing you to address the specific problem with precision and efficiency.
Removing the Keycap
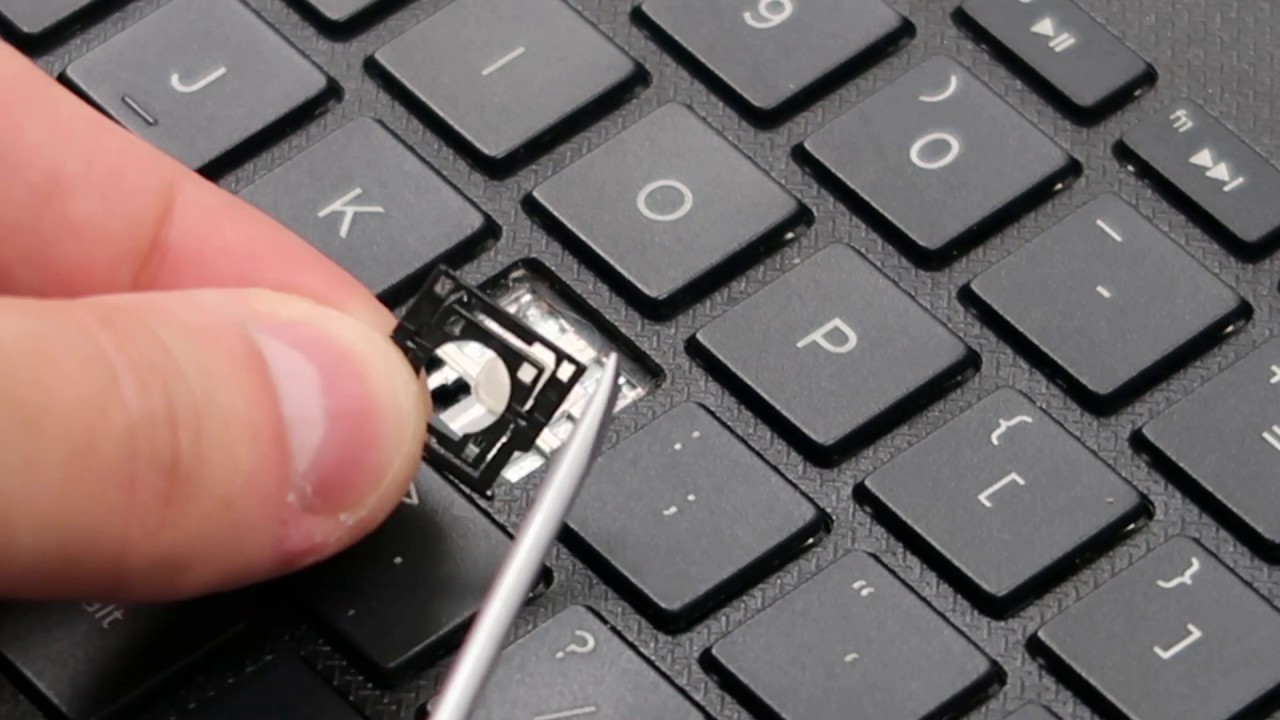
Once you have assessed the damage and identified the nature of the issue, the next step is to remove the keycap to gain access to the underlying key switch. Removing the keycap is a delicate process that requires precision and care to avoid causing further damage to the keyboard.
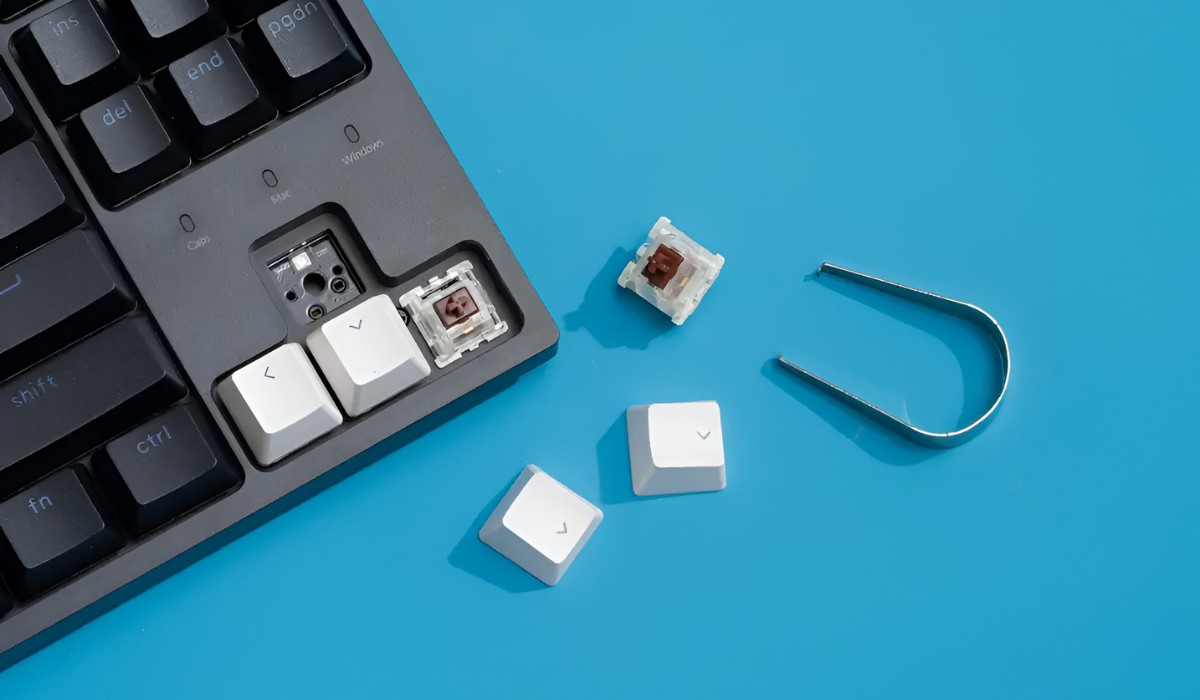
Start by locating a keycap puller, a small tool designed specifically for safely removing keycaps from mechanical keyboards. If a keycap puller is not available, you can use a pair of small, flat-headed screwdrivers as an alternative. Place the tips of the keycap puller or screwdrivers under the edges of the keycap, ensuring that you apply even pressure to avoid bending or damaging the keycap during removal.
Gently and evenly pull the keycap upwards, using the keycap puller or screwdrivers to guide its release from the switch stem. Take care not to exert excessive force, as this can lead to the keycap breaking or the switch being damaged. Slow and steady pressure, combined with a wiggling motion, can help disengage the keycap from the switch without causing any harm.
As the keycap starts to lift away from the keyboard, continue to apply gentle pressure until it is completely detached. Once the keycap is removed, set it aside in a safe place to prevent it from getting lost or damaged during the subsequent steps of the repair process.
With the keycap successfully removed, you will now have clear access to the key switch beneath it. This accessibility is essential for cleaning and inspecting the switch, as well as for preparing the switch for the installation of a new keycap once the repair is complete.
Cleaning the Switch
With the keycap removed, the next crucial step in fixing a broken mechanical keyboard key is to clean the switch. Over time, dust, debris, and residue can accumulate within the switch, leading to performance issues and malfunctions. By thoroughly cleaning the switch, you can often restore its functionality without the need for a complete replacement.
Begin by using a can of compressed air to gently blow away any loose particles and dust from the exposed switch. Hold the keyboard at an angle to allow the debris to fall away from the switch rather than further inside the keyboard. Be thorough in this process, ensuring that all visible contaminants are removed to prevent them from interfering with the switch’s operation.
Once the loose debris has been cleared, it’s time to address any stubborn residue that may be affecting the switch. Dampen a cotton swab with a small amount of isopropyl alcohol, ensuring that it is not excessively wet, and carefully swab the exposed switch to remove any remaining grime or residue. Take care to avoid saturating the switch with alcohol, as excessive moisture can lead to further damage.
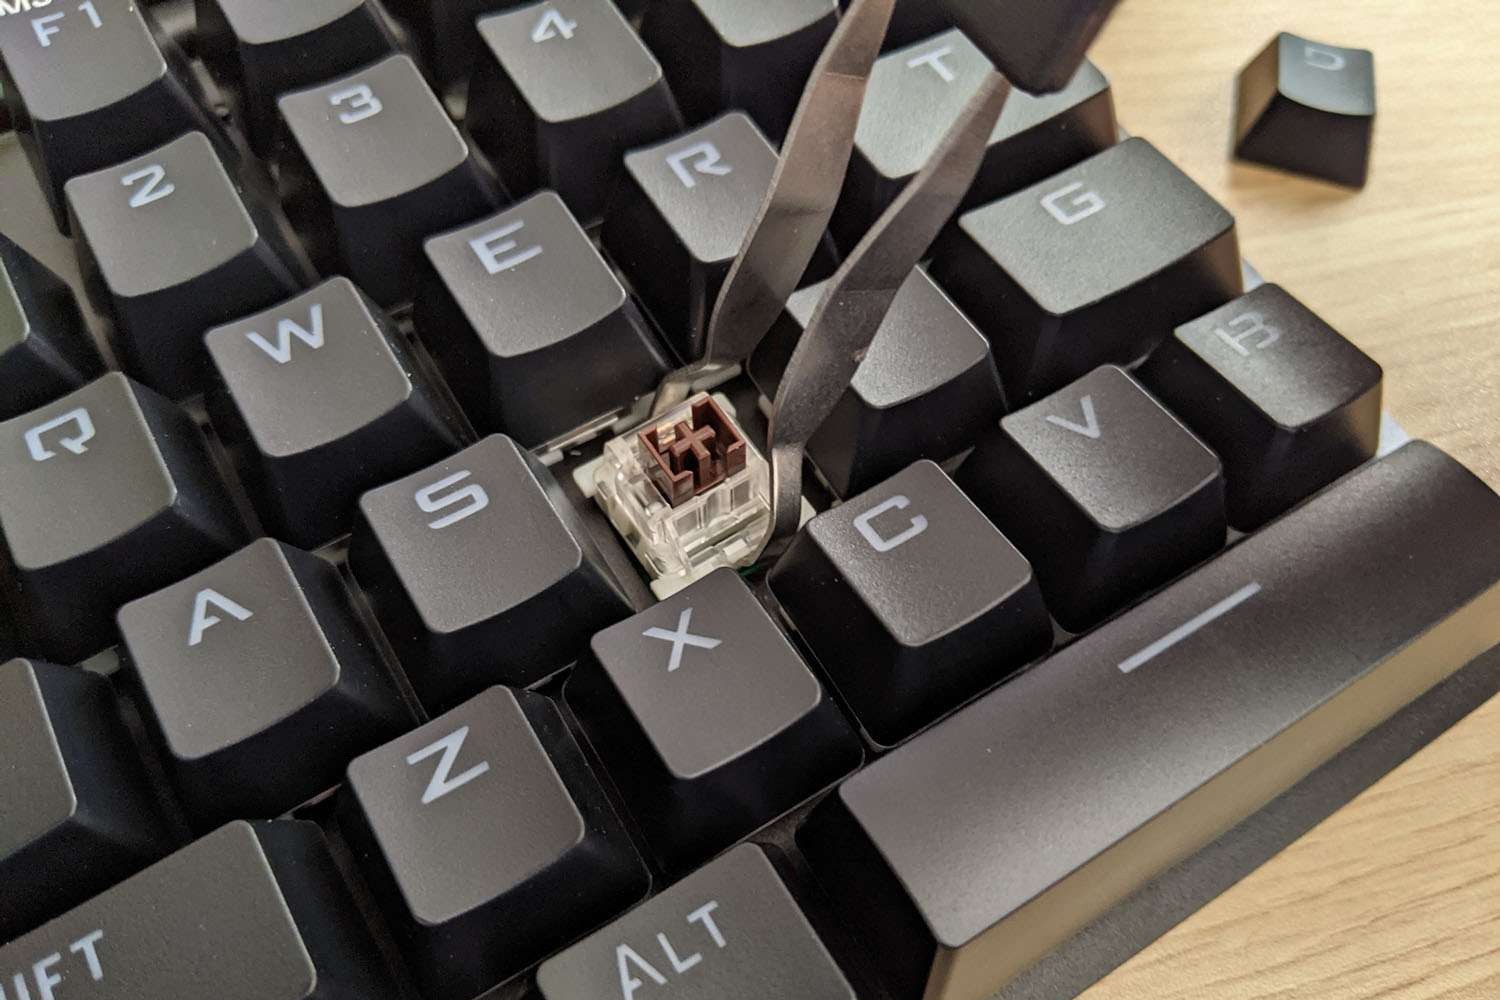
For particularly stubborn residue or debris, a specialized switch opener tool can be used to access the internal components of the switch for more thorough cleaning. This tool allows for safe and controlled disassembly of the switch, providing access to its internal components for meticulous cleaning and inspection.
After cleaning the switch, allow it to air dry completely before proceeding to the next step. This ensures that any residual moisture from the cleaning process evaporates, preventing potential damage to the switch or electrical components.
By meticulously cleaning the switch, you can often resolve performance issues and restore the key’s functionality. This essential maintenance step can significantly improve the overall responsiveness and reliability of the affected key, prolonging the lifespan of your mechanical keyboard.
Replacing the Keycap
After cleaning the switch, the next step in the repair process is to replace the keycap on the repaired mechanical keyboard key. This step requires precision and care to ensure that the keycap is securely and correctly reattached to the switch, allowing for smooth and reliable operation.
Begin by aligning the keycap with the switch stem, ensuring that it is positioned correctly and evenly. Apply gentle and even pressure to the center of the keycap, pressing it firmly onto the switch stem. Take care to avoid applying excessive force, as this can damage the switch or keycap.
As you press the keycap onto the switch, you should feel and hear a satisfying click as it securely snaps into place. This tactile feedback indicates that the keycap is properly attached and ready for use. Ensure that the keycap is level and aligned with the surrounding keys, maintaining a uniform and visually appealing appearance across the keyboard.
If the keycap features a stabilizer mechanism, such as those found on larger keys like the spacebar or shift keys, ensure that the stabilizer wires are correctly positioned and engaged before securing the keycap in place. These stabilizers play a crucial role in maintaining the stability and smooth operation of larger keys, so it is essential to verify their proper alignment during the keycap replacement process.
Once the keycap is securely in place, test its responsiveness and ensure that it functions as expected. Press the key several times to verify that it registers keystrokes accurately and provides the desired tactile feedback. If the key operates smoothly and responsively, you have successfully replaced the keycap and restored the functionality of the repaired mechanical keyboard key.
With the keycap securely reattached, take a moment to appreciate the successful repair and the renewed functionality of your mechanical keyboard. The careful replacement of the keycap marks a significant milestone in the repair process, bringing you one step closer to enjoying a fully operational keyboard once again.
Testing the Key
After completing the keycap replacement, it’s essential to thoroughly test the repaired mechanical keyboard key to ensure that it functions as intended. Testing the key allows you to verify its responsiveness, tactile feedback, and overall performance, providing confidence in the success of the repair process.
Begin by pressing the repaired key multiple times to assess its responsiveness and consistency. Pay close attention to the tactile feedback and auditory cues produced by the key, ensuring that they align with the expected behavior of the keyboard. A properly functioning key should register keystrokes reliably and provide consistent tactile feedback with each press.
Next, perform a series of rapid keystrokes on the repaired key to evaluate its ability to keep up with fast typing and repetitive input. This test is particularly important for keys used frequently during typing, as it ensures that the repaired key can maintain its responsiveness and accuracy during prolonged use.
Test the repaired key in various scenarios, such as typing long sentences, executing keyboard shortcuts, and engaging in gaming or other activities that require frequent and precise key presses. By subjecting the key to diverse usage scenarios, you can gain a comprehensive understanding of its performance and identify any potential issues that may arise during real-world use.
Observe the behavior of the repaired key in conjunction with neighboring keys, ensuring that it seamlessly integrates with the overall keyboard layout and maintains consistency in its operation. A successfully repaired key should blend harmoniously with the surrounding keys, contributing to a smooth and uninterrupted typing experience.
If the repaired key exhibits any unexpected behavior or fails to meet the desired performance standards during testing, consider revisiting the previous steps of the repair process to address any underlying issues. Thorough testing allows you to identify and resolve any lingering issues, ensuring that the repaired key operates optimally and contributes to an enhanced typing experience.
By conducting comprehensive testing, you can confirm the successful restoration of the repaired mechanical keyboard key and gain confidence in its reliability and performance. A thorough evaluation of the key’s functionality marks the final step in the repair process, allowing you to enjoy the renewed usability of your mechanical keyboard.
Conclusion
Repairing a broken mechanical keyboard key is a rewarding endeavor that allows you to restore the functionality and usability of your beloved keyboard. By following the steps outlined in this guide, you have embarked on a journey to diagnose, repair, and test the malfunctioning key, ultimately breathing new life into your keyboard.
Throughout the repair process, you carefully assessed the damage, removed the keycap, cleaned the switch, replaced the keycap, and thoroughly tested the repaired key. Each step was instrumental in addressing the specific issues affecting the key and ensuring its optimal functionality. Your meticulous approach and attention to detail have culminated in a successful repair, reaffirming the resilience and repairability of mechanical keyboards.
As you reflect on the repair journey, take pride in your ability to troubleshoot and resolve a common issue that can affect mechanical keyboards. The skills and knowledge gained from this experience empower you to tackle future keyboard maintenance and repairs with confidence, extending the lifespan of your keyboard and preserving its performance for years to come.
With the repaired key seamlessly integrated into your mechanical keyboard, you can once again enjoy the tactile satisfaction and reliable performance that this type of keyboard is known for. Whether you use your keyboard for work, gaming, or creative pursuits, the successful repair has reaffirmed its value as an essential tool in your daily activities.
Remember to maintain regular cleaning and maintenance practices to prevent future issues and prolong the longevity of your mechanical keyboard. By keeping your keyboard clean and well-maintained, you can minimize the risk of key malfunctions and ensure a consistently enjoyable typing experience.
As you continue to use and cherish your mechanical keyboard, the knowledge and skills gained from this repair experience will serve you well in maintaining its optimal performance. Embrace the satisfaction of a successful repair and the enduring functionality of your keyboard, knowing that you have the capability to overcome challenges and preserve the tools that enhance your digital endeavors.