Introduction
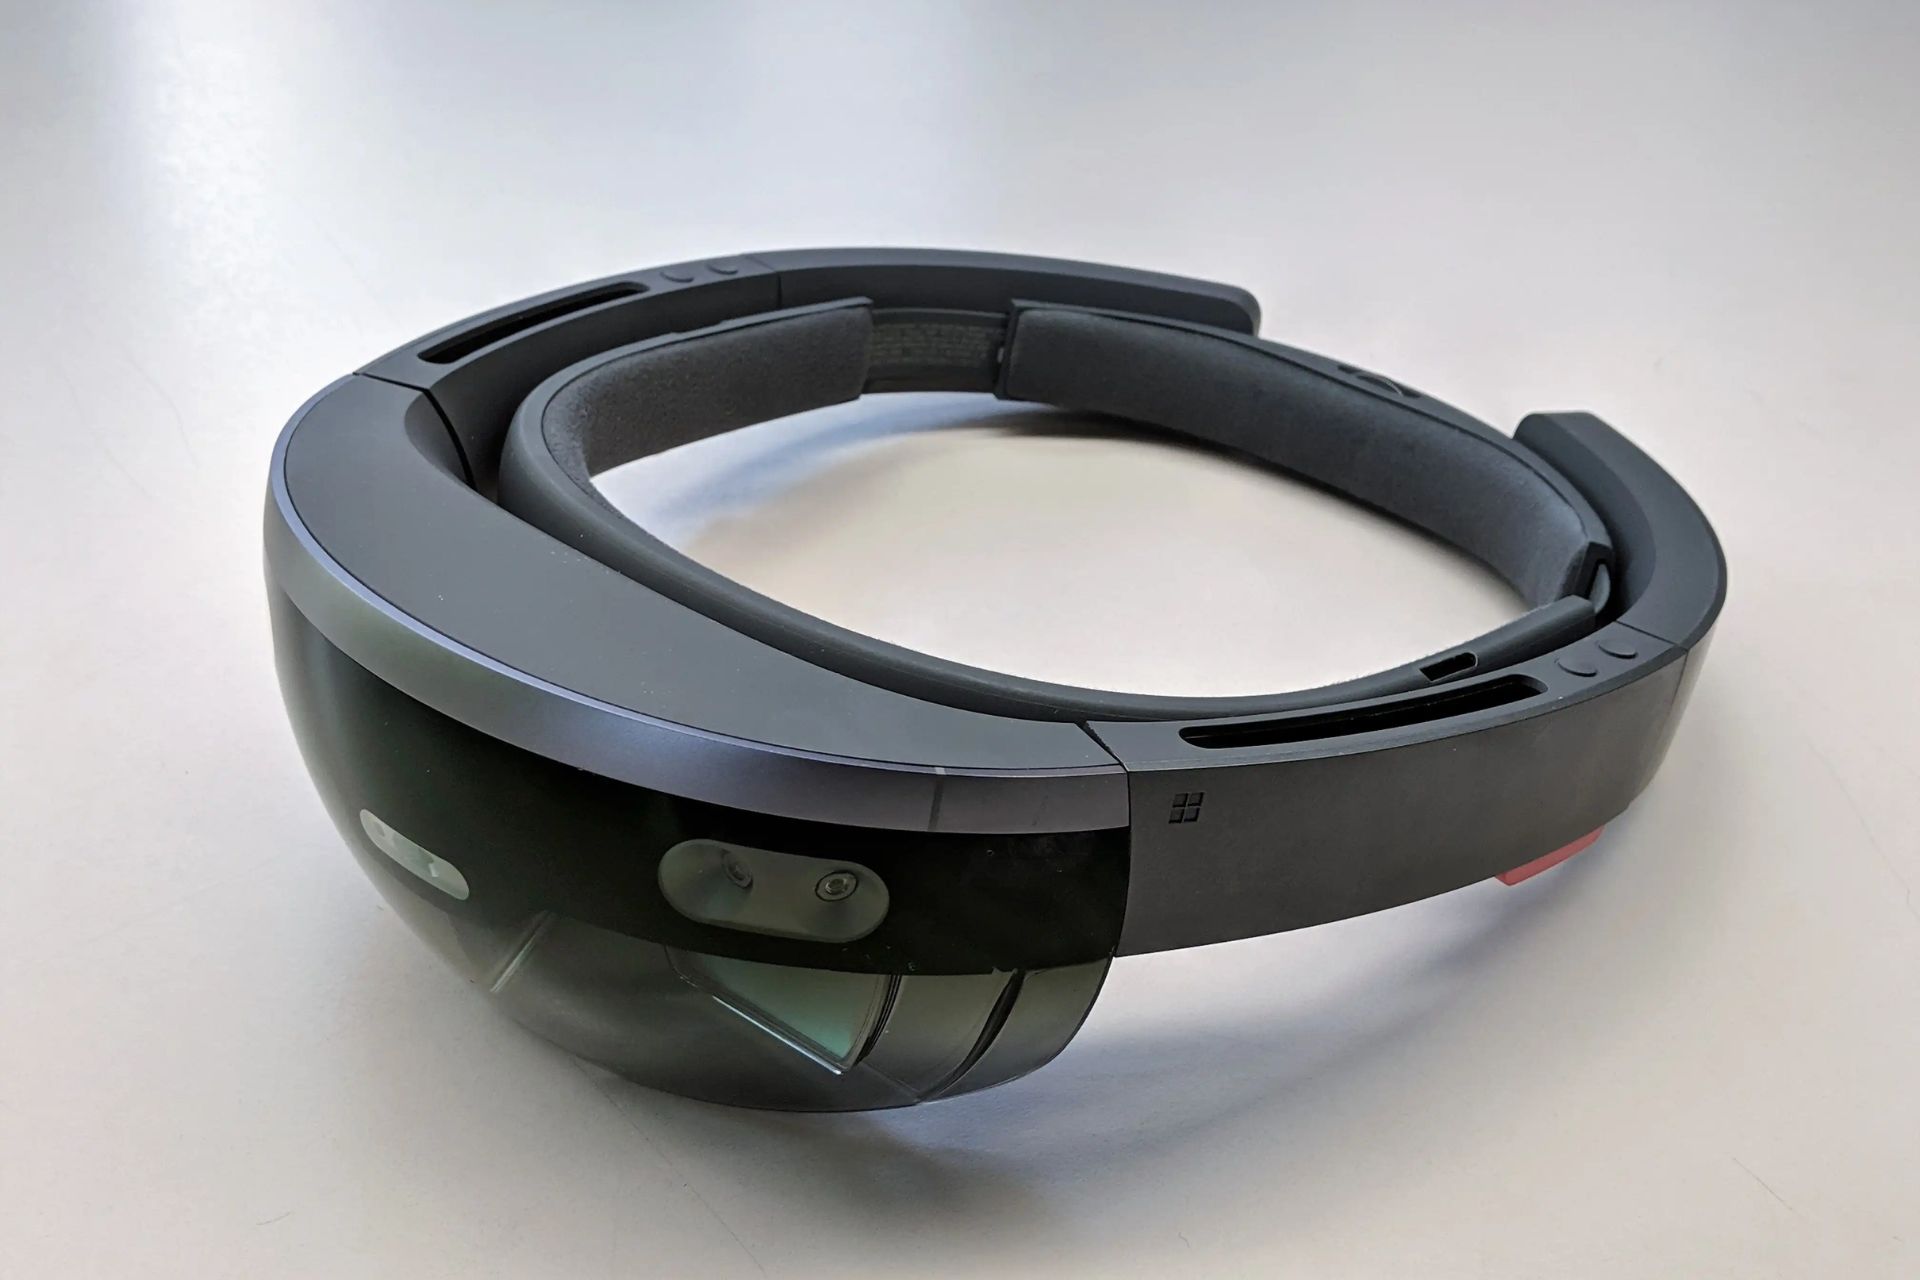
Welcome to the world of HoloLens, a revolutionary mixed reality device that blends the digital and physical worlds, allowing you to interact with holograms in your own environment. Whether you’re a developer, an avid gamer, or an enthusiast seeking a new experience, getting started with HoloLens is an exciting adventure that can open up endless possibilities.
In this guide, we will walk you through the step-by-step process of turning on your HoloLens, ensuring that you have the best experience right from the start. Before diving into the technical details, it’s important to note that the HoloLens offers an immersive and interactive experience, allowing you to interact with virtual objects and apps in a natural and intuitive way.
Before we get started, it’s crucial to ensure that you have a fully charged HoloLens. This will not only provide optimal performance but also prevent any interruptions during your HoloLens journey. Once the device is charged and ready to go, you’re just a few steps away from entering the world of holographic computing.
Now let’s put on your HoloLens and bring your holographic dreams into reality!
Step 1: Charge the HoloLens
Before diving into the world of mixed reality with your HoloLens, the first step is to ensure that it is fully charged. This will not only provide optimal performance but also extend the usage time for your device.
To charge the HoloLens, follow these simple steps:
- Connect the charging cable: Start by connecting one end of the charging cable to the dedicated charging port on the HoloLens. The charging port is located on the back of the device, near the right temple.
- Connect the other end of the charging cable: Plug the other end of the charging cable into a power outlet or a USB port on your computer. Make sure that the power source provides sufficient power output to charge the device effectively.
- Verify the charging status: Look for the LED indicator light on the charging cable. If the light is orange, it means that the HoloLens is charging. Once the device is fully charged, the LED indicator will turn green.
- Leave it to charge: Allow the HoloLens to charge for at least 2-3 hours, or until the LED indicator turns green. Avoid using the device while it is charging to prevent any interruptions in the charging process.
- Disconnect the charging cable: Once the HoloLens is fully charged, disconnect the charging cable from both the device and the power source.
By following these steps, you can ensure that your HoloLens is ready to provide you with an immersive mixed reality experience without any power-related interruptions. So, go ahead and give your HoloLens the necessary charge it needs to power your holographic adventures!
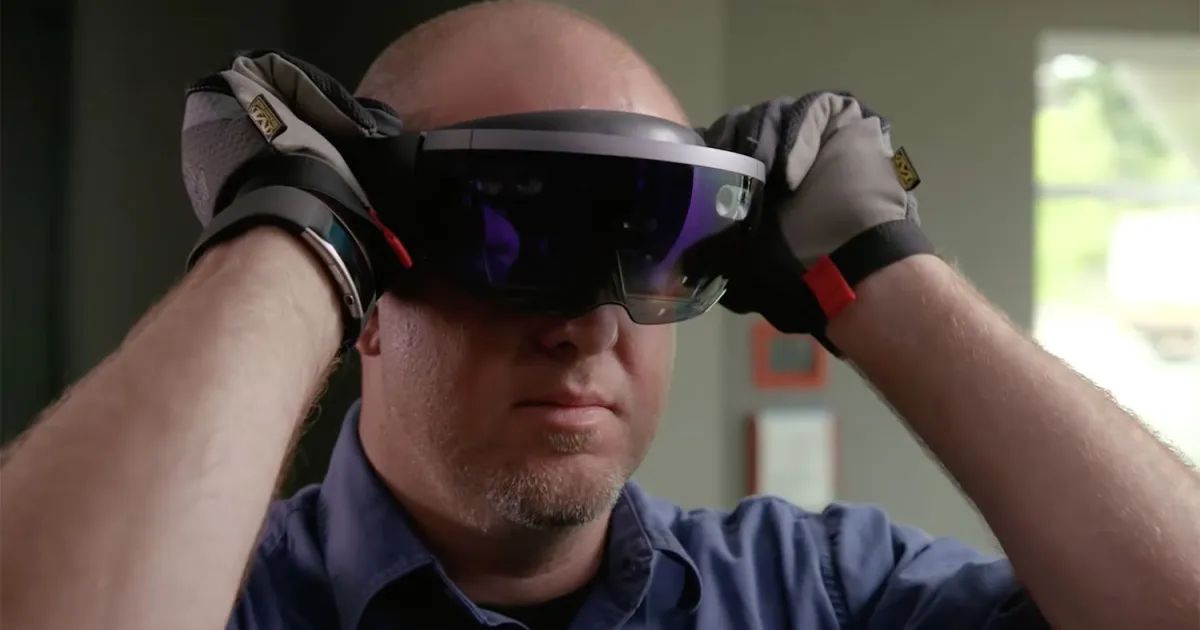
Step 2: Put on the HoloLens
Now that your HoloLens is charged and ready, it’s time to put it on and immerse yourself in the world of mixed reality. Follow these steps to wear the HoloLens properly:
- Hold the HoloLens with both hands: Grasp the HoloLens by placing your hands around the main body, ensuring a secure grip.
- Position the HoloLens: Align the HoloLens in front of your face, making sure that the nose bridge cushion rests comfortably on the bridge of your nose.
- Adjust the strap: Gently pull the back strap over the back of your head and adjust it for a snug fit. The strap should rest securely on the crown of your head, providing stability during usage.
- Secure the side straps: Adjust the side straps to fit comfortably around your ears. The HoloLens should sit firmly on your head, allowing for a clear and unobstructed view of the holographic content.
- Ensure clear vision: Adjust the visor of the HoloLens, sliding it up or down until the display is in a comfortable position and your eyes are aligned with the center of the lenses.
Once you have successfully put on the HoloLens, it’s important to take a moment to ensure that it fits well and feels comfortable. The HoloLens is designed to distribute weight evenly, minimizing any discomfort during extended usage. If necessary, make additional adjustments to the straps and visor to achieve the perfect fit.
Remember, the correct positioning of the HoloLens is crucial for an optimal mixed reality experience. By properly wearing the device, you will be able to fully immerse yourself in the holographic world, interacting with virtual objects seamlessly and intuitively.
With the HoloLens securely on your head, you’re now ready to move on to the next step and turn on the device. Get ready to embark on an extraordinary journey where the boundaries between reality and imagination blur!
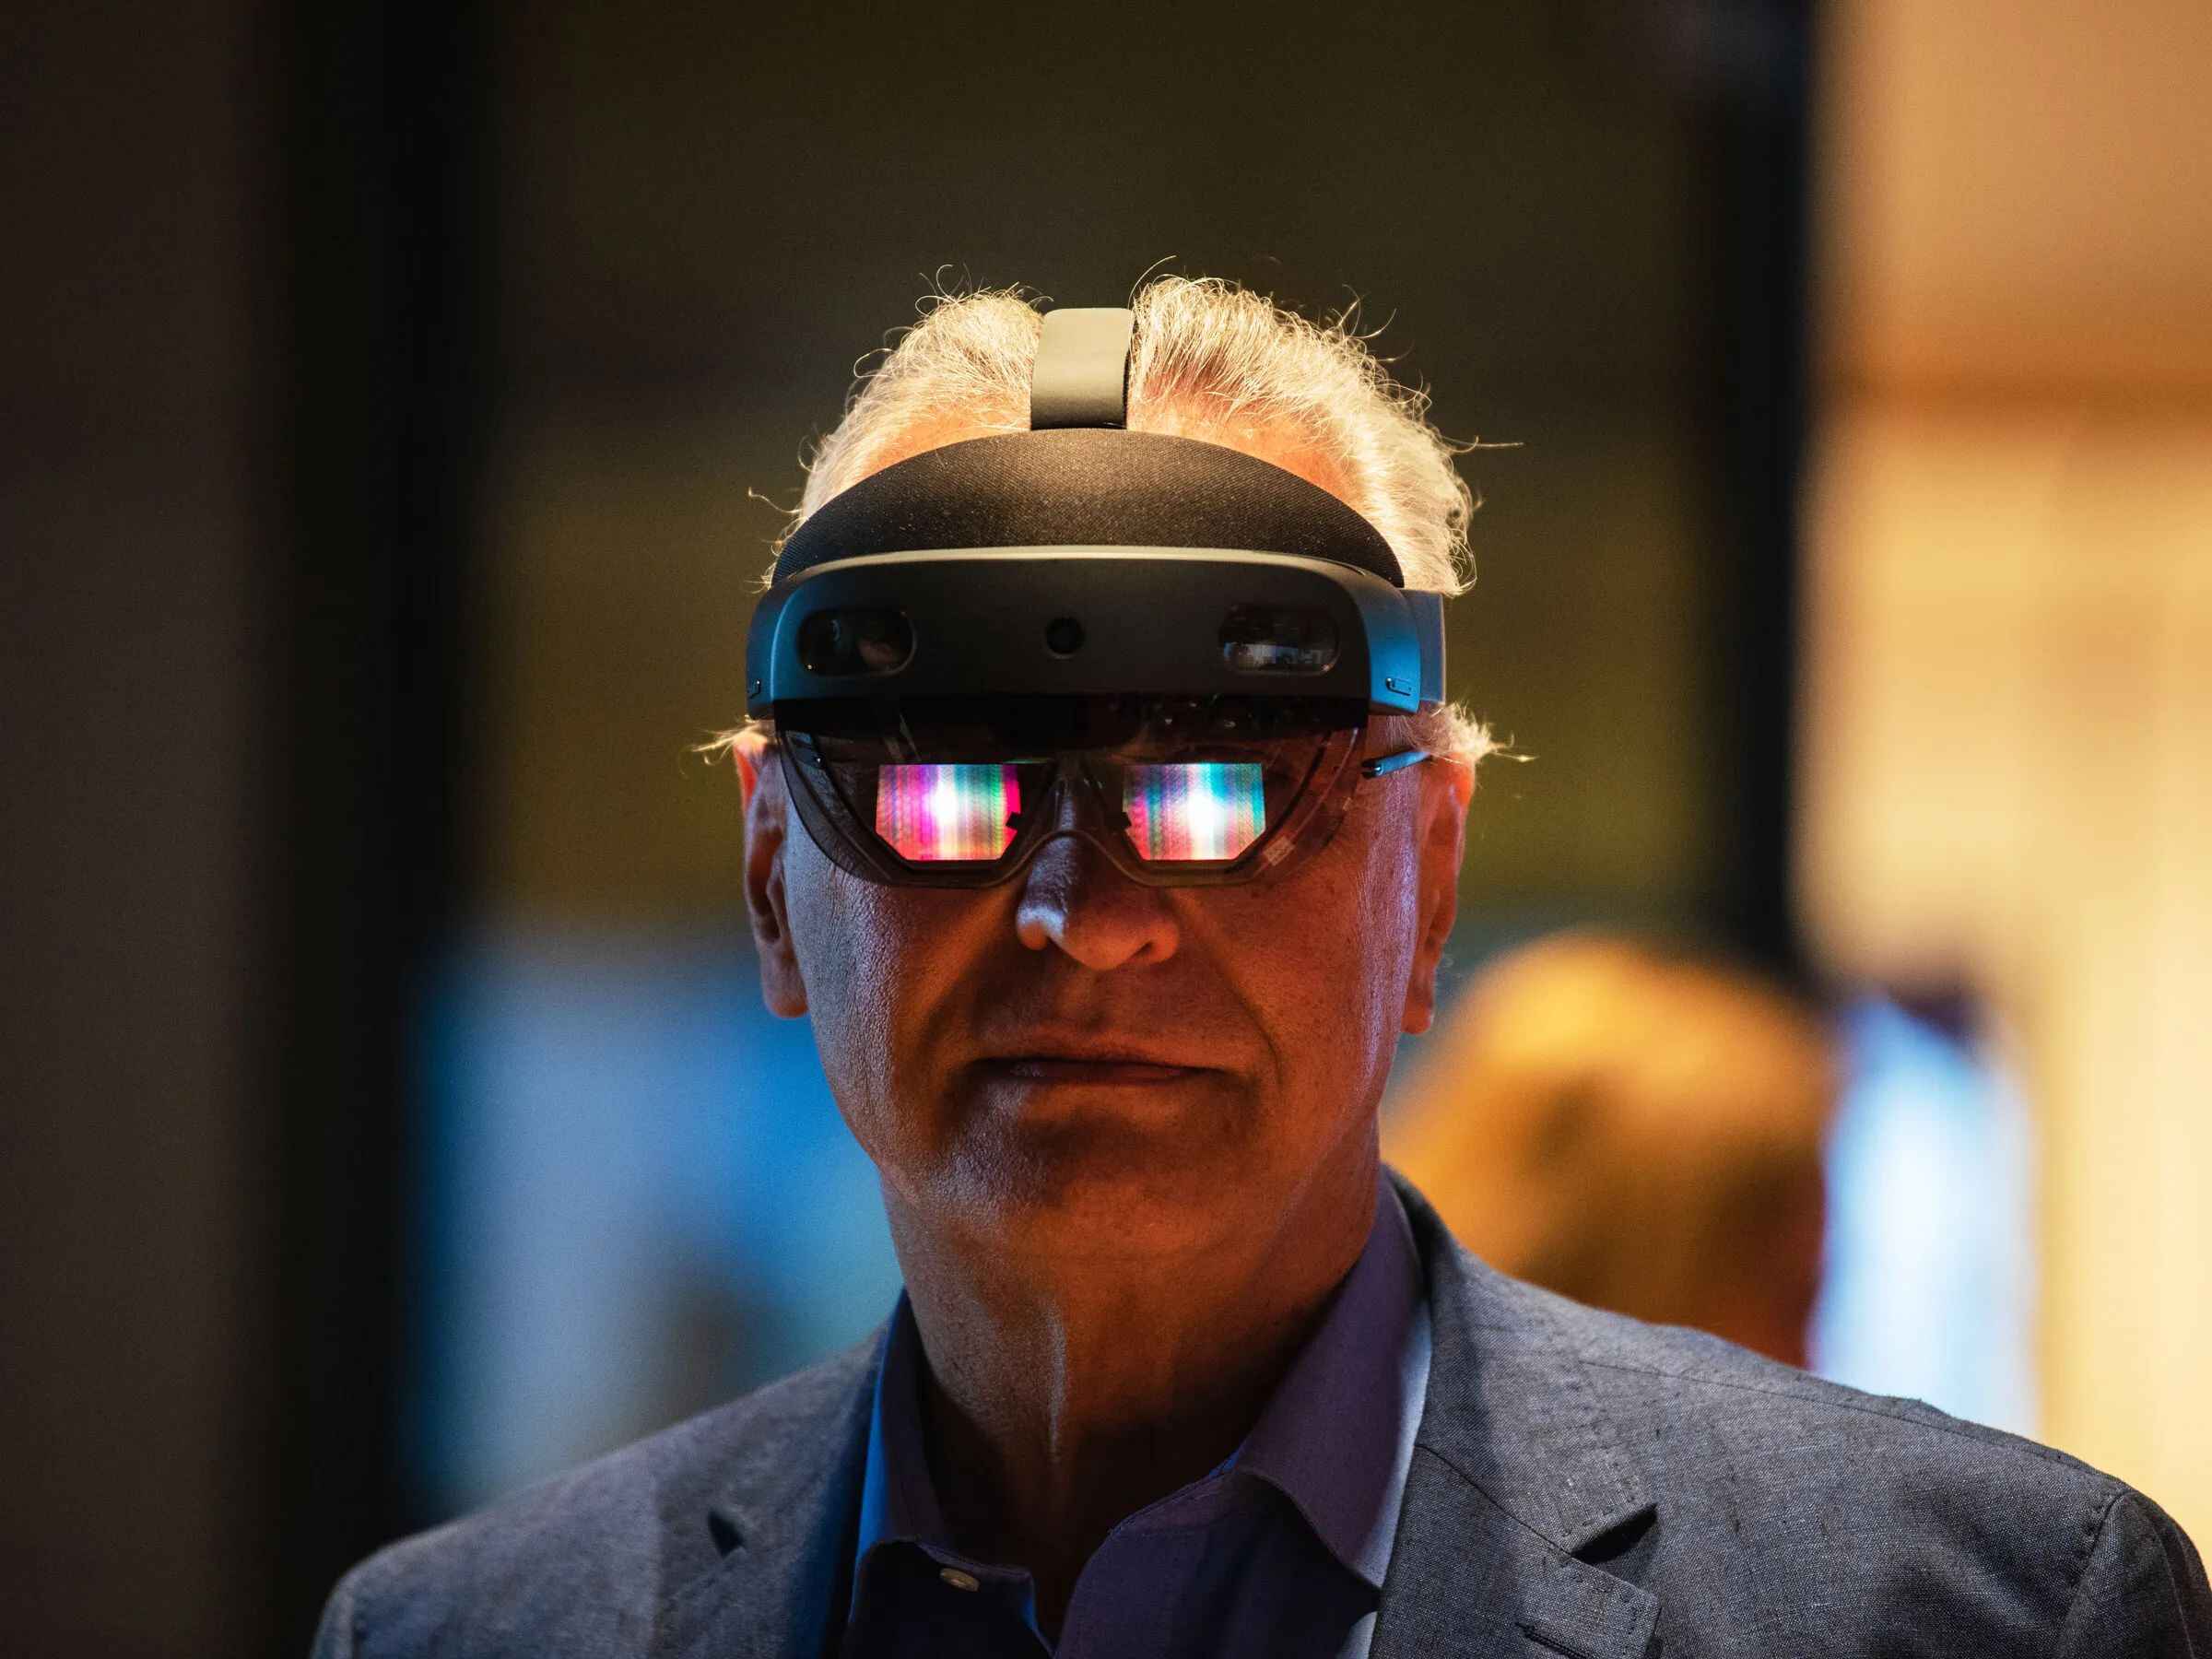
Step 3: Turn on the HoloLens
Now that you have the HoloLens securely placed on your head, it’s time to power on the device and step into the world of mixed reality. Follow these steps to turn on the HoloLens:
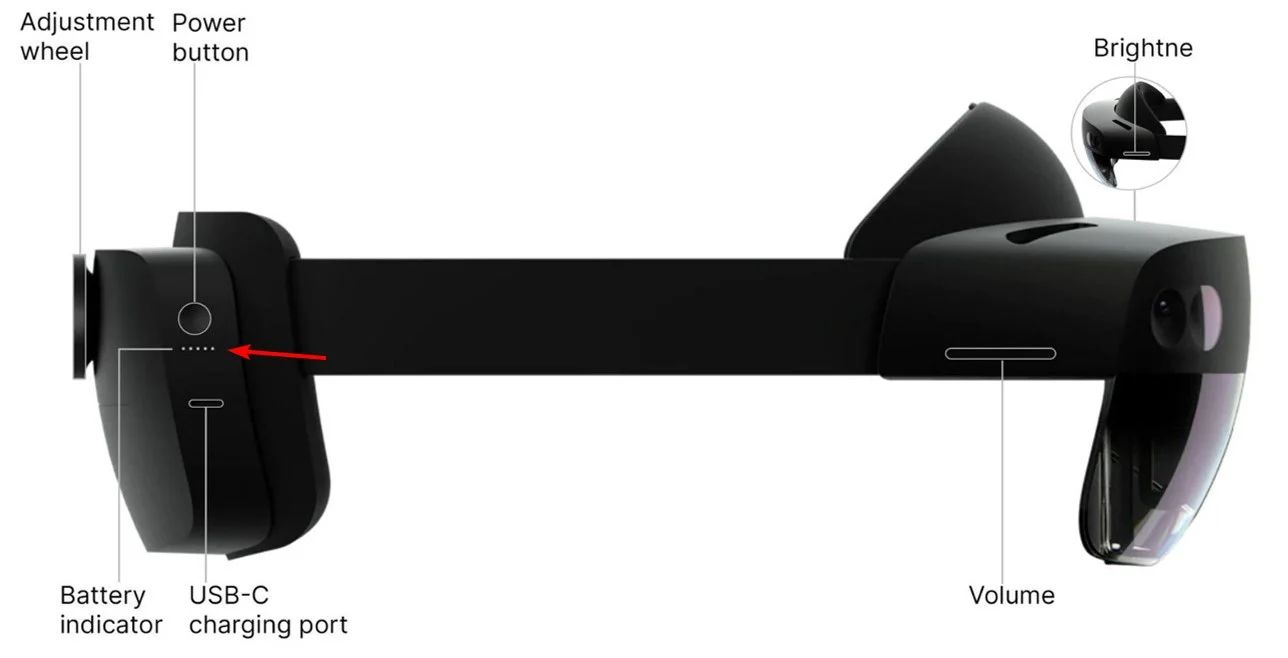
- Locate the power button: On the right side of the HoloLens, just above the right earpiece, you will find the power button.
- Press and hold the power button: Press and hold the power button for a few seconds until you see the Microsoft logo appear on the display.
- Release the power button: Once the Microsoft logo appears, release the power button and wait for the HoloLens to boot up.
- Follow the initial setup: The first time you turn on the HoloLens, you will be guided through an initial setup process. Follow the on-screen instructions to set up your device, connect to a Wi-Fi network, and sign in with your Microsoft account.
- Adjust the brightness: After the initial setup, you may want to adjust the brightness of the HoloLens display for your comfort. Swipe down on the touchpad and navigate to the Brightness section. Use the touchpad to adjust the brightness level according to your preference.
Once the HoloLens is turned on and set up, you will be greeted with a stunning mixed reality interface. The device will track your movements and surroundings, allowing you to interact with holographic content seamlessly.
During usage, you can use the power button to put the HoloLens to sleep or wake it up from sleep mode. Simply press the power button once to wake it up and press and hold the power button to put it to sleep.
Now that your HoloLens is powered on and set up, you’re ready to explore the fascinating world of mixed reality. Get ready to witness holograms come to life and unlock a new dimension of imagination and creativity!
Step 4: Calibrate the HoloLens
After turning on the HoloLens, it’s important to calibrate the device to ensure accurate tracking and an optimal mixed reality experience. Calibration helps the HoloLens understand your movements and adjust to your environment. Follow these steps to calibrate the HoloLens:
- Choose a well-lit environment: Find a room or area with good lighting conditions. Natural daylight or well-distributed artificial light is ideal for accurate calibration.
- Stand in the center of the room: Position yourself in the middle of the room, making sure you have enough space to move around comfortably without any obstructions.
- Hold your gaze on the center of your space: Look straight ahead and focus your gaze on a fixed point in the center of your physical space.
- Follow the setup instructions: The HoloLens will guide you through a calibration process on the display. Follow the on-screen instructions to complete the calibration.
- Perform head movement exercises: Once the calibration process is complete, the HoloLens may prompt you to perform head movement exercises. This helps the device understand the range of your head movements and ensures accurate tracking of your position.
During the calibration process, it’s important to keep your head steady and follow the instructions on the screen. This will enable the HoloLens to establish a spatial understanding of the environment and track your movements accurately.
Remember, proper calibration is essential for an immersive and seamless mixed reality experience. It ensures that holograms align accurately with your physical environment, allowing you to interact with virtual objects as if they are truly there.
Once the calibration is complete, you’re all set to dive into the amazing world of mixed reality with your HoloLens. Get ready to explore holographic landscapes, engage with virtual characters, and unlock endless possibilities in this exciting new frontier!
Step 5: Set up Windows Hello
Windows Hello is a convenient and secure way to unlock your HoloLens using facial recognition technology. By setting up Windows Hello, you can quickly and easily access your device without the need for passwords or PINs. Follow these steps to set up Windows Hello on your HoloLens:
- Open the Settings menu: Start by opening the Start menu on the HoloLens and selecting “Settings”.
- Navigate to Accounts: In the Settings menu, scroll down and select “Accounts”.
- Select Sign-in options: Under the Accounts menu, choose “Sign-in options” to access the Windows Hello settings.
- Set up Windows Hello: In the Sign-in options menu, select “Set up” under the Windows Hello section.
- Follow the on-screen prompts: The HoloLens will guide you through the process of setting up Windows Hello. This typically includes positioning your face within the frame and allowing the device to capture your facial features for recognition.
- Create a PIN as a backup: While setting up Windows Hello, you will be asked to create a PIN as a backup authentication method. This is useful in case Windows Hello encounters any difficulties recognizing your face.
- Test Windows Hello: After completing the setup process, you can test Windows Hello by putting the HoloLens to sleep and then waking it up. The device should recognize your face and unlock automatically.
Once Windows Hello is set up, you can enjoy the convenience of logging in to your HoloLens with just a glance. It provides a secure and personalized experience, tailored to you.
It’s worth noting that while Windows Hello offers a high level of security, it is advisable to keep a PIN as a backup option. This ensures that you can access your HoloLens even in scenarios where facial recognition may not be feasible or reliable.
With Windows Hello set up, you can now unlock the full potential of your HoloLens effortlessly. Enjoy the seamless authentication process, where the HoloLens recognizes you and grants you access to a world of holographic wonder with a simple look!
Conclusion
Congratulations! By following the steps outlined in this guide, you have successfully learned how to turn on your HoloLens and get it ready for an immersive mixed reality experience. From charging the device to calibrating it and setting up Windows Hello, each step plays a crucial role in ensuring optimal performance and a seamless user experience.
As you embark on your HoloLens journey, remember to explore the wide range of holographic apps and experiences available. Whether you’re using it for gaming, education, design, or productivity, the HoloLens offers endless possibilities to engage with holograms and blend the digital and physical worlds.
If you encounter any technical issues or have further questions, don’t hesitate to consult the HoloLens documentation or reach out to Microsoft support for assistance. The HoloLens community is also a fantastic resource for sharing experiences, insights, and creative ideas.
Now, with your HoloLens fully charged, worn comfortably, powered on, calibrated, and Windows Hello set up, it’s time to take the leap into the extraordinary realm of mixed reality. Explore new dimensions, create memories, and unlock the wonders of holographic computing right before your eyes.
Enjoy your HoloLens adventure, and may you be inspired by the limitless possibilities that await you in the magical world of mixed reality!