Introduction
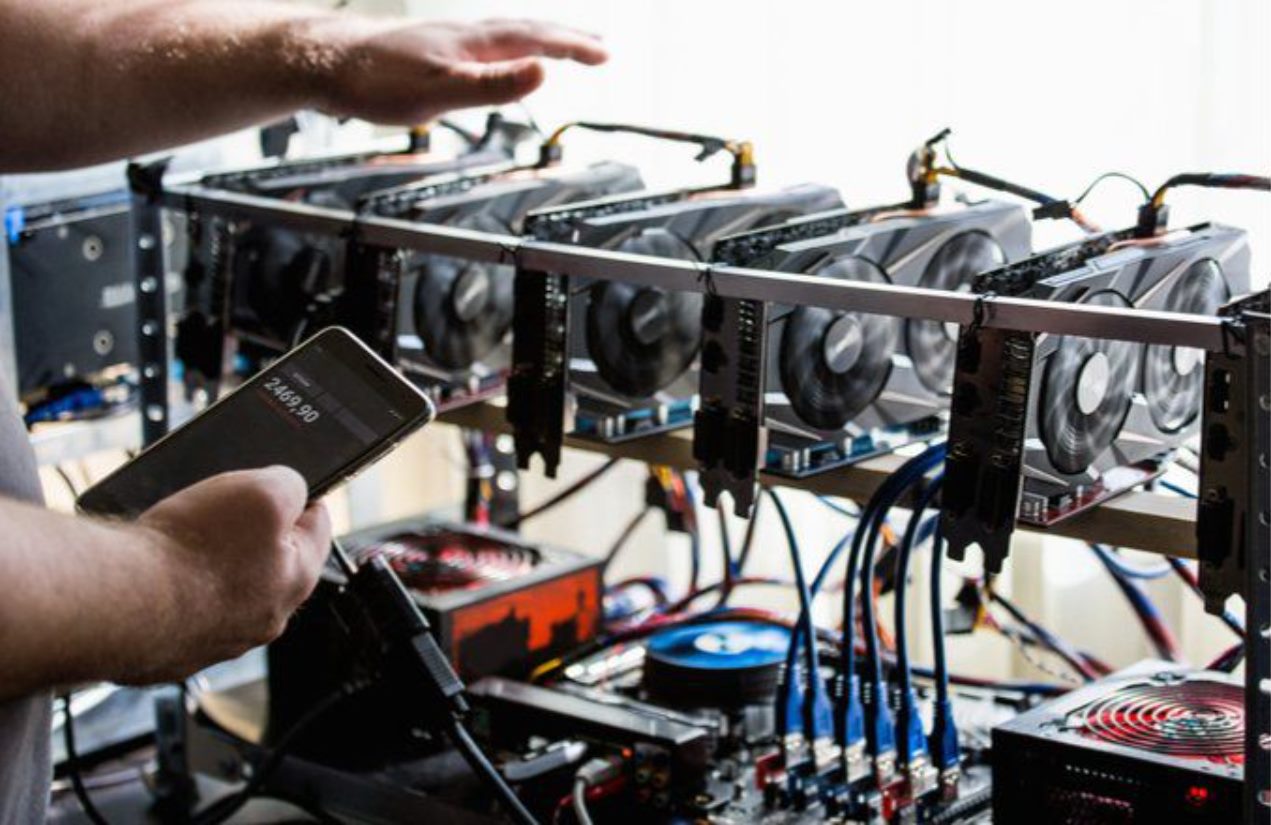
Welcome to the world of cryptocurrency mining! If you are interested in mining Litecoin, one of the most popular cryptocurrencies, you’ve come to the right place. Creating your own mining pool can be a rewarding experience that allows you to contribute to the Litecoin network while potentially earning some coins in the process.
Before we dive in, let’s understand what a mining pool is. In cryptocurrency mining, a mining pool is a group of miners who work together to increase their chances of finding a block. By pooling their resources, miners can combine their computing power and collectively solve complex mathematical problems to earn rewards.
In this guide, we will walk you through the process of setting up your own Litecoin mining pool. While it may sound complex, rest assured that with the right tools and a bit of technical know-how, you’ll be up and running in no time.
To successfully create your mining pool, there are a few key components you’ll need to set up. First, you’ll need to establish a server to host your mining pool. This server will act as the central hub for your pool’s activities. Second, you’ll need to install and configure the Litecoin Core software, which will serve as the backbone of your pool. Additionally, you’ll need to install and configure the Stratum Mining Server, a mining pool server software, to connect with Litecoin Core.
But it doesn’t stop there. To provide your miners with a user-friendly experience, you’ll need to set up a website where they can monitor their mining progress, manage their accounts, and receive payouts. This requires setting up the necessary web server software and implementing a website with all the desired features.
Throughout this guide, we’ll provide you with detailed step-by-step instructions on how to accomplish each of these tasks. By the end, you’ll have your very own Litecoin mining pool up and running, ready to accept miners and reward them for their computational efforts.
So, roll up your sleeves and let’s get started on this exciting journey of creating your own Litecoin mining pool!
Step 1: Setting up the Server
Before you can start building your own Litecoin mining pool, you’ll need to set up a server to host your pool. This server will act as the central hub for all pool activities, handling the communication between the miners and the mining software.
The server can be a physical machine that you own, or you can choose to use a cloud hosting service. If you decide to go with a cloud hosting provider, make sure to choose one that offers good network connectivity and sufficient computing power for your mining pool’s needs.
Once you have a server ready, you’ll need to install an operating system on it. Linux-based systems, such as Ubuntu or CentOS, are commonly used for mining pool servers due to their stability and efficiency. You can choose the Linux distribution that you are most comfortable with, or the one that is recommended by the mining software you plan to use.
After installing the operating system, it’s crucial to keep your server up to date with the latest security updates. Regularly check for updates and apply them to ensure that your server remains secure and protected against potential vulnerabilities.
Next, you’ll need to configure your server’s network settings. It’s essential to have a stable and reliable internet connection for your mining pool. Set up a static IP address for your server to ensure that it doesn’t change, as this could disrupt the connectivity of your mining pool.
To further secure your server, it’s recommended to set up a firewall to regulate incoming and outgoing network traffic. Configure your firewall to allow the necessary connections for your mining pool software and block any unauthorized access attempts.
Additionally, consider enabling SSH (Secure Shell) access to your server so that you can remotely manage it. SSH provides a secure method for logging into your server and performing administrative tasks from a remote location.
By setting up your server correctly, you’ll have a solid foundation for your mining pool. In the next step, we’ll install and configure Litecoin Core, the software that will handle the core functionality of your mining pool.
Step 2: Installing Litecoin Core
After setting up your server, the next step in creating your own Litecoin mining pool is to install Litecoin Core. Litecoin Core is the official software client developed by the Litecoin community, and it will serve as the backbone of your mining pool.
To install Litecoin Core, you’ll first need to download the appropriate installation package for your server’s operating system. Visit the official Litecoin website or the Litecoin GitHub repository to find the latest version of Litecoin Core and download the corresponding package.
Once you have downloaded the installation package, you can proceed with the installation process. The exact steps may vary depending on your operating system, but the general steps are as follows:
- Extract the contents of the downloaded package to a directory of your choice.
- Open a terminal or command prompt and navigate to the extracted directory.
- Run the installation command specific to your operating system.
During the installation process, Litecoin Core will create the necessary files and directories to store the Litecoin blockchain data. This data is crucial for your mining pool as it contains information about all Litecoin transactions and blocks.
After the installation is complete, you’ll need to start Litecoin Core for the first time. This process may take some time as the software needs to synchronize with the Litecoin network and download the entire blockchain. The blockchain can be several gigabytes in size, so ensure that you have enough storage space available on your server.
Once Litecoin Core is fully synchronized, it will be ready to accept connections from other software components of your mining pool. The next step is to configure Litecoin Core to enable the Stratum Mining Server to communicate with it.
With Litecoin Core successfully installed, you have taken a crucial step in setting up your mining pool. In the next step, we’ll delve into the process of configuring Litecoin Core to ensure seamless communication with the Stratum Mining Server.
Step 3: Configuring Litecoin Core
Now that you have installed Litecoin Core, the next step in creating your own Litecoin mining pool is to configure it. Configuration is important to ensure that Litecoin Core works seamlessly with the other components of your mining pool, such as the Stratum Mining Server.
First, open the configuration file of Litecoin Core using a text editor. The location of the file may vary depending on your operating system, but it is usually named “litecoin.conf” and located in the Litecoin Core data directory.
In the configuration file, you’ll find various settings that you can modify to tailor Litecoin Core to your mining pool’s needs. Here are some key configurations you should consider:
- rpcuser and rpcpassword: These settings define the username and password that the Stratum Mining Server will use to communicate with Litecoin Core via the RPC (Remote Procedure Call) interface. Choose strong and unique values for these settings for enhanced security.
- rpcport: This setting specifies the port number that Litecoin Core will listen on for incoming RPC connections. It is recommended to use a non-standard port to minimize the risk of unauthorized access.
- server: Set this to 1 to enable the server mode of Litecoin Core, allowing it to accept incoming connections from other mining pool components.
- txindex: By default, Litecoin Core does not index the transaction database for performance reasons. However, for a mining pool, it is necessary to enable transaction indexing (txindex=1) to provide accurate and up-to-date information about transactions.
After making the necessary configurations, save the file and restart Litecoin Core for the changes to take effect. Verify that Litecoin Core starts up successfully and connects to the Litecoin network without any issues.
Now that Litecoin Core is properly configured, it can establish communication with the Stratum Mining Server, which we’ll install and configure in the next step. Through this connection, the mining server will be able to request work from Litecoin Core and distribute it to the individual miners connected to your pool.
In the upcoming step, we will explore the process of installing and configuring the Stratum Mining Server, a critical component in creating a fully functional Litecoin mining pool.
Step 4: Installing Stratum Mining Server
Now that Litecoin Core is configured, the next step in creating your own Litecoin mining pool is to install the Stratum Mining Server. The Stratum Mining Server is responsible for managing the communication between the miners and Litecoin Core, distributing work and collecting mining results.
To install the Stratum Mining Server, you’ll need to use a software package specifically designed for this purpose. One popular choice is “Stratum Mining Server” by SlushPool, which is open-source and widely used in the mining community.
Start by downloading the Stratum Mining Server software from its official GitHub repository. Ensure that you are downloading the latest stable release for compatibility and security reasons.
Once you have downloaded the software, extract it to a directory of your choice on your mining pool server. Open a terminal or command prompt and navigate to the extracted directory. Here, you’ll find various configuration files and scripts needed to set up and run the Stratum Mining Server.
Before you can start the Stratum Mining Server, you’ll need to install the required dependencies. These dependencies may vary depending on your operating system, so refer to the provided documentation for specific instructions.
After installing the dependencies, you can proceed with the configuration of the Stratum Mining Server. Open the configuration file (usually named “config.py”) in a text editor. Here, you’ll find several settings that need to be adjusted to match your mining pool’s requirements.
- RPC_URL: Set this to the RPC URL of your Litecoin Core instance. It should correspond to the IP address, port, username, and password you configured in the Litecoin Core.
- BLOCK_TEMPLATE_UPDATE_INTERVAL: The interval at which the Stratum Mining Server fetches new block templates from Litecoin Core. The default value is typically fine, but you can adjust it based on your needs.
- JOBS_SUFFIX: A unique suffix added to job IDs to differentiate them from other mining pools. You can customize this to make your mining pool easily identifiable.
Once you have made the necessary configurations, save the file and start the Stratum Mining Server. Execute the provided script or command to initiate the server. Make sure that it starts up without any errors or warnings.
With the Stratum Mining Server up and running, your mining pool is ready to accept miner connections. In the next step, we’ll explore the process of setting up the website for your mining pool, where miners can monitor their progress and manage their accounts.
Step 5: Configuring Stratum Mining Server
Now that the Stratum Mining Server is installed, the next step in creating your own Litecoin mining pool is to configure it. Configuration is essential to ensure that the Stratum Mining Server functions correctly and communicates seamlessly with both the miners and Litecoin Core.
Open the configuration file of the Stratum Mining Server (usually named “config.py”) using a text editor. This file contains various settings that you can adjust to match your mining pool’s requirements.
Here are some key configurations you should consider:
- BIND_HOST: Set this to the IP address your mining pool server is listening on. It should be the same IP address used to configure Litecoin Core and should be accessible by the miners.
- PORT: Specify the port number that the Stratum Mining Server will listen on for incoming miner connections. It’s recommended to use a non-standard port to minimize the risk of unauthorized access.
- RPC_URL: Verify that the RPC URL specified here matches the RPC URL you previously configured in Litecoin Core. It should include the IP address, port, username, and password for Litecoin Core’s RPC interface.
- COINBASE_ADDRESS: Set this to your Litecoin wallet address where block rewards will be sent. This address will receive a portion of the mining rewards generated by your pool.
Additionally, you may want to customize other settings such as the minimum and maximum difficulty levels, the pool fee percentage, or the payout threshold. Review the available configuration options and adjust them according to your mining pool’s specific needs.
Once you have made the necessary configurations, save the file and restart the Stratum Mining Server. Verify that it starts up without any errors and is ready to accept connections from miners.
With the Stratum Mining Server properly configured, miners can now connect to your mining pool, receive work assignments, and submit their mining results. However, to provide a user-friendly experience, you’ll need to set up a website where miners can monitor their mining progress, manage their accounts, and receive payouts.
In the next step, we will explore the process of setting up the website for your mining pool, completing the necessary components for a fully functional Litecoin mining pool.
Step 6: Setting up the Website
A website plays a crucial role in providing miners with a user-friendly interface to interact with your mining pool. It allows them to monitor their mining progress, manage their accounts, and receive payouts. In this step, we’ll explore the process of setting up the website for your Litecoin mining pool.
First, you’ll need to choose a web server software to host your mining pool website. Popular options include Apache, Nginx, and LiteSpeed. Select the web server software that you are most comfortable with or the one that best suits your specific needs.
Once you have chosen a web server software, you’ll need to install and configure it on your server. Follow the documentation or tutorials provided by the web server software to complete the installation process.
After the web server software is set up, you’ll need to create the necessary directories and configure the virtual host settings. These settings will define the domain or IP address that will be used to access your mining pool website.
Next, you’ll need to choose a programming language to develop your website. Common languages used for web development include HTML, CSS, JavaScript, and PHP. Depending on your skillset and preferences, select the programming language that you are most comfortable with.
Utilize the selected programming language to create the necessary web pages and functionalities for your mining pool website. This may include designing the homepage, implementing user account management, displaying mining statistics, and creating a payment system to distribute rewards to miners.
To enhance the visual appeal of your website, consider utilizing modern web design techniques, such as responsive design, to ensure compatibility with various devices and screen sizes. Implementing a sleek and intuitive user interface will improve the overall user experience for your miners.
Additionally, it’s vital to prioritize the security of your website. Implement security measures such as SSL/TLS encryption, secure authentication, and protection against common web vulnerabilities like cross-site scripting (XSS) and SQL injection.
Once your website is developed and thoroughly tested, upload the website files to the appropriate directory on your web server. Ensure that the necessary permissions are set so that the web server can access and serve these files to visitors.
Finally, check the functionality of your website by accessing it through a web browser. Navigate through the different pages and test the various features to ensure they work as expected.
With the website for your mining pool up and running, miners can now access and interact with your pool, making their mining experience seamless and convenient. In the next step, we’ll explore the process of configuring the website to integrate with your mining pool’s backend components.
Step 7: Configuring the Website
Now that your website for the Litecoin mining pool is set up, it’s time to configure it to integrate with the backend components of your pool. This step is crucial to ensure that the website can communicate with the Stratum Mining Server and provide miners with an accurate representation of their mining activities.
First, you’ll need to configure the website to establish a connection with the Stratum Mining Server. This typically involves specifying the IP address and port number of the Stratum Mining Server in the website’s configuration file or settings. Ensure that the connection details match the configurations you set up for the Stratum Mining Server.
Next, you’ll need to implement functionalities on the website to display mining statistics, such as the connected miners, total hashrate, recent blocks found, and individual miner statistics. Your chosen programming language (such as PHP) can be utilized to communicate with the Stratum Mining Server and retrieve this information.
Consider implementing features that allow miners to set their payout thresholds or select different mining strategies. Providing options for miners to customize their mining experience can enhance their satisfaction and engagement with your pool.
Security is of paramount importance when configuring the website. Implement measures to protect user accounts, such as strong password policies, account verification processes, and CAPTCHA systems to prevent unauthorized access. Regularly update and patch the website’s software and plugins to mitigate potential security vulnerabilities.
Through the website, you can also provide support to miners by including a FAQ section, a contact form, or a live chat feature. This provides miners with a way to seek assistance or clarification regarding any issues they may encounter.
Consider optimizing the website for search engines by incorporating search engine optimization (SEO) techniques. This can include optimizing page titles, meta tags, and content targeting relevant keywords to improve visibility in search engine results.
Finally, thoroughly test the website’s functionalities and ensure that it is responsive and compatible with different devices and screen sizes. Conducting user testing can reveal any usability issues or bugs that need to be addressed before opening the mining pool to a broader audience.
By configuring the website, you provide miners with a smooth and intuitive interface to interact with your Litecoin mining pool. In the next step, we’ll explore how to set up user accounts, allowing miners to register and participate in the mining pool.
Step 8: Setting up User Accounts
Setting up user accounts is an essential step in creating your Litecoin mining pool. By allowing miners to register and create user accounts, you can track their mining activities, manage their payouts, and provide a more personalized experience. In this step, we’ll explore how to set up user accounts for your mining pool.
Start by developing a user registration system on your website. This system should allow miners to create an account by providing necessary information such as a username, password, and email address. Ensure that the registration process is secure, with measures in place to prevent automated bots from creating fake accounts.
Implement a user login system that allows miners to securely access their accounts. Utilize modern authentication techniques like password hashing and salting to protect user credentials and prevent unauthorized access.
Once a miner has created an account and logged in, provide them with a dashboard where they can monitor their mining progress, view their earnings, and manage their account settings. This dashboard should display key information such as hashing power, shares submitted, and pending payouts.
Consider implementing additional functionalities in the user account system, such as the ability for miners to modify their payout addresses or set up automatic payout thresholds. Allowing users to have control over their account settings enhances their experience and flexibility.
Security is of utmost importance when it comes to user accounts. Implement measures such as account verification through email, two-factor authentication (2FA), and account activity logs to ensure that user accounts are protected from unauthorized access.
Keep user data confidential and comply with data protection regulations. Store user information securely, encrypt sensitive information, and limit access to user data to authorized personnel only.
Regularly monitor user accounts for any suspicious activity or unauthorized access attempts. Implement security measures like account lockouts after multiple failed login attempts to protect against brute-force attacks.
Ensure that user account settings and preferences are seamlessly synchronized with the backend of the mining pool system. This includes updating the user’s mining status, balance, and earnings in real-time.
Finally, provide clear instructions and support to users on how to troubleshoot common issues, contact support, and access any resources they may need. Offering prompt and reliable support builds trust and reliability with your miner community.
With user accounts set up, miners can now register, log in, and access customized features and information on your Litecoin mining pool website. In the next step, we’ll explore the importance of testing and validating your mining pool setup before opening it to a wider audience.
Step 9: Testing the Mining Pool
Testing your Litecoin mining pool before launching it to a wider audience is crucial to ensure the smooth operation of the pool and identify any potential issues or bugs. In this step, we’ll explore the importance of testing and provide some recommendations for conducting thorough testing.
One vital aspect of testing is to simulate various scenarios to gauge the performance and stability of your mining pool. Test different mining configurations, such as connecting multiple miners simultaneously, to ensure that your pool can handle the expected load.
Verify that the communication between the mining software components is functioning correctly. Test the connection between the miners and the Stratum Mining Server, as well as the connection between the server and Litecoin Core. Confirm that work assignments are being distributed accurately, and mining results are being collected and processed accordingly.
Conduct extensive testing to identify and fix any potential security vulnerabilities in your mining pool system. Validate that user accounts are secure, and sensitive information is properly protected. Test different types of inputs and validate that the system handles them securely, without exposing any vulnerabilities.
Test payout processes to ensure accurate and timely distribution of mining rewards to the miners. Test different payout thresholds, frequency, and methods (such as manual or automatic) to verify that the payout system functions reliably.
Consider engaging a group of volunteer miners to participate in a beta testing phase. Their feedback and real-world usage of your mining pool can help identify any usability issues or areas for improvement that may have been overlooked during development and initial testing.
Comprehensively document and keep track of any bugs or issues encountered during testing. Prioritize and address these issues to improve the overall performance, stability, and user experience of your mining pool system.
Perform stress testing to evaluate how your mining pool handles high traffic and heavy computational demands. This testing will help you identify any performance bottlenecks and make necessary optimizations to ensure reliable and efficient mining operations.
Utilize monitoring tools and analytics to continuously monitor the performance and stability of your mining pool. Monitor mining statistics, server resource utilization, and network connectivity to identify any potential issues early on and take appropriate action.
Regularly repeat the testing process, especially when introducing new features or making significant changes to your mining pool system. This ensures that your pool remains stable, secure, and capable of supporting the mining community over the long term.
By thoroughly testing your mining pool, you can identify and address any issues or shortcomings before launching it to a wider audience. This level of testing instills confidence in the miners and ensures the successful operation of your Litecoin mining pool.
Conclusion
Congratulations! You have successfully created your own Litecoin mining pool. Through the steps outlined in this guide, you learned how to set up the server, install and configure Litecoin Core and the Stratum Mining Server, create a website, set up user accounts, and test your mining pool. By following these steps, you have gained the knowledge and skills necessary to build and manage a functioning mining pool.
Creating your own mining pool allows you to contribute to the Litecoin network, provide miners with a reliable and secure platform, and potentially generate additional income through pool fees. It’s an exciting venture that enables you to participate in the world of cryptocurrency mining.
Remember to regularly update and maintain your mining pool to ensure its security, stability, and optimal performance. Keep an eye on new developments and updates in the cryptocurrency mining sector, as they may require adjustments to your mining pool setup.
Additionally, foster a community around your mining pool by providing regular communication, support, and updates to your miners. Engage with the mining community, address their concerns, and continuously improve your pool’s features and user experience.
Always prioritize security throughout your mining pool operations. Implement best practices, monitor for potential vulnerabilities, and promptly address any security threats or concerns that may arise.
Lastly, stay up to date with changes in the Litecoin network, as they may impact your mining pool’s operations and require adjustments or upgrades. By staying informed and proactive, you can ensure the continued success of your mining pool.
Now it’s time to launch your mining pool, attract miners, and create a thriving community. Best of luck on your mining pool journey, and may your mining operations be prosperous!


