Introduction
Are you intrigued by the world of cryptocurrency and want to get involved in mining? Litecoin, one of the most popular cryptocurrencies, offers a great opportunity to start your mining journey. By building your own Litecoin mining rig, you can join the network and generate a steady stream of Litecoins.
But what exactly is Litecoin mining, and why should you consider building your own mining rig? In this guide, we will explore the ins and outs of Litecoin mining and walk you through the process of building your own rig step by step.
Litecoin mining involves using your computer’s computational power to solve complex mathematical problems. By successfully solving these problems, you contribute to the security and stability of the Litecoin network. In return for your efforts, you receive a reward in the form of Litecoins.
Building your own mining rig has several advantages over alternative methods of mining. Firstly, it allows you to have complete control over the hardware components used, ensuring that you have a reliable and efficient setup. Additionally, building your own rig gives you the flexibility to customize the configuration and optimize it for maximum performance.
Now that we understand the basics, let’s dive into the process of building a Litecoin mining rig. We will guide you through each step, from choosing the right hardware components to configuring the software and joining a mining pool.
Before we proceed, it’s important to note that mining Litecoins is resource-intensive and can be energy-consuming. As a result, it’s crucial to consider the financial and environmental aspects of mining before embarking on this venture. With that in mind, let’s get started on building your Litecoin mining rig!
What is Litecoin Mining?
Litecoin mining is the process of validating and adding transactions to the Litecoin blockchain. Similar to Bitcoin mining, it involves solving complex mathematical problems using your computer’s computational power and specialized mining hardware.
When a Litecoin transaction occurs, it is broadcasted to the network and added to a pool of pending transactions called the mempool. Miners then compete to solve a cryptographic puzzle, known as Proof of Work, to validate and group these transactions into a block.
The proof-of-work algorithm used in Litecoin mining is called Scrypt. Unlike Bitcoin’s SHA-256 algorithm, Scrypt is memory-intensive, which makes it more resistant to specialized mining hardware called ASICs. This means that Litecoin mining can be done using consumer-grade hardware, like graphic cards (GPUs), making it more accessible to a wider range of miners.
Once a miner successfully solves the puzzle, they broadcast the new block to the network and receive a reward in the form of newly minted Litecoins. This reward, along with transaction fees, incentivizes miners to continue processing transactions and securing the network.
As more miners join the network, the mining difficulty increases to maintain the average block time of 2.5 minutes. This ensures a consistent and reliable generation of new blocks and prevents any single entity from dominating the mining process.
Litecoin, like Bitcoin, has a limited supply of coins, with a maximum of 84 million Litecoins that can ever be mined. This scarcity gives Litecoin value and makes it an attractive investment and means of transferring value.
In summary, Litecoin mining involves using your computer’s computational power to validate and add transactions to the Litecoin blockchain. It is a resource-intensive process that requires specialized hardware and contributes to the security and decentralization of the network.
Why Build Your Own Mining Rig
When it comes to mining Litecoins, you have a few options – you can either use mining software on your existing computer, purchase a pre-built mining rig, or build your own mining rig. While each option has its merits, building your own mining rig offers several advantages that make it a popular choice among miners.
1. Cost-Effectiveness: Building your own mining rig allows you to choose the hardware components that best fit your budget. You have the freedom to select cost-effective options without compromising on performance. This can result in significant savings compared to purchasing a pre-built mining rig, which often comes with a premium price tag.
2. Customization: By building your own mining rig, you have full control over the configuration and optimization of the hardware components. This means you can tailor the rig to your specific needs and mining goals. You can choose the best graphic cards, power supply, cooling system, and other components that offer the best performance and efficiency for mining Litecoins.
3. Scalability: Building your own mining rig allows you to start small and expand as your mining operation grows. You can add more graphic cards or upgrade other components to increase your mining power. This flexibility provides the opportunity to scale your mining operation according to your resources and objectives.
4. Learning Experience: Building your own mining rig offers an invaluable learning experience. You get hands-on experience in assembling computer components, configuring the BIOS, installing an operating system, and setting up mining software. This knowledge can be useful not only for future mining endeavors but also for general computer maintenance and troubleshooting.
5. Long-Term Investment: Investing in building your own mining rig means you have a tangible asset that can retain its value. Even if mining becomes less profitable or you decide to cease mining, you can repurpose the hardware components for other purposes or sell them to recoup some of your investment.
While building your own mining rig requires some technical knowledge and initial investment, the benefits it offers make it a worthwhile endeavor for many Litecoin miners. Not only does it provide cost-effectiveness and customization, but it also offers a valuable learning experience and a long-term investment.
Choosing the Right Hardware Components
When building a Litecoin mining rig, selecting the right hardware components is crucial for maximizing mining performance and efficiency. Here are the key components you need to consider:
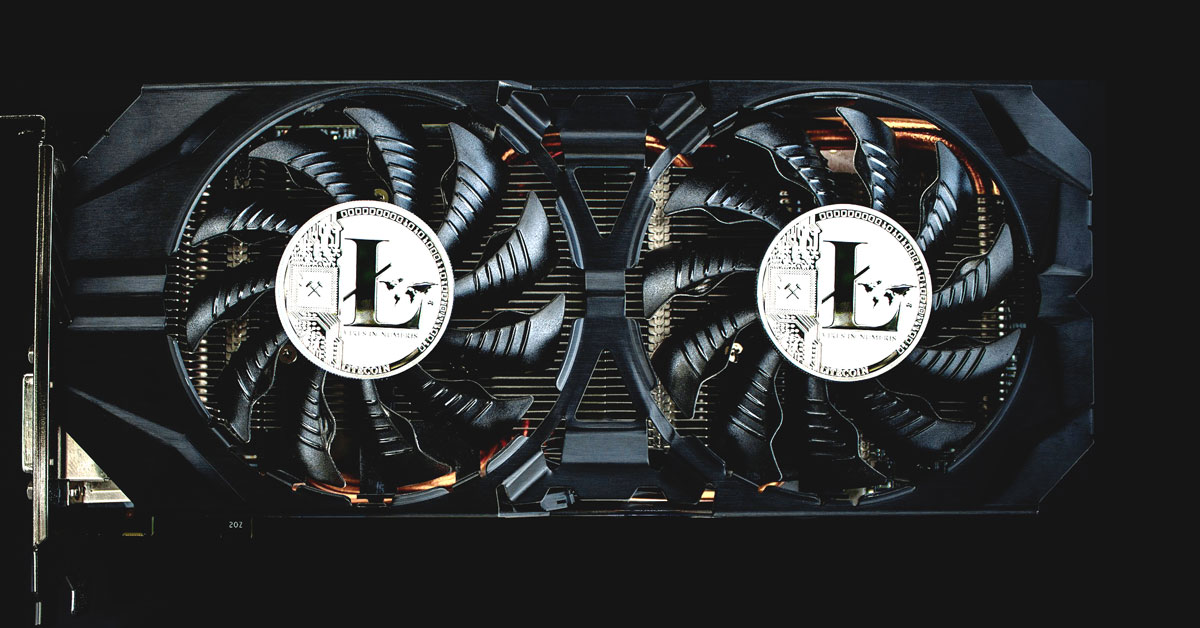
1. Graphic Cards (GPUs): The most important component for mining Litecoins is the graphic card. Ideally, you should choose a high-performance GPU that is optimized for mining. Look for models with high hash rates and low power consumption. Popular choices include AMD’s Radeon RX series and NVIDIA’s GeForce GTX series.
2. Power Supply Unit (PSU): A reliable and efficient power supply is essential to provide stable power to your mining rig. Choose a PSU with enough wattage to support all your components, accounting for any potential future upgrades. Look for a PSU with high efficiency ratings, such as 80 Plus Gold or Platinum.
3. Motherboard: Select a motherboard that supports multiple GPUs and has sufficient PCI-E slots. Ensure compatibility with your chosen CPUs and memory. Look for models with good build quality, ample power delivery, and support for overclocking if desired.
4. CPUs and Memory: While mining primarily relies on the GPU’s computational power, you still need a CPU and memory to support the system. Opt for a mid-range CPU with multiple cores to handle system tasks efficiently. Choose sufficient memory, typically 8GB or more, for smooth operation.
5. Storage: A solid-state drive (SSD) is recommended for faster boot times and smoother operation. Consider the capacity based on your needs, typically 120GB or more.
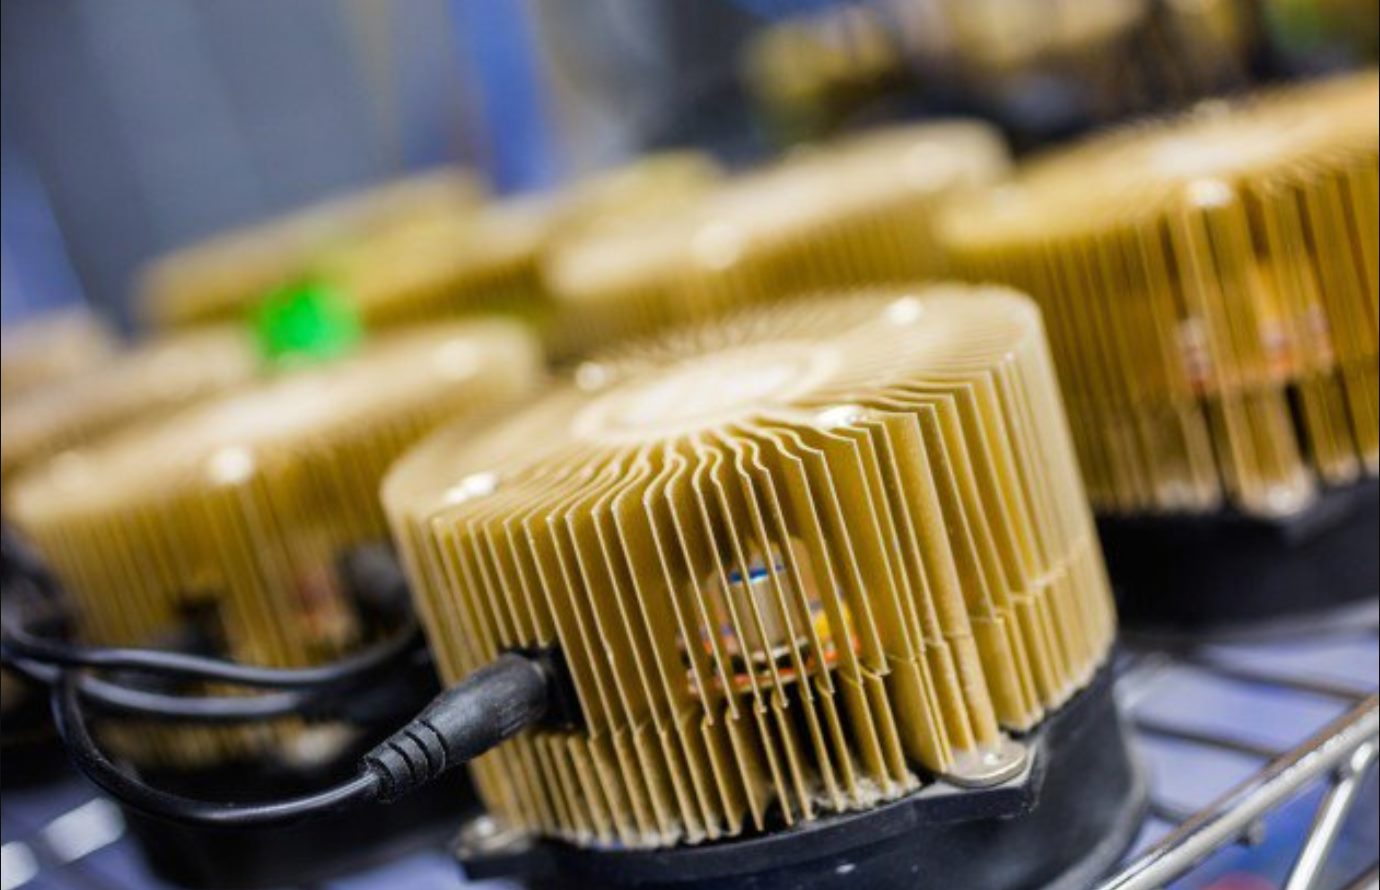
6. Cooling: Adequate cooling is crucial to prevent overheating and ensure the longevity of your components. Opt for a combination of case fans, CPU coolers, and GPU coolers to maintain optimal temperatures. Consider open-air mining rig frames or dedicated mining cases for better airflow.
7. Risers and Cables: If you plan to use multiple GPUs, you will need riser cables to connect them to the motherboard. Ensure that the risers are of good quality and provide stable connections.
When selecting hardware components, consider factors like cost, availability, power efficiency, and compatibility. Take into account the specific requirements for Litecoin mining and aim for a balance between performance and cost-effectiveness.
Lastly, before purchasing any hardware components, do thorough research, read reviews, and seek advice from experienced miners and online forums. This will help you make informed decisions and ensure that you choose the right components for your Litecoin mining rig.
Building the Frame and Assembling the Rig
Once you have gathered all the necessary hardware components, it’s time to start building your Litecoin mining rig. Here are the steps to follow:
1. Prepare the Frame: Start by setting up the frame or chassis for your mining rig. You can use a custom-built frame, a mining rig case, or even a sturdy open-air frame. Make sure the frame provides enough space and support for all your components.
2. Mount the Motherboard: Install the motherboard onto the frame using the appropriate standoffs or screws. Ensure that it is securely mounted and aligned properly with the I/O shield in the back.
3. Connect the Power Supply: Install the power supply unit (PSU) onto the frame and connect all the necessary power cables. Connect the primary power cable to the motherboard and connect power cables to each GPU.
4. Install the CPUs and Memory: Install the CPU onto the motherboard following the manufacturer’s instructions. Apply thermal paste and attach the CPU cooler. Insert the memory modules into the appropriate slots according to the motherboard’s specifications.
5. Attach the GPUs: Mount the graphic cards onto the motherboard and secure them with screws or brackets. Connect the power cables from the PSU to each GPU, ensuring a secure connection.
6. Connect the Storage: Mount the solid-state drive (SSD) onto the frame and connect it to the motherboard using the appropriate SATA cables. Ensure that the SSD is securely attached.
7. Connect the Cooling: Install case fans and CPU coolers for proper cooling. Ensure that the airflow is optimized to keep the components at optimal temperatures. Consider using thermal paste or pads for efficient heat transfer.
8. Check Connectors and Cables: Double-check all the connections, ensuring that all cables are properly fitted and secured. Avoid any loose connections that may cause stability issues or power failures.
9. Cable Management: Organize and route the cables neatly to improve airflow and maintain a tidy setup. Use cable ties or velcro straps to secure the cables and prevent them from obstructing any components.
10. Test and Boot: Before closing the rig, perform a test by connecting the monitor, keyboard, and mouse. Power on the rig and ensure that all components are functioning correctly. Check BIOS settings if necessary.
Building the frame and assembling the mining rig may require some technical skills. If you are unsure, it is recommended to consult online tutorials, manuals, or seek help from experienced miners. Once the rig is assembled and tested, you are ready to move on to the next steps of setting up the software and configuring the operating system for mining Litecoins.
Setting Up the Power Supply
The power supply unit (PSU) is a critical component in your Litecoin mining rig setup. It provides the necessary power to run all the components efficiently and reliably. Here are the steps to follow when setting up the power supply:
1. Determine Power Requirements: Before selecting a power supply, calculate the power requirements of your mining rig. Consider the power consumption of your graphic cards (GPUs), motherboard, CPU, memory, and other connected peripherals. It’s important to choose a PSU that can handle the total power consumption of your rig.
2. Choose the Right Power Supply: Select a power supply with a wattage rating that meets or exceeds the total power requirements of your mining rig. It’s recommended to choose a reliable and reputable brand that offers stable power delivery and high efficiency. Look for power supplies with at least 80 Plus Bronze certification.
3. Connect the Power Cables: Most power supplies come with various cables to connect to different components. Connect the main 24-pin ATX power cable to the motherboard. Some motherboards might require additional power connectors, such as an 8-pin or a 4-pin CPU power connector. Ensure all power cables are securely plugged in.
4. Connect GPU Power Cables: Your GPUs require dedicated power from the PSU. Connect the appropriate power cables, such as 6-pin or 8-pin connectors, from the PSU to each GPU. Make sure each connection is secure and fits properly.
5. Consider Multiple Power Supplies: If your mining rig requires a significant amount of power or if you are using a large number of GPUs, you may need to use multiple power supplies. It’s important to synchronize the power supplies’ start-up sequence and ensure a stable power distribution across the components.
6. Cable Management: Neatly organize and route the power cables to prevent them from blocking airflow and interfering with other components. Use cable ties or velcro straps to secure the cables, keeping them tidy and organized.
7. Power On the Mining Rig: Double-check all the power connections and ensure everything is properly connected and secured. Before powering on the mining rig, make sure all components are correctly installed and tested. Once you are confident, turn on the power supply and boot up the rig.
Always prioritize safety when setting up the power supply for your mining rig. Ensure that the power supply is properly grounded, and handle it with caution to avoid electrical shocks. Additionally, avoid overloading the power supply by staying within its rated capacity.
By following these steps, you can safely and efficiently set up the power supply for your Litecoin mining rig. A properly configured power supply is crucial for the stable and reliable operation of your mining setup.
Installing the Graphics Cards
The graphic cards (GPUs) are the workhorses of your Litecoin mining rig, responsible for performing the complex calculations required for mining. Here are the steps to follow when installing the GPUs:
1. Prepare the Mining Rig: Ensure that your mining rig is powered off and unplugged from the power source. Take necessary precautions to prevent static electricity discharge by grounding yourself.
2. Open the Case: If you are using a closed case, remove the side panel to access the internal components. If you are using an open-air frame, ensure that it is readily accessible.
3. Insert the GPUs: Remove the protective covers from the PCIe slots on the motherboard. Carefully insert the GPUs into the slots, pressing gently until they are fully seated. Make sure that the GPUs align with the slots and the locking mechanism clicks into place.
4. Secure the GPUs: Once the GPUs are inserted, secure them to the mining rig case or frame using screws or brackets. This will prevent any movement or instability during operation.
5. Connect Power Cables: Each GPU requires dedicated power to operate. Connect the appropriate power cables, such as 6-pin or 8-pin connectors, from the power supply unit (PSU) to the corresponding power connectors on the GPUs. Ensure a secure and firm connection.
6. Check Connectors and Cables: Double-check all the connections, including the PCIe slots and power cables, making sure they are properly seated and secured. Loose connections can cause instability or booting issues.
7. Cable Management: Organize and route the GPU power cables neatly to improve airflow and maintain a clean setup. Secure the cables using cable ties or velcro straps to prevent them from obstructing other components.
8. Close the Case: If you removed the side panel, carefully place it back onto the case and secure it. Ensure that the case is properly closed and any screws or latches are fastened.
9. Power On the Mining Rig: Connect the mining rig to the power source, and power on the system. Verify that the GPUs are recognized by the motherboard and appear in the BIOS or device manager. Proceed with configuring the BIOS and installing the operating system.
When installing the graphics cards, it’s important to handle them with care and avoid excessive force. Make sure to follow the manufacturer’s instructions for proper installation. Additionally, be mindful of the power requirements of your GPUs and ensure that your power supply can supply sufficient power for all installed GPUs.
By following these steps, you can successfully install and integrate the graphics cards into your Litecoin mining rig. The GPUs are now ready to perform the intensive computational tasks required for efficient mining operations.
Configuring the Motherboard and BIOS
Configuring the motherboard and BIOS settings is an essential step in setting up your Litecoin mining rig. This ensures the proper functioning and optimization of the hardware components. Here are the steps to follow for configuring the motherboard and BIOS:
1. Access BIOS Settings: Start by restarting your mining rig and pressing the designated key (often Del, F2, or Esc) to access the BIOS settings. The key to enter the BIOS is typically displayed on the screen during the boot-up process.
2. Configure Boot Order: In the BIOS settings, navigate to the “Boot” or “Boot Order” section. Set the boot order priority to boot from the desired storage device (usually the SSD with the operating system installed). Save the changes and exit the BIOS.
3. Enable XMP/DOCP: If you are using high-performance memory modules, look for the XMP (Extreme Memory Profile) or DOCP (Direct Overclock Profile) option in the BIOS. Enabling XMP/DOCP allows the motherboard to automatically configure the memory settings for optimal performance.
4. Adjust Power Settings: Look for power-related settings in the BIOS, such as power limit or power delivery options. Ensure that the power is set to an appropriate level based on your hardware and cooling capabilities. This helps to optimize power consumption and prevent overheating.
5. Enable Mining Mode: Some motherboards offer a specific mining mode or mining-specific settings in the BIOS. Enabling this mode can provide additional stability and optimize the system for mining operations. Check the motherboard manufacturer’s documentation for details.
6. Disable Onboard Devices: If you are not using certain onboard devices, such as onboard graphics or onboard audio, you can disable them in the BIOS. This can help free up system resources and reduce potential conflicts.
7. Update BIOS Firmware (optional): If there is a newer version of the motherboard’s BIOS firmware available, consider updating it to ensure compatibility, stability, and access to the latest features. Follow the manufacturer’s instructions and take caution during the update process.
8. Save and Exit: After making the necessary changes in the BIOS settings, save the changes and exit the BIOS. The mining rig will restart, and the configured settings will take effect.
It’s crucial to be cautious when making changes in the BIOS settings, as incorrect settings can cause instability or prevent the system from booting. It’s recommended to refer to the motherboard manufacturer’s documentation or seek guidance from experienced miners if you are unsure about certain settings.
By properly configuring the motherboard and BIOS settings, you ensure that your mining rig is optimized for performance, stability, and energy efficiency, allowing for efficient mining of Litecoins.
Installing the Operating System
After configuring the motherboard and BIOS settings, the next step in setting up your Litecoin mining rig is to install the operating system (OS). Here is a step-by-step guide to help you install the OS:
1. Choose an OS: Select the operating system that is compatible with your mining software and personal preference. Popular choices for mining include Windows, Linux (such as Ubuntu or EthOS), or mining-specific distributions.
2. Create Bootable Media: Download the installation files for your chosen OS and create a bootable USB drive or DVD. There are various software tools available, such as Rufus or Etcher, that can help you create a bootable media.
3. Set Boot Order: Restart your mining rig and enter the BIOS settings. Navigate to the “Boot” or “Boot Order” section and set the boot order priority to boot from the USB drive or DVD that contains the OS installation files.
4. Install the OS: Save the changes and exit the BIOS. The mining rig will restart and boot from the bootable media. Follow the on-screen prompts to install the operating system. Select the appropriate options and partitions based on your preferences.
5. Configure Network Settings: After the OS installation is complete, ensure that the network settings are properly configured. Connect to your internet network using either wired or wireless connections. Install any necessary network drivers if required.
6. Install Mining Software: Once the OS is installed and network settings are configured, proceed to install the Litecoin mining software of your choice. Popular mining software for Litecoin includes CGMiner, BFGMiner, and Easyminer. Follow the software’s installation instructions and configure it to connect to a mining pool.
7. Perform Updates: After the mining software is installed, it’s important to update the OS and software to the latest versions available. This ensures that you have the most up-to-date features, bug fixes, and security patches.
8. Optimize Performance (optional): Depending on your mining software and OS, you may need to optimize the configuration for better mining performance. This can include tweaking settings like GPU clock speeds, fan speeds, or voltage control. Refer to the software’s documentation or seek guidance from experienced miners.
9. Test Mining Operation: With the OS installed and mining software configured, test the mining operation to ensure that the mining software is working properly. Monitor the hash rate, temperature, and stability of the mining rig during the testing phase.
10. Backup and Security: It’s recommended to create regular backups of your mining rig’s data and configurations. Consider implementing security measures such as utilizing wallets, firewalls, and antivirus software to protect your system from potential security threats.
By following these steps, you can successfully install the operating system on your Litecoin mining rig and prepare it for efficient mining operations. Remember to refer to the documentation for your chosen OS and mining software for specific instructions and recommendations.
Mining Software Setup and Configuration
Once your operating system is installed, the next crucial step in setting up your Litecoin mining rig is to install and configure the mining software. The mining software allows your rig to communicate with the Litecoin network and start mining. Here’s a step-by-step guide to help you with the setup and configuration:
1. Choose Mining Software: Select a mining software compatible with Litecoin mining. Popular options include CGMiner, BFGMiner, Easyminer, and Cudo Miner. Research and compare different software to find the one that suits your needs in terms of features, compatibility, and ease of use.
2. Download and Install: Visit the official website of your chosen mining software and download the latest version. Follow the installation instructions provided by the software developer and complete the installation process.
3. Configure Mining Pool: Mining pools allow miners to combine their resources and share the mining rewards. Choose a reputable Litecoin mining pool and create an account. Obtain the mining pool’s stratum URL and port number, as well as your worker credentials (username and worker password) provided by the pool.
4. Edit Configuration File: Open the mining software’s configuration file using a text editor. The configuration file contains various settings that affect your mining setup. Enter the necessary information, including the mining pool’s stratum URL and port number, as well as your worker credentials.
5. Set Intensity and Clock Speeds: Depending on the mining software you choose, you may have the option to adjust the intensity of your mining operations. Higher intensity settings result in increased hash rates but may also consume more power and generate more heat. Additionally, you can adjust the clock speeds of your GPUs using overclocking software to optimize performance.
6. Save and Run the Software: Save the changes made to the configuration file and start the mining software. The software will establish a connection to the mining pool and begin mining Litecoins. Monitor the mining software’s output for any error messages or warnings.
7. Monitor and Optimize: Keep an eye on the mining software’s performance and monitor vital statistics such as hash rate, temperature, and fan speed. This will allow you to identify any issues, optimize settings, and maximize the efficiency of your mining rig.
8. Troubleshooting: If you encounter any problems during the setup or configuration process, consult the documentation provided by the mining software developer or seek assistance from online forums and communities of Litecoin miners.
Remember to regularly update your mining software to benefit from bug fixes, performance improvements, and new features released by the developer. Stay informed about the latest updates and changes in the mining software ecosystem to ensure you are running the most efficient and secure software version.
By carefully setting up and configuring the mining software, you can efficiently connect your mining rig to the Litecoin network and start generating Litecoins through the mining process.
Joining a Mining Pool
When it comes to Litecoin mining, joining a mining pool is a popular option for miners looking to increase their chances of earning a stable income. Mining pools allow miners to combine their computational power and share the mining rewards. Here’s a step-by-step guide to help you join a Litecoin mining pool:
1. Research and Choose a Pool: Conduct thorough research to find a reputable and reliable Litecoin mining pool. Consider factors such as pool fees, payout methods, pool size, and overall reputation. Look for pools with a good track record, strong community support, and low downtime.
2. Create an Account: Visit the pool’s website and create an account. Provide the required information, such as a username, password, and email address. Some pools may require additional verification steps, such as email confirmation or two-factor authentication.
3. Obtain Mining Pool Details: Navigate to the pool’s dashboard or account settings to obtain the necessary details for connecting your mining rig. You will typically need the pool’s stratum URL and port number, as well as your worker credentials (username and worker password).
4. Configure Mining Software: Open the configuration file of your mining software and input the mining pool details you obtained in the previous step. Save the changes in the configuration file and restart the mining software to establish a connection to the pool.
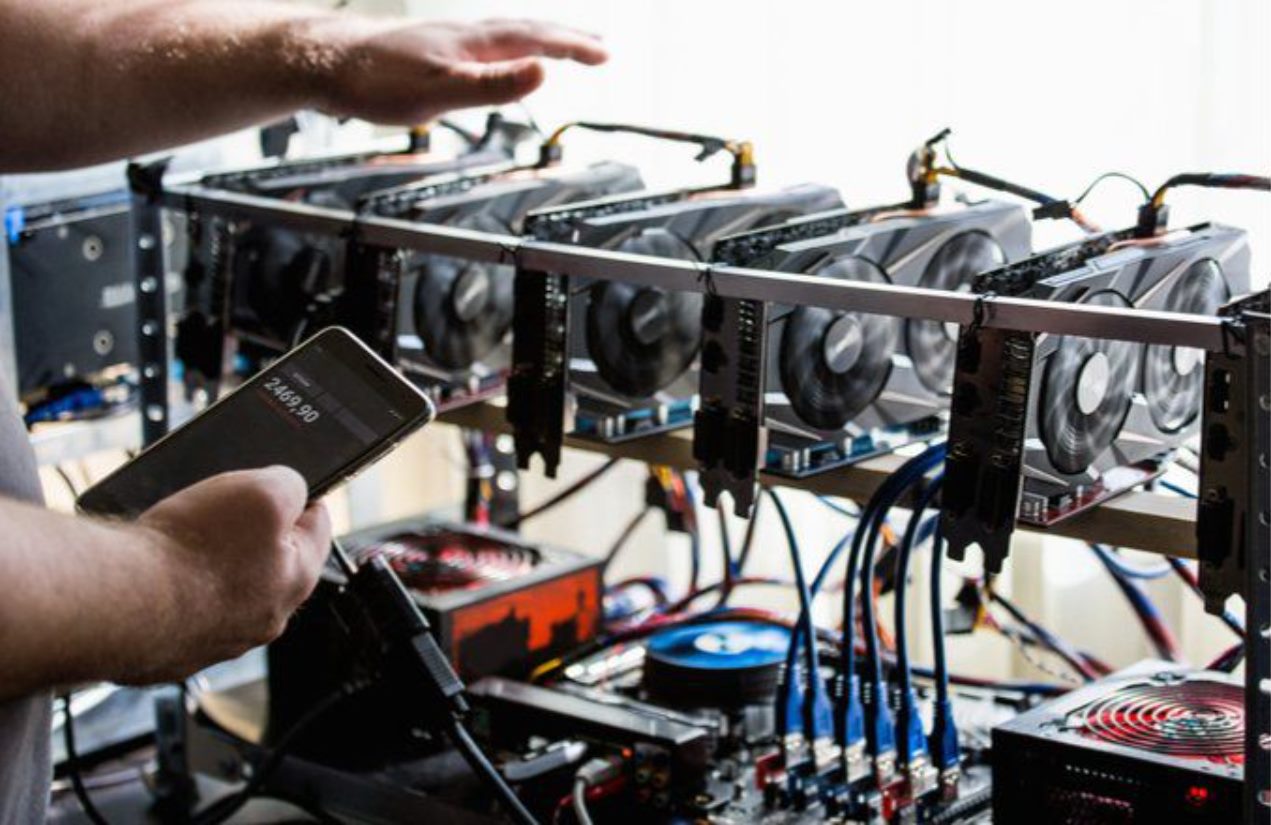
5. Monitor Pool Stats: Once your mining rig is connected to the pool, you can monitor your mining statistics on the pool’s website or through dedicated mining software. Watch for data such as hash rate, shares accepted/rejected, and earnings generated. These stats give you insight into the performance of your mining rig.
6. Track Reward Payments: Mining pools typically have specific payout thresholds, and rewards are distributed on a regular basis. Keep track of your accumulated earnings and set up automatic payment thresholds that suit your preferences. Some pools offer different payment methods, such as manual withdrawals or automatic transfers to your specified cryptocurrency wallet.
7. Participate in Pool Community: Many mining pools have active forums or community channels where miners can connect and share insights, tips, and troubleshooting help. By participating in the pool community, you can learn from experienced miners and stay updated on any important pool-related announcements or changes.
8. Consider Pool Hopping: Some miners employ a strategy called “pool hopping,” where they switch between different mining pools to maximize their earnings. Pool hopping takes advantage of fluctuations in the overall network mining difficulty and can be achieved using specialized software or online platforms. It is important to note that not all pools allow pool hopping.
Remember, when joining a mining pool, you are contributing your computational power towards securing the Litecoin network and solving blocks as a collective effort. By joining a pool, you increase your chances of receiving more frequent and consistent mining rewards compared to solo mining.
Ensure that you regularly monitor the performance and efficiency of the pool, as well as any changes to the pool’s terms and conditions. This way, you can adapt your mining strategy accordingly and make the most out of your participation in the mining pool.
Monitoring and Troubleshooting
Monitoring your Litecoin mining rig is crucial for optimizing its performance and ensuring its smooth operation. Additionally, being able to troubleshoot common issues that may arise during the mining process is essential. Here are some tips for monitoring and troubleshooting your mining rig:
1. Monitor Key Metrics: Keep a close eye on key metrics such as hash rate, temperature, fan speed, and power consumption. Monitoring these metrics allows you to identify any performance issues or anomalies and take appropriate action.
2. Utilize Mining Software: Use mining software that provides detailed information about your mining rig’s performance and statistics. These tools often offer features such as real-time monitoring, alerts, and remote management. Explore available options and choose a software that offers the functionality you need.
3. Maintain Cool Temperatures: Maintaining optimal temperatures is crucial for the longevity and efficiency of your mining rig. Ensure that your rig has sufficient cooling, such as case fans or GPU coolers, to keep components within their recommended temperature ranges. Regularly clean dust from fans and heatsinks to prevent overheating.
4. Regularly Update Software: Keep your mining software and drivers up to date. Developers often release updates to address bugs, improve performance, and optimize compatibility. Stay informed about new versions and security patches and implement them to ensure smooth operation.
5. Check Internet Connectivity: Unstable or loss of internet connectivity can disrupt your mining operations. Make sure you have a reliable internet connection and check for any network issues that may affect your mining rig’s connection to the mining pool.
6. Address Power Issues: Monitor your power supply unit (PSU) for any signs of instability or failure. Check for loose connections, unusual noises, or fluctuations in power output. Ensure that the PSU can deliver sufficient power to all connected components.
7. Troubleshoot Hardware Issues: If you encounter hardware-related problems, such as GPU errors or system crashes, perform basic troubleshooting steps. This may include reseating the GPU, checking cable connections, updating drivers, or testing components individually.
8. Stay Informed: Keep yourself informed about the latest news, updates, and developments in the cryptocurrency and mining communities. Join mining forums, chat groups, or follow relevant online resources to stay updated on potential issues and solutions.
9. Maintain Regular Backup: It is essential to regularly back up your mining rig’s data and configurations. Backing up important files, such as your mining software configuration and wallet files, can help you recover quickly from unexpected failures or system issues.
10. Seek Community Support: If you are facing difficulties or have questions, reach out to the mining community for assistance. Online forums and communities are filled with experienced miners who can offer guidance, troubleshooting tips, and solutions to common problems.
By actively monitoring your mining rig and promptly addressing any issues that arise, you can maintain the performance and efficiency of your Litecoin mining operation. Troubleshooting and resolving problems in a timely manner will help ensure the smooth and uninterrupted mining process.
Conclusion
Congratulations! You have successfully learned the essential steps in building and setting up your own Litecoin mining rig. By understanding the process and carefully choosing the right hardware components, configuring the motherboard and BIOS, installing the operating system, and joining a mining pool, you are now well-equipped to embark on your mining journey.
Building your own mining rig offers several advantages, including cost-effectiveness, customization, scalability, and a valuable learning experience. With proper setup and configuration, you can optimize the performance and efficiency of your mining rig, increasing your chances of earning a steady stream of Litecoins.
Remember to monitor your mining rig regularly, staying vigilant about key metrics, temperature levels, and power consumption. Regularly update your mining software and drivers to benefit from bug fixes and performance improvements.
If you encounter any challenges or issues, don’t hesitate to seek assistance from the vibrant mining community. Online forums, chat groups, and resources are readily available to offer guidance, troubleshooting tips, and solutions to common problems.
Lastly, it’s important to keep in mind the financial and environmental considerations of mining. Litecoin mining can be resource-intensive and energy-consuming. To ensure profitability, carefully calculate costs and weigh them against potential earnings.
We hope this guide has provided you with the necessary knowledge and guidance to start building and operating your Litecoin mining rig. Remember to stay informed about the latest developments in the cryptocurrency mining space and adapt your mining strategy accordingly.
Good luck on your mining journey, and may your Litecoin mining rig be prosperous and fruitful!