Introduction
Connecting your bank account to WePay is a simple and convenient way to manage your financial transactions. WePay is a secure online payment service that allows individuals and businesses to send and receive money electronically. By linking your bank account to WePay, you can easily transfer funds, receive payments, and handle various financial transactions with ease. In this guide, we will walk you through the step-by-step process of connecting your bank account to WePay.
Whether you are a small business owner, a freelancer, or an individual looking for a reliable payment solution, WePay offers a user-friendly interface and robust security measures to ensure a seamless and safe experience. By integrating your bank account with WePay, you can efficiently manage your finances, track payments, and streamline your financial operations.
By following the steps outlined in this guide, you can quickly set up and connect your bank account to WePay. We will cover the process of signing up for a WePay account, verifying your email address, navigating to the settings page, selecting “Bank Account,” choosing your bank, entering your bank account details, and verifying your bank account. Once your bank account is successfully connected, you will be able to start using it for various transactions on WePay.
So, let’s get started and explore how to connect your bank account to WePay, simplifying your financial management and optimizing your online payment capabilities.
Step 1: Sign up for a WePay account
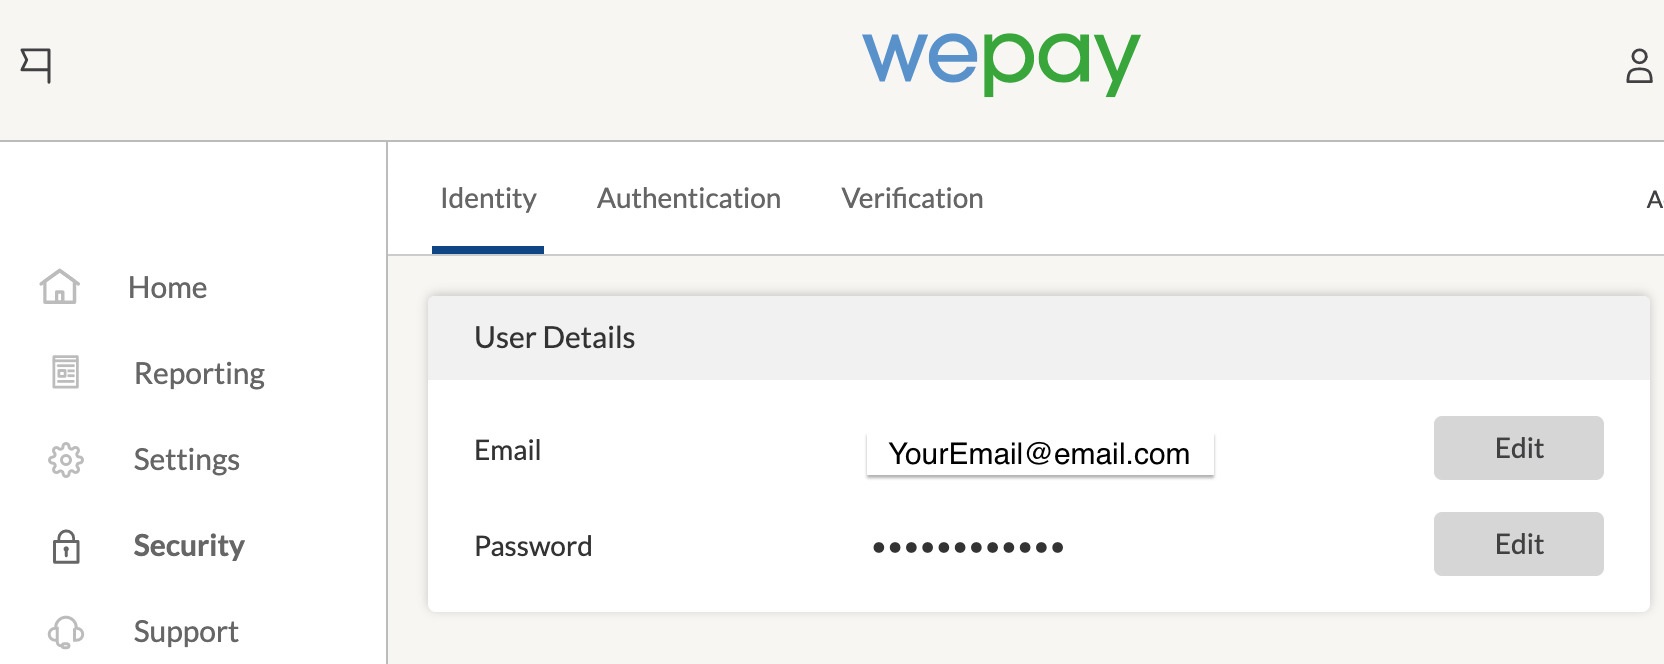
The first step to connect your bank account to WePay is to sign up for a WePay account. To do this, visit the WePay website and click on the “Sign Up” button. You will be prompted to provide some basic information such as your name, email address, and a password.
Make sure to choose a strong password that includes a combination of uppercase and lowercase letters, numbers, and special characters. This will ensure the security of your WePay account and protect your financial information.
After providing the necessary information, click on the “Sign Up” button to proceed. You will receive a confirmation email with a verification link.
Check your email and click on the verification link to confirm your email address. This step is crucial to ensure the security and validity of your WePay account. Once your email address is verified, you can proceed to the next step of connecting your bank account.
Creating a WePay account is free, and it offers a range of features and tools that make managing your financial transactions a breeze. Whether you are an individual looking to receive payments for a personal project or a business owner seeking a secure online payment solution, WePay has you covered.
Remember to keep your login credentials safe and confidential. This will prevent unauthorized access to your account and protect your sensitive financial information. If you suspect any suspicious activity or have trouble accessing your account, reach out to the WePay support team for assistance.
Now that you have successfully signed up for a WePay account and verified your email address, you are ready to move on to the next step of connecting your bank account.
Step 2: Verify your email address
Once you have signed up for a WePay account, the next step is to verify your email address. Verifying your email address is an essential security measure that ensures the authenticity of your account and helps protect against unauthorized access.
After completing the sign-up process, you will receive an email from WePay with a verification link. Open your email inbox and find the email from WePay. If you don’t see it in your inbox, check your spam or junk folder as it may have been filtered there.
Click on the verification link provided in the email. This will redirect you to the WePay website and confirm that the email address is valid and belongs to you.
Verifying your email address is a crucial step in the process of connecting your bank account to WePay. It adds an extra layer of security to your account, ensuring that only authorized individuals have access to your financial information.
If you do not receive the verification email, you can try the following steps to resolve the issue:
- Check the email address you provided during sign-up to ensure it is correct.
- Refresh your email inbox and check all folders, including spam or junk.
- If you still haven’t received the email, you can click on the option to resend the verification link on the WePay website.
- If the issue persists, reach out to WePay customer support for further assistance.
Once you have successfully verified your email address, you can proceed to the next step of connecting your bank account to WePay. Verifying your email address is a one-time process, and you won’t need to repeat it unless you change your email address associated with your WePay account.
By completing this step, you are one step closer to enjoying the convenience and security of managing your financial transactions through WePay.
Step 3: Navigate to the “Settings” page
After successfully signing up for a WePay account and verifying your email address, the next step is to navigate to the “Settings” page. This is where you will find the options to connect your bank account and manage your account preferences.
To access the “Settings” page, log in to your WePay account using your registered email address and password. Once logged in, locate the menu or navigation bar, usually located at the top or side of the screen, depending on the device you are using.
Click on the menu icon or select the “Settings” option to access the settings page. The layout and design may vary slightly based on the version of WePay you are using, but the main options should be easily identifiable.
On the “Settings” page, you will find various sections and options related to your WePay account. Look for the option specifically labeled “Bank Account” or something similar. Click on this option to proceed with connecting your bank account.
If you are having trouble locating the “Bank Account” option, you can use the search bar within the settings page and type in “bank account” to quickly find it.
It is essential to familiarize yourself with the other settings and options available on the “Settings” page. This way, you can customize your WePay account preferences according to your needs and ensure a personalized experience.
Take your time to explore the various settings and features available to you. This will enable you to make the most out of the WePay platform and optimize your financial management and payment solutions.
Now that you have successfully accessed the “Settings” page on WePay, it’s time to move on to the next step of connecting your bank account.
Step 4: Select “Bank Account”
Now that you have navigated to the “Settings” page in your WePay account, it’s time to select the “Bank Account” option. This step will allow you to proceed with connecting your bank account to WePay securely.
On the “Settings” page, you will see a list of options related to your account preferences and settings. Look for the option labeled “Bank Account” or something similar. It is usually located under the “Payment” or “Financial” section.
Click on the “Bank Account” option to proceed. This will open a new page or section specifically dedicated to managing your bank account details on WePay.
The “Bank Account” section is where you will provide the necessary details and information about your bank account. WePay uses this information to securely link your bank account to your WePay account, facilitating seamless financial transactions.
It is crucial to ensure that you have the necessary information on hand before proceeding. This includes your bank account number, routing number, and any other specific details required by WePay.
If you are unsure about the information required, you can refer to your bank statements, contact your bank directly, or check with WePay customer support for guidance.
Keep in mind that the specific details and requirements may vary depending on your country and the banking regulations in place. WePay strives to adhere to the highest security standards and ensures that your bank account information is protected and encrypted.
By selecting the “Bank Account” option, you are taking the next step towards establishing a secure connection between your WePay account and your bank account. This connection will facilitate smooth and efficient financial transactions, allowing you to send and receive payments with ease.
Now that you have selected “Bank Account”, it’s time to provide your bank account details in the following step of the process.
Step 5: Choose your bank
After selecting the “Bank Account” option in your WePay settings, the next step is to choose your bank. This step involves selecting your financial institution from a list of available banks that are compatible with WePay.
WePay works with various banks to provide a wide range of options for its users. This allows you to connect your bank account conveniently, regardless of which bank you hold an account with.
On the “Bank Account” page, you will typically find a dropdown menu or a search bar where you can enter the name of your bank. This will help narrow down the list and make it easier to locate your specific bank.
If your bank is not listed, it’s possible that WePay does not currently support that particular bank or financial institution. In such cases, you may need to consider alternative options or contact WePay customer support for further assistance or information.
When choosing your bank, ensure that you select the correct one from the list to avoid any connection or compatibility issues. If you are unsure about the exact name of your bank, you can refer to your bank statements or contact your bank for clarification.
Remember, WePay takes the security of your financial information seriously. Therefore, it’s important to connect your bank account to a trusted and recognized financial institution.
Once you have selected your bank, you can proceed to the next step of entering your bank account details. This information is necessary to establish a secure and seamless connection between your bank and WePay, enabling you to manage your financial transactions efficiently.
By choosing your bank, you are making progress towards integrating your bank account with WePay, unlocking the benefits of seamless financial transactions and efficient payment management.
Now that you have selected your bank, let’s move on to the next step and enter your bank account details to complete the connection process.
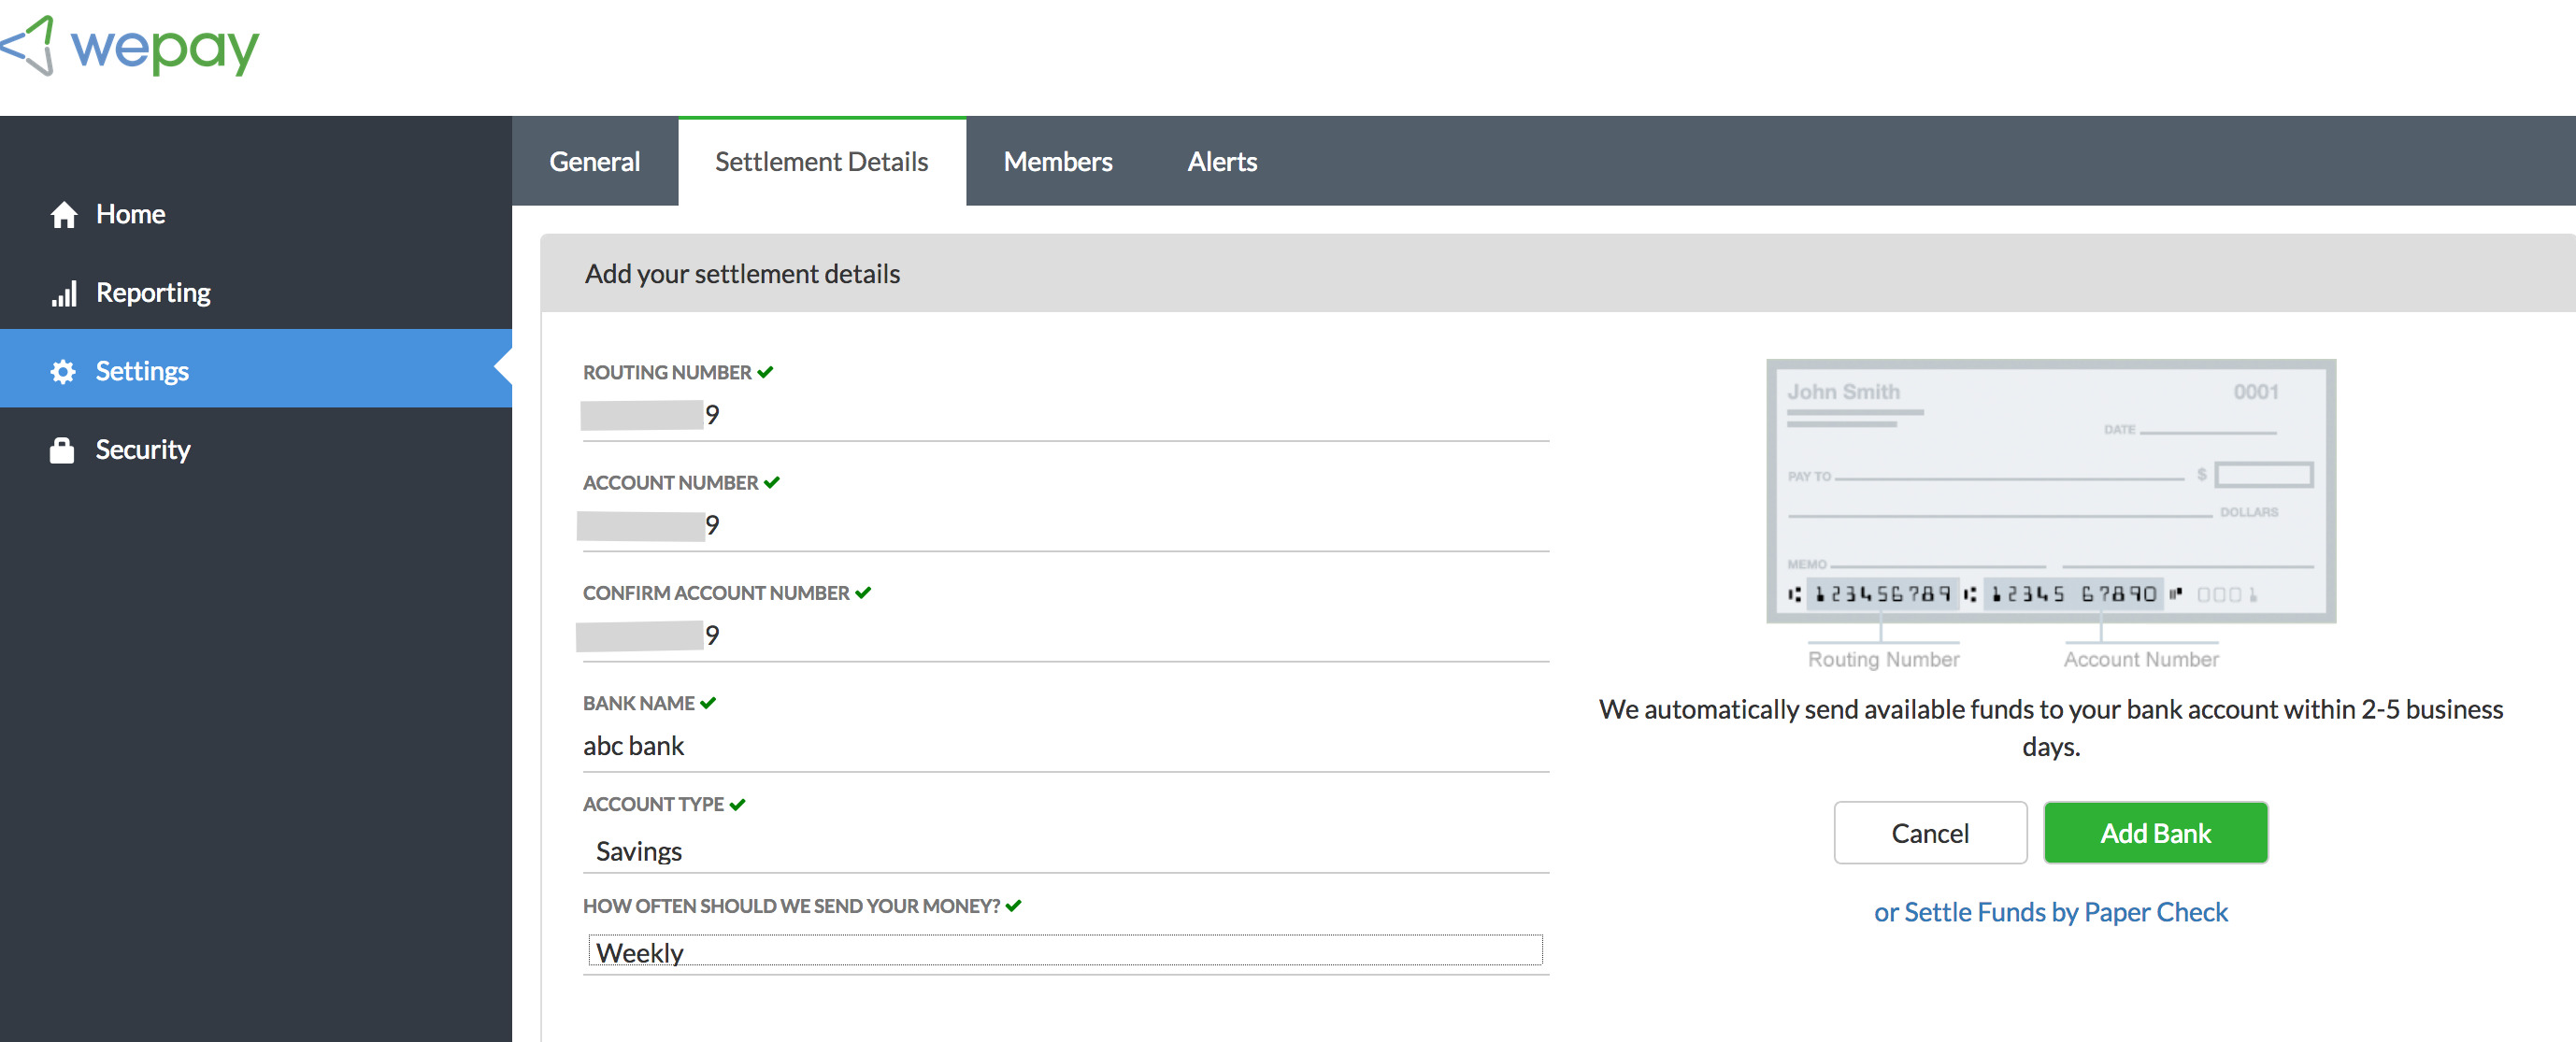
Step 6: Enter your bank account details
Now that you have chosen your bank in the previous step, it’s time to enter your bank account details into WePay. This step is crucial in establishing a secure connection between your bank account and WePay, enabling seamless financial transactions.
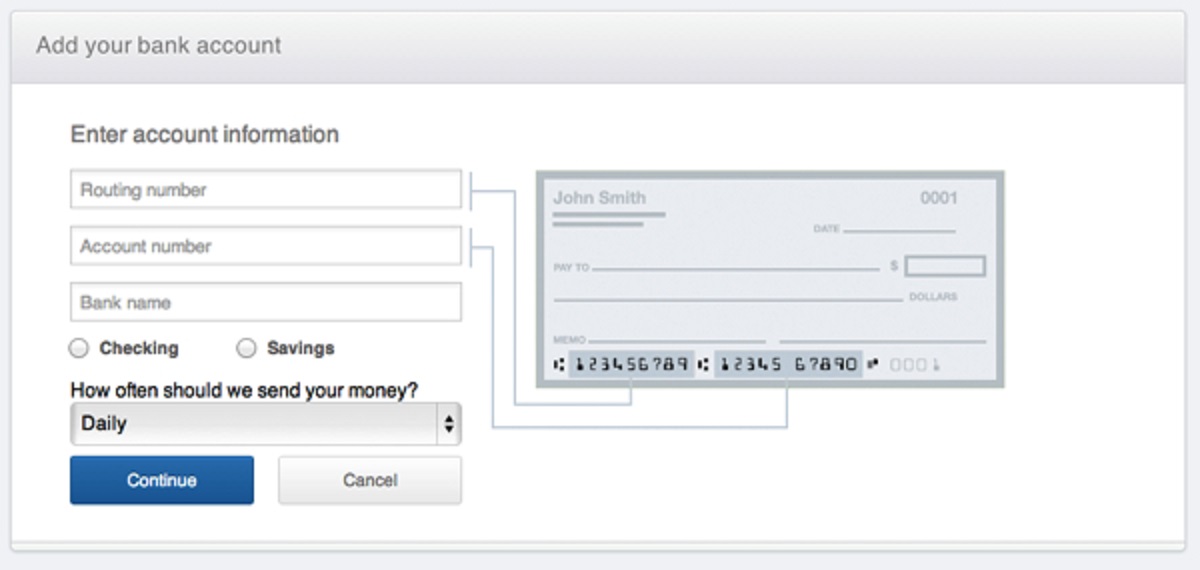
On the “Bank Account” page, you will see a form or fields where you can enter the required information. The specific details needed may vary depending on your country and the banking regulations in place.
Commonly, you will be asked to provide the following information:
- Bank account number: This is the unique identifier for your bank account. You can find this number on your checks or from your bank statements. Make sure to enter the correct account number to ensure a successful connection.
- Routing number: This is a nine-digit code that identifies the specific financial institution associated with your bank account. It enables the smooth transfer of funds between banks. You can find your routing number on your checks or by contacting your bank directly.
- Account type: You will need to select the account type from the options provided, such as checking or savings. Choose the appropriate option that matches your bank account type.
It’s important to double-check the accuracy of the information you enter. Any errors or typos may cause issues with connecting or using your bank account on WePay. Take your time to ensure that all the information is entered correctly and matches the details on your bank account.
If you are unsure about any of the required information, refer to your bank statements or contact your bank for assistance. They will be able to provide you with the correct account number, routing number, and any other specific details required by WePay.
WePay utilizes advanced encryption and security measures to protect your bank account information. Rest assured that your details will be kept confidential and secure.
Once you have entered your bank account details, double-check everything and click on the “Save” or “Submit” button to proceed. This will initiate the verification process to ensure the accuracy and validity of the information provided.
Congratulations! You have successfully entered your bank account details into WePay. Now, it’s time to verify your bank account in the next step to complete the connection process.
Step 7: Verify your bank account
After entering your bank account details in WePay, it’s time to verify your bank account. This step is essential in the process of connecting your bank account securely and ensuring that the information provided is accurate.
Verification is typically done through a small deposit or withdrawal made by WePay to your bank account. This process helps confirm that the bank account owner is the same person or entity associated with the WePay account.
Once you have saved your bank account details, WePay will initiate the verification process. This may take a few business days, so be patient throughout the verification period.
Keep an eye on your bank account transactions or statements for any activity from WePay. Look for small deposits or withdrawals made by WePay, typically ranging from a few cents to a dollar.
When you see these transactions in your bank account, take note of the transaction details, such as the amount or reference number. You will need this information to complete the verification process.
Return to your WePay account and navigate to the “Bank Account” section or the designated verification page. Enter the transaction details that you observed in your bank account.
By providing the correct details, you are confirming that you have access to the bank account and are authorized to link it to your WePay account.
Make sure to double-check the accuracy of your entries before submitting the verification details. Incorrect entries may result in a failed verification process.
Once you have submitted the verification details, WePay will process the information provided. If everything matches, your bank account will be verified, and you will receive a confirmation notification.
Verification is an important step in ensuring the security and validity of the connection between your bank account and WePay. It prevents unauthorized individuals from accessing your financial information and provides an added layer of protection for your transactions.
If, for any reason, you encounter issues during the verification process or do not see the verification transactions in your bank account, contact WePay customer support for assistance. They will guide you through the next steps and help resolve any verification-related concerns.
Once your bank account is successfully verified, you can start using it for various transactions on WePay, such as sending or receiving payments, making purchases, or managing your financial transactions seamlessly.
Now that you have completed the verification process, you are one step closer to fully utilizing your bank account with WePay.
Step 8: Start using your bank account with WePay
Congratulations! You have successfully connected and verified your bank account with WePay. Now, it’s time to start utilizing your bank account for seamless financial transactions and payments.
With your bank account linked to WePay, you can perform a variety of actions, such as:
- Sending and receiving payments: You can easily transfer funds to other WePay users or receive payments from clients, customers, or friends. Seamlessly handle transactions without the need for physical cash or checks.
- Paying bills: Use your WePay account to pay bills online, such as utility bills, rent, subscriptions, and more. Enjoy the convenience of managing your expenses all in one place.
- Receiving payouts: If you are a business owner, freelancer, or platform worker, you can receive payouts from your clients or the platforms you work with directly into your WePay-linked bank account. No more hassle with manual transfers or delays in receiving your hard-earned money.
- Managing finances: With WePay, you can easily keep track of your financial activities, view transaction histories, and access reports and analytics to stay on top of your financial management.
As you start using your bank account with WePay, remember to keep an eye on your account activity and monitor your transactions regularly. This will help you stay informed about the movement of funds and ensure that all transactions align with your expectations.
If you encounter any issues or have questions regarding your WePay account or bank account transactions, don’t hesitate to reach out to the WePay customer support team. They are available to assist you and provide guidance in navigating any challenges that may arise.
Additionally, it’s important to stay updated with the latest security practices and follow any recommended security measures provided by WePay. This includes regularly updating your password, enabling two-factor authentication, and being cautious of phishing attempts or suspicious emails.
By incorporating your bank account into your WePay account, you have unlocked a world of convenience and efficiency in handling your financial transactions. Enjoy the benefits and ease of managing your financial activities all in one place.
Now that you are ready to embark on your WePay journey with your connected bank account, seize the opportunities it presents and simplify your financial management like never before.
Conclusion
Connecting your bank account to WePay opens up a world of convenient and secure financial transactions. By following the step-by-step process outlined in this guide, you can easily set up and link your bank account to WePay, enabling seamless payments, transfers, and financial management.
During the process, ensure that you sign up for a WePay account, verify your email address, navigate to the “Settings” page, select “Bank Account,” choose your bank, enter your bank account details accurately, and verify your bank account. These steps ensure the security and validity of your connection between WePay and your bank account.
Once your bank account is successfully connected and verified, you can start utilizing it for a range of financial activities. You can send and receive payments, pay bills, receive payouts, and efficiently manage your finances within the WePay platform.
Remember to stay vigilant and follow recommended security practices to safeguard your sensitive information. Regularly monitor your account activity and reach out to WePay customer support for any assistance or concerns.
By integrating your bank account with WePay, you are taking advantage of a reliable and secure online payment solution. Simplify your financial management, streamline your transactions, and enjoy the convenience that WePay has to offer.
Start connecting your bank account to WePay today and experience the ease and efficiency of managing your finances online.


