Introduction
Welcome to the world of online payments! As the digital landscape continues to evolve, businesses are increasingly looking for secure and reliable payment solutions to meet their customers’ needs. One such solution is WePay, a leading online payment gateway that offers seamless integration into your website.
Whether you run an e-commerce store, a crowdfunding platform, or any website that requires payments, WePay can be an excellent choice for your online payment needs. In this article, we will explore what WePay is, why you should consider using it for your website, and how to integrate it effectively.
So, what exactly is WePay? At its core, WePay is a payment processor that enables businesses to accept credit card payments, bank transfers, and other online payment methods securely.
But why choose WePay? One of the main advantages of using WePay is its user-friendly interface and straightforward setup process. Unlike traditional payment processors, WePay offers a simple and intuitive account setup, allowing you to start accepting payments quickly. Additionally, WePay ensures the security of your transactions, mitigating the potential risk of fraud and chargebacks.
Now that we’ve covered the basics, let’s dive deeper into the process of integrating WePay into your website. In the next sections, we’ll discuss how to set up your WePay account, integrate the WePay API, add a WePay button to your website, customize the payment flow, and test your integration to ensure everything is working seamlessly.
Before we get into the technical details, it’s essential to understand the significance of security when it comes to online payments. WePay has implemented industry-standard security measures to safeguard your customers’ sensitive information. We’ll address these security considerations and provide tips on how to enhance the security of your payment integration.
Now that you have a brief overview of what to expect, let’s get started with setting up your WePay account and integrating it into your website. Whether you’re a developer or a business owner, this guide will help you navigate the integration process and take advantage of the benefits that WePay offers.
What is WePay?
WePay is an online payment gateway that allows businesses to accept payments from customers securely and conveniently. It serves as a middleman between your website and the financial institutions that process the transactions, ensuring a smooth and reliable payment experience.
Founded in 2008, WePay has established itself as a trusted and reputable payment solution in the industry. It is known for its user-friendly interface, robust security measures, and seamless integration capabilities.
As a payment processor, WePay enables businesses to accept various payment methods, including credit and debit cards, bank transfers, and virtual wallets. It supports major card networks like Visa, Mastercard, American Express, and Discover, making it accessible to a wide range of customers.
One of the key advantages of using WePay is its simplicity and ease of use. Setting up a WePay account is quick and straightforward. You can easily create an account on the WePay website by providing some basic information about your business and linking it to your bank account for seamless fund transfers.
Once your account is set up, you can start accepting payments immediately. WePay offers ready-made payment buttons and widgets that you can embed into your website with minimal effort. This eliminates the need for complex coding or design changes, making it convenient for business owners with little to no technical expertise.
Moreover, WePay provides a safe and secure environment for payments. It employs advanced encryption methods and adheres to stringent compliance standards, ensuring that customer data and transactions are protected at all times. WePay also offers support for fraud detection and prevention tools, minimizing the risk of fraudulent transactions and chargebacks.
Additionally, WePay provides comprehensive customer support to help you navigate any issues or questions you may have. Their support team is readily available via email or phone, ensuring a prompt and satisfactory resolution to any payment-related concerns.
In a nutshell, WePay empowers businesses to accept online payments seamlessly. Its user-friendly interface, robust security features, and responsive customer support make it an ideal choice for businesses of all sizes and industries.
In the following sections, we will explore the setup process, API integration, customization options, and testing methods to help you integrate WePay effectively into your website. So, let’s dive deeper into the integration process and unlock the full potential of WePay for your business.
Why Choose WePay for Your Website?
When it comes to selecting a payment gateway for your website, making the right choice is crucial. WePay offers a range of benefits that make it an excellent option for businesses looking to accept online payments. Let’s explore why you should choose WePay for your website.
1. Security and Trust: WePay prioritizes the security of your transactions and customer data. With advanced encryption and compliance with industry standards, you can have peace of mind knowing that your customers’ sensitive information is protected. WePay also offers robust fraud detection and prevention measures, reducing the risk of fraudulent transactions and chargebacks.
2. Seamless Integration: Integrating WePay into your website is a breeze. With its user-friendly interface and intuitive setup process, you can start accepting payments quickly. WePay provides simple and ready-to-use payment buttons and widgets that can be easily added to your website, eliminating the need for complex coding or design changes.
3. Multiple Payment Methods: WePay supports various payment methods, including credit and debit cards, bank transfers, and virtual wallets. This enables your customers to choose their preferred payment option, enhancing their overall experience on your website.
4. Competitive Pricing: WePay offers competitive pricing plans tailored to suit the needs of different businesses. With transparent fee structures and no hidden charges, you can efficiently manage your payment processing costs while maximizing your revenue.
5. Developer-Friendly: If you’re a developer, you’ll appreciate WePay’s developer-friendly API. The API allows for seamless integration, customization, and automation, giving you the flexibility to tailor the payment experience to meet your specific requirements.
6. Reliable Support: WePay provides dedicated customer support to address any queries or concerns you may have. Their responsive support team is available to assist you throughout the integration process, ensuring a smooth and hassle-free experience.
7. Scalability: Whether you’re a small business just starting or an established enterprise, WePay can scale with your business needs. As your customer base grows, WePay can handle high transaction volumes, ensuring that your payment processing remains efficient and seamless.
8. Enhanced Customer Experience: By offering a secure and hassle-free payment experience, WePay contributes to an overall positive customer experience. This, in turn, can lead to increased customer satisfaction, repeat business, and positive word-of-mouth recommendations.
In summary, WePay offers a combination of security, simplicity, flexibility, and reliable support that makes it a top choice for website owners. From its robust security measures and seamless integration to its range of payment options and competitive pricing, WePay provides everything you need to effectively process online payments.
In the upcoming sections, we will delve into the account setup process, API integration, adding WePay buttons to your website, customizing the payment flow, testing your integration, and important security considerations. So, let’s move forward and unlock the full potential of WePay for your website!
Account Setup
Setting up your WePay account is a straightforward process that can be completed in a few simple steps. Follow these guidelines to get started:
1. Visit the WePay Website: Begin by visiting the official WePay website (www.wepay.com) and click on “Get Started” or a similar call-to-action button to create an account.
2. Provide Business Details: Provide essential information about your business, including its name, address, and contact details. It is crucial to provide accurate and up-to-date information to ensure a smooth account setup process.
3. Verify Your Identity: As part of the account setup process, WePay requires you to verify your identity. This is done to comply with legal and regulatory requirements. You may be asked to provide documents such as government-issued identification, business registration documents, and proof of address.
4. Link Your Bank Account: To receive payments, you will need to link your bank account to your WePay account. This allows for seamless and secure fund transfers from WePay to your bank. Follow the on-screen instructions to provide the necessary banking details and complete the verification process.
5. Customize Account Settings: Once your account is set up, take some time to review and customize your account settings. You can set preferences such as email notifications, payment options, and security settings. This gives you control over how payments are processed and how you are notified of transaction activities.
6. Compliance and Legal Agreements: As a payment processor, WePay has certain compliance and legal requirements you need to adhere to. This includes accepting WePay’s terms of service and complying with anti-fraud and anti-money laundering policies. Read through the agreements carefully and ensure that you understand and comply with all the necessary obligations.
7. Test Transactions: Before going live, it is recommended to perform some test transactions to ensure that everything is working correctly. WePay provides sandbox testing environments, which allow you to simulate transactions without involving real money. This helps you identify and rectify any issues before processing actual customer payments.
8. Go Live: Once you have completed the necessary setup and testing, you are ready to go live and start accepting real payments through WePay. At this stage, you can integrate WePay’s payment buttons, widgets, or API into your website to enable a seamless payment experience for your customers.
Remember, throughout the account setup process, WePay offers customer support to assist you with any questions or issues you encounter. Don’t hesitate to reach out to their support team if you need guidance or clarification.
In the next section, we’ll explore how to integrate the WePay API into your website, giving you more customization options and control over the payment experience. So, let’s move forward and unlock the power of WePay!
API Integration
Integrating the WePay API into your website allows for more customization and control over the payment experience. By leveraging the API, you can incorporate WePay’s payment functionality seamlessly into your website’s checkout process. Follow these steps to integrate the WePay API:
1. Obtain API Credentials: To start, you need to obtain API credentials from WePay. These credentials include your Client ID and Client Secret, which are unique identifiers that authenticate your website with WePay’s API. Visit the WePay developer portal and create an API application to generate these credentials.
2. Choose Integration Method: WePay offers different integration methods to suit various technical capabilities and requirements. Decide whether you want to use a client-side integration or a server-side integration. Client-side integration uses JavaScript to interact with the WePay API directly in the browser. Server-side integration involves making API calls from your server backend.
3. Set Up WePay SDK: If you choose client-side integration, you can leverage the WePay JavaScript SDK to simplify the integration process. Include the SDK in your website’s code by adding the script tag provided by WePay. This enables you to access the WePay API methods and handle payment-related tasks easily.
4. Handle Authorization: Before making API calls, you need to obtain an access token to authorize your requests. WePay uses OAuth 2.0 for authentication. Implement the necessary OAuth flow to allow your website to obtain the access token securely. This token grants permission to make API calls on behalf of your user.
5. Implement API Calls: Once you have the necessary credentials and authorization in place, you can start making API calls to perform actions like creating payments, retrieving transaction details, and handling refunds. These API calls allow you to customize the payment flow, track and manage transactions, and provide a seamless experience to your customers.
6. Handle Webhooks: WePay supports webhooks, which are notifications sent to your website whenever certain events occur, such as a payment being made or a refund being issued. Set up the necessary webhook endpoints in your system to receive and handle these notifications. Webhooks allow you to keep your website updated with the latest payment information and automate certain actions.
7. Test and Debug: Testing is crucial to ensure the integration is working as expected. Make test transactions and monitor the API calls to verify that the integration is processing payments accurately. Use WePay’s testing environments, such as the sandbox or staging environment, to simulate transactions without involving real money. This helps in identifying and resolving any issues before deploying the integration live.
8. Monitor and Maintain: Once your API integration is live, it is essential to regularly monitor its performance and ensure that it remains up-to-date with any changes or updates from WePay. Stay updated with WePay’s documentation and developer resources to take advantage of new features or improvements.
Integrating the WePay API can enhance the payment experience for your customers, while providing you with more control over the process. By following the steps outlined above, you can implement a seamless integration and leverage the power of the WePay API to streamline your payment operations.
In the next section, we will explore how to add a WePay button to your website, which offers a quick and simple way to start accepting payments. So, let’s move forward and continue our journey with WePay!
Adding a WePay Button to Your Website
Adding a WePay button to your website is a straightforward process that allows you to start accepting payments quickly. Whether you have an e-commerce store, a crowdfunding platform, or a donation website, a WePay button provides a convenient way for your customers to make payments. Follow these steps to add a WePay button to your website:
1. Choose Button Type: WePay offers various types of buttons to suit different payment scenarios. Decide which button type best matches your website’s needs. Common options include “Pay Now,” “Donate,” “Subscribe,” and “Buy Now.” Each button type has its own purpose and functionality.
2. Generate Button Code: Once you’ve decided on the button type, generate the necessary button code from WePay. This code contains the HTML markup and JavaScript that will render the WePay button on your website. WePay provides a user-friendly button generator tool that allows you to customize the button’s appearance and behavior.
3. Insert Button Code: Once you have the button code, copy and paste it into the HTML code of your website, where you want the button to appear. You can place it on a product page, a fundraising campaign page, or any other relevant location. If you’re using a content management system (CMS) like WordPress, you can typically paste the code into a “text” or “HTML” widget or module.
4. Configure Button Settings: Depending on your specific requirements, you may need to configure additional settings for the WePay button. These settings could include the payment amount, currency, product details, and any additional customizations you want to apply. These settings can typically be modified within the button code itself or via a configuration panel provided by WePay.
5. Test Button Functionality: After adding the button to your website, it is important to test its functionality to ensure that it works as expected. Make a test transaction to confirm that the button directs the user to the WePay payment page, processes payments correctly, and generates the necessary transaction data.
6. Customize Button Design (Optional): If you want to further customize the design of the WePay button, you can modify the CSS styles applied to the button or use custom images. WePay provides guidelines and resources for customizing the look and feel of the buttons to seamlessly match your website’s design and branding.
7. Monitor Button Performance: Once the WePay button is live on your website, it’s essential to monitor its performance and track its usage. Keep an eye on analytics and reports provided by WePay to gather insights on transaction volumes, conversion rates, and customer behaviors. This information can help you optimize your payment strategy and make data-driven decisions.
By following these steps, you can easily add a WePay button to your website and provide a convenient payment option for your customers. The WePay buttons are designed to be user-friendly and customizable, ensuring a seamless integration into your website’s checkout process.
In the next section, we will explore how to customize the WePay payment flow to match your brand’s look and feel. So, let’s continue our journey with WePay!
Customizing the WePay Payment Flow
Customizing the WePay payment flow allows you to provide a cohesive and branded experience to your customers. By incorporating your website’s design elements and maintaining a consistent user interface, you can enhance customer trust and improve the overall checkout process. Follow these steps to customize the WePay payment flow:
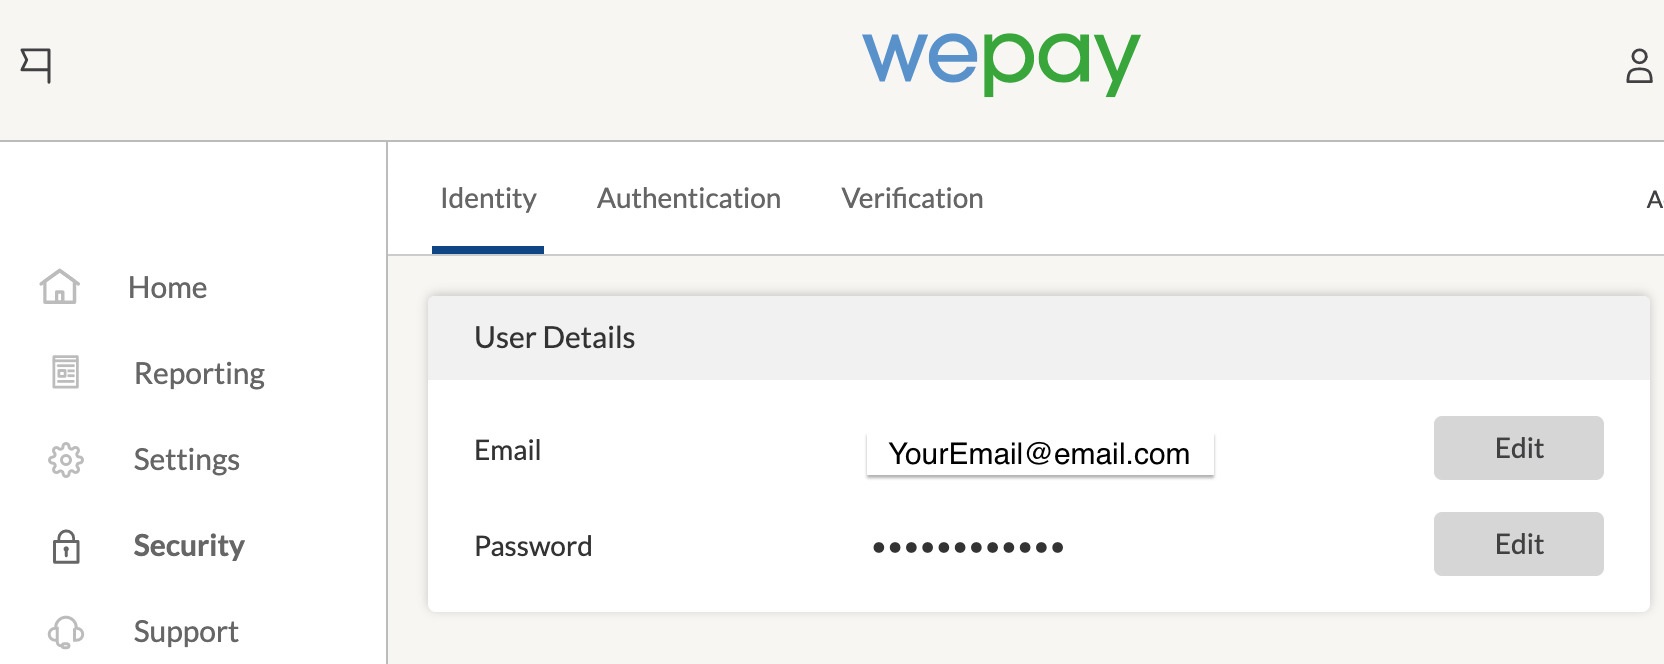
1. Access Branding Center: WePay offers a Branding Center that allows you to customize the payment flow. Log in to your WePay account and navigate to the Branding Center section. Here, you will find options to modify various aspects of the payment flow, including colors, logos, and messaging.
2. Choose Colors: Select colors that align with your website’s design and branding. You can specify primary and secondary colors that will be applied to the payment pages. By using colors consistent with your website’s color scheme, you can create a visually cohesive experience for your customers.
3. Upload Logo: Upload your website’s logo to the Branding Center. WePay will display this logo on the payment pages, creating a sense of familiarity and trust for your customers. Ensure that the logo is of good quality and properly sized to fit within the provided specifications.
4. Customize Messaging: Customize the text and messaging displayed on the payment pages. This includes transaction confirmation messages, payment descriptions, and any additional instructions or information you want to provide to your customers. Tailor the messaging to align with your brand voice and ensure clarity for users.
5. Test the Customization: After applying the customization settings, it is crucial to test the payment flow to ensure that the changes are functioning as expected. Make a test transaction and verify that the customized colors, logo, and messaging are displayed correctly throughout the payment process.
6. Iterate and Refine: Review the customized payment flow regularly to ensure it continues to align with your website’s branding and user experience. If necessary, make adjustments to the colors, logo, or messaging based on user feedback or changes to your website’s design. Continuously refining the customization will help maintain a seamless and engaging payment experience.
By customizing the WePay payment flow, you create a consistent and professional look and feel for your customers throughout the payment process. This customization reinforces your brand identity and helps build trust and credibility with your audience.
In the next section, we will explore how to test your WePay integration to ensure its functionality and identify any potential issues. So, let’s move forward and continue our exploration of WePay!
Testing Your Integration
Before launching your WePay integration live, it is important to thoroughly test its functionality to ensure a smooth and seamless payment experience for your customers. Testing allows you to identify and address any potential issues or errors to ensure a successful integration. Follow these steps to test your WePay integration:
1. Create a Test Environment: WePay provides a sandbox or staging environment specifically designed for testing. It allows you to simulate transactions without involving real money or affecting your live production environment. Set up a test account in the sandbox environment to perform your integration testing.
2. Perform Test Transactions: Make a series of test transactions to ensure that all aspects of your integration are functioning correctly. Test different scenarios, such as successful payments, declined payments, and refunds, to validate the behavior of your integration. This helps you identify any issues related to payment processing, data validation, or error handling.
3. Check Data Accuracy: After each test transaction, verify that the data captured during the transaction is accurate and consistent with your expectations. This includes payment details, customer information, and any additional metadata that is being passed through WePay’s API. Ensure that the captured data is correctly synced with your system for proper order fulfillment or record keeping.
4. Test Error Handling: Test different error scenarios, such as entering invalid payment information or encountering network issues, to ensure that your integration can handle error situations gracefully. Your integration should provide clear and helpful error messages to guide customers in resolving any issues they may encounter during the payment process.
5. Test on Multiple Devices and Browsers: It’s crucial to test your integration on various devices (e.g., desktops, tablets, and smartphones) and different web browsers (e.g., Chrome, Firefox, and Safari). This ensures that the payment flow is optimized for different screen sizes and performs consistently across different platforms.
6. Test Webhooks and Notifications: If you have implemented webhooks to receive real-time notifications, test the webhook functionality to ensure that your website can properly handle and process these notifications. Confirm that the necessary data is being captured and that any associated actions or updates are executed correctly.
7. Monitor Performance and Response Time: During the testing phase, keep an eye on the performance and response time of your WePay integration. Monitor the speed at which payments are processed, the accuracy of transaction records, and the overall stability of your integration. Optimize any areas that may be causing delays or affecting performance.
8. Gather Feedback: Involve your team and collect feedback from different perspectives. Get input from your developers, customer support team, and other stakeholders involved in the integration process. This feedback can help uncover any additional issues or improvements that can be made to enhance the overall payment experience.
By thoroughly testing your WePay integration, you can identify and address any underlying issues or flaws, ensuring that your payment process is robust and reliable. The testing process provides you with the confidence to launch your integration live and provide a seamless payment experience to your customers.
In the next section, we will explore important security considerations to keep in mind when integrating WePay into your website. So, let’s move forward and delve into the realm of security!
Security Considerations
When integrating WePay into your website, it is crucial to prioritize the security of your customers’ data and transactions. By implementing robust security measures, you can protect sensitive information and maintain the trust of your customers. Consider the following security considerations when using WePay:
1. PCI Compliance: Ensure that your website and WePay integration comply with the Payment Card Industry Data Security Standard (PCI DSS). WePay handles the PCI compliance for the payment processing, but you still need to ensure that your website meets the necessary requirements to ensure the secure transfer and storage of sensitive cardholder data.
2. Secure Data Transmission: Pay attention to the encryption protocols utilized to secure the transmission of data between your website and WePay. WePay supports HTTPS for secure communication, and it is essential to ensure that your website is also secured with an SSL/TLS certificate. This encryption helps protect customer data from interception by unauthorized parties.
3. Secure User Authentication: Implement secure user authentication mechanisms to prevent unauthorized access to your WePay account and associated data. Consider using strong passwords, two-factor authentication (2FA), and other authentication measures to enhance the security of your account.
4. Regular Updates and Patches: Keep your website and any associated software up to date with the latest security patches and updates. This includes your CMS, plugins, and any other integrations that interact with WePay. Regular updates help protect against known security vulnerabilities and ensure that you have the latest security features in place.
5. Fraud Detection and Prevention: WePay employs various fraud detection and prevention mechanisms, but it is important to stay vigilant. Monitor your transactions for any suspicious activity and promptly report any potential fraud or unauthorized charges. Familiarize yourself with WePay’s fraud prevention tools and features, and utilize them to mitigate the risk of fraudulent transactions.
6. Data Protection and Access Control: Take measures to protect customer data and restrict access to sensitive information. Limit access to the WePay integration and associated data to only those individuals who require it. Implement proper access control and user management practices to prevent unauthorized access or data leaks.
7. Privacy and Data Handling: Ensure that you have a clear and transparent privacy policy in place that explains how customer data is handled and protected. Comply with applicable data protection laws, such as the General Data Protection Regulation (GDPR), and adhere to privacy best practices to maintain the privacy and trust of your users.
8. Periodic Security Audits: Conduct regular security audits of your website and WePay integration to identify any vulnerabilities or potential weaknesses. Perform penetration testing and vulnerability assessments to evaluate the security of your infrastructure and applications. These audits help you stay proactive and address any security issues before they can be exploited.
By following these security considerations, you can create a secure environment for your customers’ transactions and protect their sensitive data. Implementing security measures not only safeguards your customers but also helps build trust and confidence in your brand and payment process.
In the next section, we will conclude our exploration of WePay and summarize the key points covered throughout this article. So, let’s wrap things up and reflect on our WePay journey!
Conclusion
WePay is a robust and user-friendly online payment gateway that offers seamless integration into your website. Throughout this article, we have explored what WePay is, why you should choose it for your website, and how to effectively integrate it into your payment process.
WePay provides a secure and reliable payment solution for businesses of all sizes, offering multiple payment methods, competitive pricing, and developer-friendly APIs. Its user-friendly interface and straightforward account setup make it easy to start accepting payments quickly.
By integrating the WePay API into your website, you gain more customization options and control over the payment experience. The API allows you to tailor the payment flow, handle authentication, and manage transactions with ease. Customizing the WePay payment flow further enhances your brand’s presence and improves the overall customer experience.
However, it is crucial to prioritize security when integrating WePay. Protecting customer data, complying with industry standards, and proactively monitoring for fraud are essential steps to maintain a secure payment environment.
Remember to thoroughly test your WePay integration before going live, ensuring that all functionalities are working as expected. Use the provided testing environments, simulate different scenarios, and gather feedback from your team to make necessary improvements.
In conclusion, by choosing WePay for your website, you gain access to a reliable and secure payment gateway that offers seamless integration, customization options, and a user-friendly experience. Whether you run an e-commerce store, a crowdfunding platform, or any website that requires payments, WePay can simplify your payment process and provide a convenient payment solution for your customers.
Embrace the power of WePay, follow the integration guidelines, and unleash the possibilities of seamless online payments for your business. With WePay, you can enhance customer satisfaction, streamline your payment operations, and focus on growing your business.