Introduction
Welcome to this tutorial on how to connect WePay to Mystudio. Mystudio is an innovative platform that allows businesses and professionals to manage and streamline their operations, including payment processing. By integrating WePay with Mystudio, you can offer your customers a convenient and secure payment experience.
WePay is a trusted and reliable payment gateway that enables businesses to accept payments online. It offers a range of features, including seamless payment processing, advanced fraud protection, and robust reporting capabilities. By integrating WePay with Mystudio, you can accept credit card payments, automate recurring billing, and manage customer transactions all in one place.
In this tutorial, we will guide you through the step-by-step process of connecting WePay to Mystudio. Whether you’re a small business owner, a fitness professional, or any other service provider, integrating WePay with Mystudio will simplify your payment management and improve the overall customer experience.
Before we dive into the integration process, please ensure that you have already created a WePay account. If you haven’t done so, you can easily sign up for a WePay account on their website. Once you have your WePay account ready, you can proceed with the integration process detailed in the following steps.
Now, let’s get started and explore how to connect WePay to Mystudio in a few simple steps. By the end of this tutorial, you’ll be able to seamlessly accept online payments through WePay, provide a secure payment experience to your customers, and enhance the efficiency of your business operations.
Step 1: Create a WePay Account
The first step in connecting WePay to Mystudio is to create a WePay account. Follow these simple steps to get started:
- Visit the WePay website (www.wepay.com) and click on the “Sign Up” button.
- Choose the account type that best suits your needs. WePay offers two options: Personal and Business. If you are a sole proprietor or a small business owner, the Personal account should suffice. For larger businesses or organizations, a Business account is recommended.
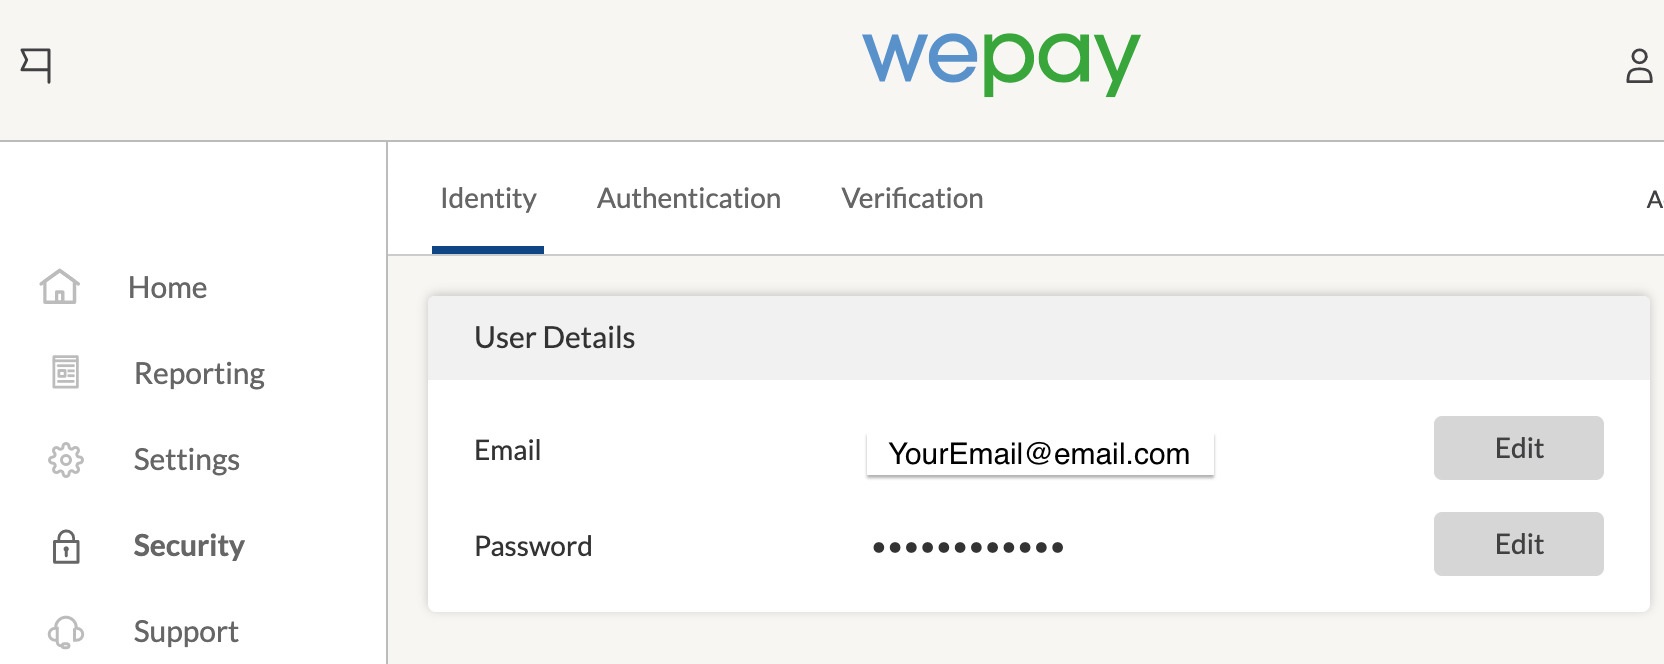
- Fill in the required information, including your name, email address, and password. Make sure to choose a strong and secure password to protect your WePay account.
- Read and accept the WePay terms of service and privacy policy.
- Complete the identity verification process. WePay may require additional information, such as your address or social security number, to ensure the security of your account and prevent fraudulent activity.
- Once your account is created, you will receive a confirmation email from WePay. Click on the verification link in the email to activate your account.
- After verifying your account, you can log in to WePay using your email address and password.
Congratulations! You have successfully created a WePay account. It’s important to note that WePay may have additional requirements or verification steps depending on your business type or industry. Make sure to carefully follow any instructions provided by WePay to ensure a smooth account setup process.
Now that you have a WePay account, you’re one step closer to connecting it to Mystudio. In the following steps, we will guide you through the process of setting up a payment gateway in Mystudio and integrating WePay for seamless payment processing. Continue reading to learn more!
Step 2: Set Up a Payment Gateway in MyStudio
Now that you have a WePay account, the next step is to set up a payment gateway in MyStudio. Follow these steps to configure the payment gateway settings:
- Login to your MyStudio account using your credentials. If you don’t have an account yet, sign up for one on the MyStudio website.
- Once you’re logged in, navigate to the “Settings” or “Payment Settings” section of your MyStudio dashboard. The exact location may vary depending on the version of MyStudio you are using.
- Look for the option to add a new payment gateway or connect an existing one. In this case, we want to select WePay as our payment gateway.
- Click on the “Connect with WePay” button or a similar option. You may be prompted to log in to your WePay account if you haven’t already done so.
- Authorize MyStudio to access your WePay account by clicking on the “Allow” or “Authorize” button when prompted. This will grant MyStudio permission to process payments through your WePay account.
- Once the authorization is complete, you will be redirected back to your MyStudio dashboard, and the payment gateway setup should be complete.
Congratulations! You have successfully set up a payment gateway in MyStudio and connected it to your WePay account. This integration will enable MyStudio to securely process payments on your behalf, ensuring a seamless payment experience for your customers.
It’s important to note that MyStudio may have additional settings and options related to payment processing. Take the time to explore the available features and customize them according to your business needs. For example, you may want to set up recurring payments, offer different payment methods, or configure tax settings.
Now that the payment gateway is set up, let’s move on to the next step and connect WePay to MyStudio to ensure a smooth payment flow. Continue reading to learn more!
Step 3: Connect WePay to MyStudio
In this step, we will guide you through connecting WePay to MyStudio. By establishing this connection, you will be able to seamlessly process payments through WePay within the MyStudio platform. Follow the steps below to complete the integration:
- Login to your MyStudio account and navigate to the “Settings” or “Payment Settings” section.
- Look for a section that allows you to manage your payment gateway connections. Here, you should see an option to connect WePay.
- Click on the “Connect” or “Link” button next to the WePay option.
- You will be redirected to the WePay website to authenticate the connection. If you’re already logged in to your WePay account, you may be prompted to grant MyStudio permission to access your WePay account.
- Follow the prompts and authorize the WePay integration with MyStudio. Ensure that you carefully review and accept any terms or permissions requested.
- After completing the authentication process, you will be redirected back to your MyStudio dashboard.
Congratulations! You have successfully connected WePay to MyStudio. This integration allows you to receive and process payments seamlessly through WePay without leaving the MyStudio platform.
Once the integration is complete, you may want to review any additional settings or preferences related to the WePay integration within MyStudio. Take the time to explore features such as fee management, payment methods, and currency options to customize the payment experience for your customers.
With WePay now connected to MyStudio, you’re one step away from optimizing your payment management. In the next step, we will guide you through configuring the payment settings in MyStudio to ensure a smooth payment flow. So, let’s continue with the next step!
Step 4: Configure Payment Settings in MyStudio
Now that you have connected WePay to MyStudio, it’s time to configure the payment settings to ensure a seamless payment flow. Follow these steps to customize and optimize your payment settings:
- Login to your MyStudio account and navigate to the “Settings” or “Payment Settings” section.
- Look for the option to configure payment settings. This section may be labeled differently depending on the version of MyStudio you are using.
- Review the available payment settings and options. Here are some key settings to consider:
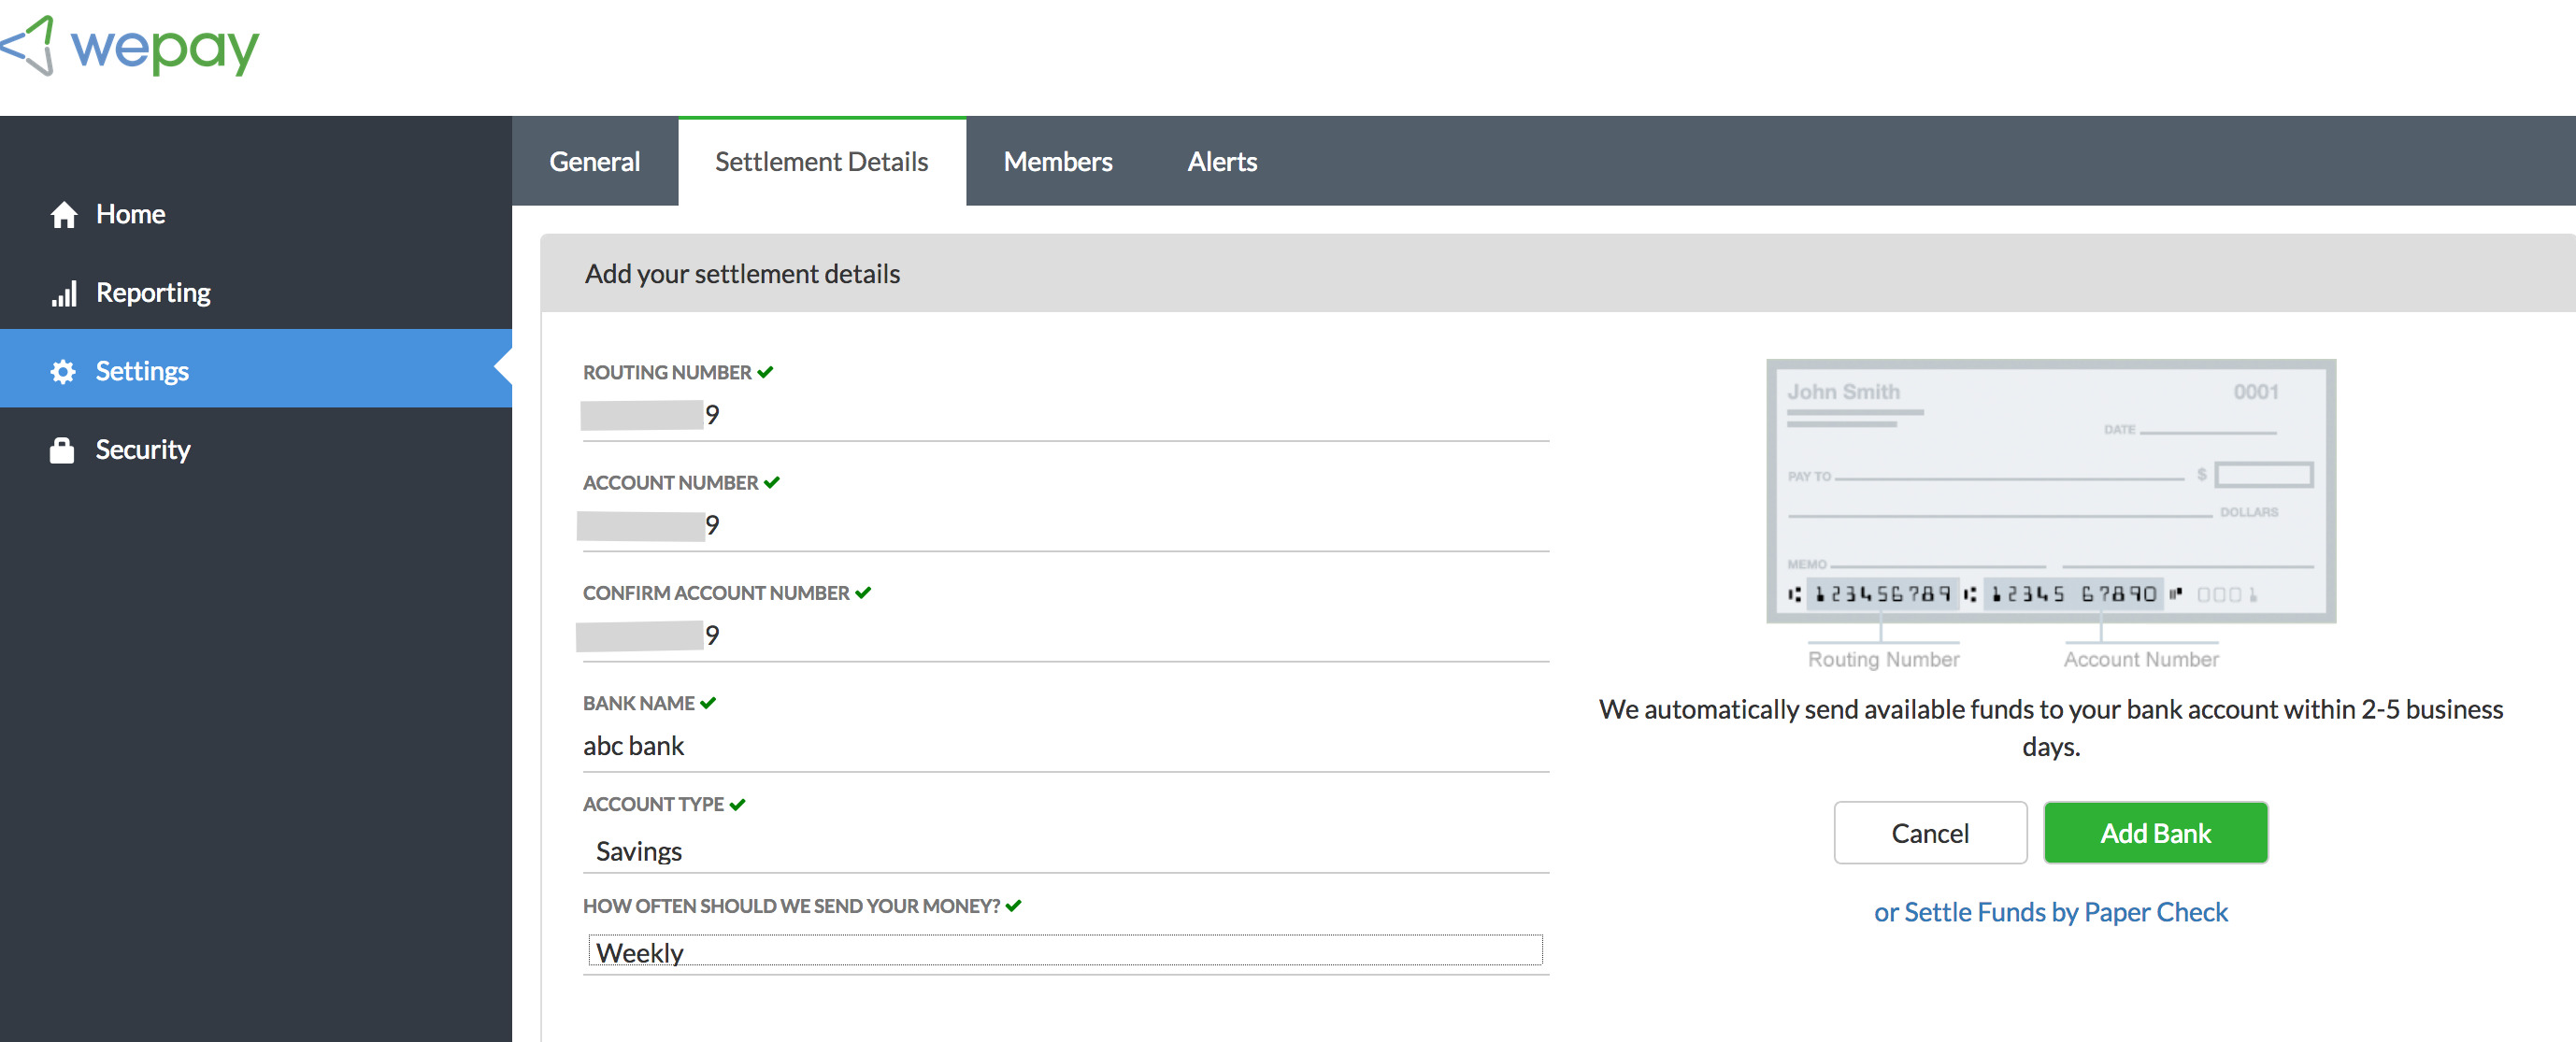
- Currency: Choose the currency in which you would like to accept payments. Select the currency that is most relevant to your business and customer base.
- Payment methods: Determine which payment methods you want to offer to your customers. WePay supports major credit cards, so make sure to enable the appropriate options.
- Fee management: Decide whether you will absorb or pass on transaction fees to your customers. Evaluate the pricing structure and consider the impact on your profit margins and customer satisfaction.
- Recurring payments: If you offer subscription-based services or recurring billing, configure the necessary settings for your recurring payment plans.
- Customize the payment settings according to your business needs. Make sure to strike a balance between providing convenience for your customers and optimizing your payment management.
- Save your changes to apply the updated payment settings.
Congratulations! You have successfully configured the payment settings in MyStudio. This step allows you to tailor the payment processing experience to your specific business requirements and optimize the payment flow for your customers.
Before proceeding to the final step, take some time to test the WePay integration and ensure that payments are being processed correctly. This will allow you to identify and address any potential issues before accepting live payments from your customers.
In the next and final step, we will guide you through the process of testing the WePay integration to ensure that everything is functioning smoothly. So, let’s move on to the last step!
Step 5: Test the WePay Integration
After configuring the payment settings in MyStudio, it’s crucial to test the WePay integration to ensure that everything is working smoothly. Follow these steps to conduct a test transaction:
- Login to your MyStudio account and navigate to the section where you can create a test transaction or make a sample purchase.
- Select a product or service to simulate a purchase. Use a dummy or test product to avoid any unintended charges.
- Proceed through the checkout process as if you were a customer making a real purchase. Fill in the required information, such as name, address, and payment details.
- During the test transaction, ensure that you receive a confirmation email or notification from both MyStudio and WePay.
- Check your WePay account to verify that the test transaction appears in your transaction history. Ensure that the payment details and amounts are accurately reflected.
- If the test transaction is successful, cancel or void the transaction to avoid any actual financial transactions or charges.
By conducting a test transaction, you can validate the integration between MyStudio and WePay. It allows you to confirm that the payment process is functioning correctly and that the transaction data is being recorded accurately.
If any issues arise during the test transaction, take note of the specific error messages or unexpected behaviors. These details will be helpful for troubleshooting and resolving any potential issues with the WePay integration. Reach out to the support teams of both MyStudio and WePay for assistance if needed.
Once you are confident that the WePay integration is working properly, you can move forward with accepting live payments from your customers. Make sure to monitor your transaction history and verify that funds are being deposited into your WePay account according to the designated payout schedule.
Congratulations! You have successfully tested the WePay integration and are ready to accept payments through MyStudio. This integration will enhance the efficiency of your business operations and provide a seamless payment experience for your customers.
Remember to perform regular checks and updates to ensure that your WePay integration remains secure and up-to-date with the latest features and improvements. Now that you’re familiar with the integration process, you can confidently manage your payments and focus on growing your business.
Conclusion
Congratulations on successfully connecting WePay to MyStudio! By integrating WePay, you have unlocked a myriad of benefits for your business, including seamless payment processing, advanced fraud protection, and comprehensive reporting capabilities.
Throughout this tutorial, we guided you through the step-by-step process of connecting WePay to MyStudio. We covered everything from creating a WePay account to configuring payment settings and conducting test transactions.
By connecting WePay to MyStudio, you can now offer your customers a secure and convenient payment experience. With features such as recurring billing, diverse payment methods, and customizable fee management, you can tailor the payment process to suit your specific business needs.
Remember to regularly monitor and review your payment settings to ensure optimal performance and customer satisfaction. Stay informed about any updates or enhancements provided by both WePay and MyStudio to make the most of this integration.
Should you encounter any issues or have any questions along the way, don’t hesitate to reach out to the support teams of both WePay and MyStudio. They are there to assist you and ensure that your integration runs smoothly.
Now that you have successfully integrated WePay with MyStudio, you have equipped your business with a robust payment processing solution. Harness this integration to streamline your payment management, enhance customer satisfaction, and focus on growing your business.
Thank you for following this tutorial. We hope it has provided you with the necessary guidance to connect WePay to MyStudio effectively. Best of luck in utilizing this integration to its full potential!