Introduction
Changing your address on WePay is a straightforward process that ensures your account information remains accurate and up-to-date. Whether you’ve recently moved or need to update your business address, WePay makes it easy to make the necessary modifications. By following a few simple steps, you can ensure that your address is correctly reflected in your WePay account, ensuring a seamless experience when conducting transactions or receiving payments.
Having the right address on your WePay account is crucial for a variety of reasons. Firstly, it helps in accurately identifying your business or personal location. This is essential when engaging in any financial transactions as it reduces the risk of miscommunication or errors in shipping and receiving goods. Secondly, it ensures that you receive any important communications or notifications from WePay regarding your account. Whether it’s a security alert or an update on policy changes, having your correct address on file guarantees that you stay informed and can take appropriate action when necessary.
So, if you’ve recently moved to a new place of residence or your business has relocated, it’s important to update your WePay address promptly. Fortunately, the process is quite simple and can be completed within a few minutes. In the following sections, we will guide you through the step-by-step process of changing your address on WePay, ensuring that your account information remains accurate and reliable.
Step 1: Log into your WePay account
To begin the process of changing your address on WePay, you first need to log into your account. Open your preferred web browser and enter the WePay website’s URL. Once the page loads, locate the “Log In” button or link, usually positioned in the top right corner of the screen.
Click on the “Log In” button, and you will be directed to the WePay login page. Here, you will need to provide your login credentials, including your email address and password. If you have forgotten your password, you can typically find a “Forgot Password” link on the login page, which will guide you through the steps to reset it.
After entering the required information, click on the “Log In” button. If the credentials are correct, you will be successfully logged into your WePay account, granting you access to the various features and settings.
It’s crucial to ensure the security of your WePay account, especially when accessing it from a public or shared computer. Remember to log out once you’ve finished your session and refrain from saving your login credentials on the device.
With Step 1 completed, you are now logged into your WePay account and ready to proceed to the next step, where we will guide you on how to navigate to your account settings.
Step 2: Navigate to your account settings
Once you have successfully logged into your WePay account, the next step is to navigate to your account settings. This is where you can access and modify various aspects of your account, including your address.
To get to your account settings, look for a profile icon or your account name displayed somewhere on the WePay platform. It is typically located in the top right corner of the screen. Click on the profile icon or your account name, and a dropdown menu should appear.
In the dropdown menu, locate and click on the “Settings” option. This will take you to the settings page, where you can customize and manage various aspects of your WePay account, including your address.
Alternatively, you might find a dedicated “Account” or “Profile” tab in the navigation menu. Clicking on this tab should also bring you to the account settings page. WePay might organize its user interface differently, but the general concept remains the same.
It’s important to note that the exact location or wording of the account settings option may vary slightly depending on the version of WePay you are using or any recent platform updates. However, they will generally be located in a prominent location, making it easy to find and access.
With Step 2 completed, you have successfully navigated to your account settings page. In the next step, we will guide you on how to access your profile information, where you can make changes to your address.
Step 3: Access your profile information
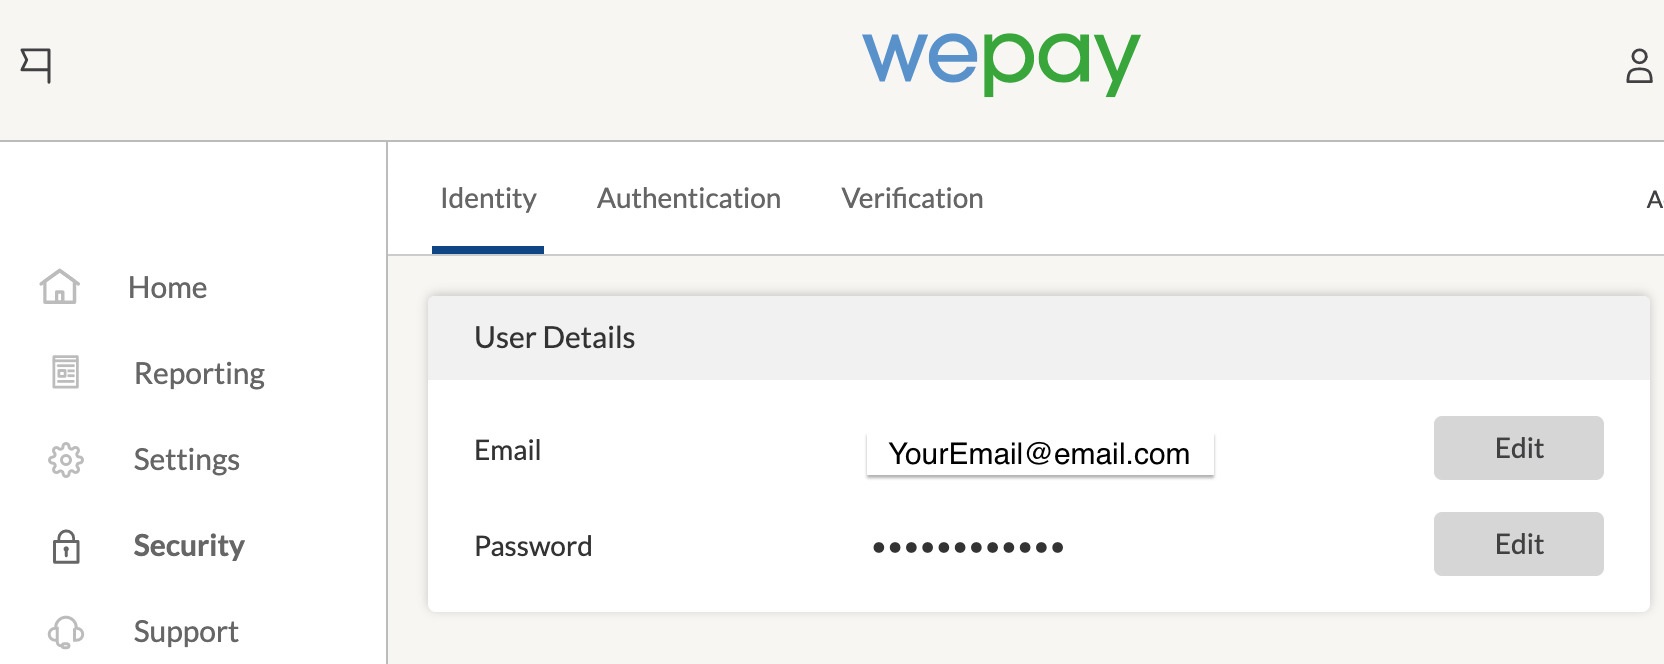
After reaching the account settings page, it’s time to access your profile information. This is where you can find and modify the details associated with your WePay account, including your address.
On the account settings page, look for a section labeled “Profile” or “Personal Information.” Click on this section to access your profile information. Depending on the layout and design of WePay, the profile information section might be displayed as a tab or a separate page.
Once you’ve accessed your profile information, you will see various fields and details related to your account. This might include your name, email address, phone number, and, most importantly, your current address.
Locate the field that contains your address, labeled “Address” or something similar. If your address is not visible in this section, you might need to click on an “Edit” or “Change” button to proceed with modifying it.
It’s worth noting that WePay might have specific guidelines or requirements for the format in which you should enter your address. Ensure that you read any instructions or tips provided on the page to ensure the accuracy and consistency of your address information.
With Step 3 completed, you have successfully accessed your profile information and are ready to move on to the next step, where we will guide you through the process of editing your address on WePay.
Step 4: Edit your address
Now that you have accessed your profile information, it’s time to edit your address on WePay. Follow the steps below to ensure that your address is accurately updated:
- Locate the field that displays your current address.
- If the address field is editable directly, click inside the field and make the necessary changes to your address. Ensure that you double-check the accuracy of the new address to avoid any errors or delays in shipping or communication.
- If the address field is not editable directly, look for an “Edit” or “Change” button next to the address field. Click on this button, and a form or pop-up window should appear where you can input your new address.
- Enter your new address in the designated fields. These fields typically include street address, city, state/province, postal code, and country. Fill in each field with the correct information based on your new address.
- Take the time to review your changes and ensure that all the information entered is accurate and complete. Double-check the spelling, formatting, and punctuation to avoid any errors that may cause issues in the future.
If you encounter any specific requirements or instructions regarding the address format or input, make sure to follow them closely. This will help ensure that your address is entered correctly and that there are no issues with future transactions or communications.
With Step 4 completed, you have successfully edited your address on WePay. In the final step, we will guide you on how to save the changes you made to your address.
Step 5: Save the changes
After editing your address on WePay, it’s important to save the changes to ensure that your updated address is reflected in your account. Follow the steps below to successfully save the changes:
- Once you have entered or updated your address information, look for a “Save” or “Update” button on the page. This button is usually located at the bottom of the form or pop-up window.
- Click on the “Save” or “Update” button to apply the changes you made to your address. Be patient as the system processes and saves the updated information.
- After clicking the “Save” or “Update” button, you may be redirected to a confirmation page or receive a notification indicating that your changes have been successfully saved. This confirms that your updated address is now reflected in your WePay account.
It’s always a good idea to double-check that your address has been correctly updated after saving the changes. You can do this by navigating back to your profile information or account settings page and verifying that the new address is displayed accurately in the corresponding field.
Remember, accurate and up-to-date address information is essential for smooth and successful transactions on WePay. It ensures that your payments are properly processed, and any important communications regarding your account reach you promptly.
With Step 5 completed, you have successfully saved the changes you made to your address on WePay. Congratulations! Your account now reflects the updated address information, providing you with a seamless and reliable experience when using the platform.
Conclusion
Changing your address on WePay is a simple process that can be completed in just a few easy steps. By logging into your WePay account, navigating to your account settings, accessing your profile information, editing your address, and saving the changes, you can ensure that your account reflects your accurate and up-to-date address information.
Updating your address on WePay is crucial to ensure smooth and successful transactions on the platform. With the correct address on file, you can avoid any miscommunication or errors that may arise during shipping or communication. Additionally, having an updated address ensures that you receive important notifications and communications regarding your WePay account in a timely manner.
Remember to follow any specific instructions or requirements provided by WePay regarding address format or input. Double-check your changes before saving them to ensure accuracy and avoid any issues down the line.
Now that you know how to change your address on WePay, you can confidently keep your account information updated and enjoy a seamless experience when conducting transactions and receiving payments.