Introduction
Welcome to this guide on how to buy Ripple on Bitstamp! If you’re looking to invest in the popular cryptocurrency Ripple (XRP), Bitstamp is a reliable and user-friendly platform to get started. Whether you’re a seasoned trader or a beginner in the world of cryptocurrencies, this step-by-step guide will walk you through the process of buying Ripple on Bitstamp.
Ripple is known for its fast transactions and global payment solutions, making it an attractive choice for investors looking to diversify their portfolios. Bitstamp, founded in 2011, is one of the oldest and most reputable cryptocurrency exchanges in the industry. By following the steps outlined in this guide, you’ll be able to set up an account on Bitstamp, deposit funds, and successfully purchase Ripple.
This guide assumes that you have some basic understanding of cryptocurrencies and how they work. If you’re new to the world of cryptocurrencies, it’s recommended to do some research and familiarize yourself with key terms and concepts before proceeding.
Before we get started, it’s important to note that investing in cryptocurrencies carries a certain level of risk. The cryptocurrency market is highly volatile, and prices can fluctuate significantly. This guide is not financial advice, and it’s always a good idea to do your own research and consult with a financial advisor before making any investment decisions.
Now, let’s dive in and learn how to buy Ripple on Bitstamp!
Setting up an Account on Bitstamp
Before you can start buying Ripple on Bitstamp, you’ll need to create an account. Follow these steps to set up your account:
- Visit the Bitstamp website: Go to the Bitstamp homepage (www.bitstamp.net) using your preferred web browser.
- Click on “Register” or “Create Account”: Look for the “Register” or “Create Account” button on the homepage and click on it.
- Provide your email and password: Enter your email address and choose a strong, secure password for your Bitstamp account. Make sure to use a secure password that includes a combination of numbers, letters, and special characters.
- Agree to the terms and conditions: Read and review Bitstamp’s terms and conditions, and if you agree, check the box to indicate your acceptance.
- Complete the registration process: Click on the “Register” or “Create Account” button to complete the registration process. You may be asked to complete a captcha or other verification steps to ensure you’re a real person.
- Activate your account: Once you’ve completed the registration, Bitstamp will send a confirmation email to the address you provided. Click on the link in the email to activate your account.
With these steps completed, you’re now ready to move on to the next phase: verifying your Bitstamp account.
Verifying Your Account
Once you have created your Bitstamp account, the next step is to verify your account to increase your withdrawal limits and gain access to more features. Here’s how to verify your Bitstamp account:
- Log in to your Bitstamp account: Visit the Bitstamp website and enter your email and password to log in to your account.
- Go to the account verification section: In the top navigation menu, click on “Account” and then select “Verification” from the dropdown menu.
- Provide the required information: Bitstamp requires you to provide certain personal information for verification purposes. This may include your full name, date of birth, address, and phone number. Fill in the required fields accurately.
- Upload necessary documents: Bitstamp may ask you to upload identification documents to verify your identity. Commonly accepted documents include a valid passport, driver’s license, or government-issued ID card. Make sure the documents are clear and legible before uploading.
- Submit your verification request: Once you have provided all the required information and uploaded the necessary documents, click on “Submit” to send your verification request to Bitstamp.
- Wait for verification: The verification process may take some time as Bitstamp reviews your submitted information and documents. You will receive an email notification once your account has been successfully verified.
It’s important to note that Bitstamp may request additional information or documents during the verification process. Be prepared to provide any additional information required to complete the verification process. Verifying your account is crucial to comply with regulatory requirements and to ensure the security and integrity of the platform.
Once your Bitstamp account is verified, you can proceed to the next steps to deposit funds into your account and start buying Ripple.
Depositing Funds into Your Bitstamp Account
Before you can purchase Ripple on Bitstamp, you’ll need to deposit funds into your account. Here’s how to deposit funds into your Bitstamp account:
- Log in to your Bitstamp account: Visit the Bitstamp website and enter your email and password to log in to your account.
- Go to the deposit section: In the top navigation menu, click on “Deposit” and select the currency you wish to deposit. Bitstamp supports various fiat currencies like USD, EUR, and GBP, as well as cryptocurrencies like Bitcoin (BTC).
- Generate a deposit address: Bitstamp will provide you with a unique deposit address for the selected currency. This address is specific to your account and must be used when sending funds.
- Send funds to the provided address: Using your preferred cryptocurrency wallet or a bank transfer, send the desired amount of funds to the provided deposit address. Make sure to double-check the accuracy of the address to avoid any mistakes.
- Wait for confirmation: Depending on the method used, it may take some time for the funds to be credited to your Bitstamp account. Cryptocurrency deposits usually require a few confirmations on the blockchain, while bank transfers may take a few business days.
It’s essential to note that Bitstamp may have minimum deposit requirements for different currencies, and they may charge fees for depositing funds into your account. Make sure to review and understand the deposit fees and minimum requirements before initiating a deposit.
Once your funds are successfully deposited into your Bitstamp account, you’re ready to move on to the next steps: understanding XRP trading pairs and placing a buy order for Ripple.
Understanding XRP Trading Pairs
When buying Ripple on Bitstamp, it’s crucial to understand the concept of trading pairs. A trading pair refers to the two currencies being traded against each other on the exchange. In the case of Ripple, the main trading pairs on Bitstamp are XRP/USD, XRP/EUR, and XRP/BTC.
If you’re using fiat currency (USD or EUR) to buy Ripple, you’ll need to select the XRP/USD or XRP/EUR trading pair. For those who already have cryptocurrencies like Bitcoin, you can choose the XRP/BTC trading pair to exchange your BTC for XRP.
Each trading pair has its own price, which is determined by the supply and demand of the respective currencies. The price represents the amount of the quote currency (USD, EUR, or BTC) needed to purchase one unit of the base currency (XRP).
It’s important to keep in mind that the prices of cryptocurrencies can fluctuate rapidly. Therefore, it’s recommended to monitor the market and consider factors such as liquidity and trading volume when choosing a trading pair.
When placing a buy order on Bitstamp, you’ll have the option to choose the trading pair and specify the amount of Ripple you want to purchase. The exchange will execute your order at the best available price based on the current market conditions.
Understanding XRP trading pairs is crucial to ensure that you select the right pair and make informed decisions when buying Ripple on Bitstamp. Now that you have a grasp of trading pairs, let’s move on to placing a buy order for Ripple.
Placing a Buy Order for Ripple on Bitstamp
Once you have funds deposited into your Bitstamp account and understand the XRP trading pairs, you’re ready to place a buy order for Ripple. Here’s how to do it:
- Log in to your Bitstamp account: Visit the Bitstamp website and enter your email and password to log in to your account.
- Go to the “Buy/Sell” section: In the top navigation menu, click on “Buy/Sell” to access the trading interface.
- Select the XRP trading pair: Choose the appropriate trading pair based on your preferred currency. For example, if you’re using USD, select XRP/USD.
- Choose the type of order: Bitstamp offers different types of orders, including market orders and limit orders. A market order will be executed immediately at the current market price, while a limit order allows you to set a specific price at which you want to buy Ripple.
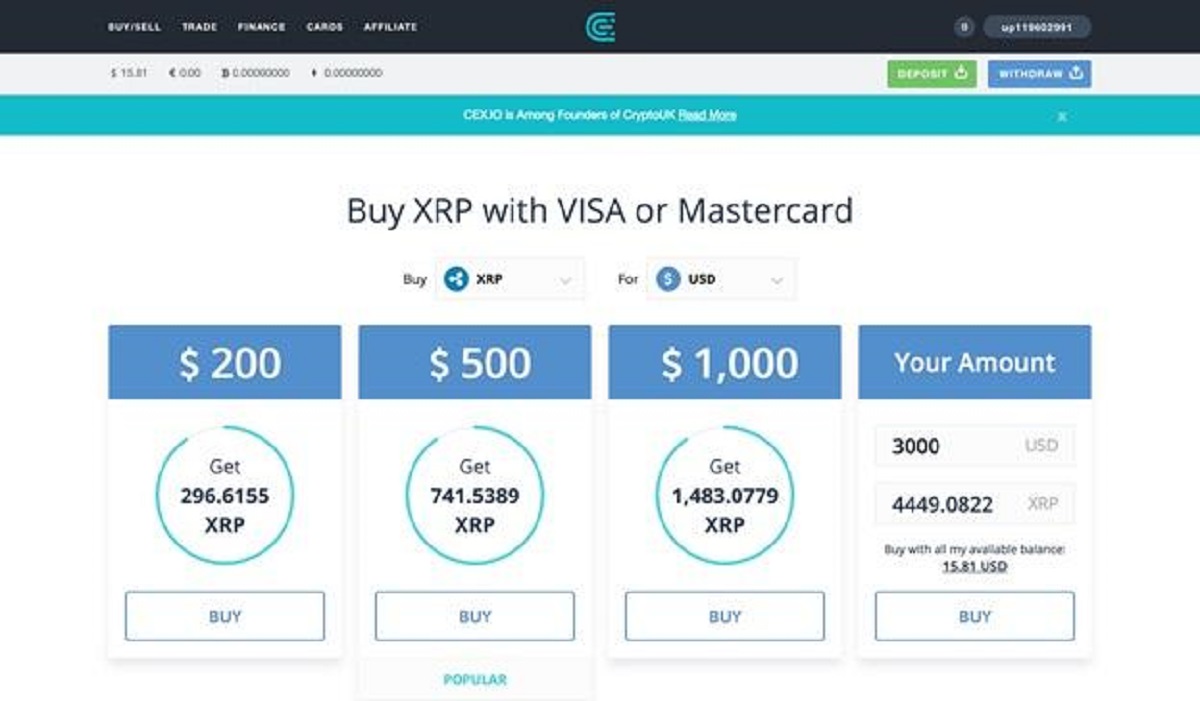
- Specify the amount of Ripple to buy: Enter the amount of Ripple you want to purchase in the “Amount” field. You may also have the option to specify the total amount you want to spend.
- Review and confirm your order: Double-check the details of your buy order, including the trading pair and the amount you’re buying. Once you’re satisfied, click on the “Buy” or “Place Order” button to submit your order.
- Wait for the order to be executed: If you placed a market order, your buy order will be executed at the current market price. If you placed a limit order, your order will be placed in the order book until the price reaches your specified limit.
It’s important to note that fees may be applied to your buy order on Bitstamp. The fees vary depending on your trading volume and the type of order you place. Make sure to review and understand the fee structure on Bitstamp’s website before placing your buy order.
Once your buy order is executed, the purchased Ripple will be credited to your Bitstamp account. You can then choose to hold your Ripple on the exchange or transfer it to a secure cryptocurrency wallet for safekeeping.
Now that you know how to place a buy order for Ripple on Bitstamp, let’s move on to the next section: reviewing and confirming your order.
Reviewing and Confirming Your Order
After placing a buy order for Ripple on Bitstamp, it’s important to review and confirm the details of your order to ensure its accuracy. Here’s what you need to do:
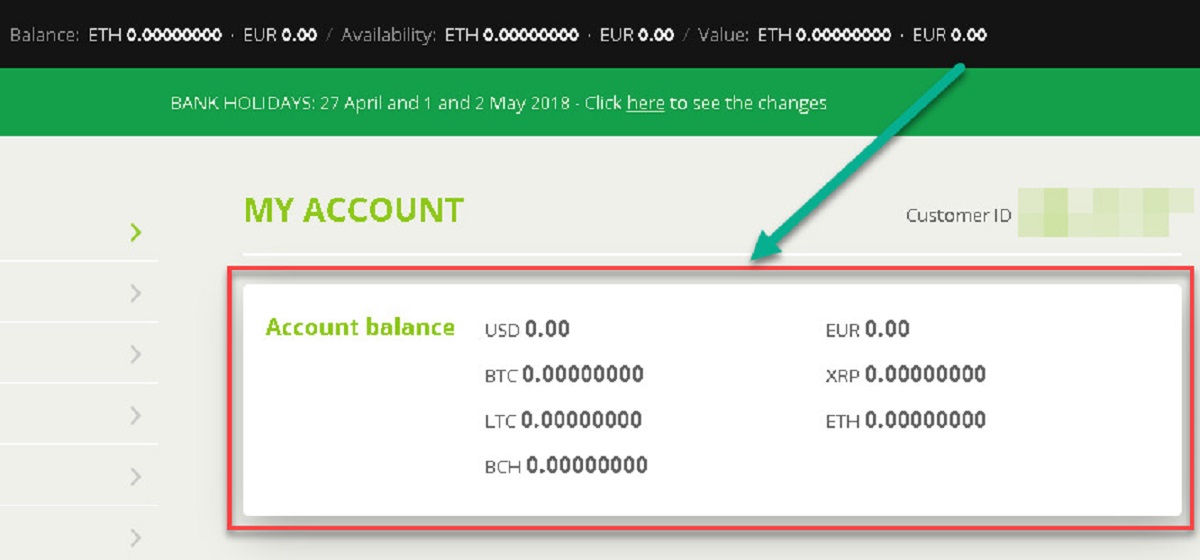
- Go to the “Open Orders” section: Once you’ve submitted your buy order, navigate to the “Open Orders” section on Bitstamp. This section will display all your active orders.
- Locate your buy order: Look for your Ripple buy order in the list of open orders. Take note of the order details, including the trading pair, price, and quantity.
- Verify the order details: Double-check all the information regarding your buy order. Make sure that the trading pair is correct, the price is as expected, and the quantity matches your intended purchase.
- Confirm your order: If the order details are accurate, proceed to confirm your buy order on Bitstamp. This confirms your intention to purchase Ripple at the specified price.
It’s important to note that once an order is placed and confirmed, it cannot be canceled or modified. Therefore, it’s crucial to carefully review and verify the order details before confirming.
After confirming your buy order, Bitstamp will process the order according to the market conditions and execute it at the best available price. You may receive a confirmation of the executed order via email or through the Bitstamp platform.
If the buy order is successfully executed, you will see the purchased Ripple in your Bitstamp account balance. You can then choose to hold your Ripple on the exchange or transfer it to a personal cryptocurrency wallet for added security.
By reviewing and confirming your buy order on Bitstamp, you can ensure that your purchase of Ripple is executed accurately and according to your intentions.
Now that you have reviewed and confirmed your buy order, the next section will guide you through the process of withdrawing your Ripple from your Bitstamp account.
Withdrawing Your Ripple from Bitstamp
Once you have purchased Ripple on Bitstamp, you may choose to withdraw it from your Bitstamp account and transfer it to a personal cryptocurrency wallet for added security and control. Here’s how to withdraw your Ripple from Bitstamp:
- Log in to your Bitstamp account: Visit the Bitstamp website and enter your email and password to log in to your account.
- Go to the withdrawal section: In the top navigation menu, click on “Withdrawal” and select XRP as the currency you want to withdraw.
- Enter the withdrawal details: Provide the destination wallet address where you want to send your Ripple. Make sure to double-check the accuracy of the address as transactions cannot be reversed.
- Specify the amount to withdraw: Enter the quantity of Ripple you wish to withdraw from your Bitstamp account. Ensure that the amount is within your available balance.
- Review and confirm the withdrawal: Double-check all the withdrawal details, including the destination address and the amount of Ripple to be withdrawn. Once you’re satisfied, click on the “Withdraw” or “Submit” button to initiate the withdrawal.
- Verify your withdrawal: Bitstamp may send you an email or require you to confirm the withdrawal via a verification method. Follow the provided instructions to complete the verification process. This step is in place to enhance the security of your funds.
- Wait for the withdrawal to process: The withdrawal process typically takes some time to complete. Bitstamp may have specific security measures or processing times in place to ensure the safety of your funds.
It’s important to note that Bitstamp may charge a fee for withdrawing your Ripple. The fee structure can vary depending on the withdrawal method and the amount being withdrawn. Make sure to review the withdrawal fees on the Bitstamp website to understand the cost associated with transferring your Ripple to a personal wallet.
Once the withdrawal is successfully processed, the transferred Ripple will be reflected in your personal wallet. From there, you have full control over your Ripple and can manage and store it according to your preferences.
Remember to keep your personal cryptocurrency wallet secure and make regular backups of your wallet information to prevent any potential loss of funds.
Now that you know how to withdraw your Ripple from Bitstamp, you can confidently take control of your cryptocurrency holdings and ensure their safety.
Tips and Considerations for Buying Ripple on Bitstamp
As you navigate the process of buying Ripple on Bitstamp, it’s important to keep in mind some tips and considerations to make your experience smoother and more successful. Here are some valuable insights:
- Do your research: Before buying Ripple or any other cryptocurrency, take the time to research and understand the market. Stay updated with the latest news and developments in the crypto space to make informed decisions.
- Set a budget: Determine how much you’re willing to invest in Ripple and set a budget accordingly. Cryptocurrency markets can be highly volatile, so consider the potential risks and only invest what you can afford to lose.
- Choose a reliable exchange: Bitstamp is a reputable and well-established exchange, but it’s always a good idea to conduct your due diligence and choose an exchange that suits your needs and requirements.
- Consider security measures: Safeguarding your cryptocurrencies is crucial. Enable two-factor authentication (2FA) on your Bitstamp account, and consider using a hardware wallet or other secure storage options for your Ripple.
- Monitor market trends: Keep an eye on the price movements and trading volume of Ripple to identify potential buying opportunities or market trends.
- Understand trading fees: Familiarize yourself with the fee structure on Bitstamp, including trading fees, deposit fees, and withdrawal fees. Factor in these costs when determining your overall investment strategy.
- Practice risk management: Consider using tools like stop-loss orders to protect your investments from significant price drops. This allows you to automatically sell your Ripple if it reaches a predetermined price level.
- Seek professional advice: If you’re new to cryptocurrency trading or unsure about investment decisions, consider consulting with a financial advisor or cryptocurrency expert to get personalized guidance.
Remember, buying Ripple on Bitstamp or any other cryptocurrency comes with risks. The market can be volatile, and prices can change rapidly. It’s important to stay informed, exercise caution, and make decisions based on your own risk tolerance and financial goals.
By following these tips and considering the factors mentioned above, you can navigate the process of buying Ripple on Bitstamp with greater confidence and increase your chances of making informed investment decisions.
Conclusion
Congratulations! You have reached the end of this guide on how to buy Ripple on Bitstamp. By following the steps outlined in this guide, you should now have a clear understanding of the process involved in purchasing Ripple on Bitstamp and some valuable tips to enhance your buying experience.
Remember, the world of cryptocurrencies can be exciting and rewarding, but it’s essential to approach it with caution and do your due diligence. Keep in mind the risks associated with investing in cryptocurrencies, and only invest what you can afford to lose.
Bitstamp provides a trusted and user-friendly platform for buying Ripple, allowing you to tap into the potential of this global payment solution. With proper account setup, verification, and depositing funds, you can seamlessly enter the world of Ripple trading.
Understanding XRP trading pairs is crucial for selecting the right pair to trade and placing the buy order correctly. By reviewing and confirming your order, you can ensure that your purchase aligns with your intentions.
Finally, if you choose to withdraw your Ripple from Bitstamp, make sure to follow the necessary steps and consider wallet security to protect your investment.
We hope this guide has provided you with valuable insights and guidance on how to navigate the process of buying Ripple on Bitstamp. Remember to stay informed, monitor market trends, and seek professional advice if needed.
Good luck with your Ripple trading journey on Bitstamp and may your investments be prosperous!


