Introduction
Welcome to the world of digital currency, where transactions are decentralized, secure, and transparent. If you’re curious about Ripple’s XRP digital currency and want to get started with buying it, you’ve come to the right place. In this guide, we’ll walk you through the steps of purchasing XRP, from setting up a digital wallet to completing your first transaction on a cryptocurrency exchange.
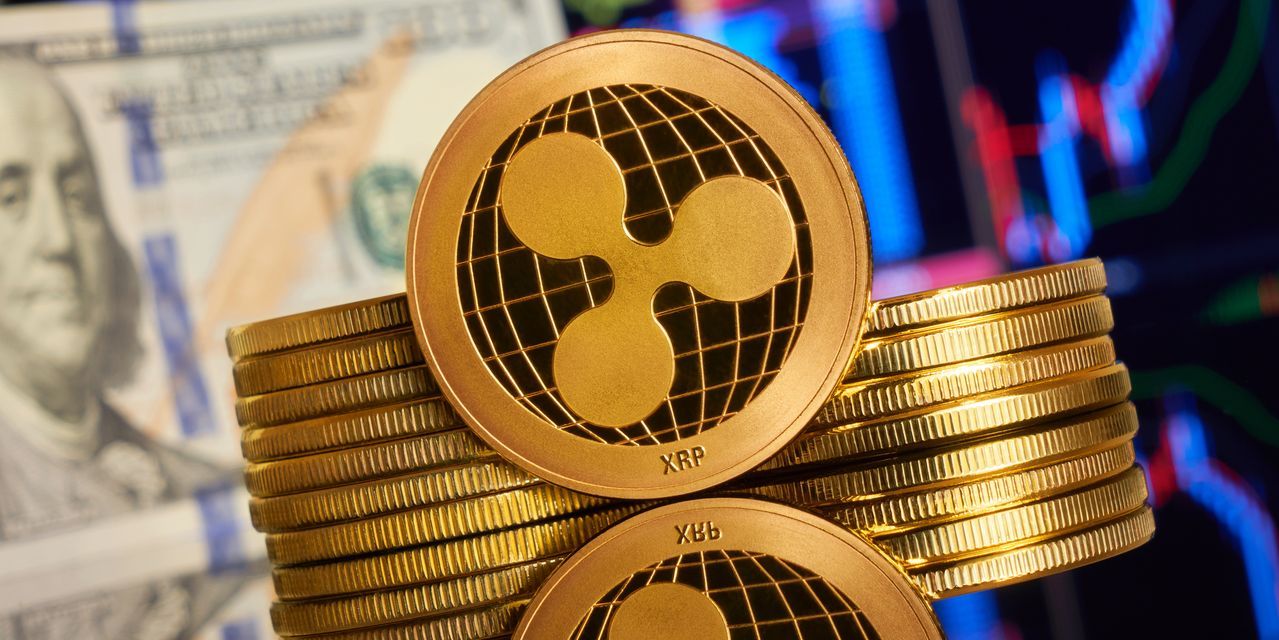
First, let’s understand what Ripple’s XRP digital currency is and why it has gained popularity in the crypto market. XRP is the native cryptocurrency of the Ripple network, a platform designed to enable fast and low-cost international money transfers. Ripple aims to revolutionize the traditional banking system by using XRP as a bridge currency to facilitate cross-border transactions. It boasts impressive transaction speeds, significantly reducing settlement times compared to traditional methods.
Buying XRP involves a few essential steps, and we’ll guide you through the process to ensure a smooth experience. You’ll need to set up a digital wallet to store your XRP securely, choose a cryptocurrency exchange that supports XRP trading, verify your account, deposit funds, and make the purchase. Finally, we’ll discuss the importance of securing and storing your XRP safely.
It’s important to note that the cryptocurrency market can be volatile, and it’s essential to conduct thorough research before investing. Also, make sure to comply with any legal regulations regarding digital currency in your country.
Now that we have the basics covered, let’s dive into the details of each step, starting with setting up your digital wallet.
What is Ripple’s XRP Digital Currency?
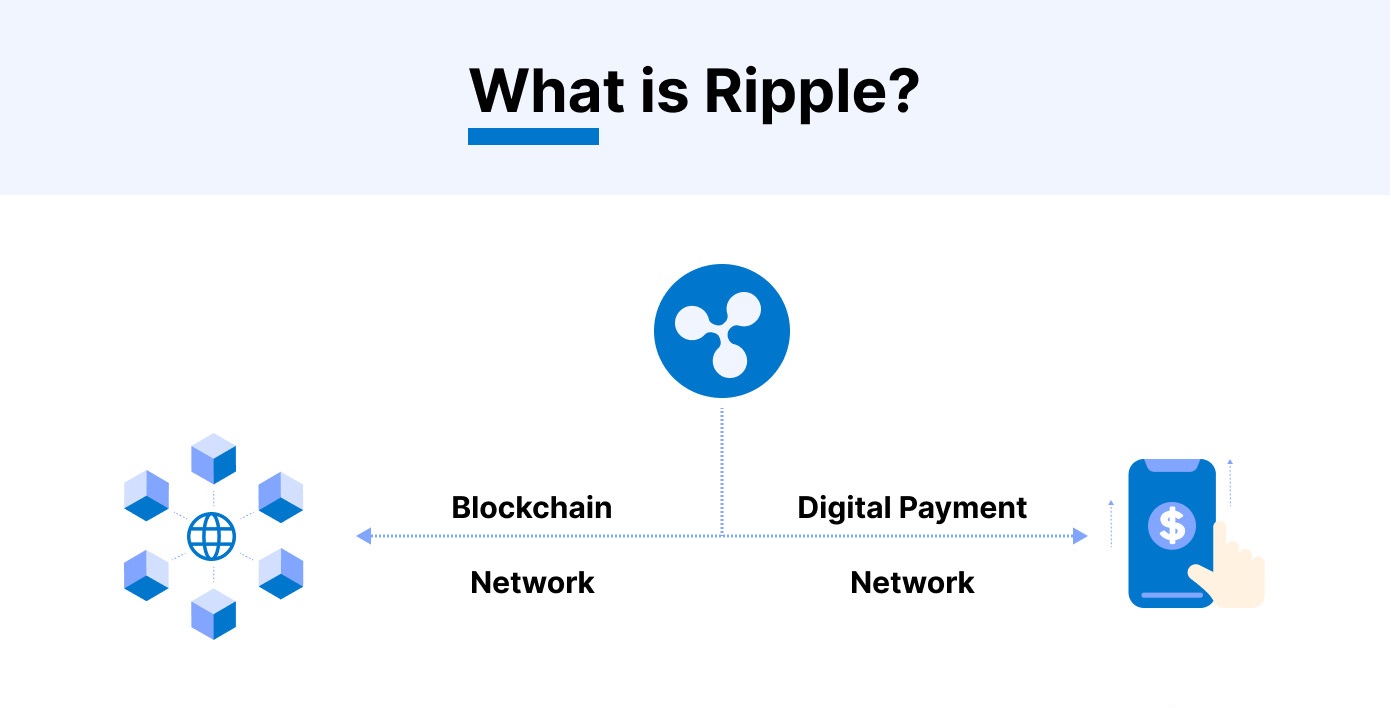
Ripple’s XRP is a digital currency that serves as the primary token on the Ripple network. Unlike traditional cryptocurrencies like Bitcoin, which aim to replace or compete with existing financial systems, XRP has a different purpose. It functions as a bridge currency for facilitating fast and efficient international money transfers.
The Ripple network is a decentralized platform that enables the seamless transfer of different currencies. It uses a technology called the XRP Ledger, which serves as a distributed ledger and consensus mechanism. This infrastructure allows for secure and instant settlement of transactions, eliminating the need for intermediaries and reducing costs for financial institutions.
Ripple’s XRP was designed to solve some of the pain points associated with cross-border payments. Traditional methods of international money transfers are often slow, expensive, and cumbersome. Bank transfers can take several days to complete, involve high fees, and are subject to intermediaries at each step of the process.
XRP offers a more efficient alternative by acting as a bridge currency. When a financial institution wants to send money across borders, they can use XRP as an intermediary. XRP is liquid and can be quickly converted into different fiat currencies, such as USD or EUR, making it an ideal choice for facilitating international transactions.
One of the key advantages of using XRP for cross-border payments is the speed of settlement. Traditional methods can take multiple days, while XRP transactions settle within seconds. This quick settlement time is possible due to the consensus algorithm used by the XRP Ledger, which allows for fast and efficient confirmation of transactions.
Another notable feature of XRP is its scalability. The Ripple network can handle a high volume of transactions per second, making it suitable for global financial institutions and payment providers. This scalability ensures that the network can handle the demands of real-world use cases without compromising on speed or security.
Overall, Ripple’s XRP digital currency has gained recognition for its potential to revolutionize cross-border transactions. Its speed, low costs, and scalability make it an appealing option for financial institutions and individuals looking for a more efficient alternative to traditional methods of international money transfers.
Now that you have a better understanding of what Ripple’s XRP is, let’s move on to the first step in buying XRP: setting up a digital wallet.
Step 1: Set Up a Digital Wallet
Before you can buy Ripple’s XRP digital currency, you need a digital wallet to securely store and manage your coins. A digital wallet, also known as a cryptocurrency wallet, is a software application or online service that allows you to interact with the blockchain and hold your crypto assets.
There are several types of digital wallets available, each with its own advantages and security features. Let’s explore the different options:
- Software Wallets: These wallets are applications that you install on your computer or mobile device. They offer full control over your private keys, giving you the responsibility of keeping your wallet secure. Examples of popular software wallets include Exodus, Atomic Wallet, and Toast Wallet.
- Online Wallets: Also known as web wallets, online wallets are hosted on a cloud-based platform. They provide convenient access from any device with an internet connection. However, since online wallets are controlled by a third party, it’s important to choose a reputable and secure provider. Some well-known online wallet options for XRP include GateHub and Binance.
- Hardware Wallets: Considered the most secure option, hardware wallets are physical devices that store your private keys offline. They offer protection against malware and hacking attempts. Popular hardware wallet brands include Ledger and Trezor. While they are a bit more expensive, hardware wallets are recommended for those concerned about security.
When choosing a digital wallet, consider factors such as security, ease of use, and compatibility with Ripple’s XRP. It’s important to research and compare different wallet options to find the one that best suits your needs.
Once you have selected a wallet, follow the specific instructions provided by the wallet provider to set it up. This usually involves creating a strong password, backing up your wallet’s recovery phrase, and completing any additional security measures.
Remember to keep your private keys secure and never share them with anyone. Losing your private keys can result in permanent loss of access to your funds, so it’s crucial to make backups and store them in a safe place.
Now that you have your digital wallet set up, you’re ready to proceed to the next step: choosing a cryptocurrency exchange to buy Ripple’s XRP.
Step 2: Choose a Cryptocurrency Exchange
Once you have set up your digital wallet, the next step in buying Ripple’s XRP digital currency is to choose a cryptocurrency exchange. A cryptocurrency exchange is an online platform where you can buy, sell, and trade various cryptocurrencies, including XRP.
When selecting a cryptocurrency exchange, you’ll want to consider a few factors:
- Reputation and Security: Look for an exchange with a solid reputation and a strong commitment to security. Research the exchange’s history, read reviews from other users, and check whether they have implemented robust security measures, such as two-factor authentication (2FA) and cold storage for funds.
- Liquidity: Liquidity refers to the ease with which an asset can be bought or sold without causing a significant change in its price. Choose an exchange that has sufficient liquidity for XRP to ensure that you can execute your transactions quickly and at fair market prices.
- Supported Countries: Not all cryptocurrency exchanges are available in all countries. Make sure the exchange you choose supports customers from your country to avoid any restrictions or legal issues.
- User Interface and Experience: Consider the user interface and overall user experience offered by the exchange. A user-friendly interface can make the buying process more convenient and enjoyable.
- Trading Fees: Exchanges typically charge fees for executing trades. Compare the trading fees among different exchanges to find one that offers competitive rates.
Some popular cryptocurrency exchanges that support XRP trading include Coinbase, Binance, Kraken, and Bitstamp. Each exchange has its own advantages and features, so it’s recommended to research and compare them based on your specific requirements.
Once you have chosen an exchange, you’ll need to create an account. This usually involves providing your email address, creating a strong password, and agreeing to the exchange’s terms of service. Some exchanges may also require additional identity verification, such as submitting identification documents.
It’s important to note that different exchanges may have varying registration and verification processes. Be prepared to provide any necessary documentation and complete the required steps before you can start trading on the platform.
Now that you have selected a cryptocurrency exchange and created your account, you’re ready to move on to the next step: registering and verifying your account.
Step 3: Register and Verify Your Account
After choosing a cryptocurrency exchange, the next step in buying Ripple’s XRP digital currency is to register and verify your account on the exchange platform. Registering and completing the verification process is a crucial step to ensure the security and compliance of your transactions.
Here is a general guide on how to register and verify your account on a cryptocurrency exchange:
- Registration: Visit the chosen cryptocurrency exchange’s website and look for the “Sign Up” or “Register” button. Click on it, and you will be directed to the registration page. Fill in the required information, such as your email address and a secure password. Make sure to create a strong and unique password to protect your account.
- Email Verification: After submitting your registration details, you will receive an email from the exchange with a verification link. Click on the link to confirm your email address and activate your account. Some exchanges may require you to complete additional security measures, such as enabling two-factor authentication (2FA) for added protection.
- Identity Verification: To comply with Know Your Customer (KYC) and Anti-Money Laundering (AML) regulations, most reputable cryptocurrency exchanges require identity verification. This step involves submitting identification documents, such as a passport, driver’s license, or government-issued ID. Follow the instructions provided by the exchange to upload and verify your identity documents. This process ensures the legitimacy of your account and helps establish trust within the exchange.
- Address Verification: Some exchanges may also require proof of address verification. This can be done by providing utility bills, bank statements, or other official documents that display your full name and current residential address. The address verification process helps enhance security and prevents fraud on the platform.
- Verification Approval: Once you have submitted all the required documents, the exchange’s verification team will review them. This process may take a few hours to a few days, depending on the exchange’s volume of pending verifications. The exchange will notify you via email once your account has been successfully verified.
It is important to note that the registration and verification process may vary slightly from one cryptocurrency exchange to another. Ensure that you read and follow the specific instructions provided by the exchange to avoid any delays or complications.
Once your account is verified, you can move on to the next step: depositing funds into your exchange account.
Step 4: Deposit Funds into Your Exchange Account
After successfully registering and verifying your account on the chosen cryptocurrency exchange, it’s time to deposit funds into your account. Depositing funds into your exchange account allows you to have the necessary funds to purchase Ripple’s XRP digital currency.
The deposit process may vary slightly depending on the cryptocurrency exchange you’re using, but here are some general steps to follow:
- Locate the Deposit Section: Once you log into your exchange account, navigate to the deposit section. This section is usually found by clicking on your account or profile settings.
- Select the Cryptocurrency: Choose XRP as the cryptocurrency you want to deposit into your exchange account. Some exchanges may support multiple cryptocurrencies, so make sure to select XRP.
- Generate a Deposit Address: The exchange will provide you with a unique XRP deposit address. This address is a long string of alphanumeric characters specific to your account. This address is where you’ll send your XRP tokens from your digital wallet, so double-check to ensure the accuracy of the address.
- Initiate the Deposit: Open your digital wallet that you set up earlier and navigate to the send or transfer section. Enter the XRP deposit address you obtained from the exchange and specify the amount of XRP you want to deposit. Confirm the transaction and initiate the transfer.
- Wait for Confirmation: Once you initiate the deposit, it may take some time for the transaction to be confirmed on the network. The time required for confirmation can vary depending on network congestion and other factors. You can track the progress of your deposit on the blockchain explorer or within your exchange account.
It’s important to note that some exchanges may require a minimum deposit amount or have specific deposit limits. Make sure to familiarize yourself with the exchange’s deposit policies before initiating the deposit.
Once your deposit is confirmed, the XRP digital currency will be credited to your exchange account, and you’ll be ready to purchase XRP. The deposited funds should be visible in your exchange account balance.
Now that you have successfully deposited funds into your exchange account, let’s move on to the next step: buying XRP on the exchange.
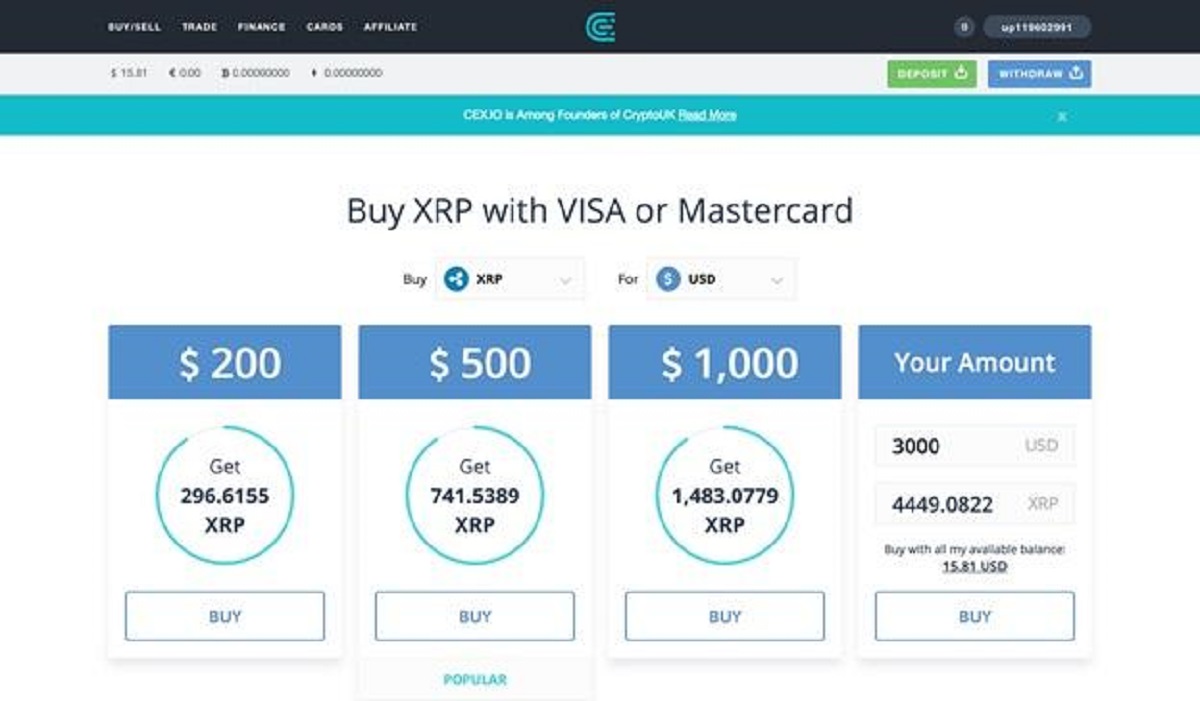
Step 5: Buy XRP on the Exchange
With funds deposited into your exchange account, you’re now ready to buy Ripple’s XRP digital currency. Buying XRP on a cryptocurrency exchange involves placing a buy order to acquire the desired amount of XRP tokens.
Here’s a typical process for buying XRP on an exchange:
- Navigate to the Trading Section: In your exchange account, locate the trading section or platform. This is where you’ll find the options to buy and sell cryptocurrencies.
- Choose the XRP Trading Pair: Select the appropriate XRP trading pair, depending on the type of currency you are using to buy XRP. For example, if you’re using US dollars (USD), choose the XRP/USD trading pair.
- Specify the Buy Order: Determine the amount of XRP you want to buy and specify the price at which you are willing to buy. You can choose to place a market order, which executes immediately at the current market price, or a limit order, which allows you to set a specific price you’re willing to pay.
- Review and Confirm: Double-check all the details of your buy order, including the amount of XRP, the price, and any applicable fees. Once you’re satisfied, review and confirm the order.
- Execute the Buy Order: After confirming your order, the exchange will process your buy order. If you placed a market order, the transaction will be executed immediately at the current market price. If you placed a limit order, the transaction will only be executed when the market reaches your specified price.
- Check Your XRP Balance: After the buy order is executed, you can check your XRP balance in your exchange account. The XRP tokens you purchased should now be reflected in your account balance.
It’s essential to monitor the market conditions and set a realistic and competitive price when placing a buy order. Keep in mind that cryptocurrency prices can be volatile, and the actual price at which your order gets executed may differ slightly from the price you set.
Remember to consider any trading fees that may apply. Exchanges typically charge a small percentage fee for each trade, which can vary depending on the exchange and your trading volume. Familiarize yourself with the fee structure of your chosen exchange to understand how much you’ll be paying in fees.
Congratulations! You have successfully purchased Ripple’s XRP digital currency on the exchange. The XRP tokens are now yours, and you can manage them within your exchange account.
Now that you have bought XRP, it’s essential to secure and store your tokens properly. Let’s explore the next step: securing and storing your XRP.
Step 6: Secure and Store Your XRP
After purchasing Ripple’s XRP digital currency, it’s crucial to take steps to secure and store your tokens safely. Proper security measures will help protect your XRP investment from potential theft or loss.
Here are some tips for securing and storing your XRP:
- Hardware Wallet: Consider using a hardware wallet to store your XRP. Hardware wallets are physical devices specifically designed to securely store cryptocurrencies. They offer offline storage and robust security features to protect your private keys.
- Backup Your Wallet: Make sure to create backups of your wallet’s recovery phrase or seed. This phrase allows you to restore your wallet in case it is lost, damaged, or stolen. Store your backups in a safe and secure location, such as a fireproof and waterproof safe.
- Secure Your Devices: Keep your devices, including your computer and mobile devices, secure by regularly installing software updates, using strong passwords, and enabling screen locks. Use reputable antivirus software and avoid downloading files or clicking on suspicious links.
- Enable Two-Factor Authentication (2FA): Activate 2FA on your wallet and exchange accounts for an extra layer of security. This adds an additional step to the login process by requiring a verification code from your smartphone or another trusted device.
- Be Wary of Phishing Attempts: Beware of phishing attempts where attackers pose as legitimate entities to trick you into disclosing your private keys or sensitive information. Always double-check the authenticity of emails, websites, and messages before providing any personal or financial details.
- Regularly Update Security Measures: Stay updated on the latest security protocols and best practices in the cryptocurrency industry. Follow news and announcements from wallet providers and exchanges to ensure you are implementing the most up-to-date security measures.
It’s important to emphasize that you should avoid storing significant amounts of XRP on exchanges for an extended period. While exchanges can be convenient for trading, they are vulnerable to hacks and other security breaches. Move your XRP holdings to a secure hardware wallet whenever possible to maintain full control over your assets.
By following these security measures, you can minimize the risk of theft or loss and ensure the long-term safety of your XRP investment.
Now that you have secured and stored your XRP tokens, you’re ready to enjoy the benefits and potential of Ripple’s digital currency. Stay informed about the latest developments in the cryptocurrency market and continue to monitor your investment accordingly.
Conclusion
Congratulations, you have successfully navigated the process of buying Ripple’s XRP digital currency! By following the steps outlined in this guide, you have gained the knowledge and confidence to enter the world of cryptocurrency investing.
We explored what Ripple’s XRP digital currency is and how it differs from other cryptocurrencies. XRP’s role as a bridge currency for fast and low-cost international money transfers positions it as an attractive choice for individuals and financial institutions looking for efficient cross-border transactions.
We discussed the importance of setting up a digital wallet to securely store your XRP tokens. Choosing the right type of wallet and following proper security measures are vital to safeguard your investment and protect your private keys.
Next, we covered selecting a reputable cryptocurrency exchange and walking you through the registration and verification process. These steps ensure the legitimacy of your account and compliance with regulatory requirements.
We then delved into depositing funds into your exchange account, allowing you to have the necessary funds to purchase XRP. With funds available, we guided you through the process of buying XRP on the exchange, including selecting the trading pair, placing your buy order, and executing the transaction.
Finally, we emphasized the importance of securing and storing your XRP tokens properly. By using hardware wallets, backing up your wallet’s recovery phrase, implementing strong security measures, and staying vigilant against phishing attempts, you can protect your investment from potential risks.
Remember, the cryptocurrency market can be volatile, and it’s essential to do thorough research and make informed decisions. Stay updated on market trends, news, and innovative developments within the Ripple ecosystem to make the most of your XRP investment.
With your newfound knowledge and understanding, you’re now equipped to explore the world of Ripple’s XRP digital currency and participate in this exciting and transformative financial revolution.
Best of luck on your XRP journey!