Introduction
Ripple Editing is a powerful feature offered by Vegas, a popular video editing software. This feature allows you to make changes to your video timeline, while automatically adjusting all subsequent clips to accommodate those changes. It’s like creating a ripple effect, where the modifications you make have a cascading impact on the rest of your video.
Whether you’re a professional video editor or a beginner exploring the world of video production, understanding Ripple Editing can greatly enhance your workflow efficiency and save you valuable time. Instead of manually moving each clip individually when you make changes to your timeline, Ripple Editing automatically adjusts all subsequent clips while maintaining their relative positions.
In this article, we will explore how to enable Ripple Editing in Vegas and provide step-by-step instructions on how to activate this feature. Additionally, we will share some tips and common mistakes to avoid when using Ripple Editing effectively.
So, let’s dive in and unleash the power of Ripple Editing in Vegas!
What is Ripple Editing?
Ripple Editing is a fundamental concept in video editing that enables you to make changes to your timeline while automatically adjusting the following clips. When you perform a modification, such as cutting out a section of a video or adding a new clip, Ripple Editing intelligently shifts all subsequent clips to maintain the correct sequence and timing. It’s like creating a ripple effect that propagates throughout your video, ensuring the smooth continuity of your project.
One of the key benefits of Ripple Editing is its time-saving capability. Instead of manually moving each clip after making changes, Ripple Editing automatically manages the rest. This can be particularly useful when working on complex projects with numerous clips, as it eliminates the tedious task of repositioning everything manually.
Another advantage of Ripple Editing is its ability to maintain the interdependencies between clips. For example, let’s say you have a transition effect applied between two clips. If you decide to shorten the first clip using Ripple Editing, the second clip will automatically adjust, preserving the timing and synchronization of the transition. This ensures a seamless viewing experience without the need to manually readjust or reapply effects.
Ripple Editing can be a valuable tool in streamlining your video editing workflow. By allowing you to make changes quickly and effortlessly, it empowers you to focus on the creative aspects of your project rather than the technicalities of sequence management.
Now that you have a clear understanding of what Ripple Editing is and its benefits, let’s explore how to enable this feature in Vegas.
How to Enable Ripple Editing in Vegas
Enabling Ripple Editing in Vegas is a straightforward process. Follow these steps to activate this feature and start enjoying its time-saving benefits:
- Launch Vegas and open your project.
- Navigate to the timeline area where you want to enable Ripple Editing.
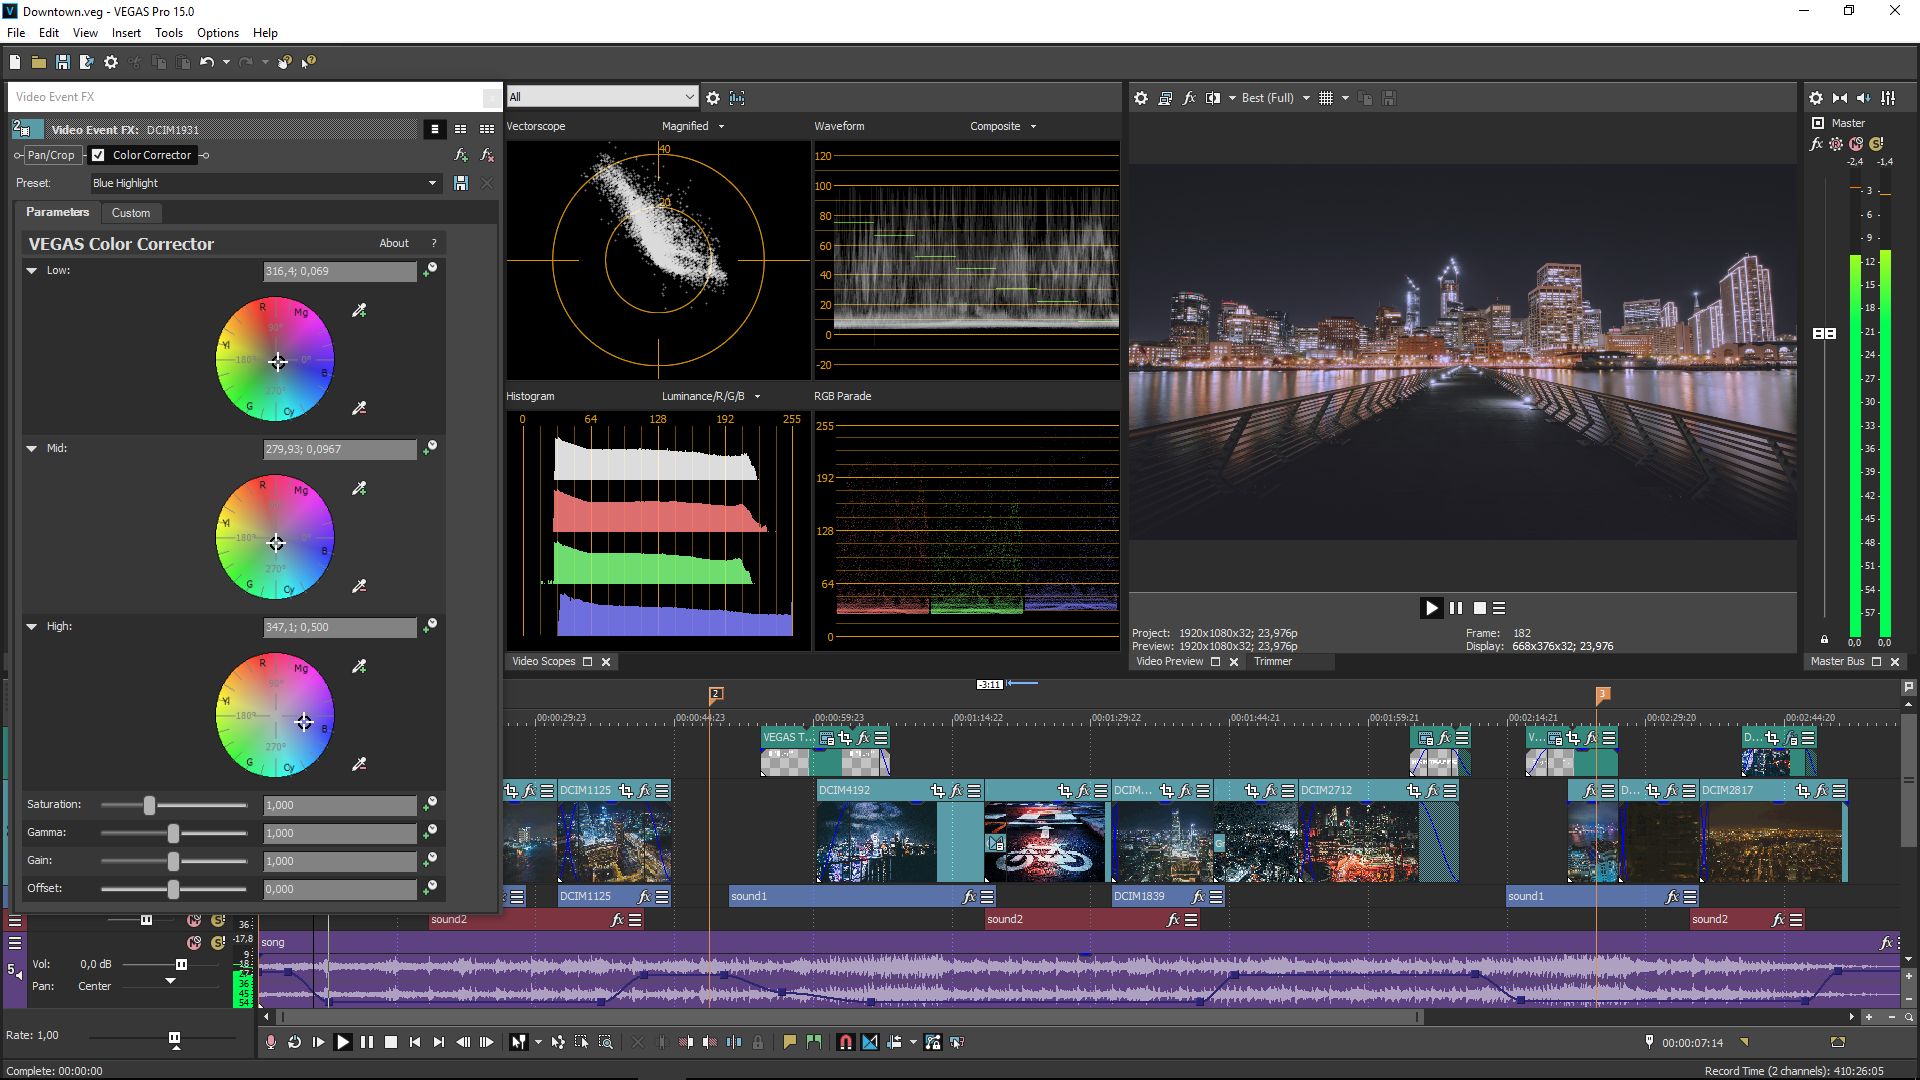
- Right-click anywhere within the timeline and select the “Switches” option from the context menu.
- A drop-down menu will appear with various editing options. Look for the “Ripple Editing” option and click on it to enable it.
- Once enabled, you’ll notice that the timeline visuals change, indicating that Ripple Editing is now active.
That’s it! You have successfully enabled Ripple Editing in Vegas. From now on, any modifications you make to the timeline will automatically adjust the subsequent clips without affecting their relative positions.
It’s important to note that the specific steps to enable Ripple Editing might vary slightly depending on the version of Vegas you are using. However, the general procedure remains the same across most versions.
Now that you have enabled Ripple Editing, let’s explore how to use it effectively.
Step-by-step Guide to Activating Ripple Editing
Activating Ripple Editing in Vegas is a simple process. Follow these step-by-step instructions to enable and start using this feature:
- Launch Vegas and open your project.
- Locate the timeline area where you want to enable Ripple Editing.
- Right-click anywhere within the timeline.
- A context menu will appear. Look for the “Switches” option and click on it.
- A drop-down menu will appear with various editing options. Find the “Ripple Editing” option and click on it to enable it.
- You will notice a change in the visual representation of the timeline, indicating that Ripple Editing is now active.
- To start using Ripple Editing, make any modifications to the timeline, such as cutting out a section or adding a new clip.
- Observe how the subsequent clips automatically adjust to accommodate the changes you made while maintaining their relative positions.
- If you want to disable Ripple Editing, simply repeat steps 3 and 4 and click on the “Ripple Editing” option to turn it off.
By following these steps, you can easily activate and deactivate Ripple Editing in Vegas, providing you with the flexibility to utilize this powerful feature as needed.
Now that you have successfully activated and understood how to use Ripple Editing, let’s explore some tips to help you make the most out of this feature.
Tips for Using Ripple Editing Effectively
Now that you have enabled Ripple Editing in Vegas, here are some helpful tips to make the most out of this feature and enhance your video editing workflow:
- Plan your edits: Before making any modifications using Ripple Editing, take some time to plan your edits. Understand the sequence and flow of your video to ensure that the changes you make align with your overall vision.
- Use keyboard shortcuts: Familiarize yourself with the keyboard shortcuts for Ripple Editing in Vegas. These shortcuts can significantly speed up your editing process and make it more efficient.
- Preview your changes: As you make modifications with Ripple Editing, regularly preview your video to ensure the changes are in line with your desired outcome. This will help you catch any potential issues and make necessary adjustments.
- Utilize the trim handles: When working with Ripple Editing, pay attention to the trim handles on the clips. These handles enable you to extend or reduce the duration of a clip while keeping the ripple effect intact.
- Experiment with variations: Ripple Editing offers the flexibility to experiment with different edits without permanently affecting your clips. Take advantage of this and try out various modifications to see which works best for your video.
- Keep a backup: It’s always a good practice to create a backup of your project before making extensive modifications with Ripple Editing. This ensures that you can revert to a previous version if needed without losing any valuable work.
By incorporating these tips into your video editing process, you can maximize the effectiveness of Ripple Editing and streamline your workflow in Vegas.
However, it’s essential to be aware of some common mistakes that can occur when using Ripple Editing. Let’s explore what to avoid in the next section.
Common Mistakes to Avoid When Using Ripple Editing
While Ripple Editing in Vegas can greatly enhance your video editing workflow, it’s important to be aware of common mistakes that can occur. By avoiding these pitfalls, you can ensure a smoother editing process and maintain the integrity of your project. Here are some common mistakes to watch out for:
- Forgetting to review the entire timeline: When making changes with Ripple Editing, it’s crucial to review the entire timeline to check how the ripple effect impacts the entire project. Neglecting to do so may result in unintended consequences further down the line.
- Overlapping or gaps in clips: Be mindful of overlapping or leaving gaps between clips when using Ripple Editing. This can disrupt the flow of your video and create jarring transitions. Ensure that each clip smoothly transitions into the next.
- Not considering effects and transitions: Effects and transitions applied to clips may not adjust automatically when using Ripple Editing. Take the time to review and readjust any effects or transitions to maintain the desired visual impact.
- Ignoring audio continuity: Ripple Editing can affect audio continuity, causing audio clips to overlap or create sudden changes in volume. Pay attention to audio transitions and ensure a smooth audio flow throughout your video.
- Forgetting to fine-tune: While Ripple Editing can save time, it’s important not to rely solely on automation. Take the time to fine-tune adjustments and ensure that each edit meets your specific needs and vision.
- Not backing up your project: Accidental deletions or irreversible changes can occur when using Ripple Editing. Always create a backup of your project before making extensive modifications to safeguard against any potential data loss.
Avoiding these common mistakes will help you maintain the quality and consistency of your video project while leveraging the efficiency of Ripple Editing.
With the understanding of how to enable and use Ripple Editing effectively, along with the knowledge of common mistakes to avoid, you can now make the most out of this powerful feature in Vegas.
Conclusion
Ripple Editing is a valuable feature offered by Vegas that can significantly enhance your video editing experience. By enabling Ripple Editing, you can streamline your workflow, save time, and maintain the continuity of your project. This feature automatically adjusts subsequent clips when you make changes to your timeline, ensuring a seamless ripple effect throughout your video.
In this article, we explored how to enable Ripple Editing in Vegas and provided a step-by-step guide to activating this feature. We also shared tips for using Ripple Editing effectively, such as planning your edits, utilizing keyboard shortcuts, and regularly previewing your changes. Additionally, we discussed common mistakes to avoid when using Ripple Editing, including neglecting to review the entire timeline and not considering effects and audio continuity.
By understanding how to enable and use Ripple Editing while avoiding common mistakes, you can make the most out of this powerful feature in Vegas. As you continue to explore video editing, remember to experiment with different techniques and tailor them to fit your specific project’s needs.
So, embrace the ripple effect, unleash your creativity, and enjoy the seamless editing experience that Ripple Editing brings to your video projects in Vegas!