Introduction
Are you looking to elevate your video conferencing or live streaming game? Your camcorder can be a powerful tool to enhance the quality of your video content. By setting up your camcorder as a webcam, you can take advantage of its superior optics and advanced features for a professional-looking video feed. Whether you're a content creator, business professional, or simply want to improve your virtual presence, using a camcorder as a webcam can significantly enhance your video quality.
In this guide, we will walk you through the process of setting up your camcorder as a webcam. You'll learn how to check compatibility, install necessary software, connect your camcorder to your computer, and configure it to function as a high-quality webcam. By following these steps, you can harness the full potential of your camcorder and achieve exceptional video quality for your online activities.
So, if you're ready to step up your video game and make a lasting impression with your audience, let's dive into the process of setting up your camcorder as a webcam. Whether you're using a consumer-grade camcorder or a professional-grade one, this guide will help you unleash its full potential for your video streaming and conferencing needs.
Step 1: Check Compatibility
Before diving into the setup process, it’s crucial to ensure that your camcorder is compatible with your computer and the software you’ll be using. Not all camcorders are designed to function as webcams out of the box, so it’s essential to verify compatibility to avoid potential issues down the line.
Start by checking the specifications of your camcorder. Look for information regarding its connectivity options and supported output formats. Many modern camcorders feature HDMI or USB outputs, which are commonly used for connecting to computers. Additionally, some camcorders offer specific webcam functionality, allowing them to be recognized as a webcam when connected to a computer.
Next, research whether the manufacturer of your camcorder provides dedicated webcam software or drivers. Some camcorder manufacturers offer software that enables their devices to function as webcams, providing a seamless integration with popular video conferencing and streaming applications. If such software is available, ensure that it is compatible with your computer’s operating system.
If your camcorder does not have built-in webcam functionality or dedicated software, you may need to explore third-party solutions. There are various software applications and hardware adapters available that can facilitate the use of a camcorder as a webcam. However, it’s important to research and confirm the compatibility of these third-party solutions with your specific camcorder model and computer setup.
By thoroughly checking the compatibility of your camcorder with your computer and available software options, you can avoid potential compatibility issues and streamline the setup process. Once you’ve confirmed that your camcorder is compatible, you can proceed to the next steps with confidence, knowing that you have the necessary components to set up your camcorder as a high-quality webcam.
Step 2: Install Necessary Software
Once you’ve verified the compatibility of your camcorder with your computer, the next step is to install any required software or drivers that will enable your camcorder to function as a webcam. Depending on your camcorder model and the available connectivity options, you may need to install specific software provided by the manufacturer or third-party applications that support camcorder-to-webcam functionality.
If your camcorder features a USB output and is designed to function as a webcam without additional software, connecting it to your computer should prompt the operating system to automatically install the necessary drivers. In this case, you can proceed to configure the camcorder as a webcam within your preferred video conferencing or streaming application.
For camcorders that require dedicated software to enable webcam functionality, visit the manufacturer’s official website to download the appropriate software for your specific camcorder model. Ensure that the software is compatible with your computer’s operating system, and follow the installation instructions provided by the manufacturer.
If your camcorder utilizes an HDMI output or requires additional hardware to connect to your computer, you may need to explore third-party software solutions that support HDMI capture or USB video input. There are numerous software applications available that can capture video input from HDMI sources and present them as webcam feeds to your computer, allowing you to use your camcorder as a high-quality webcam for video conferencing and streaming.
After installing the necessary software or drivers, restart your computer to ensure that the changes take effect. Once your computer has restarted, proceed to the next steps to connect your camcorder to your computer and configure it as a webcam within your preferred applications.
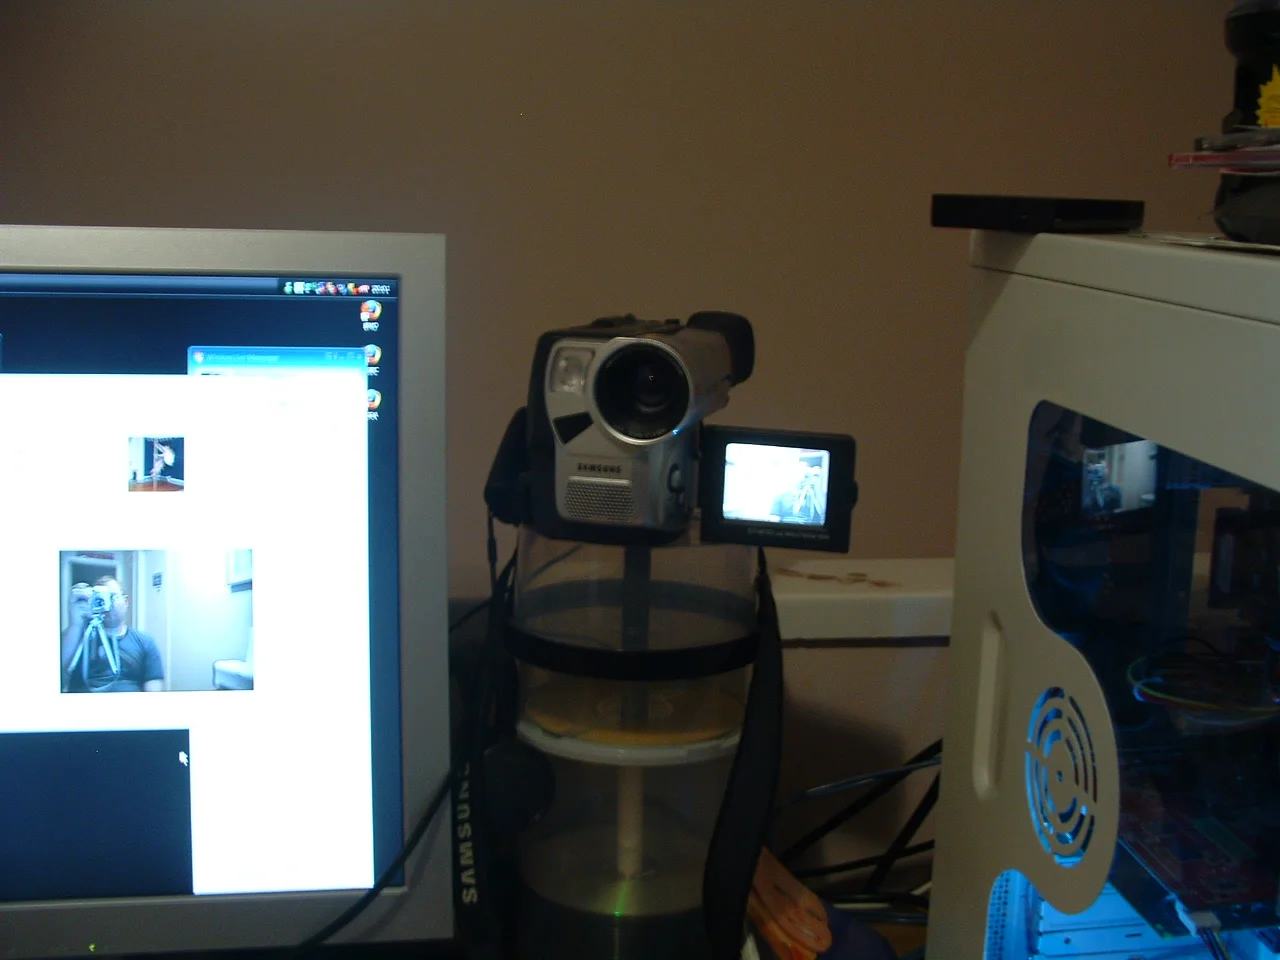
Step 3: Connect the Camcorder to Your Computer
With the necessary software or drivers installed, it’s time to physically connect your camcorder to your computer. The method of connection will depend on the available connectivity options on your camcorder and the input ports on your computer. Here are the common methods for connecting a camcorder to a computer:
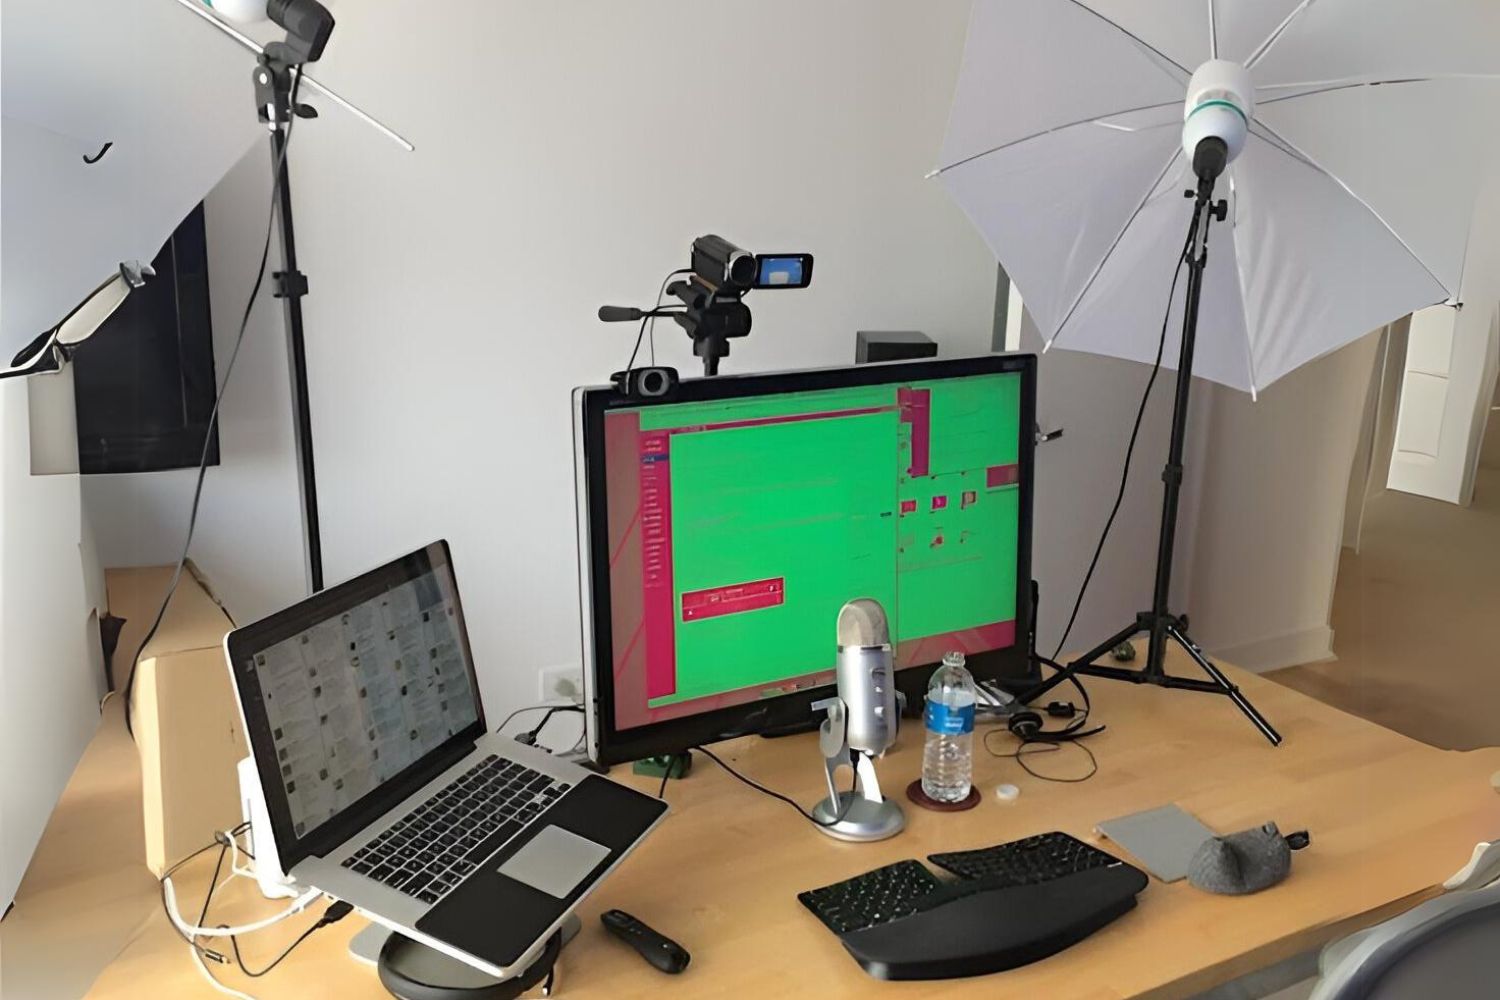
- USB Connection: If your camcorder features a USB output with webcam functionality, simply connect it to an available USB port on your computer using a compatible USB cable. Once connected, your computer should recognize the camcorder as a webcam device, allowing you to configure it within your video conferencing or streaming applications.
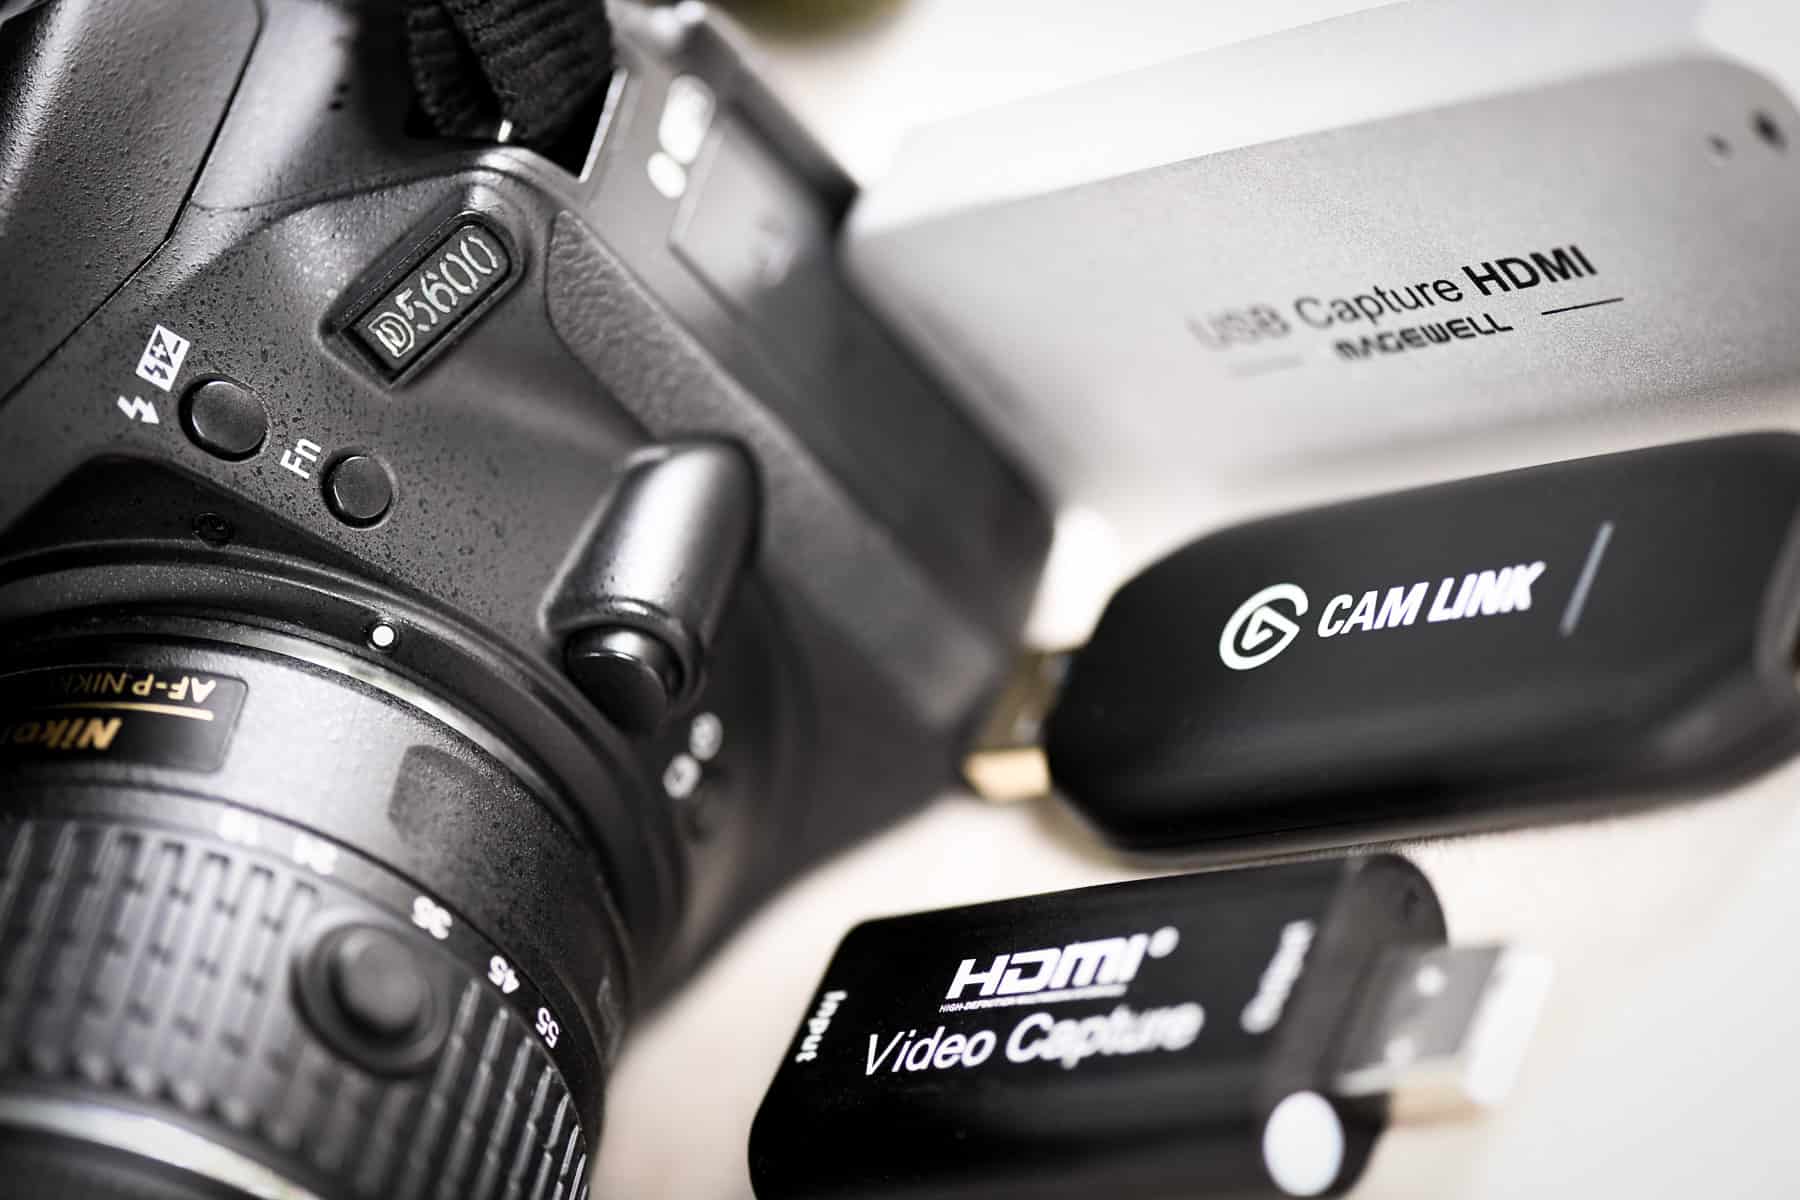
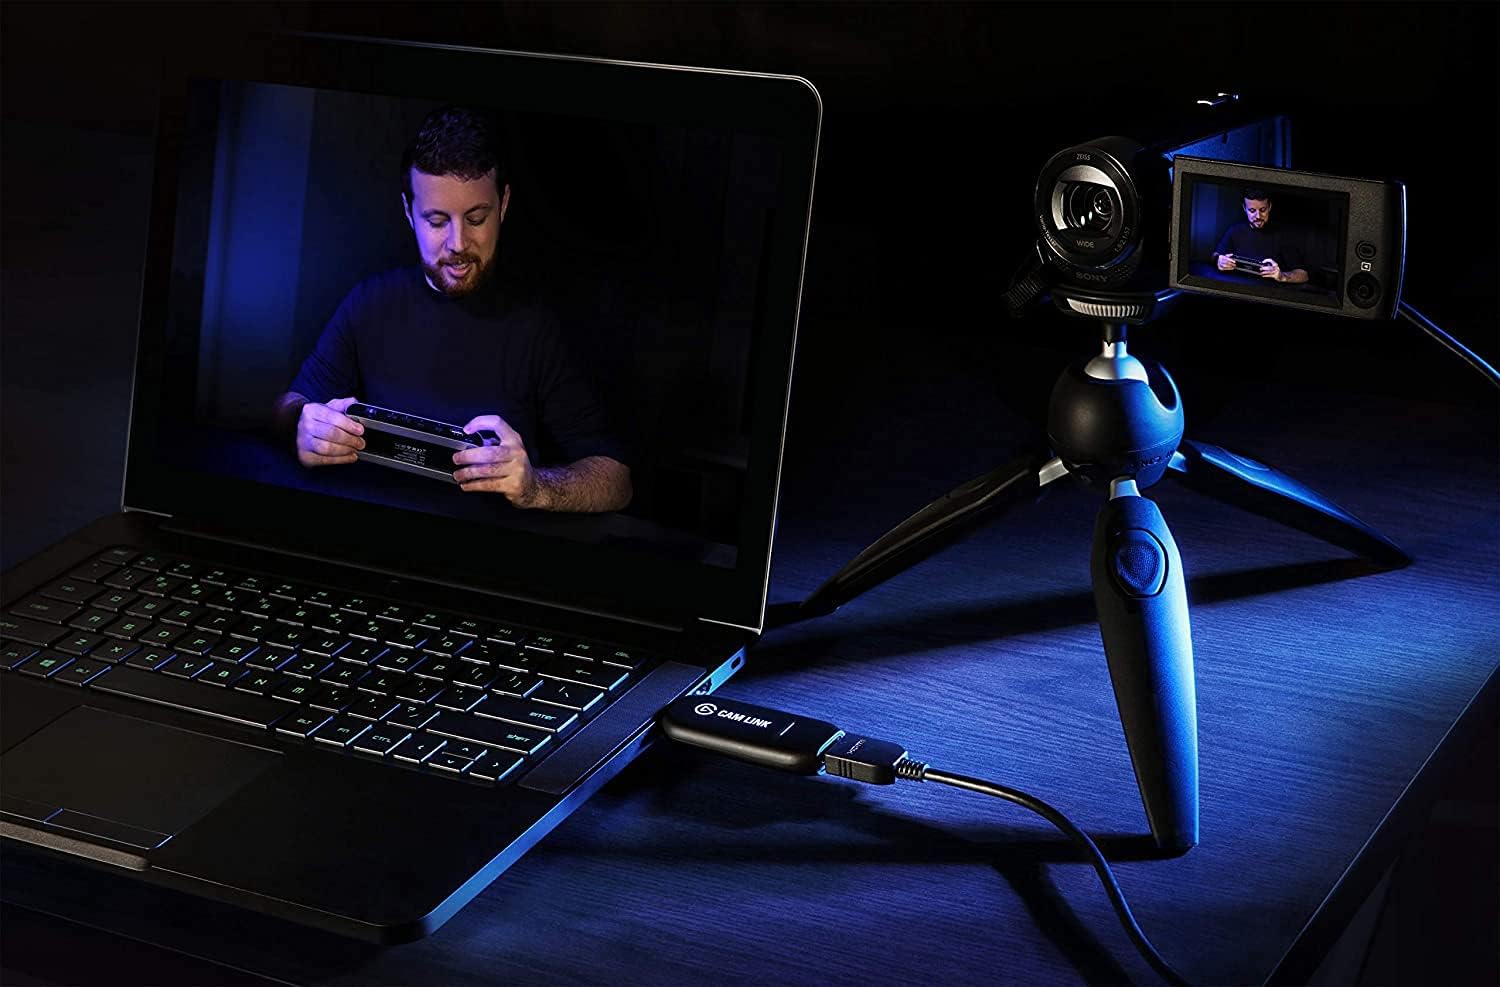
- HDMI Connection: Some camcorders offer HDMI outputs for high-definition video transmission. To connect a camcorder with an HDMI output to your computer, you may need an HDMI capture device that connects to a USB port on your computer. This device captures the HDMI output from your camcorder and presents it as a webcam feed to your computer, enabling you to use your camcorder for video conferencing and streaming.
- Wireless Connection: Certain camcorders support wireless connectivity options, allowing them to transmit video wirelessly to compatible receivers or devices. If your camcorder supports wireless transmission to a computer or compatible receiver, follow the manufacturer’s instructions to establish the wireless connection and configure the camcorder as a webcam.
Once your camcorder is physically connected to your computer, ensure that it is powered on and set to the appropriate mode for webcam functionality, if applicable. If your camcorder requires specific settings to enable webcam mode, consult the user manual or documentation provided by the manufacturer for guidance.
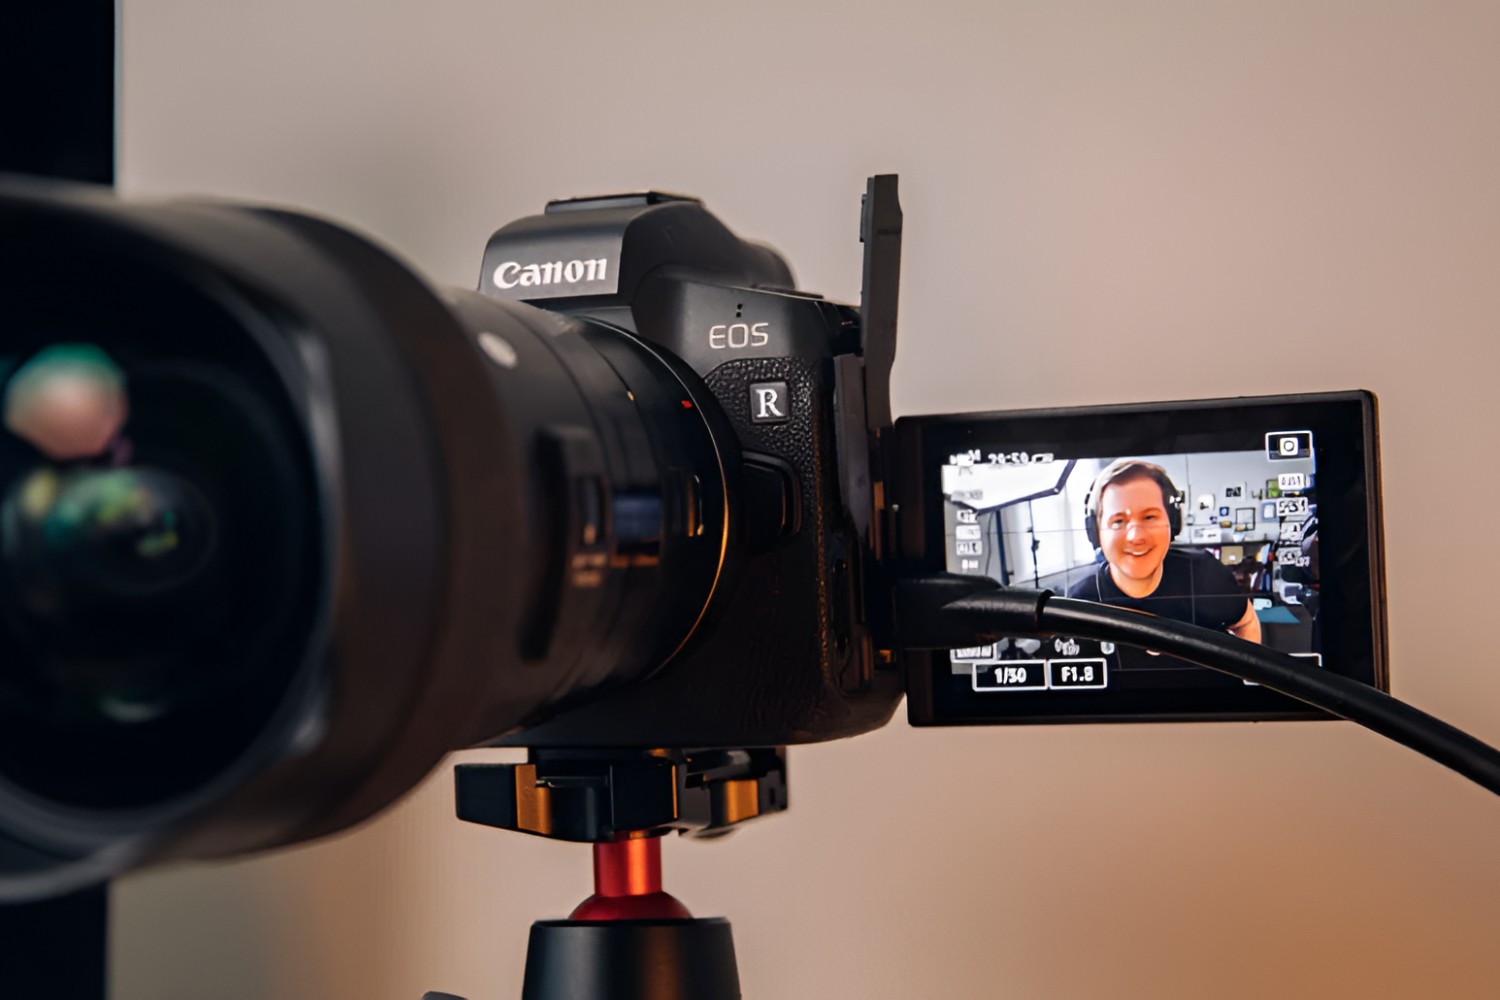
After establishing the physical connection, your computer should recognize the camcorder as a video input device, allowing you to configure it within your preferred video conferencing or streaming applications. Proceed to the next step to configure your camcorder as a webcam and test the setup to ensure everything is functioning as expected.
Step 4: Set Up the Camcorder as a Webcam
After connecting your camcorder to your computer, the next step is to configure it as a webcam within your preferred video conferencing or streaming applications. The process of setting up the camcorder as a webcam may vary depending on the software you’re using and the specific features of your camcorder, but the following general steps can guide you through the setup:
- Open Your Video Application: Launch the video conferencing or streaming application you intend to use with your camcorder. This could be Zoom, Skype, OBS Studio, or any other software that supports external webcams.
- Access Webcam Settings: Locate the settings or preferences within the video application that allow you to select and configure your webcam. Look for options related to video input devices or webcams, and ensure that your camcorder is recognized as an available webcam source.
- Select Your Camcorder: Within the webcam settings of the application, choose your camcorder from the list of available video input devices. If your camcorder is not immediately recognized, ensure that it is properly connected to your computer and powered on.
- Adjust Video and Audio Settings: Once your camcorder is selected as the webcam source, you may have the option to adjust video resolution, frame rate, and audio input settings. Configure these settings according to your preferences and the capabilities of your camcorder to achieve the desired video and audio quality.
- Test the Webcam Feed: To ensure that your camcorder is functioning as a webcam, initiate a video call or start a test stream within the application. Verify that the video feed from your camcorder is being displayed correctly and that the audio input, if applicable, is also functioning as expected.
It’s important to note that the specific steps for setting up your camcorder as a webcam may differ based on the software and operating system you’re using. Always refer to the documentation provided by the video application and any additional instructions from the camcorder manufacturer to ensure a smooth configuration process.
By following these steps, you can harness the advanced optics and features of your camcorder to deliver high-quality video content for your video conferencing, live streaming, or content creation needs. Once your camcorder is successfully configured as a webcam, you’re ready to engage with your audience in a whole new light, showcasing professional-grade video quality that sets you apart.
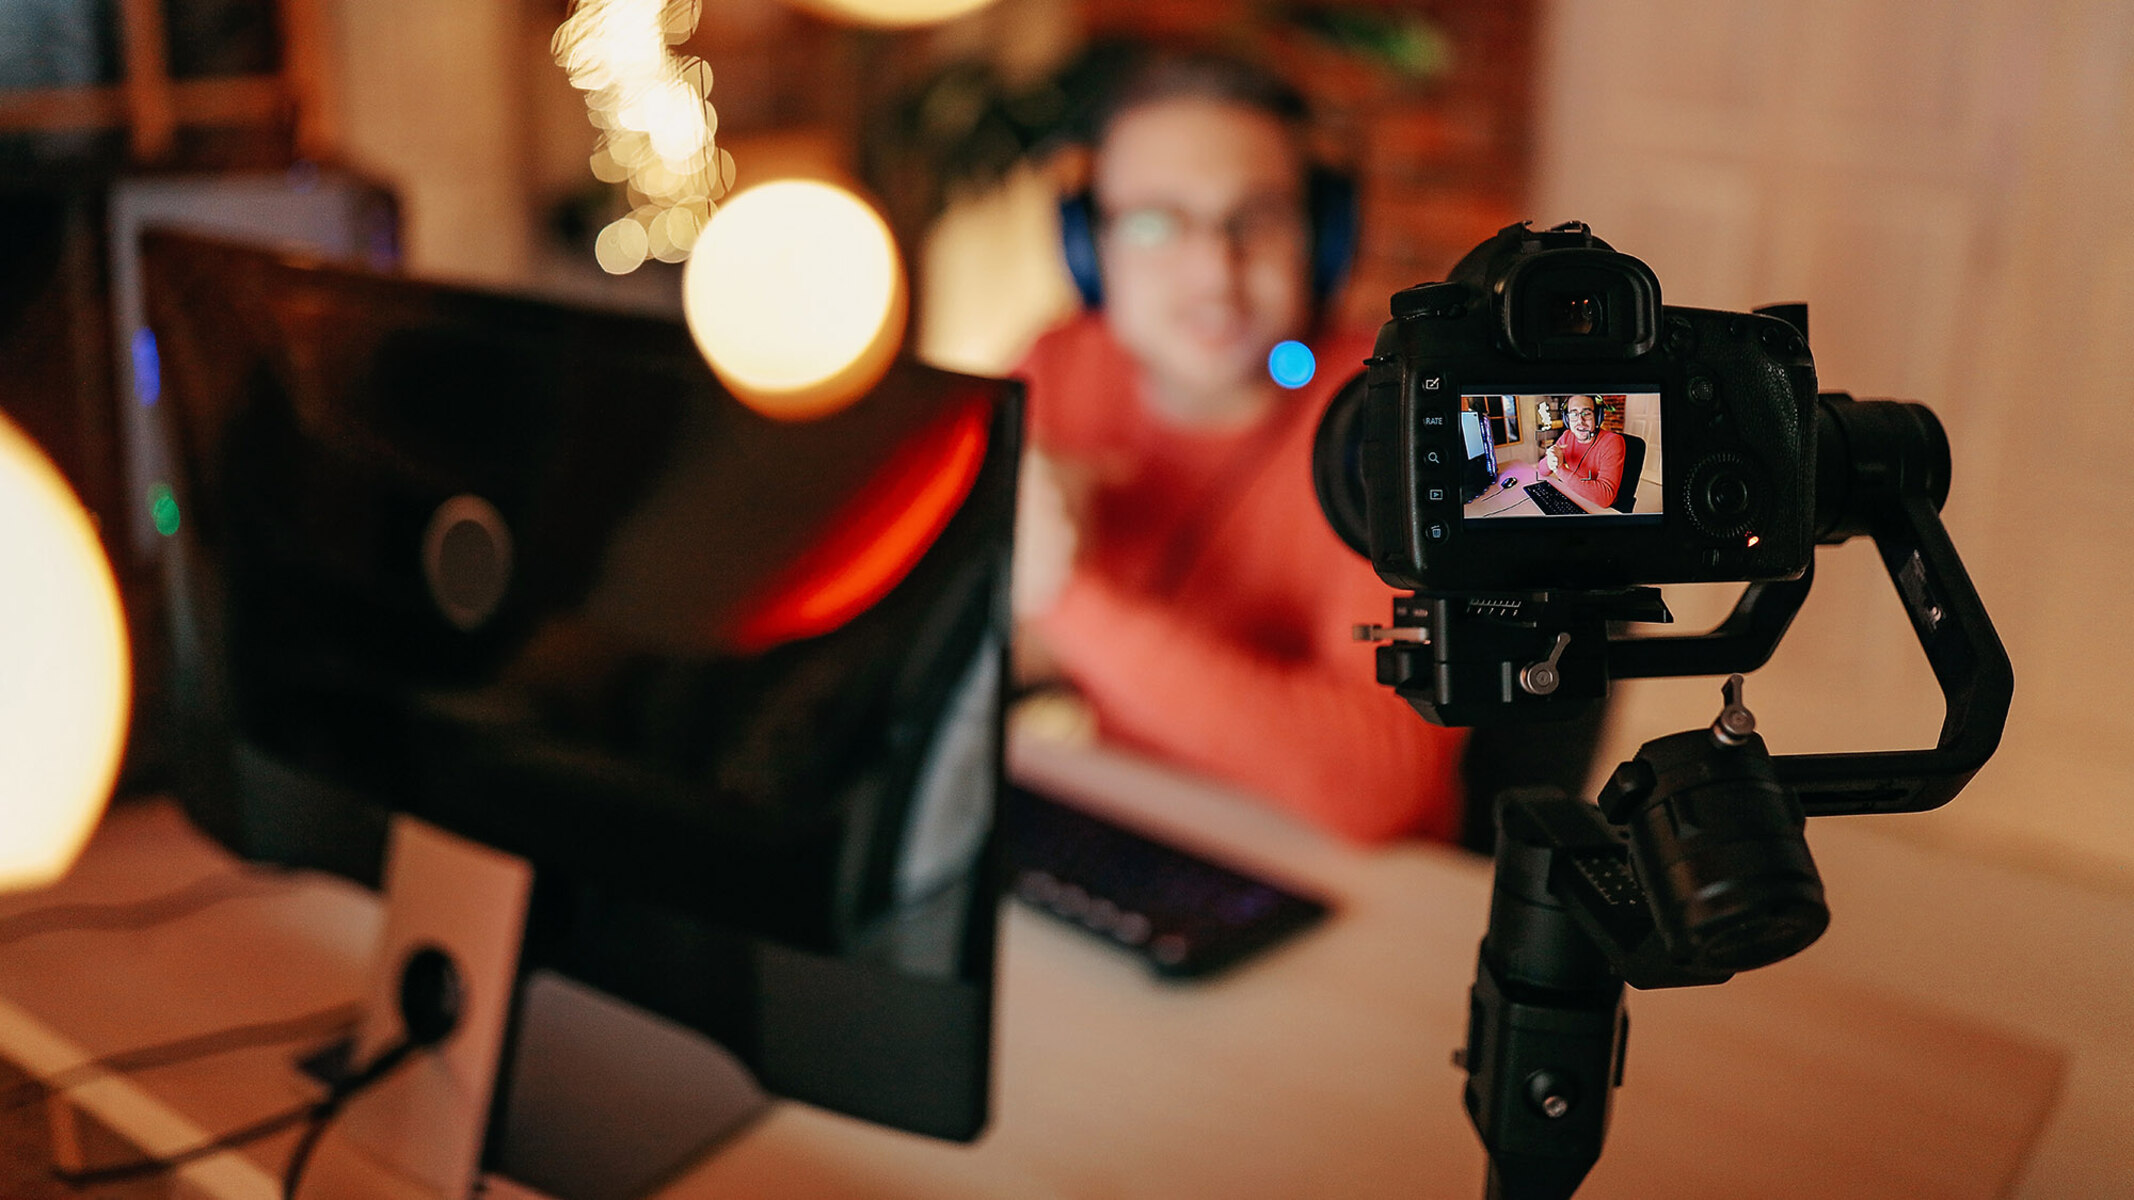
Step 5: Test the Setup
With your camcorder configured as a webcam, it’s crucial to test the setup to ensure that everything is functioning as expected. Testing the setup allows you to verify the video and audio quality, confirm proper integration with your video applications, and make any necessary adjustments before engaging in live video calls or streaming sessions. Here are the essential steps for testing your camcorder setup as a webcam:
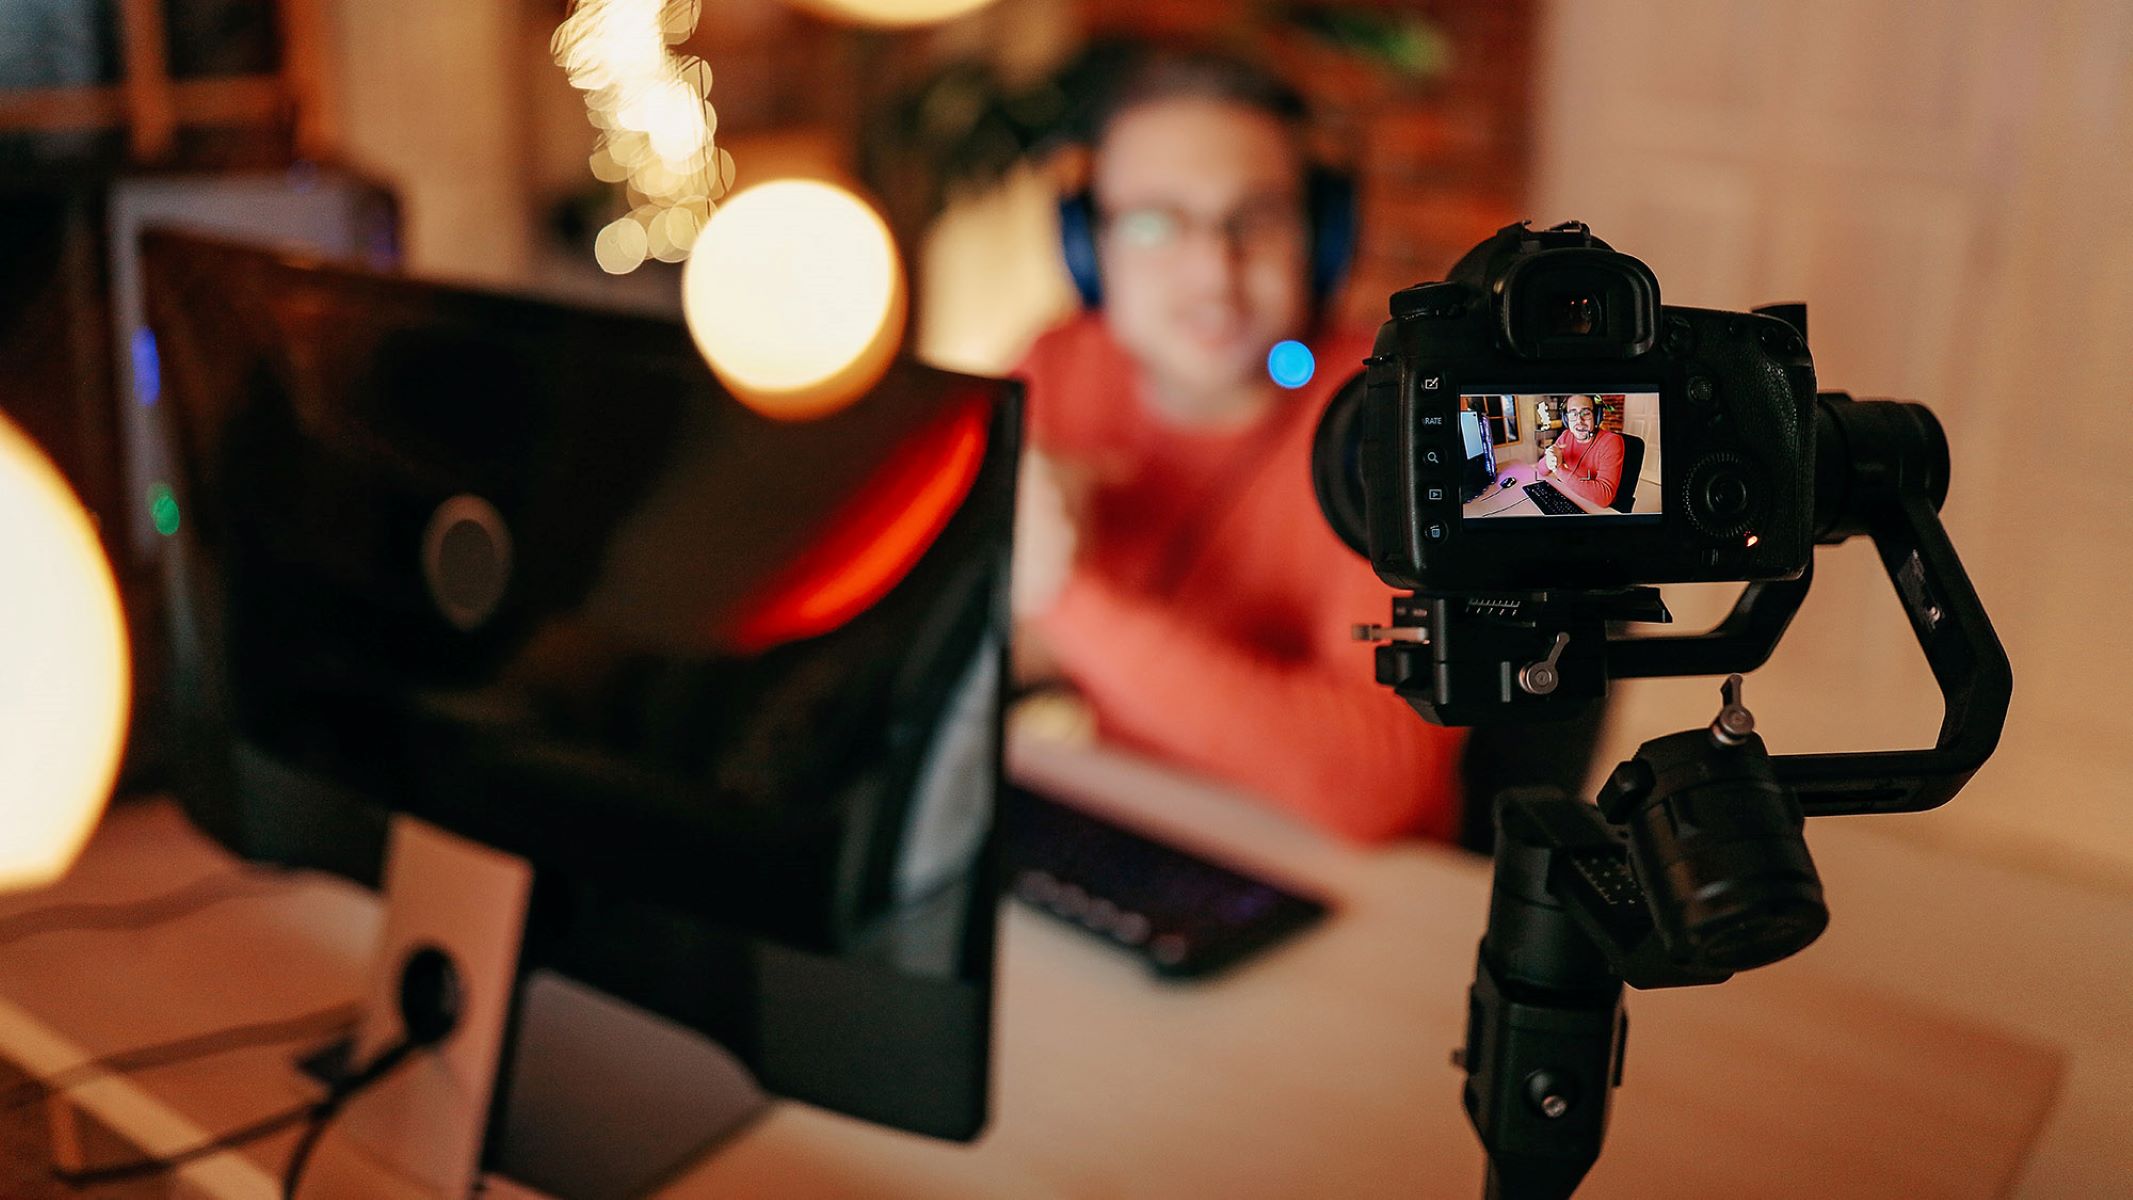
- Initiate a Test Call: Use your preferred video conferencing application to initiate a test call with a trusted contact or create a private test meeting. This allows you to assess the video and audio quality of your camcorder feed in a controlled environment.
- Verify Video Quality: During the test call, pay attention to the video output from your camcorder. Assess the clarity, color accuracy, and overall visual appeal of the video feed. Ensure that the resolution and frame rate are optimized for a professional-looking video presentation.
- Assess Audio Performance: If your camcorder features built-in microphones or external audio input, evaluate the audio performance during the test call. Confirm that the audio input is clear, free from distortion, and adequately captures your voice or desired audio content.
- Adjust Settings if Needed: If you encounter any issues with the video or audio quality during the test call, revisit the webcam settings within your video application. Make necessary adjustments to video resolution, frame rate, audio input levels, and other relevant settings to enhance the overall quality of the camcorder feed.
- Record a Test Stream: If you plan to use your camcorder for live streaming or content creation, consider recording a brief test stream to evaluate the performance under realistic streaming conditions. Review the recorded stream to identify any areas for improvement and refine your setup accordingly.
By thoroughly testing the setup, you can address any potential issues proactively and fine-tune the configuration to deliver exceptional video and audio quality. Testing also provides an opportunity to familiarize yourself with the features and capabilities of your camcorder as a webcam, empowering you to present polished and professional video content in your online interactions.
Once you are satisfied with the performance of your camcorder setup as a webcam, you can confidently integrate it into your regular video conferencing, live streaming, or content creation activities, knowing that you have optimized the setup for an impressive visual and auditory experience.
Conclusion
Congratulations! You’ve successfully learned how to set up your camcorder as a high-quality webcam, unlocking its full potential for video conferencing, live streaming, and content creation. By following the comprehensive steps outlined in this guide, you’ve harnessed the advanced optics and features of your camcorder to elevate the visual and auditory quality of your online interactions.
Setting up your camcorder as a webcam offers numerous benefits, including:
- Enhanced Video Quality: Leveraging the superior optics and advanced imaging capabilities of your camcorder results in crisp, clear, and professional-looking video output.
- Improved Audio Performance: Some camcorders feature high-quality microphones or support for external audio input, enhancing the overall audio experience during video calls and streams.
- Flexibility and Versatility: Utilizing a camcorder as a webcam expands your options for capturing and presenting video content, allowing for greater creativity and visual impact.
- Professional Presence: With the enhanced video and audio quality, you can project a professional and polished image in your virtual engagements, leaving a lasting impression on your audience.
As you embark on your journey with your camcorder as a webcam, remember to periodically review and optimize your setup to adapt to evolving needs and technological advancements. Stay informed about firmware updates, software enhancements, and new features that may further enhance the capabilities of your camcorder as a webcam.
Whether you’re engaging in virtual meetings, live streaming to a global audience, or creating compelling video content, your camcorder-as-webcam setup empowers you to deliver captivating and immersive visual experiences. Embrace the creative possibilities and technical advantages that come with leveraging your camcorder for online communication and content creation.
By mastering the process of setting up your camcorder as a webcam, you’ve unlocked a valuable resource for producing high-quality video content that captivates and resonates with your audience. Embrace the power of your camcorder as a webcam, and let your creativity and professionalism shine through in every virtual interaction.