Introduction
Welcome to the world of modern technology, where innovation constantly opens up new possibilities. One such exciting possibility is the ability to use a camcorder as a webcam. While webcams are commonly built into laptops and external devices, using a camcorder as a webcam offers a range of benefits and opportunities for enhanced video quality and flexibility.
In this article, we will explore the different aspects of using a camcorder as a webcam, including the reasons for doing so, selecting the right camcorder, connecting it to your computer, configuring the settings, software options, troubleshooting common issues, and tips for optimizing your setup. Whether you need a high-quality webcam for professional video conferences or want to enhance your streaming capabilities, using a camcorder can elevate your video experience to new heights.
Before we dive into the specifics, let’s understand why you might consider using a camcorder as a webcam. Firstly, camcorders are designed for capturing high-quality videos with advanced features, such as better resolution, zoom capabilities, and image stabilization, compared to traditional webcams. Secondly, using a camcorder as a webcam allows for more flexible positioning and framing options, giving you greater control over how you appear on screen. This is particularly useful for content creators, online educators, or anyone who needs a professional-looking video.
Additionally, camcorders often have superior audio recording capabilities compared to webcams, thanks to built-in microphones or the ability to connect external microphones. This ensures crystal-clear sound during your video calls or recordings. Moreover, if you already own a camcorder, repurposing it as a webcam can save you money compared to investing in a separate webcam.
Now that you’re aware of the advantages of using a camcorder as a webcam, let’s move on to the next section, where we’ll discuss how to choose the right camcorder for your needs.
Reasons to Use a Camcorder as a Webcam
Using a camcorder as a webcam offers several compelling reasons to elevate your video quality and enhance your online presence. Let’s explore some of the key reasons why you might consider using a camcorder as your go-to webcam:
1. Superior video quality: Unlike traditional webcams, camcorders are designed specifically for capturing high-quality videos. They typically offer higher resolutions, better image sensors, and advanced features such as optical zoom and image stabilization. With a camcorder, you can ensure that you’re presenting yourself in the best possible light during video conferences, live streams, or online presentations.
2. Flexibility in composition and positioning: One of the major advantages of using a camcorder as a webcam is the ability to have more control over the framing and positioning of your video. Camcorders usually have adjustable lenses and a variety of shooting modes, allowing you to choose the most flattering angle and composition for your video feed. You can experiment with different perspectives, zoom levels, and depth of field, creating a more visually appealing and professional-looking video presence.
3. Enhanced audio capabilities: While webcams often come with built-in microphones, camcorders generally offer better audio recording options. Many camcorders have superior built-in microphones that can capture clearer and more detailed sound. Additionally, camcorders often have the capability to connect external microphones, giving you greater control over your audio setup. Whether you’re conducting interviews, delivering presentations, or engaging in video chats, clear and high-quality audio will significantly enhance your communication.
4. Repurposing your existing equipment: If you already own a camcorder, using it as a webcam allows you to make the most of your investment. Repurposing your camcorder saves you money compared to purchasing a separate webcam and can provide substantially better video and audio quality. It’s a cost-effective solution that allows you to upgrade your video conferencing or streaming capabilities without breaking the bank.
5. Professional appearance: Whether you’re a content creator, online instructor, or business professional, presenting yourself in a professional manner is paramount. A camcorder can help you achieve this by providing a more polished and high-quality video output. The improved video quality, coupled with flexible framing options, can help you stand out and create a lasting impression on your audience.
Now that you understand the numerous benefits of using a camcorder as a webcam, it’s time to learn how to choose the right camcorder for your specific needs. In the next section, we will guide you through the selection process, enabling you to make an informed decision that aligns with your requirements and budget.
Choosing the Right Camcorder for Webcam Use
When it comes to choosing a camcorder for webcam use, several factors need to be considered to ensure you select the right device that best suits your needs. Let’s explore the key considerations:
1. Video Quality: Look for a camcorder that offers high video resolution, preferably Full HD (1080p) or higher. This will ensure sharp and clear video output during your video calls or streaming sessions. Additionally, consider the bitrate and sensor size, as these factors contribute to the overall video quality.
2. Audio Capabilities: As audio is crucial for effective communication, choose a camcorder with excellent audio capture capabilities. Look for features such as built-in microphones, audio filters, and the ability to connect external microphones. Clear and crisp audio will enhance your overall video experience.
3. Connectivity Options: Ensure that the camcorder can be easily connected to your computer. Look for camcorders with USB output or HDMI output options, as they are commonly used to connect the camcorder to your computer. If you plan to use an external capture card, make sure the camcorder has the necessary ports and compatibility.
4. Zoom and Optical Image Stabilization: For more versatility and professional-looking videos, select a camcorder with a zoom feature. Optical zoom provides better image quality compared to digital zoom. Additionally, built-in optical image stabilization will help reduce camera shake and ensure stable video footage.
5. Low Light Performance: Consider the camcorder’s low-light performance as it can greatly impact video quality in dimly lit environments. Look for a camcorder with a wide aperture lens and good low-light sensitivity, allowing you to maintain clear and well-lit video even in challenging lighting conditions.
6. Manual Controls: Having manual control over settings such as exposure, focus, white balance, and aperture gives you greater flexibility to adjust your video output according to specific lighting conditions or desired artistic effects.
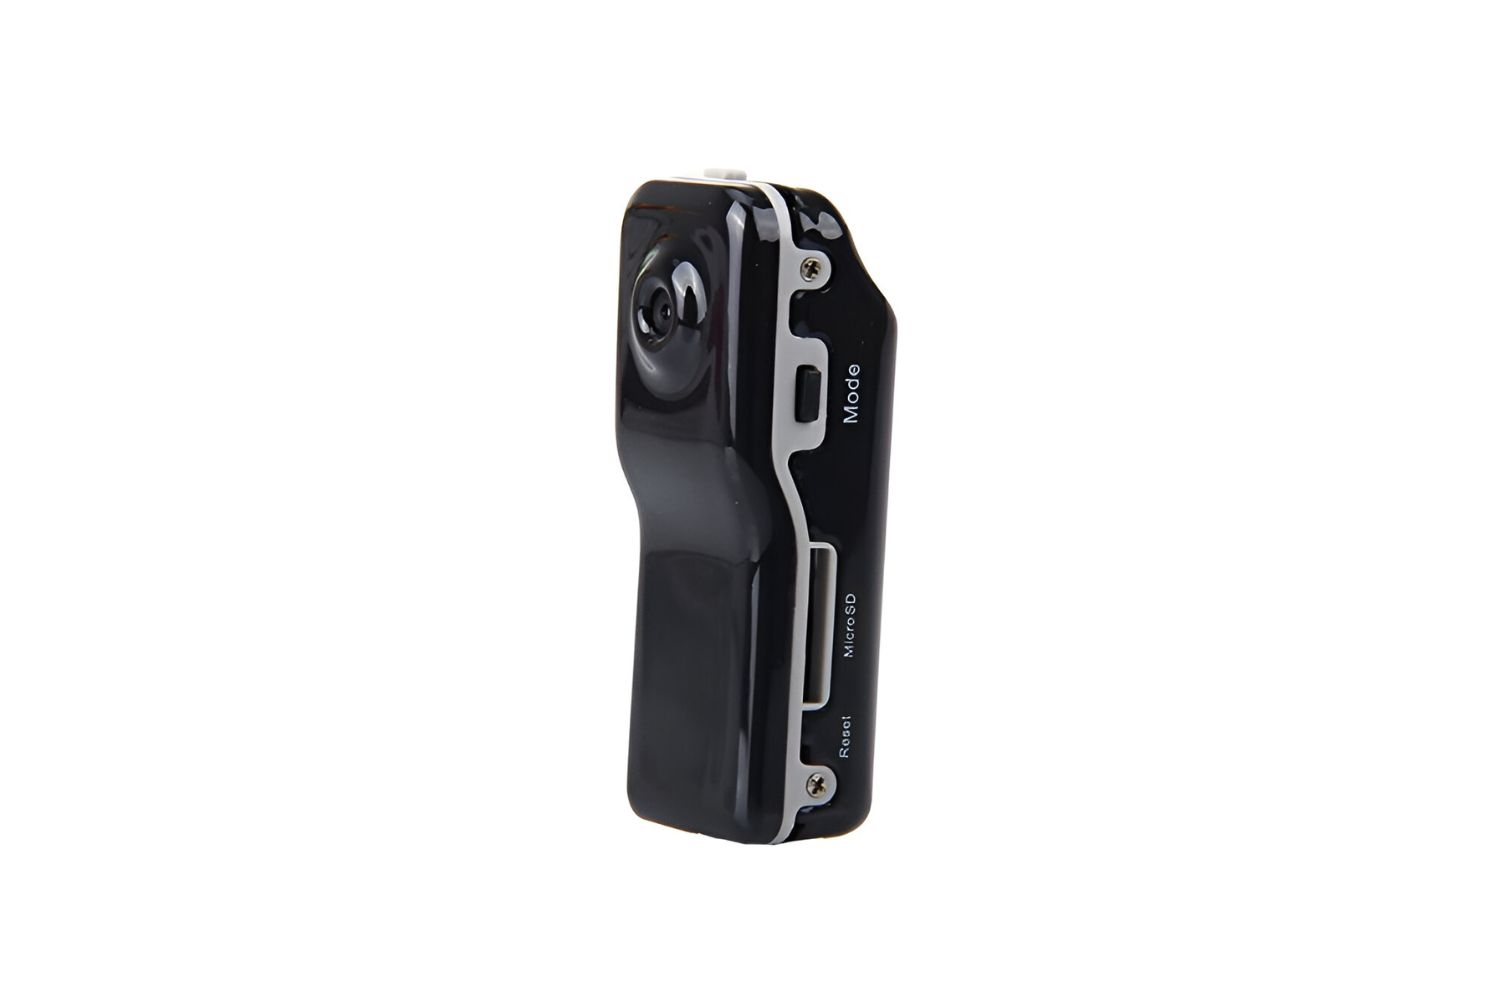
7. Size and Portability: If you plan to use the camcorder as a webcam regularly, consider its size and portability. A lightweight and compact camcorder will be more convenient to set up and transport, allowing you to easily integrate it into your workspace or take it on the go.
8. User-Friendly Interface: Choose a camcorder with an intuitive and user-friendly interface. A camera with easy-to-navigate menus and controls will save you time and frustration, enabling you to quickly adjust settings and get started with your webcam setup.
By considering these factors, you can make an informed decision and choose a camcorder that meets your specific requirements. Next, we will explore how to connect your camcorder to your computer for webcam use.
Connecting Your Camcorder to Your Computer
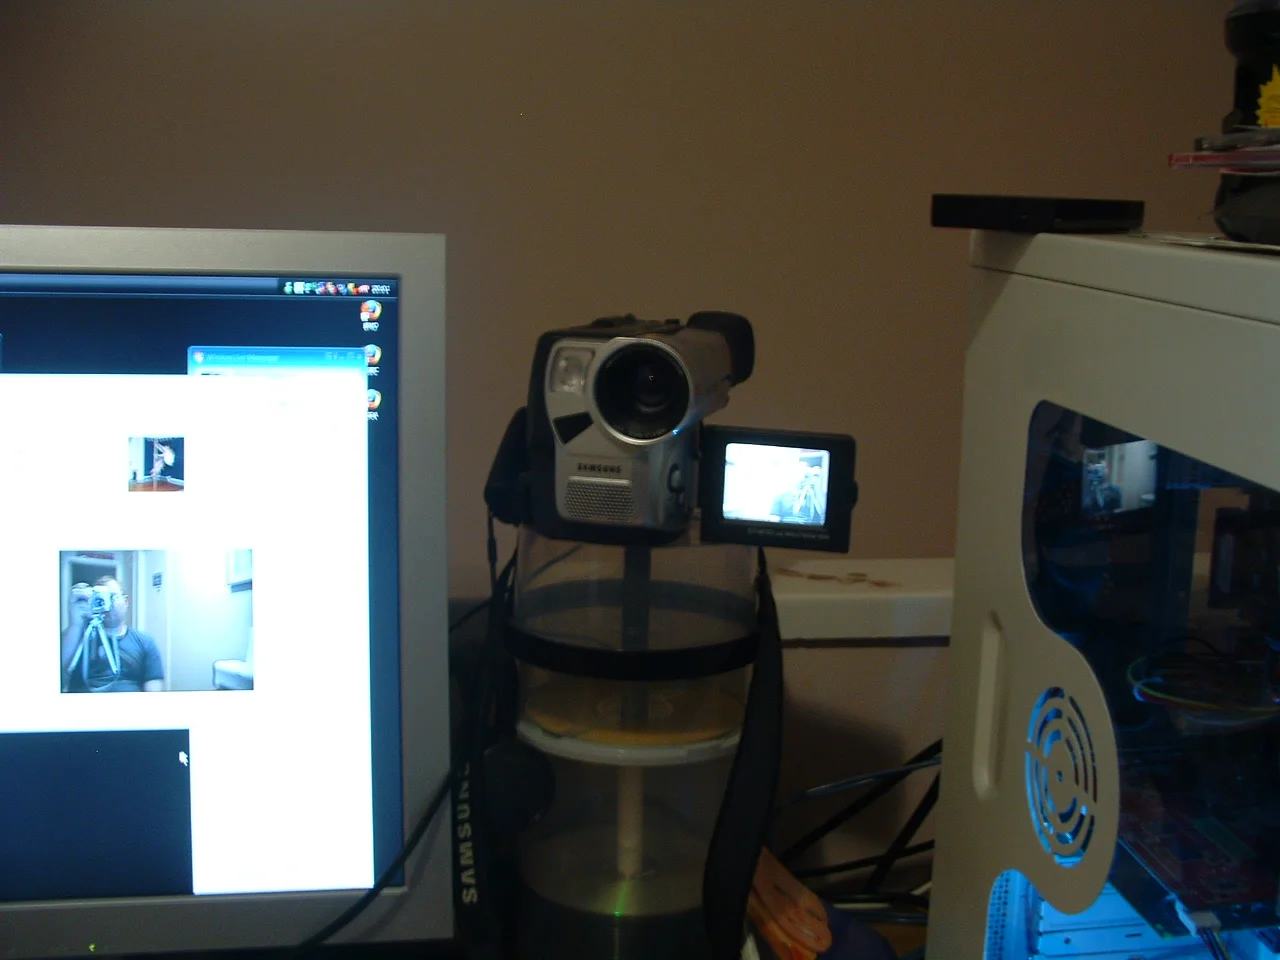
Once you have chosen the appropriate camcorder for webcam use, the next step is to connect it to your computer. Establishing a reliable and stable connection is essential for using your camcorder as a webcam effectively. Follow these steps to connect your camcorder to your computer:
1. USB Connection: Check if your camcorder has a USB output port. Most modern camcorders offer this option. Use a USB cable to connect the camcorder to an available USB port on your computer. Ensure that the cable is securely connected on both ends.
2. HDMI Connection: If your camcorder does not have a USB output, you can use an HDMI connection instead. Check if your computer has an HDMI input port. Connect one end of an HDMI cable to the camcorder’s HDMI output port and the other end to the computer’s HDMI input port. Make sure the cable is inserted firmly on both ends.
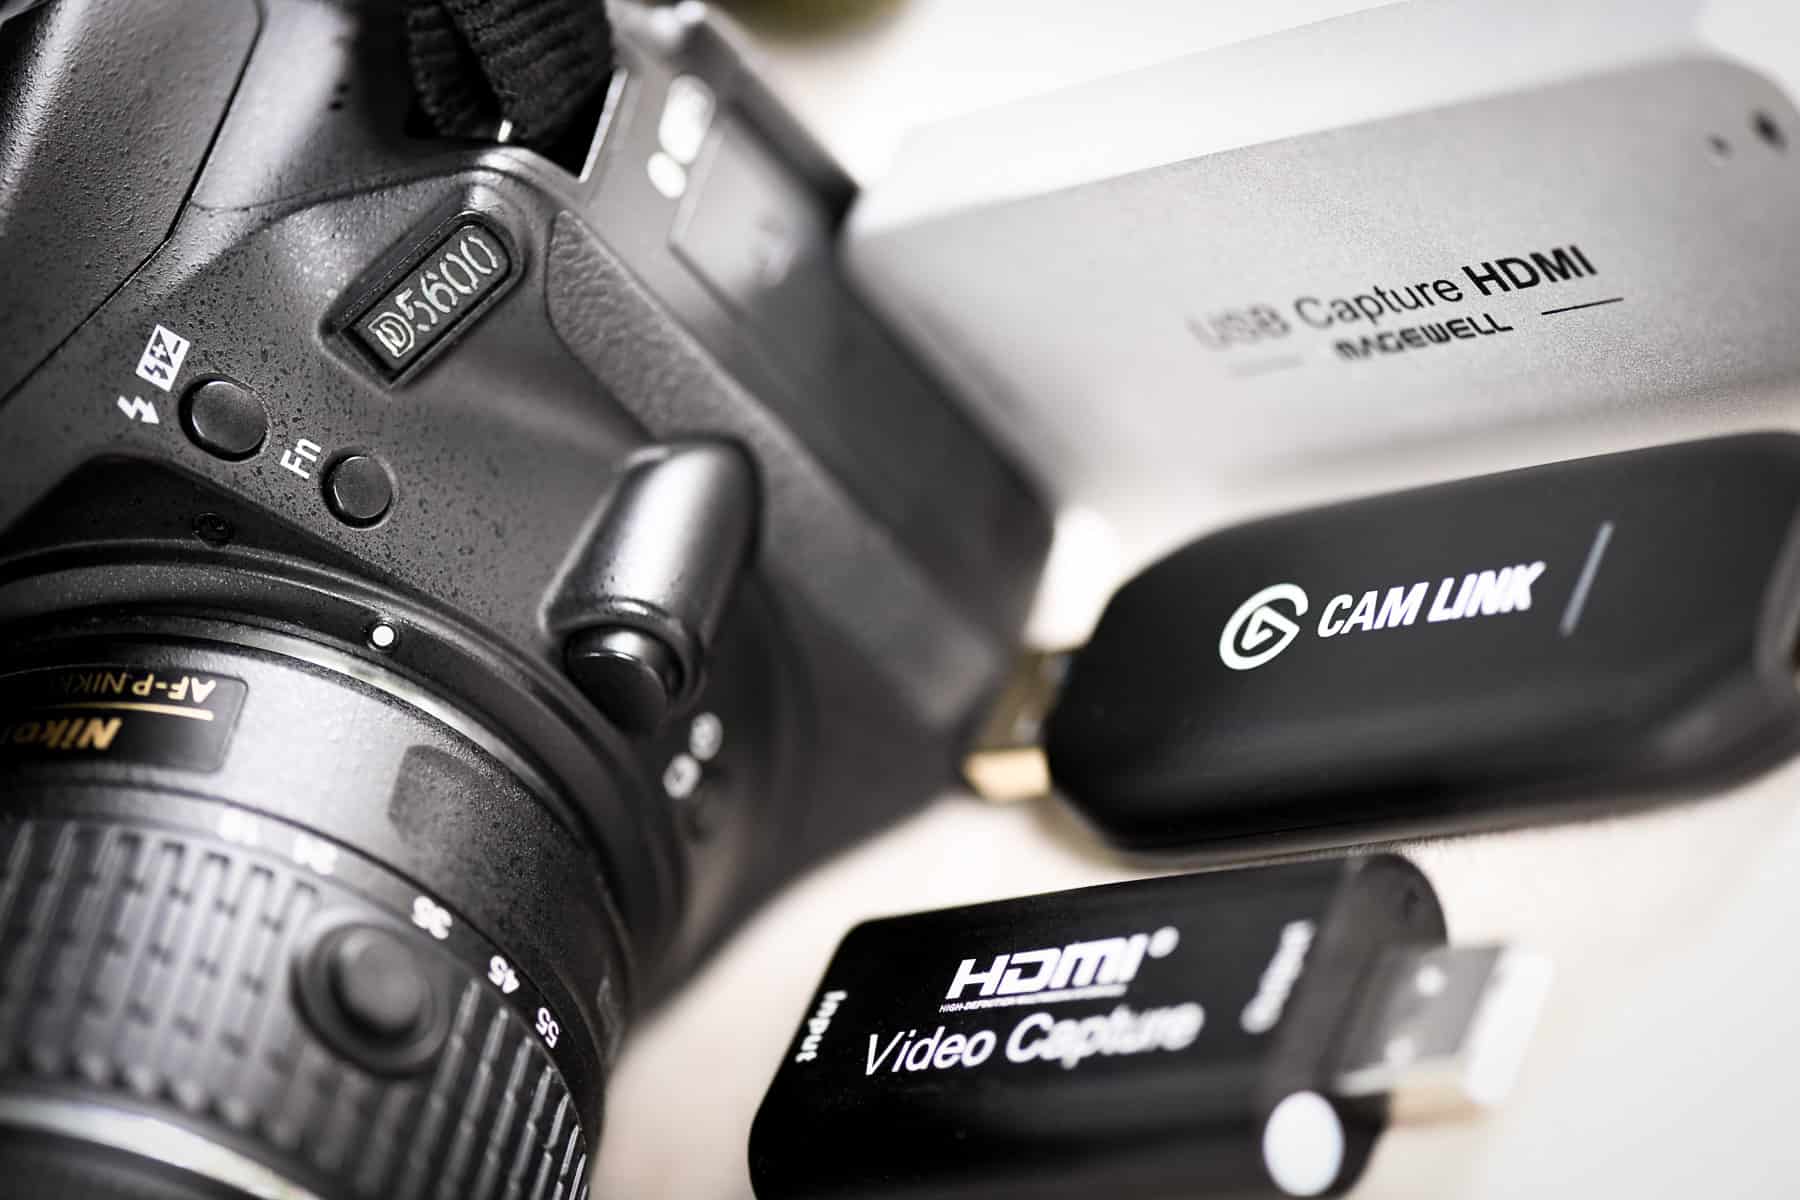
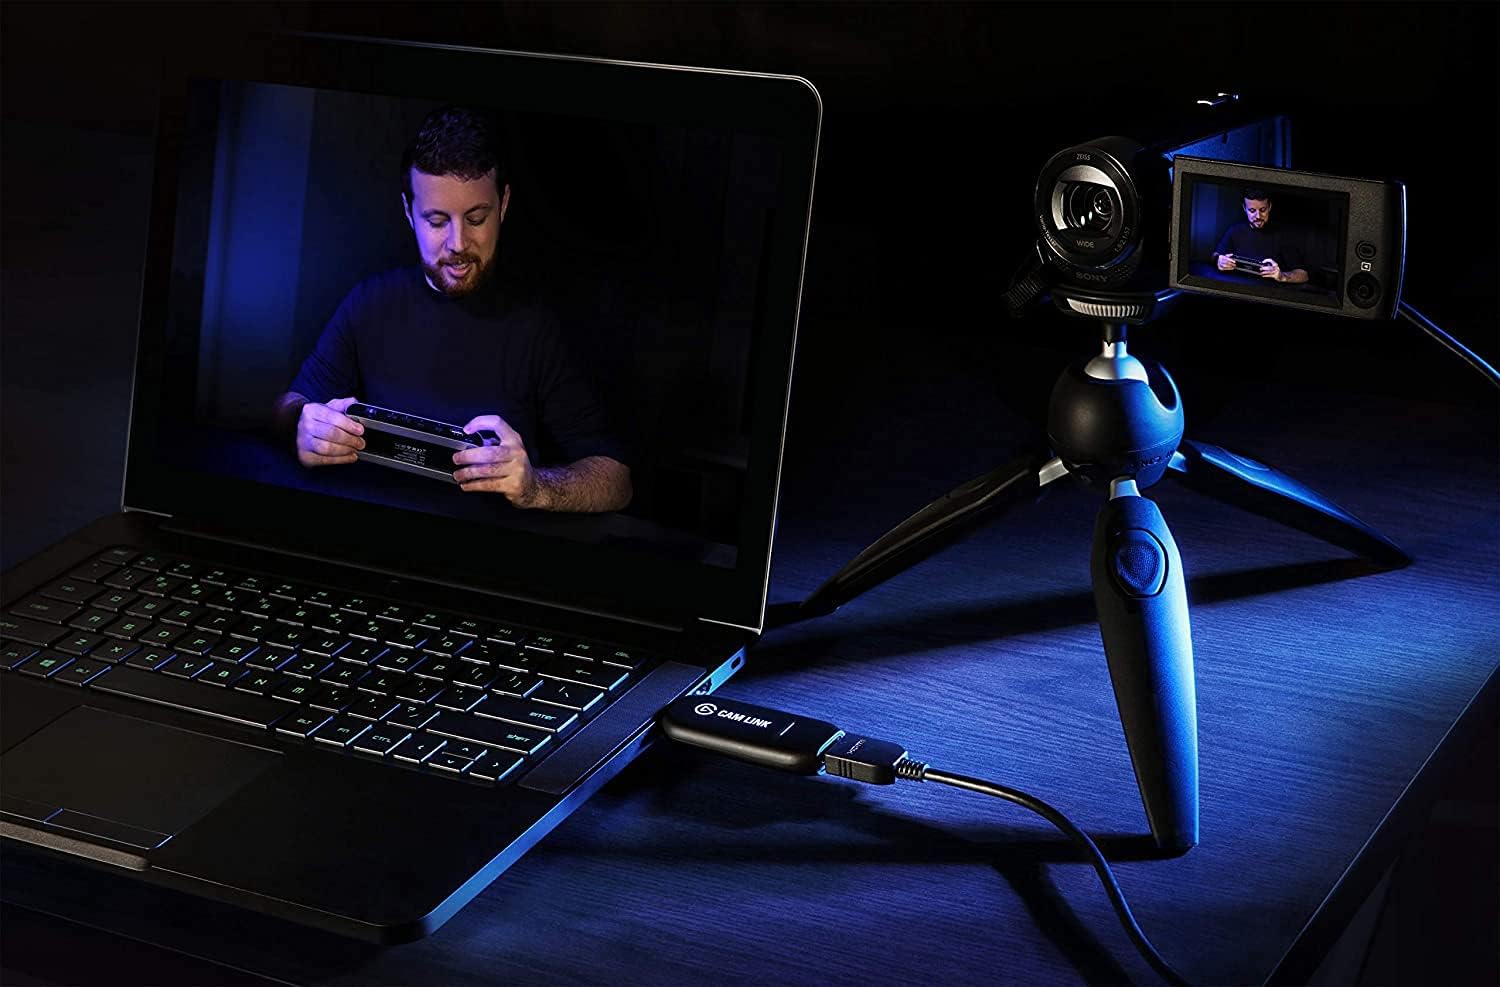
3. Capture Card: If your computer doesn’t have an HDMI input port, you can use an external capture card. Connect the HDMI output from your camcorder to the input port of the capture card. Then, connect the capture card to your computer using a USB or Thunderbolt cable, depending on the type of capture card you have. Follow any additional instructions provided by the capture card manufacturer for proper installation and setup.
4. Power On: Ensure that your camcorder is powered on and set to the appropriate shooting or recording mode. Some camcorders require specific settings to be enabled for webcam functionality. Consult your camcorder’s user manual for instructions on activating webcam mode if necessary.
5. Recognize the Camcorder: Your computer may automatically recognize the connected camcorder as a webcam. However, if it does not, you may need to install specific drivers or software provided by the camcorder manufacturer. Check the manufacturer’s website for any available webcam drivers or software updates for your specific model and operating system.
6. Select the Camcorder as Webcam: Open the video conferencing software or streaming application that you intend to use and access the settings or preferences menu. Look for the option to select a video source or camera device. In the options, choose the camcorder as the video source or webcam. Adjust any additional settings, such as resolution, frame rate, or audio input, according to your preferences.
7. Test the Connection: Once everything is set up, test the connection by making a video call or previewing your video feed. Ensure that the video output from the camcorder is displayed correctly in the application, and verify that the audio is clear and synchronized with the video.
By carefully following these steps, you will successfully connect your camcorder to your computer and utilize it as a webcam. In the next section, we will discuss how to configure the necessary settings on your camcorder for optimal webcam usage.
Configuring Your Camcorder Settings for Webcam Use
Once you have connected your camcorder to your computer, it’s important to configure the necessary settings on your camcorder to ensure optimal webcam usage. The specific settings may vary depending on your camcorder model, but here are some general guidelines to follow:
1. Webcam Mode: Check if your camcorder has a specific webcam mode or setting. This mode is designed to optimize the camcorder’s performance for use as a webcam. Consult your camcorder’s user manual for instructions on activating the webcam mode if available.
2. Resolution and Frame Rate: Set the resolution and frame rate of your camcorder to match the required specifications of your video conferencing or streaming application. For example, if your application supports Full HD (1080p) at 30 frames per second, ensure that your camcorder is set to these settings for the best video quality and performance.
3. Exposure and White Balance: Adjust the exposure and white balance settings to ensure that your video feed appears balanced and properly exposed. This will help prevent overexposed or underexposed images and maintain accurate colors. Use your camcorder’s manual controls or automatic options to achieve the desired settings.
4. Focus and Zoom: Ensure that the focus is set correctly, so that you appear sharp and clear in the video feed. If your camcorder has autofocus capabilities, enable it for convenient and accurate focusing. Adjust the zoom level if necessary, but avoid excessive zooming to maintain a natural and professional appearance.
5. Audio Settings: Check and adjust the audio settings on your camcorder. Enable any advanced audio features, such as audio filters or wind reduction, to improve the sound quality. If you are using an external microphone, make sure it is properly connected and select the corresponding audio input option on your camcorder.
6. Power Management: Consider the power management settings of your camcorder. Depending on your usage, you may want to disable any power-saving features that could automatically turn off the camcorder after a certain period of inactivity. This will ensure that your camcorder stays powered on for uninterrupted webcam usage.
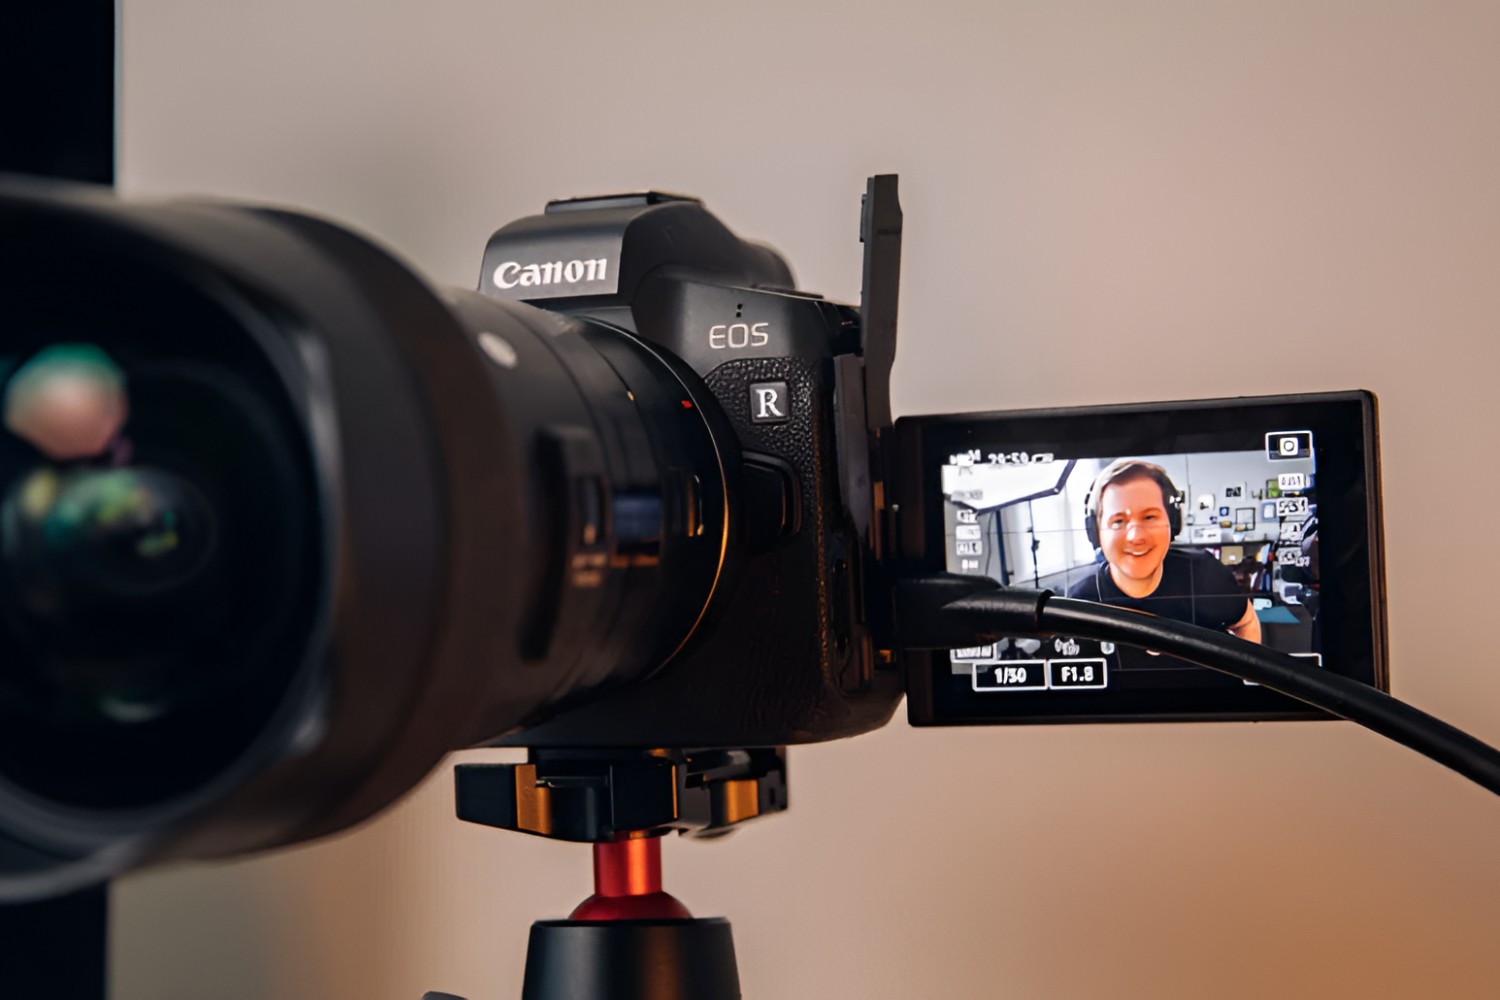
7. Mounting and Positioning: Securely mount your camcorder in the desired position for your webcam setup. Use a tripod or any other stable surface to ensure a steady and consistent video feed. Adjust the tilt, pan, or height of the camcorder to frame yourself appropriately in the video and achieve the desired composition.
8. Test and Adjust: After configuring the settings, test your camcorder webcam setup by making a video call or previewing your video feed. Evaluate the video and audio quality and check if any adjustments are needed. Fine-tuning the settings may be necessary to achieve the best results for your specific environment and requirements.
By following these guidelines and customizing the settings based on your camcorder’s capabilities, you can optimize your camcorder for use as a webcam. In the next section, we will explore different software options that can further enhance your camcorder webcam experience.
Software Options for Using Your Camcorder as a Webcam
When using a camcorder as a webcam, there are various software options available that can enhance your webcam experience and provide additional features and functionalities. Let’s explore some popular software options for utilizing your camcorder as a webcam:
1. OBS Studio: Open Broadcaster Software (OBS) Studio is a free, open-source software widely used for live streaming and video recording. It supports a wide range of camcorders and provides advanced features such as scene switching, custom overlays, and audio mixing. OBS Studio is highly customizable and works well for both Windows, macOS, and Linux users.
2. ManyCam: ManyCam is a versatile webcam software that allows you to connect and switch between multiple video sources, including your camcorder. It offers various effects, filters, and scene transitions to enhance your webcam feed. ManyCam is available for both Windows and macOS and has a free version with limited features and a pro version with additional functionalities.
3. XSplit Broadcaster: XSplit Broadcaster is professional-grade broadcasting software suitable for live streaming, video recording, and virtual meetings. It supports a wide range of cameras, including camcorders, and offers features such as scene composition, customizable transitions, and live chat integration. XSplit Broadcaster is available for Windows users and offers a free version with limited features and a premium version with more advanced options.
4. Zoom: Zoom is a popular video conferencing software that allows you to use your camcorder as a webcam for meetings, webinars, or online classes. It supports a wide range of cameras and offers options to adjust settings such as video resolution and audio input. Zoom is available for Windows, macOS, iOS, and Android platforms and has both free and paid plans with varying features and meeting durations.
5. Microsoft Teams: Microsoft Teams is a comprehensive communication and collaboration platform widely used for remote work and online meetings. It allows you to utilize your camcorder as a webcam for video calls and conferences. Microsoft Teams supports various cameras and provides options to adjust video and audio settings. It is available for Windows, macOS, iOS, and Android, and offers both free and premium plans.
6. Skype: Skype is a well-known communication software that enables video calls and messaging. It supports using your camcorder as a webcam, providing high-quality video output. You can select your camcorder as the default camera in the Skype settings and adjust video and audio settings as needed. Skype is available for Windows, macOS, Linux, iOS, and Android, and offers free voice and video calling features, with additional paid plans for more extensive functionalities.
7. Manufacturer-Specific Software: Some camcorder manufacturers provide their own software that allows you to utilize your camcorder as a webcam. Check the manufacturer’s website for any proprietary software or drivers available for your specific camcorder. These software options often offer additional features tailored to your camcorder and may provide optimal compatibility and performance when used as a webcam.
Explore these software options based on your specific needs and compatibility with your operating system. Take advantage of the features they offer to further enhance your camcorder webcam setup and elevate your video communication or streaming experience.
In the next section, we will delve into troubleshooting common issues that you may encounter when using a camcorder as a webcam.
Troubleshooting Common Issues with Camcorder Webcams
While using a camcorder as a webcam can greatly enhance your video quality and flexibility, you may encounter some common issues along the way. Here are some troubleshooting tips to help you address these issues and ensure a smooth camcorder webcam experience:
1. Connection Problems: If your computer does not recognize the camcorder as a webcam, double-check the connection between the camcorder and the computer. Ensure that the cables are securely plugged in on both ends and try using a different USB port or HDMI input if available.
2. Driver and Firmware Updates: Make sure that you have the latest drivers and firmware updates for your camcorder. Visit the manufacturer’s website and search for any available updates specifically for webcam usage. Installing the latest updates can resolve compatibility issues and improve performance.
3. Power and Battery Management: If your camcorder powers off during usage, check the battery level and make sure it is sufficiently charged or connect the camcorder to a power source. Adjust the power management settings on the camcorder to prevent it from automatically turning off due to inactivity.
4. Software Compatibility: Ensure that the software you are using supports the use of a camcorder as a webcam. Verify that you have the latest version of the software installed on your computer. If issues persist, try using an alternative software option that is compatible with your camcorder.
5. Resolution and Frame Rate Mismatches: If your camcorder’s video resolution or frame rate does not match the requirements of the software you are using, adjust the camcorder settings accordingly. Set the appropriate resolution and frame rate that are supported by the software to avoid compatibility issues and ensure smooth video output.
6. Audio Problems: If you are experiencing audio-related issues, ensure that the audio input settings are correctly configured. Verify that the correct audio source, such as the built-in microphone or an external microphone, is selected on both the camcorder and the software you are using. Adjust the audio settings within the software to optimize the sound quality.
7. Lighting and Exposure: If your video feed appears dark, grainy, or overexposed, check the lighting conditions and adjust the exposure settings on your camcorder. Optimize the lighting in your environment by using additional lighting sources or positioning yourself in a well-lit area. Experiment with different exposure settings to achieve the desired video quality.
8. Compatibility with Operating System: Ensure that your camcorder is compatible with your operating system. Check the manufacturer’s specifications and verify that the camcorder supports the operating system you are using. If connectivity or functionality issues persist, consider contacting the manufacturer’s support team for further assistance.
If you encounter any other specific issues or problems with your camcorder webcam setup, consult the user manual or documentation provided by the manufacturer. Additionally, online forums, support communities, and the manufacturer’s support channels can be valuable resources for troubleshooting and solving specific problems.
By following these troubleshooting tips, you can overcome common issues and make the most of your camcorder as a webcam. In the final section, we will share some tips for optimizing your camcorder webcam setup to achieve the best results.
Tips for Optimizing Your Camcorder Webcam Setup
To ensure the best possible performance and quality when using a camcorder as a webcam, consider implementing the following tips to optimize your setup:
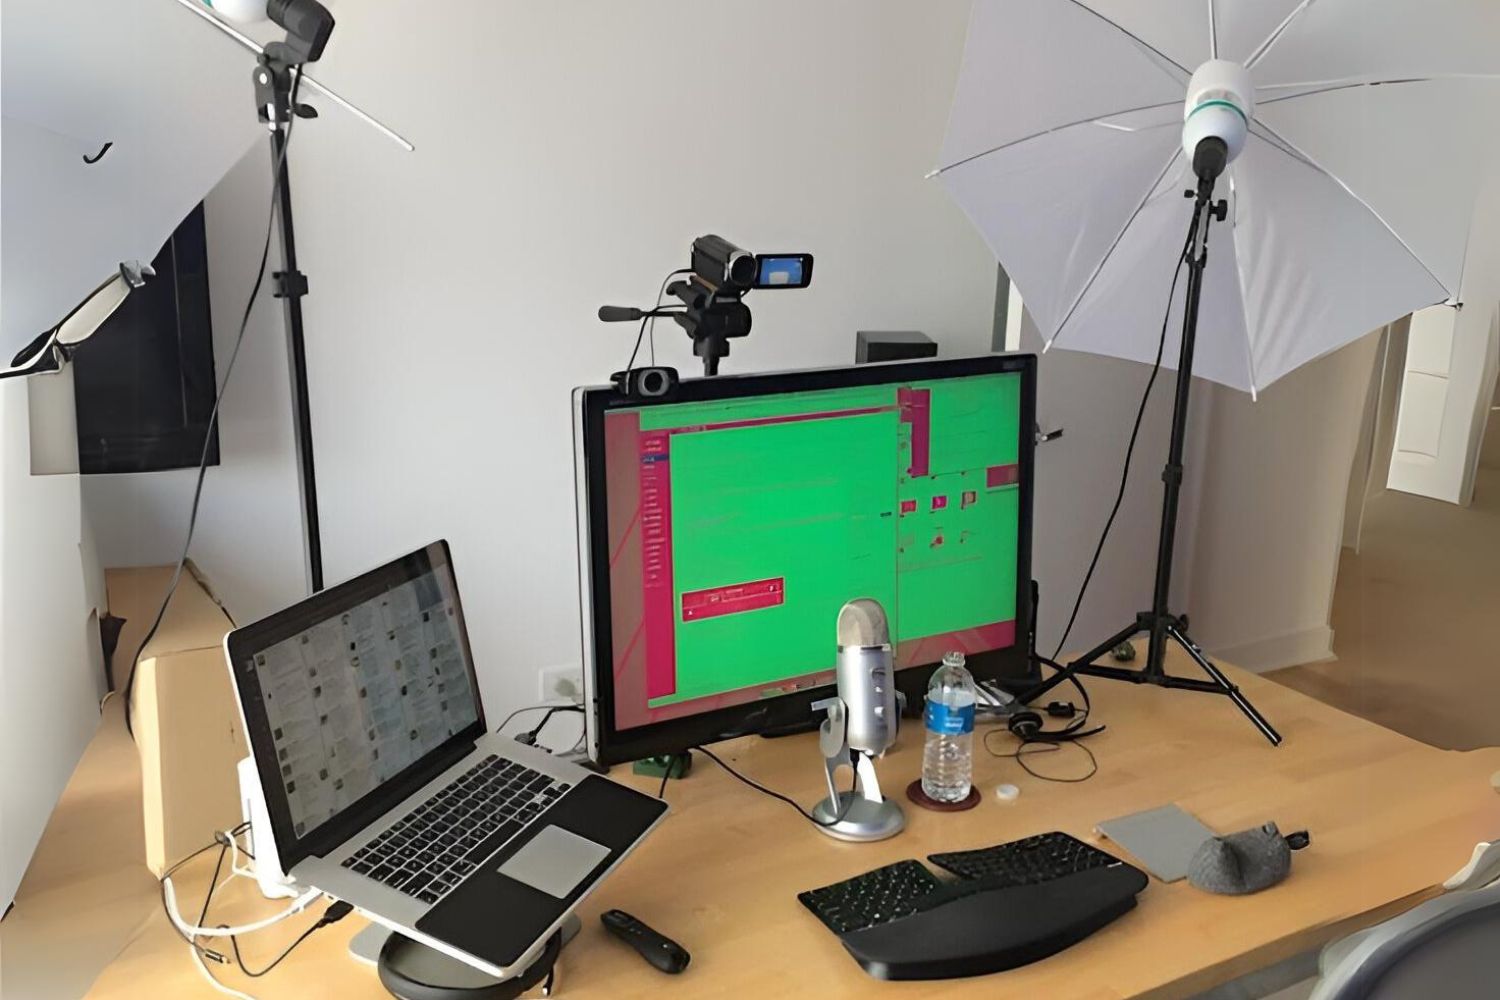
1. Lighting: Pay attention to your lighting setup. Ensure that the lighting in your environment is sufficient and evenly distributed. Use natural light sources or invest in lighting equipment, such as ring lights or softboxes, to achieve well-lit and flattering visuals. Proper lighting will enhance the overall quality of your video feed.
2. Background: Consider the background behind you. Choose a clean and uncluttered background or use a virtual background feature available in some video conferencing software. A neat and professional background will help maintain focus on you, the presenter, and eliminate any distractions.
3. Framing and Composition: Pay attention to the framing and composition of your video feed. Position yourself centrally in the frame, with appropriate headroom and a balanced composition. Use the rule of thirds to create a visually appealing layout, ensuring that your face is clearly visible and in focus.
4. Audio Quality: Invest in a high-quality external microphone if your camcorder doesn’t provide satisfactory audio performance. A separate microphone can significantly improve the clarity and fidelity of your voice. Position the microphone close to you to ensure optimal audio pickup and minimize background noise.
5. Stable Mounting: Use a tripod or stable surface to mount your camcorder. A stable mounting setup will provide a consistent and steady video feed, eliminating any shakiness. Ensure that the camcorder is securely attached to the mount and position it at eye level for a natural and engaging perspective.
6. Bandwidth Considerations: Video conferencing and streaming can require substantial internet bandwidth. Ensure that you have a reliable and fast internet connection to prevent disruptions or poor video quality. Close any unnecessary applications or devices that may consume bandwidth and affect the performance of your webcam setup.
7. Test and Adjust: Regularly test your camcorder webcam setup before important meetings or broadcasts. Check the video and audio quality, adjust the settings if needed, and familiarize yourself with the software and controls. Conduct test calls with a friend or colleague to ensure everything is working as expected.
8. Maintain a Professional Demeanor: Finally, maintain a professional demeanor and engage with your audience. Dress appropriately, maintain eye contact with the camera, speak clearly and confidently, and project a friendly and engaging presence. A professional attitude will help you make a lasting impression during your video conferences or streams.
By implementing these tips, you can optimize your camcorder webcam setup and ensure a professional and high-quality video experience. Remember to regularly maintain and update your equipment and software to take advantage of any new features or improvements. With a well-optimized setup, you can confidently communicate, collaborate, and create captivating content in the online world.
Conclusion
Using a camcorder as a webcam opens up a world of possibilities for enhancing your video quality and flexibility. By choosing the right camcorder, connecting it to your computer, configuring the settings, and utilizing software options, you can achieve professional-looking video output for your video conferences, live streams, online presentations, and more.
We discussed the reasons why using a camcorder as a webcam can be advantageous, such as superior video quality, flexibility in composition and positioning, enhanced audio capabilities, cost-saving benefits, and a more professional appearance. We also explored the importance of choosing the right camcorder that aligns with your specific needs, considering factors like video quality, audio capabilities, connectivity options, and portability.
Furthermore, we provided guidance on connecting your camcorder to your computer, including options like USB and HDMI connections, as well as the use of capture cards. We also covered troubleshooting common issues that may arise during the setup process, such as connection problems, software compatibility issues, and audio or video quality concerns.
Additionally, we explored software options that can further enhance your camcorder webcam setup, including OBS Studio, ManyCam, XSplit Broadcaster, Zoom, Microsoft Teams, Skype, and manufacturer-specific software. These software tools offer features like scene switching, effects, and customizable overlays to elevate your webcam experience.
Finally, we provided tips for optimizing your camcorder webcam setup, such as paying attention to lighting, choosing a suitable background, framing and composition techniques, improving audio quality, stable mounting, managing bandwidth, and maintaining a professional demeanor. By implementing these tips, you can ensure a polished and engaging video presence.
Now armed with this knowledge, you are ready to leverage your camcorder as a webcam to deliver high-quality video content, collaborate effectively, and make a lasting impression in the online world. So go ahead, start exploring the possibilities, and elevate your webcam experience with the power of a camcorder.