Introduction
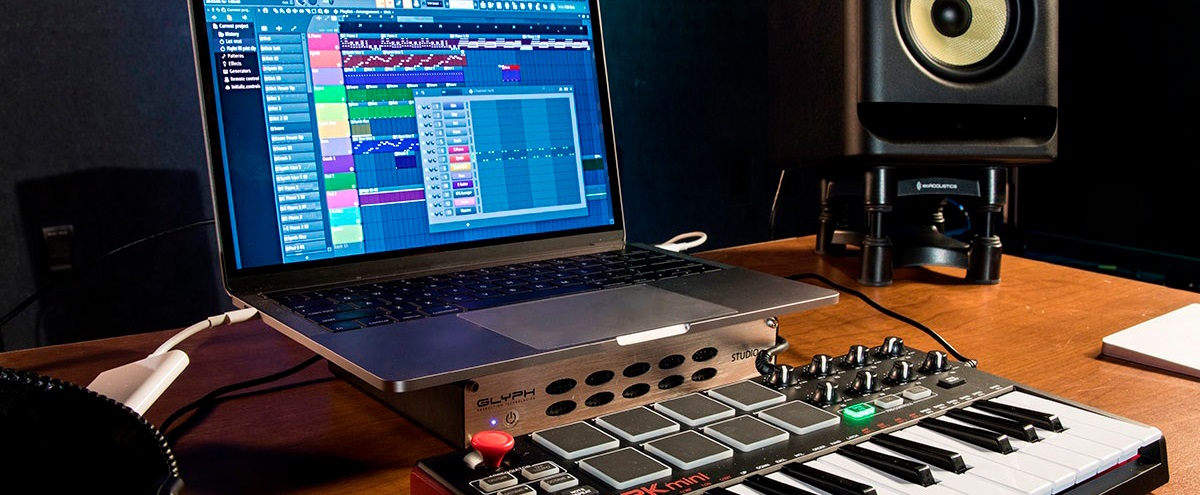
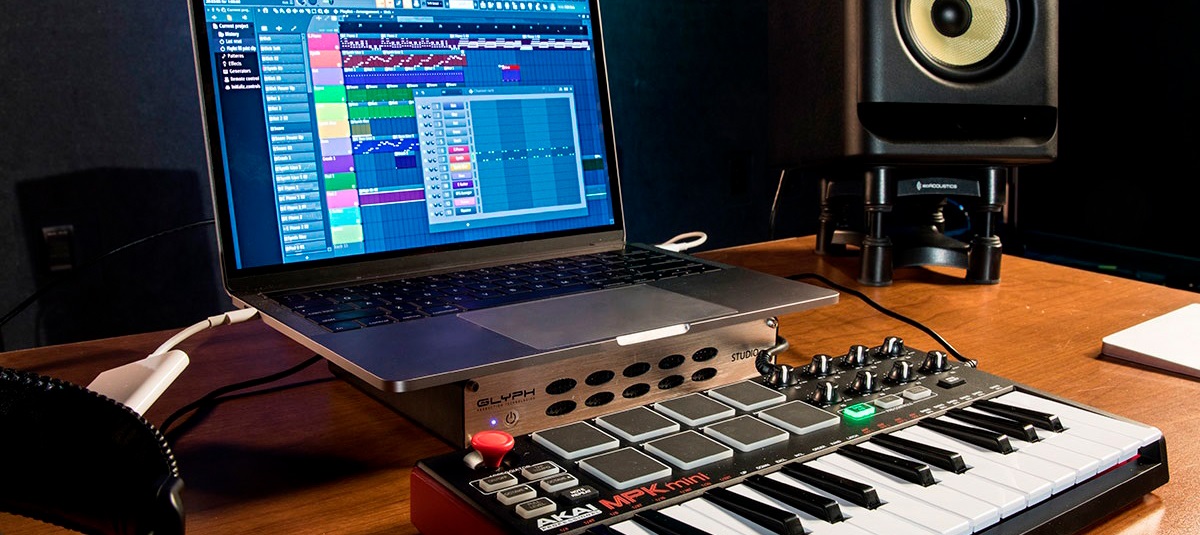
So, you've got your hands on a MIDI keyboard and you're ready to dive into the world of music production using FL Studio. Congratulations! A MIDI keyboard is a fantastic tool that allows you to bring your musical ideas to life with a level of expressiveness that's hard to achieve with a mouse and keyboard alone. In this guide, we'll walk you through the process of setting up your MIDI keyboard in FL Studio, so you can start creating music with ease.
Whether you're a seasoned musician or a complete beginner, setting up your MIDI keyboard in FL Studio is a crucial step in unleashing your creativity and maximizing your productivity. By the end of this tutorial, you'll be able to seamlessly integrate your MIDI keyboard into FL Studio, enabling you to play virtual instruments, control parameters, and streamline your music production workflow.
Before we dive into the nitty-gritty details, it's important to understand the fundamental concepts of MIDI and how it relates to your keyboard and FL Studio. MIDI, which stands for Musical Instrument Digital Interface, is a universal protocol that allows electronic musical instruments, computers, and audio devices to communicate with each other. Essentially, MIDI enables your keyboard to transmit musical data, such as note information, velocity, and control messages, to your computer and FL Studio.
Now that we've set the stage, let's embark on this exciting journey of connecting, configuring, and testing your MIDI keyboard in FL Studio. By the end of this guide, you'll be well-equipped to harness the full potential of your MIDI keyboard and elevate your music production endeavors to new heights. So, without further ado, let's get started on this musical adventure!
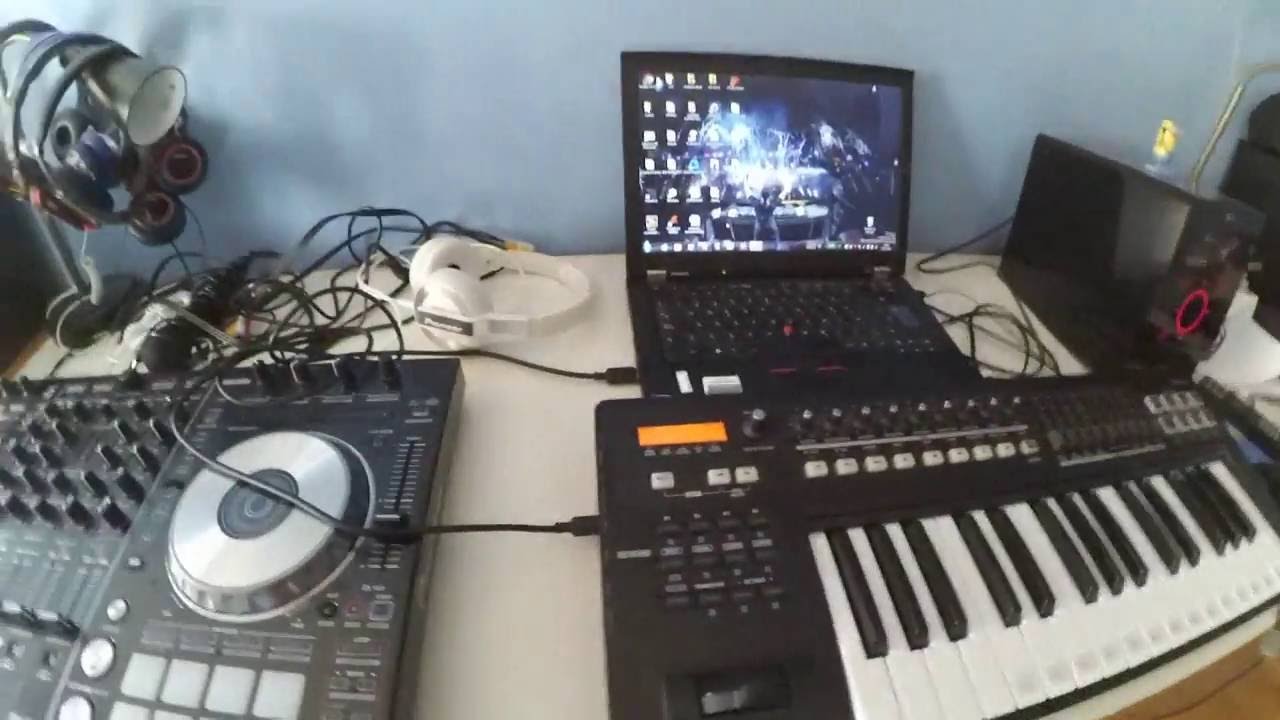
Step 1: Connecting Your MIDI Keyboard to Your Computer
Before you can start using your MIDI keyboard in FL Studio, you need to establish a physical connection between the keyboard and your computer. Here’s a step-by-step guide to help you get your MIDI keyboard up and running:
- Check the Interface: Most MIDI keyboards feature a USB connection, allowing you to directly plug the keyboard into a USB port on your computer. Some keyboards may also have traditional MIDI ports (MIDI IN/OUT) or a combination of both USB and MIDI ports. Ensure that you have the necessary cables and adapters to connect your keyboard to your computer.
- Power On the Keyboard: If your MIDI keyboard requires external power, make sure to connect it to a power source and turn it on. For USB-powered keyboards, simply plugging the USB cable into your computer should provide the necessary power.
- Connect to Your Computer: Using a USB cable or MIDI cables, connect your MIDI keyboard to an available USB port or MIDI interface on your computer. If you’re using a USB connection, your computer should automatically detect the MIDI keyboard and install any necessary drivers. For traditional MIDI connections, you may need to use a MIDI interface to connect to your computer’s USB port.
- Verify the Connection: Once connected, verify that your computer recognizes the MIDI keyboard. You can check the device manager or system preferences on your computer to ensure that the MIDI keyboard is detected and properly configured.
After completing these steps, your MIDI keyboard should be successfully connected to your computer, laying the foundation for integrating it with FL Studio. With the physical connection established, you’re now ready to move on to the next crucial step: configuring your MIDI keyboard within FL Studio.
Step 2: Configuring Your MIDI Keyboard in FL Studio
Now that your MIDI keyboard is connected to your computer, the next step is to configure it within FL Studio. This process involves setting up FL Studio to recognize and interact with your MIDI keyboard effectively. Follow these steps to configure your MIDI keyboard in FL Studio:
- Launch FL Studio: Open FL Studio on your computer. Once FL Studio is up and running, you’ll need to access the MIDI settings to configure your keyboard.
- Access the MIDI Settings: In FL Studio, navigate to the “Options” menu and select “MIDI Settings.” This will open the MIDI settings panel, where you can manage MIDI input and output devices.
- Select Your MIDI Keyboard: In the MIDI settings panel, locate your MIDI keyboard in the list of input devices. If your keyboard is connected and recognized by your computer, it should appear as an available input device. Select your MIDI keyboard from the list to designate it as the input device for FL Studio.
- Enable MIDI Input: Once your MIDI keyboard is selected as the input device, ensure that MIDI input is enabled. This allows FL Studio to receive MIDI data from your keyboard, such as note and control messages. Check the box or toggle the setting to activate MIDI input for your keyboard.
- Configure Additional Settings: Depending on your MIDI keyboard’s features and capabilities, you may have additional settings to configure, such as MIDI channels, control mappings, and velocity sensitivity. Refer to your MIDI keyboard’s documentation for specific details on customizing these settings within FL Studio.
By following these steps, you’ll effectively configure your MIDI keyboard within FL Studio, enabling seamless communication between your keyboard and the software. With the configuration process complete, your MIDI keyboard is now ready to be utilized as a powerful musical instrument and control surface within FL Studio.
Step 3: Assigning MIDI Keyboard Controls to FL Studio Parameters
Once your MIDI keyboard is configured in FL Studio, you can take advantage of its versatile controls to interact with various parameters and functions within the software. Assigning MIDI keyboard controls to FL Studio parameters allows you to manipulate virtual instruments, effects, mixer settings, and more with the tactile responsiveness of your keyboard. Here’s how you can assign MIDI keyboard controls to FL Studio parameters:
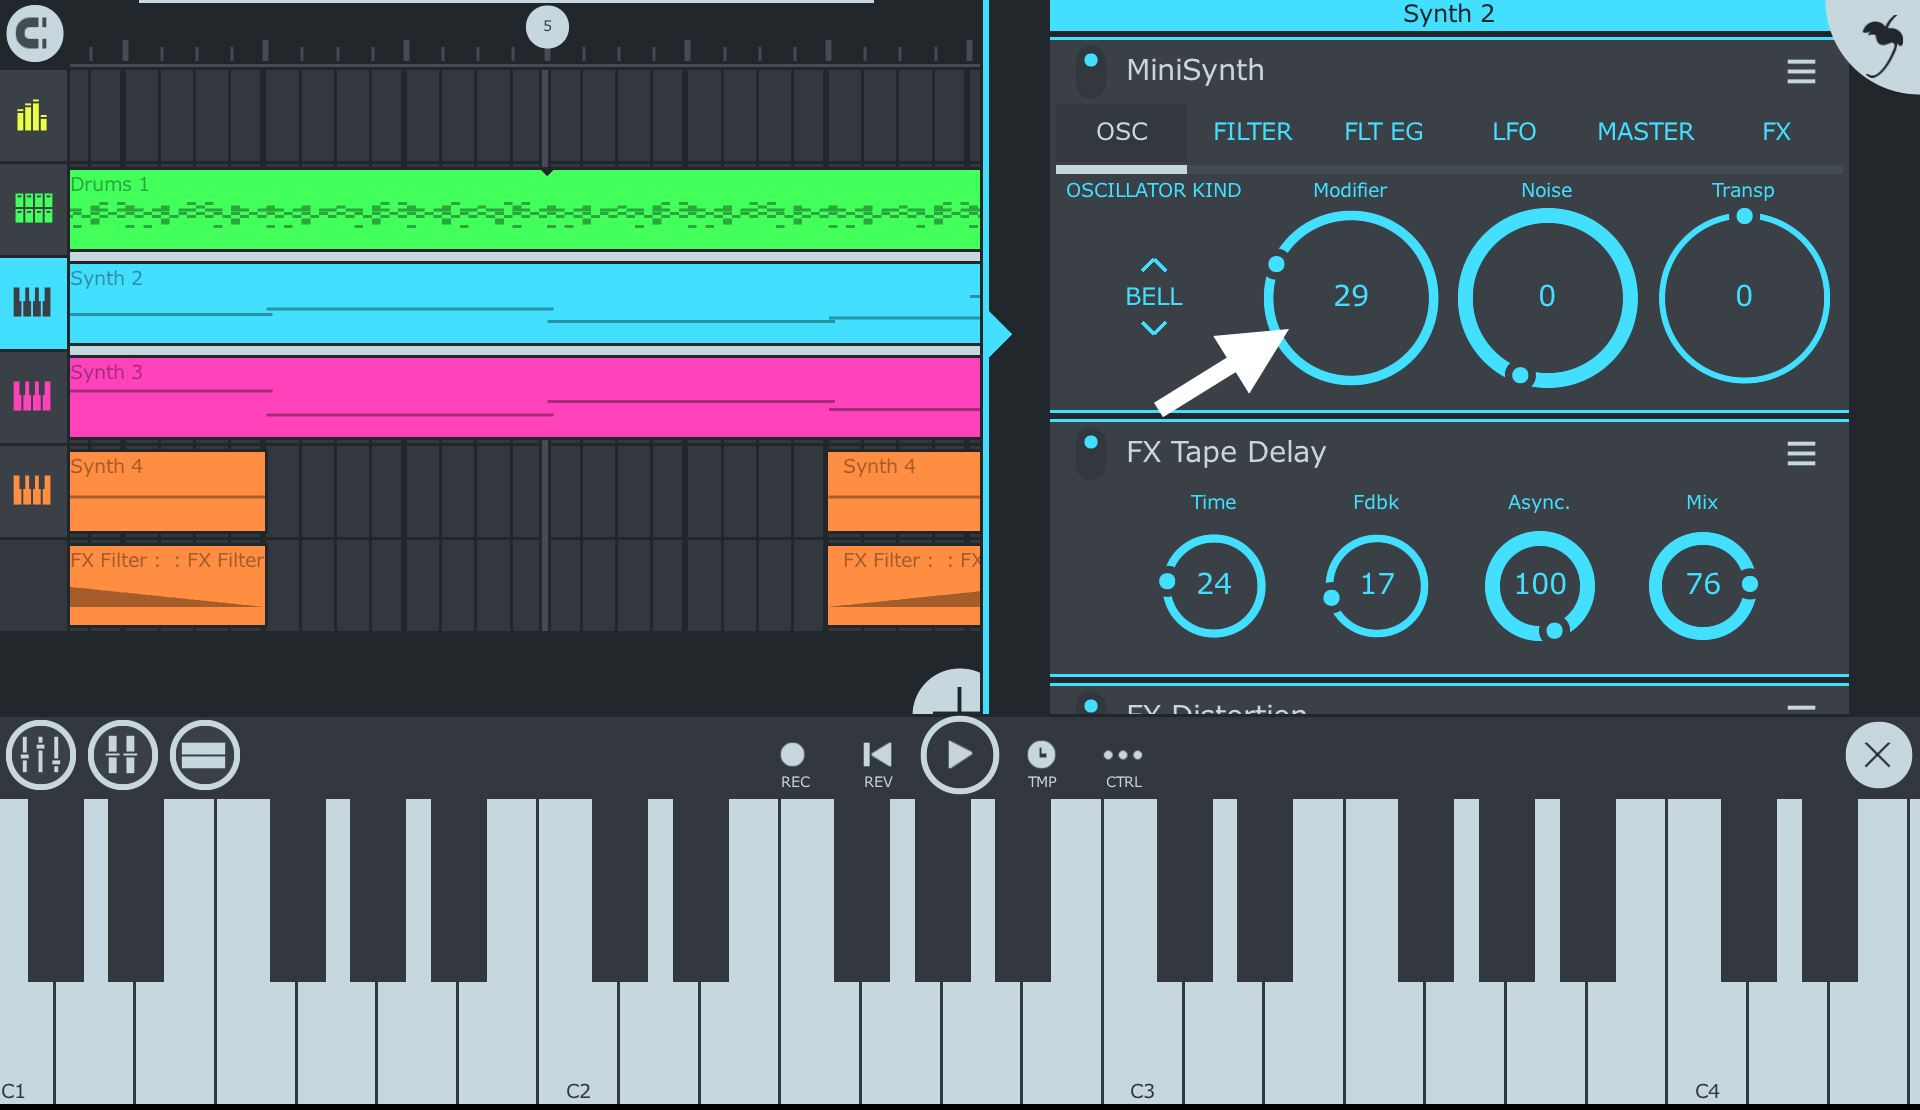
- Access the MIDI Assignments: In FL Studio, navigate to the “Options” menu and select “MIDI Settings” to open the MIDI settings panel. Within the MIDI settings panel, locate the “MIDI Control Surfaces” section, which allows you to assign MIDI controls to specific parameters in FL Studio.
- Select a Parameter: Choose the FL Studio parameter that you want to control with your MIDI keyboard. This could be a knob, fader, button, or any other assignable parameter within FL Studio’s interface or plugins.
- Assign the MIDI Control: Once you’ve selected the parameter, click on the parameter’s interface in FL Studio. Then, manipulate the control on your MIDI keyboard that you want to assign to the parameter. FL Studio will detect the MIDI input and automatically assign it to the selected parameter.
- Verify the Assignment: After assigning the MIDI control, test it by interacting with the corresponding control on your MIDI keyboard. You should see and hear the parameter in FL Studio respond to your MIDI input, confirming that the assignment is successful.
- Repeat for Additional Controls: If you have multiple controls on your MIDI keyboard that you want to assign to FL Studio parameters, simply repeat the process for each control and parameter combination. This allows you to create a customized control scheme tailored to your workflow and creative preferences.
By assigning MIDI keyboard controls to FL Studio parameters, you empower yourself to interact with the software in a more expressive and intuitive manner. Whether you’re adjusting filter cutoff frequencies, modulating synth parameters, or controlling mixer levels, the tactile feedback of your MIDI keyboard enhances the music production experience within FL Studio.
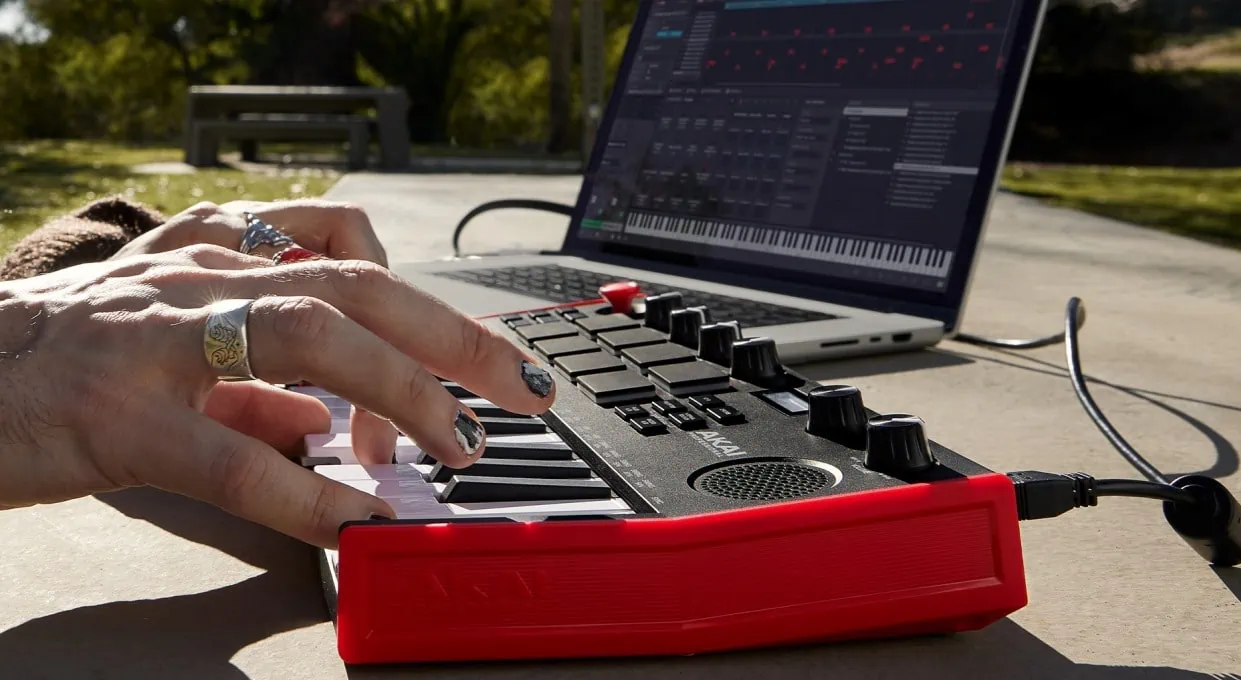
Step 4: Testing Your MIDI Keyboard in FL Studio
After connecting, configuring, and assigning controls to your MIDI keyboard in FL Studio, it’s essential to conduct a comprehensive test to ensure that everything is functioning as intended. Testing your MIDI keyboard in FL Studio allows you to validate the connection, responsiveness of controls, and overall integration with the software. Follow these steps to effectively test your MIDI keyboard in FL Studio:
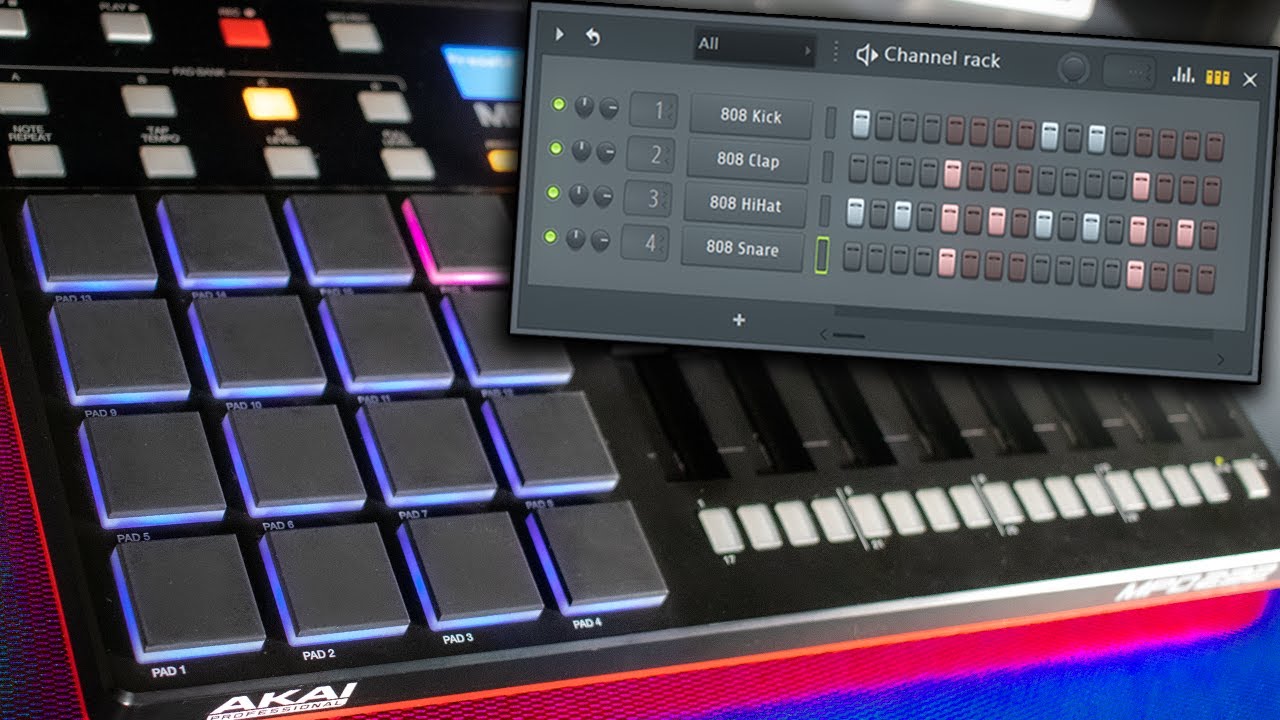
- Play Virtual Instruments: Load a virtual instrument, such as a piano, synthesizer, or drum kit, within FL Studio. Use the keys on your MIDI keyboard to play notes and assess the responsiveness and accuracy of the note triggering. Ensure that the velocity sensitivity, if applicable, is accurately represented in the virtual instrument’s sound.
- Manipulate Parameters: Experiment with the assigned MIDI controls to adjust various parameters within FL Studio, such as filter cutoff, resonance, envelope settings, or effects parameters. Verify that the controls on your MIDI keyboard effectively modulate the corresponding parameters in real-time, providing a seamless and expressive control experience.
- Record and Playback: Record a short musical passage or performance using your MIDI keyboard within FL Studio. Playback the recorded sequence to confirm that the MIDI data from your keyboard is accurately captured and reproduced. This test ensures that your MIDI keyboard functions reliably during the recording and playback processes.
- Test Control Assignments: Verify that the MIDI control assignments you’ve configured in FL Studio accurately reflect the intended parameter adjustments. Manipulate the assigned controls on your MIDI keyboard and observe the corresponding changes in FL Studio. Confirm that the assigned controls exhibit the desired behavior and responsiveness.
- Explore Workflow Efficiency: As you test your MIDI keyboard in FL Studio, consider how its integration enhances your workflow and creative process. Evaluate the convenience of using your MIDI keyboard for various tasks, such as note input, parameter adjustments, and real-time performance, and identify any areas for potential optimization.
By thoroughly testing your MIDI keyboard in FL Studio, you can ensure that it seamlessly integrates into your music production environment, providing a reliable and expressive tool for creating and shaping musical compositions. Testing also allows you to familiarize yourself with the capabilities and nuances of your MIDI keyboard within FL Studio, empowering you to leverage its full potential in your music-making endeavors.
Conclusion
Congratulations, you’ve successfully navigated the process of setting up your MIDI keyboard in FL Studio, laying the groundwork for a seamless and expressive music production experience. By following the steps outlined in this guide, you’ve established a vital connection between your MIDI keyboard and FL Studio, unlocking a world of creative possibilities and streamlined workflow enhancements.
As you’ve connected your MIDI keyboard to your computer, configured it within FL Studio, assigned controls to parameters, and thoroughly tested its functionality, you’ve gained a deeper understanding of how your MIDI keyboard can serve as a versatile and intuitive tool within the software. Whether you’re playing virtual instruments, manipulating sound parameters, or recording expressive performances, your MIDI keyboard is now an integral part of your music production arsenal.
It’s important to continue exploring and experimenting with your MIDI keyboard in FL Studio, discovering new ways to leverage its capabilities and integrate it into your unique creative process. As you delve into music composition, sound design, and production tasks, your MIDI keyboard will undoubtedly become a trusted companion, empowering you to express your musical ideas with precision and emotion.
Remember to consult your MIDI keyboard’s documentation for specific details on its features and functionalities, as well as any advanced configuration options that may further enhance its integration with FL Studio. Additionally, stay curious and open-minded as you explore the diverse ways in which your MIDI keyboard can elevate your music production endeavors.
With your MIDI keyboard seamlessly integrated into FL Studio, you’re poised to embark on a musical journey filled with inspiration, innovation, and artistic expression. Embrace the creative potential of your MIDI keyboard, and let it serve as a catalyst for bringing your musical visions to life within the dynamic and versatile environment of FL Studio.