Introduction
An acoustic guitar is a beautiful instrument with its own unique charm and character. Over time, you may find that the pick guard on your guitar has become worn, damaged, or simply no longer suits your aesthetic preferences. In such cases, removing the pick guard is a straightforward process that can be done at home with the right tools and techniques.
Removing a pick guard from an acoustic guitar requires careful attention to avoid any damage to the guitar’s finish or structure. This guide will take you through a step-by-step process, providing you with the necessary instructions to successfully remove the pick guard and restore your guitar to its pristine condition.
Before diving into the removal process, it’s important to gather the required tools and materials to ensure a smooth operation. Having everything you need at hand will save you time and frustration during the process.
So, if you’re ready to give your acoustic guitar a fresh new look, grab your tools and let’s get started!
Tools and Materials Needed
Before beginning the process of removing the pick guard from your acoustic guitar, it’s essential to gather the necessary tools and materials. Having everything prepared in advance will make the process smoother and more efficient. Here’s a list of what you’ll need:
- Heat source: A hairdryer or heat gun will be necessary to soften the adhesive on the pick guard.
- Protective gloves: It’s recommended to wear gloves to protect your hands from hot surfaces and to ensure a better grip.
- Warm water and mild soap: These will be used to clean the guitar after the pick guard removal.
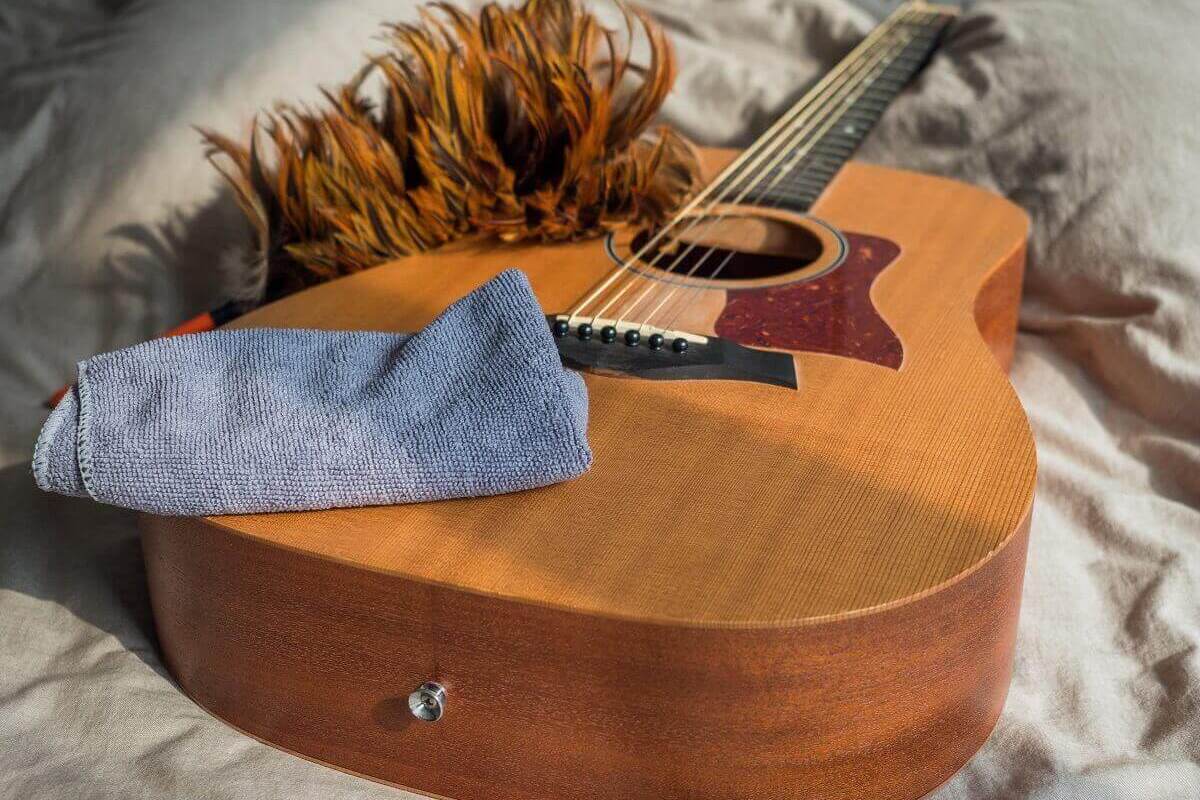
- Soft cloth or towel: A soft cloth or towel will help in wiping and drying the guitar during the cleaning process.
- Guitar polish: This will be used to restore the guitar’s shine after the pick guard removal and cleaning.
- Guitar picks or plastic spatula: These tools will aid in gently lifting the pick guard without damaging the guitar’s surface.
- Guitar strap: If your guitar has a strap, it’s advisable to remove it before starting the pick guard removal process to prevent any interference.
- Patience: Removing the pick guard may take some time and effort, so it’s important to remain patient throughout the process.
Gather these tools and materials before you begin, ensuring that you have everything within reach. This will help you work efficiently and minimize the chances of any accidental damage to your precious acoustic guitar.
Step 1: Prepare the Guitar
Before you can start removing the pick guard from your acoustic guitar, it’s important to prepare the guitar for the process. Follow these steps to ensure a smooth and successful pick guard removal:
- Find a flat and stable surface: It’s essential to work on a stable surface where your guitar will be secure and protected from accidental bumps or falls.
- Loosen the guitar strings: Gently loosen the guitar strings to relieve tension. This will help prevent any unwanted pulling or movement of the bridge during the pick guard removal process.
- Remove the guitar strap: If your guitar has a strap attached, it’s best to remove it to avoid any interference or complications during the pick guard removal.
- Clean the guitar surface: Use a soft cloth or towel to wipe away any dust or grime from the area around the pick guard. This will ensure better adhesion when reapplying the pick guard in the future.
By preparing the guitar beforehand, you create a safe and clean working environment for the pick guard removal process. This step is crucial for maintaining the integrity of your instrument and ensuring a successful outcome.
Step 2: Loosen the Pick Guard
Once you have prepared the guitar, it’s time to start loosening the pick guard. The pick guard is typically secured to the guitar’s body with adhesive, so it’s important to approach this step with care. Follow these instructions to loosen the pick guard:
- Use a hairdryer or heat gun: Apply heat to the pick guard using a hairdryer or heat gun on a low heat setting. Gently move the heat source back and forth over the pick guard, maintaining a safe distance to prevent damage to the guitar’s finish. The heat softens the adhesive, making it easier to remove the pick guard.
- Test the pick guard: After applying the heat for a few minutes, check if the pick guard feels slightly loose. You can gently try to lift it with your fingers or a plastic spatula. If it still feels firmly attached, continue applying heat until the adhesive is sufficiently softened.
- Use a guitar pick or plastic spatula: Take a guitar pick or plastic spatula and carefully slide it under the edge of the pick guard. Slowly and gently lift the pick guard from the guitar’s body, applying steady pressure to separate it from the adhesive. Be cautious not to force it or use excessive pressure to avoid any damage to the guitar’s surface.
- Continue lifting around the pick guard: Once you have lifted a portion of the pick guard, work your way around its edges, gradually lifting it off the guitar’s body. Take your time and proceed carefully to ensure the pick guard is fully detached without any part sticking to the guitar.
By following these steps, you can successfully loosen the pick guard from your acoustic guitar. Remember to exercise patience and caution throughout the process to avoid any unnecessary damage or mishaps.
Step 3: Apply Heat
Applying heat is a crucial step in effectively removing the pick guard from your acoustic guitar. Heat softens the adhesive, making it easier to lift off the pick guard without causing damage to the guitar’s finish. Follow these steps to properly apply heat:
- Position a hairdryer or heat gun: Place the hairdryer or heat gun on the lowest heat setting, ensuring that it is a safe distance away from the guitar’s surface to avoid any potential heat damage. Hold it at an angle, directing the heat towards the pick guard.
- Begin heating the pick guard: Turn on the hairdryer or heat gun and start moving it back and forth over the pick guard. Keep the heat source at a reasonable distance to prevent overheating or discoloration of the guitar’s surface.
- Apply heat evenly: Heat the pick guard in a circular motion, covering the entire surface area. Make sure to spend a little extra time on the edges and corners, as these areas tend to have more adhesive holding the pick guard in place.
- Monitor the temperature: As you apply heat, periodically touch the pick guard with your fingertip to check its temperature. It should feel warm to the touch but not uncomfortably hot. If it becomes too hot, pause for a moment to let it cool down before continuing.
- Be patient: Depending on the type of adhesive used, it may take a few minutes for the heat to soften it sufficiently. Avoid rushing the process and continue applying heat until the pick guard feels slightly loosened.
By following these steps, you will effectively apply heat to the pick guard, allowing the adhesive to soften and making it easier to remove in the next step. It’s important to take your time and apply heat evenly, ensuring the best possible outcome for your pick guard removal process.
Step 4: Remove the Pick Guard
Now that you have properly heated the pick guard and loosened the adhesive, it’s time to remove the pick guard from your acoustic guitar. Follow these steps to carefully lift off the pick guard:
- Use a guitar pick or plastic spatula: Take a guitar pick or plastic spatula and gently slide it under the edge of the pick guard where you initially loosened it. This will help you lift the pick guard without damaging the guitar’s surface.
- Apply gentle pressure: Once the pick guard is partially lifted, apply gentle and steady pressure with the guitar pick or spatula, moving it further under the pick guard. Gradually work your way around the pick guard’s edges, separating it from the adhesive.
- Continue lifting the pick guard: As you lift the pick guard, you may encounter areas where the adhesive is still firmly attached. In such cases, apply a bit more heat to those areas before attempting to lift them. Take your time to ensure that the pick guard is fully detached without leaving any residue or causing damage to the guitar.
- Inspect the adhesive residue: Once the pick guard is removed, carefully examine the guitar’s surface for any adhesive residue. If you notice any, gently rub it with a soft cloth or towel dampened with warm water and mild soap. Be careful not to use excessive force or aggressive cleaning agents that could harm the guitar’s finish.
By following these steps, you will be able to successfully remove the pick guard from your acoustic guitar. Take your time, apply gentle pressure, and ensure that you lift the pick guard without causing any damage to your cherished instrument.
Step 5: Clean the Guitar
After removing the pick guard from your acoustic guitar, it’s important to clean the guitar to restore its shine and remove any remaining residue. Follow these steps to properly clean your guitar:
- Prepare a warm water and mild soap solution: Fill a bowl or container with warm water and add a few drops of mild soap. Mix the solution gently to create a soapy mixture.
- Dampen a soft cloth or towel: Dip a soft cloth or towel into the soapy water, making sure it is well saturated but not dripping wet.
- Gently wipe the guitar’s body: Starting from the top of the guitar’s body, gently wipe the surface using the dampened cloth. Make smooth, circular motions to remove any dirt, fingerprints, or residue left behind.
- Clean hard-to-reach areas: Pay attention to hard-to-reach areas, such as around the soundhole and bridge, where dust and grime tend to accumulate. Use a cotton swab or a small soft brush to clean these areas effectively.
- Rinse the cloth: Once you’ve cleaned the guitar’s body thoroughly, rinse the cloth with clean water to remove any soap residue.
- Wipe the guitar again: With the rinsed cloth, wipe the guitar’s body again to remove any soap remnants. Ensure that you remove all the soap to prevent any potential damage to the guitar’s finish.
- Dry the guitar: Use a dry, soft cloth or towel to gently dry the guitar’s body. Ensure that you remove all excess moisture to prevent any water damage or streaks.
- Apply guitar polish (optional): If desired, you can finish the cleaning process by applying a small amount of guitar polish to a clean, soft cloth. Follow the instructions on the polish and gently buff the guitar’s body, restoring its shine and protecting the finish.
By following these steps, you will effectively clean your guitar and have it looking as good as new after the pick guard removal process. Remember to handle the guitar with care to prevent any accidental damage, and enjoy the process of restoring its beauty.
Step 6: Reassemble the Guitar
Once you have removed the pick guard and cleaned your acoustic guitar, it’s time to reassemble and put everything back together. Follow these steps to properly reassemble your guitar:
- Clean the pick guard: Take a soft cloth or towel and gently wipe down the removed pick guard to remove any residue or dirt. Ensure it is clean before proceeding with the reassembly.
- Prepare the adhesive: Depending on the type of adhesive used on the pick guard, you may need to apply a fresh layer or use adhesive remover to remove any leftover residue. Follow the instructions provided with the adhesive or adhesive remover product.
- Position the pick guard: Carefully align the pick guard with the original placement on the guitar’s body. Take your time to ensure it is aligned and centered properly.
- Apply the adhesive: If using adhesive, apply a thin and even layer to the back of the pick guard. Be careful not to use too much adhesive to avoid any smearing or visible residue.
- Press firmly: Gently press the pick guard onto the guitar’s body, applying even pressure across the entire surface. Ensure that it adheres securely, but avoid using excessive force to prevent any damage to the guitar’s finish.
- Wipe away excess adhesive: Use a clean cloth or towel to carefully wipe away any excess adhesive that may have seeped out from under the pick guard during reassembly.
- Reattach the guitar strap (if applicable): If you previously removed the guitar strap, now is the time to reattach it to your acoustic guitar. Follow the manufacturer’s instructions for proper attachment.
- Tune the guitar: With everything reassembled, tune your guitar to your desired pitch. Adjust the strings and check the tension to ensure optimal playability.
By following these steps, you can successfully reassemble your acoustic guitar after removing the pick guard. Take your time, double-check your alignment, and ensure a secure and proper reattachment of the pick guard. Once you’re finished, you can enjoy playing your rejuvenated guitar!
Conclusion
Removing a pick guard from an acoustic guitar is a rewarding process that allows you to customize the instrument or restore its original appearance. By following the steps outlined in this guide and using the necessary tools and materials, you can successfully remove the pick guard without causing any damage to your guitar.
Remember the importance of preparation, patience, and careful handling throughout the process. Preparing the guitar and gathering the necessary tools beforehand ensures a smooth operation. Applying heat and loosening the adhesive, followed by gentle removal, helps minimize the risk of any damage to the guitar’s surface.
After removing the pick guard, taking the time to clean the guitar thoroughly ensures that it looks its best. Lastly, reassembling the guitar and properly attaching the pick guard completes the process, giving you a revitalized instrument ready to be played.
However, it’s essential to note that each guitar may have slight variations, and the pick guard removal process may differ slightly. Always refer to the manufacturer’s instructions or seek professional assistance if you’re uncertain or uncomfortable performing the task on your own.
Now that you have the knowledge, tools, and steps needed to remove a pick guard, it’s time to unleash your creativity, enhance your guitar’s appearance, and enjoy the journey of transforming your acoustic guitar into a true expression of your style and personality.