Introduction
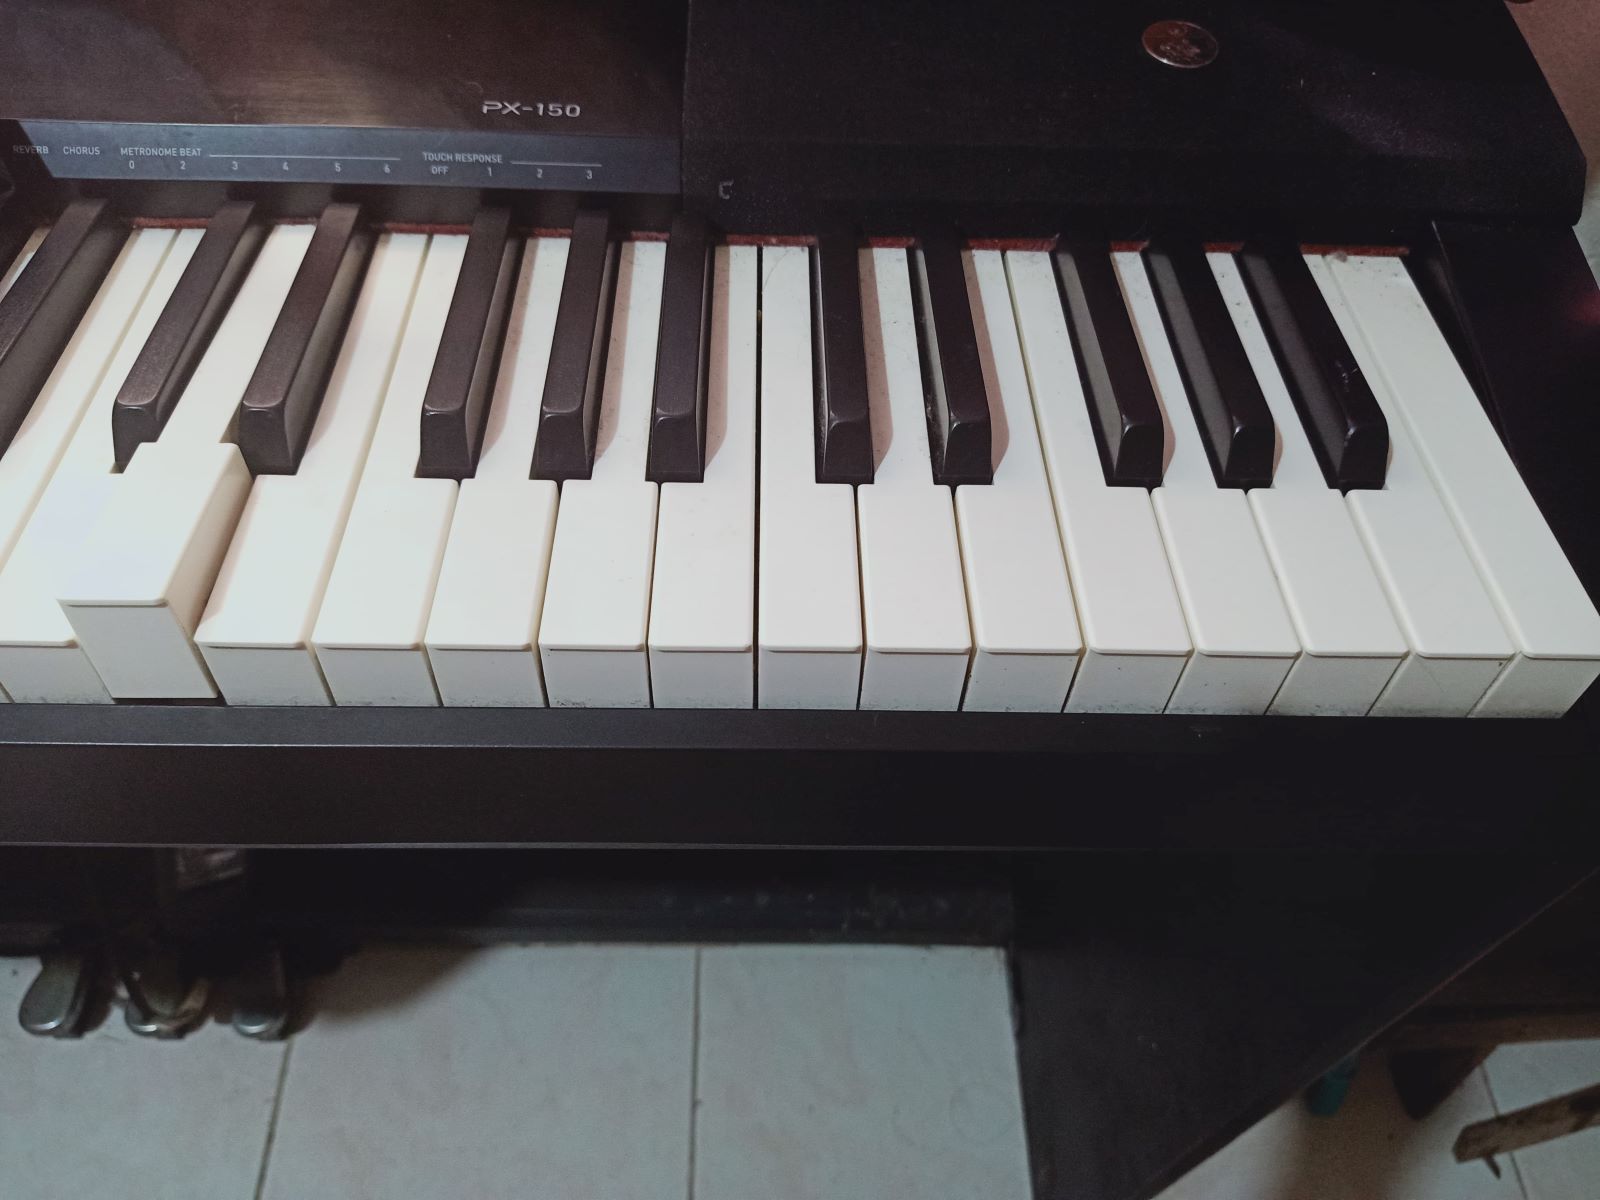
Digital pianos are sophisticated musical instruments that rely on advanced technology to produce high-quality sound. However, like any electronic device, they are susceptible to issues over time, particularly with the keys. A malfunctioning key can significantly impact the playability and overall performance of a digital piano. Whether it's due to dirt and debris accumulation or mechanical problems, knowing how to address and fix a digital piano key can save you time and money.
In this guide, we will walk you through the step-by-step process of fixing a digital piano key. From assessing the issue to cleaning and adjusting the key action, we will cover various methods to help you restore your instrument to optimal working condition. You'll also learn when it might be necessary to replace a key and how to test it once the repairs are complete.
By following these instructions, you can potentially save on costly repairs and gain a better understanding of your digital piano's mechanics. With a few basic tools and a systematic approach, you can troubleshoot and resolve common key-related problems, allowing you to continue enjoying the beautiful sounds of your digital piano without interruptions. Let's dive into the process of fixing a digital piano key and get your instrument back to making music in no time.
Tools and Materials Needed
Before you begin fixing a digital piano key, it’s essential to gather the necessary tools and materials to ensure a smooth and efficient repair process. Here’s a list of items you’ll need:
- Screwdriver Set: A precision screwdriver set with various head types will be useful for accessing the internal components of the digital piano.
- Compressed Air Duster: This will help in removing dust and debris that may be causing the key malfunction.
- Soft Microfiber Cloth: Use a gentle, lint-free cloth for cleaning the key surfaces and surrounding areas.
- Tweezers: Precision tweezers can aid in removing small debris or foreign objects lodged beneath the keys.
- Key Puller (Optional): If you need to remove and replace a key, a key puller can make the process easier and prevent damage to the surrounding keys.
- Lubricant: A specialized key lubricant can help address mechanical issues related to key action and movement.
- Replacement Key (If Necessary): In the event of irreparable damage to a key, having a replacement key on hand will be essential.
Having these tools readily available will streamline the repair process and ensure that you can address a wide range of key-related issues effectively. Once you have these items assembled, you’ll be well-prepared to assess and fix the problem with your digital piano key.
Assessing the Issue
Before delving into the repair process, it’s crucial to assess the issue affecting the digital piano key. Common problems can range from sticking keys and unresponsive notes to unusual clicking or grinding sounds when a key is pressed. Here are the steps to effectively assess the issue:
- Observe Key Behavior: Carefully play and observe the problematic key. Note any irregularities in its response, such as sluggish movement, uneven key action, or unusual noises.
- Inspect Key Surface: Examine the key’s surface and surrounding areas for any visible debris, dust, or obstructions that may be impeding its movement or causing mechanical issues.
- Test Adjacent Keys: Compare the behavior of the affected key with its neighboring keys. If adjacent keys are functioning normally, it can help narrow down the source of the problem.
- Check for Foreign Objects: Use a flashlight to inspect the keybed and action mechanism for any foreign objects or debris that may have become lodged beneath the keys.
- Assess Key Response: Determine if the key produces sound when pressed and if the sound is consistent with the rest of the keys. Note any inconsistencies in sound or responsiveness.
By systematically evaluating the behavior and condition of the problematic key, you can gain valuable insights into the nature of the issue. This initial assessment will guide the subsequent steps in the repair process, whether it involves cleaning, adjusting, or replacing the key. Understanding the specific symptoms and characteristics of the problem is essential for effectively resolving it and restoring the functionality of your digital piano key.
Cleaning the Key
Cleaning the key and its surrounding components is a fundamental step in addressing many issues that affect digital piano keys. Dust, dirt, and debris can accumulate over time, leading to sticking keys, unresponsive notes, and erratic key movement. Here’s a systematic approach to cleaning the key:
- Power Off the Piano: Before cleaning the key, ensure that the digital piano is powered off and unplugged to prevent any electrical hazards.
- Access the Keybed: If possible, carefully remove the key cover or keybed to gain access to the individual keys and their mechanisms.
- Use Compressed Air: With the key exposed, use a can of compressed air to blow away any loose dust and debris from the key surfaces and surrounding areas. Be thorough but gentle to avoid damaging delicate components.
- Clean Key Surfaces: Use a soft microfiber cloth lightly dampened with water or a gentle piano key cleaner to wipe the surfaces of the affected key. Ensure that no moisture seeps into the key mechanism.
- Inspect and Test: After cleaning, visually inspect the key and test its responsiveness. Press the key multiple times to ensure that it moves smoothly and produces consistent sound.
By meticulously cleaning the key and its components, you can often resolve issues related to dirt and debris accumulation. This simple yet crucial maintenance task can improve the overall performance and longevity of your digital piano’s keys, ensuring a more enjoyable playing experience.
Adjusting the Key Action
When a digital piano key exhibits irregular or inconsistent behavior, adjusting the key action can often alleviate the issue. Key action refers to the mechanism that governs how the keys respond when pressed and released. Here’s how you can adjust the key action:
- Identify Key Movement: Observe the movement of the problematic key to determine if it feels sluggish, uneven, or excessively resistant. Note any specific characteristics that deviate from the standard key response.
- Access the Action Mechanism: Depending on the piano model, carefully remove the key cover or keybed to access the action mechanism. This may require using a screwdriver to disassemble certain parts.
- Inspect Key Guides and Springs: Examine the key guides and springs for any signs of misalignment, damage, or obstruction. Ensure that they are properly seated and functioning as intended.
- Lubricate Key Pivot Points: Apply a small amount of specialized key lubricant to the pivot points of the key mechanism. This can help reduce friction and improve the key’s movement.
- Test Key Response: After making adjustments and applying lubricant, test the key’s responsiveness by pressing it multiple times. Assess whether the key action has become smoother and more consistent.
By addressing the key action, you can often rectify issues related to mechanical constraints and friction within the key mechanism. It’s important to approach this process with precision and care to avoid causing additional damage to the key components. With a systematic adjustment, you can potentially restore the optimal functionality of the digital piano key.
Replacing the Key
In cases where a digital piano key is damaged beyond repair or has sustained irreparable mechanical issues, replacing the key becomes necessary to restore the instrument’s functionality. Here’s a step-by-step guide to replacing a digital piano key:
- Identify the Replacement Key: Obtain a compatible replacement key that matches the size, shape, and design of the original key. This may require contacting the piano manufacturer or a specialized parts supplier.
- Power Off the Piano: Ensure that the digital piano is powered off and unplugged to prevent any electrical hazards during the replacement process.
- Remove the Damaged Key: Carefully detach the damaged key by following the specific disassembly instructions provided in the piano’s manual. Use caution to avoid causing damage to adjacent keys or internal components.
- Install the Replacement Key: Place the replacement key into the designated position, ensuring that it aligns properly with the surrounding keys and fits securely into the keybed.
- Test Key Functionality: Once the replacement key is installed, test its functionality by pressing it and assessing its responsiveness. Ensure that it produces consistent sound and moves smoothly like the other keys.
Replacing a digital piano key requires careful attention to detail and precision to ensure that the new key integrates seamlessly with the instrument’s keybed and action mechanism. While this process may be more involved than cleaning or adjusting a key, it can effectively resolve issues stemming from irreparable key damage or mechanical failure.
Testing the Key
After performing the necessary repairs or maintenance on a digital piano key, it’s essential to conduct thorough testing to ensure that the key functions optimally and integrates seamlessly with the instrument’s overall performance. Here’s a systematic approach to testing the key:
- Play the Key Repeatedly: Press the repaired or replaced key multiple times to assess its responsiveness and consistency in producing sound. Pay attention to any changes in its behavior compared to its pre-repair state.
- Test Key Variations: Play the key with varying degrees of force to gauge its sensitivity and dynamic response. Ensure that it registers both soft and firm keystrokes accurately.
- Observe Key Integration: Play musical passages or exercises that involve the repaired key in conjunction with neighboring keys to verify its seamless integration within the instrument’s keybed and action mechanism.
- Check for Unusual Noises: Listen for any abnormal clicking, buzzing, or grinding noises when the key is pressed, as these may indicate underlying mechanical issues that require further attention.
Thoroughly testing the repaired or replaced key is crucial for validating the effectiveness of the repair process and ensuring that the key operates harmoniously within the digital piano’s framework. By meticulously evaluating its performance under various playing conditions, you can confidently ascertain that the key has been successfully restored to optimal functionality.
Conclusion
Repairing a digital piano key encompasses a series of systematic steps, from assessing the issue and cleaning the key to adjusting its action and, if necessary, replacing the key. By following this comprehensive guide, you’ve gained valuable insights into troubleshooting and addressing common issues that may affect the functionality of a digital piano key.
Through careful observation and meticulous maintenance, you can often resolve key-related problems stemming from dirt and debris accumulation, mechanical constraints, or irreparable damage. The process of fixing a digital piano key empowers you to take proactive measures in preserving the performance and longevity of your instrument, potentially saving on costly repairs and downtime.
By familiarizing yourself with the tools and materials needed for key repairs and understanding the step-by-step procedures for cleaning, adjusting, and replacing a key, you’ve equipped yourself with the knowledge and skills to maintain your digital piano’s keys in optimal condition. Furthermore, the thorough testing of the repaired or replaced key ensures that it seamlessly integrates with the instrument’s overall functionality, allowing you to continue playing and enjoying your music without interruptions.
Ultimately, the ability to troubleshoot and fix digital piano keys not only enhances your technical proficiency as a musician but also fosters a deeper connection with your instrument. As you embark on this repair journey, remember that patience, precision, and attention to detail are key elements in achieving successful outcomes. With these principles in mind, you can navigate key-related challenges with confidence and keep your digital piano in top playing condition for years to come.


