Introduction:
Welcome to our guide on how to connect a USB microphone to Skype! With the rise of remote meetings, interviews, and podcasting, having good audio quality is essential for clear communication. USB microphones offer a convenient and reliable solution for capturing high-quality audio directly into your computer. If you’re looking to use your USB microphone with Skype, this step-by-step guide will walk you through the process. Whether you’re a professional or a beginner, by the end of this article, you’ll be able to connect your USB microphone to Skype and enhance your audio experience.
Skype is a popular communication platform that allows you to make voice and video calls, send instant messages, and share files. While Skype has built-in support for most computer microphones, connecting a USB microphone may require additional setup steps. By following the instructions in this guide, you will ensure that your USB microphone is recognized and properly configured by Skype.
Before we begin, it’s important to note that this guide assumes you have a compatible USB microphone and have already installed Skype on your computer. If you haven’t done so, make sure to download and install the latest version of Skype from the official website. Additionally, ensure that your USB microphone is compatible with your operating system, as some models may require specific drivers for proper functionality.
Now that you understand the basics, let’s dive into the step-by-step process of connecting your USB microphone to Skype. Follow each step carefully to ensure a successful setup!
Step 1: Check the compatibility of your USB microphone and Skype
Before you begin the process of connecting your USB microphone to Skype, it’s important to ensure that both your microphone and Skype are compatible with each other. This will help avoid any compatibility issues and ensure a smooth setup process.
First, check the specifications of your USB microphone. Look for compatibility information on the manufacturer’s website or in the product manual. Ensure that your microphone is compatible with your operating system (Windows or macOS) and that it supports the version of Skype you are using.
Next, make sure you have the latest version of Skype installed on your computer. Updates often include improvements and bug fixes, so having the latest version will help guarantee optimal performance. You can check for updates by opening Skype and navigating to the “Help” or “Settings” menu.
If your USB microphone is not compatible with Skype, you may need to consider alternative options. Some microphones require specific drivers to function properly, so check the manufacturer’s website for any available driver downloads. Alternatively, you might need to invest in a different USB microphone that is officially supported by Skype.
It’s also worth noting that not all USB microphones are created equal. Different models have varying levels of audio quality and features. Consider your specific needs and budget before making a purchase. Reading reviews and comparing specifications can help you make an informed decision.
By ensuring the compatibility of your USB microphone and Skype, you will be setting yourself up for success in the following steps. Once you have confirmed compatibility, you can proceed to the next step and install any necessary drivers for your USB microphone.
Step 2: Install necessary drivers for your USB microphone
Once you have confirmed the compatibility of your USB microphone with Skype, the next step is to install any necessary drivers for your microphone. Drivers are software components that facilitate communication between your USB microphone and your computer’s operating system.
Most USB microphones are “plug-and-play,” meaning they are recognized by the operating system without the need for additional drivers. In such cases, you can skip this step and proceed to the next one. However, some USB microphones may require specific drivers to unlock their full functionality or to ensure proper operation.
To determine if your USB microphone requires drivers, consult the manufacturer’s documentation or visit their website. Look for any driver downloads or installation instructions specifically for your microphone model. Download the appropriate driver for your operating system, whether it’s Windows or macOS.
Once you have downloaded the driver file, locate it on your computer and double-click to begin the installation process. Follow the on-screen instructions to install the drivers. During the installation, make sure your USB microphone is not connected to the computer. Some drivers may require you to connect the microphone at a later stage.
After the driver installation is complete, restart your computer to ensure that the changes take effect. Once your computer has restarted, connect your USB microphone using the appropriate USB port. Windows or macOS should now recognize the device and install the necessary drivers automatically. This may take a few moments.
After the driver installation is complete, you can check whether your USB microphone is recognized by your computer. Open the “Sound” settings on your computer, either through the Control Panel (Windows) or System Preferences (macOS). Look for your USB microphone in the list of input devices. If it appears as an available option, then the drivers were installed successfully.
By installing the necessary drivers for your USB microphone, you ensure that it is fully compatible with your operating system. With the drivers in place, your USB microphone is ready to be connected and configured within Skype, which we will cover in the next step.
Step 3: Connect your USB microphone to your computer
With the necessary drivers installed, it’s time to connect your USB microphone to your computer. Follow the steps below to ensure a proper connection:
- Locate an available USB port on your computer. Typically, USB ports are found on the front or back of a desktop computer, or on the sides of a laptop.
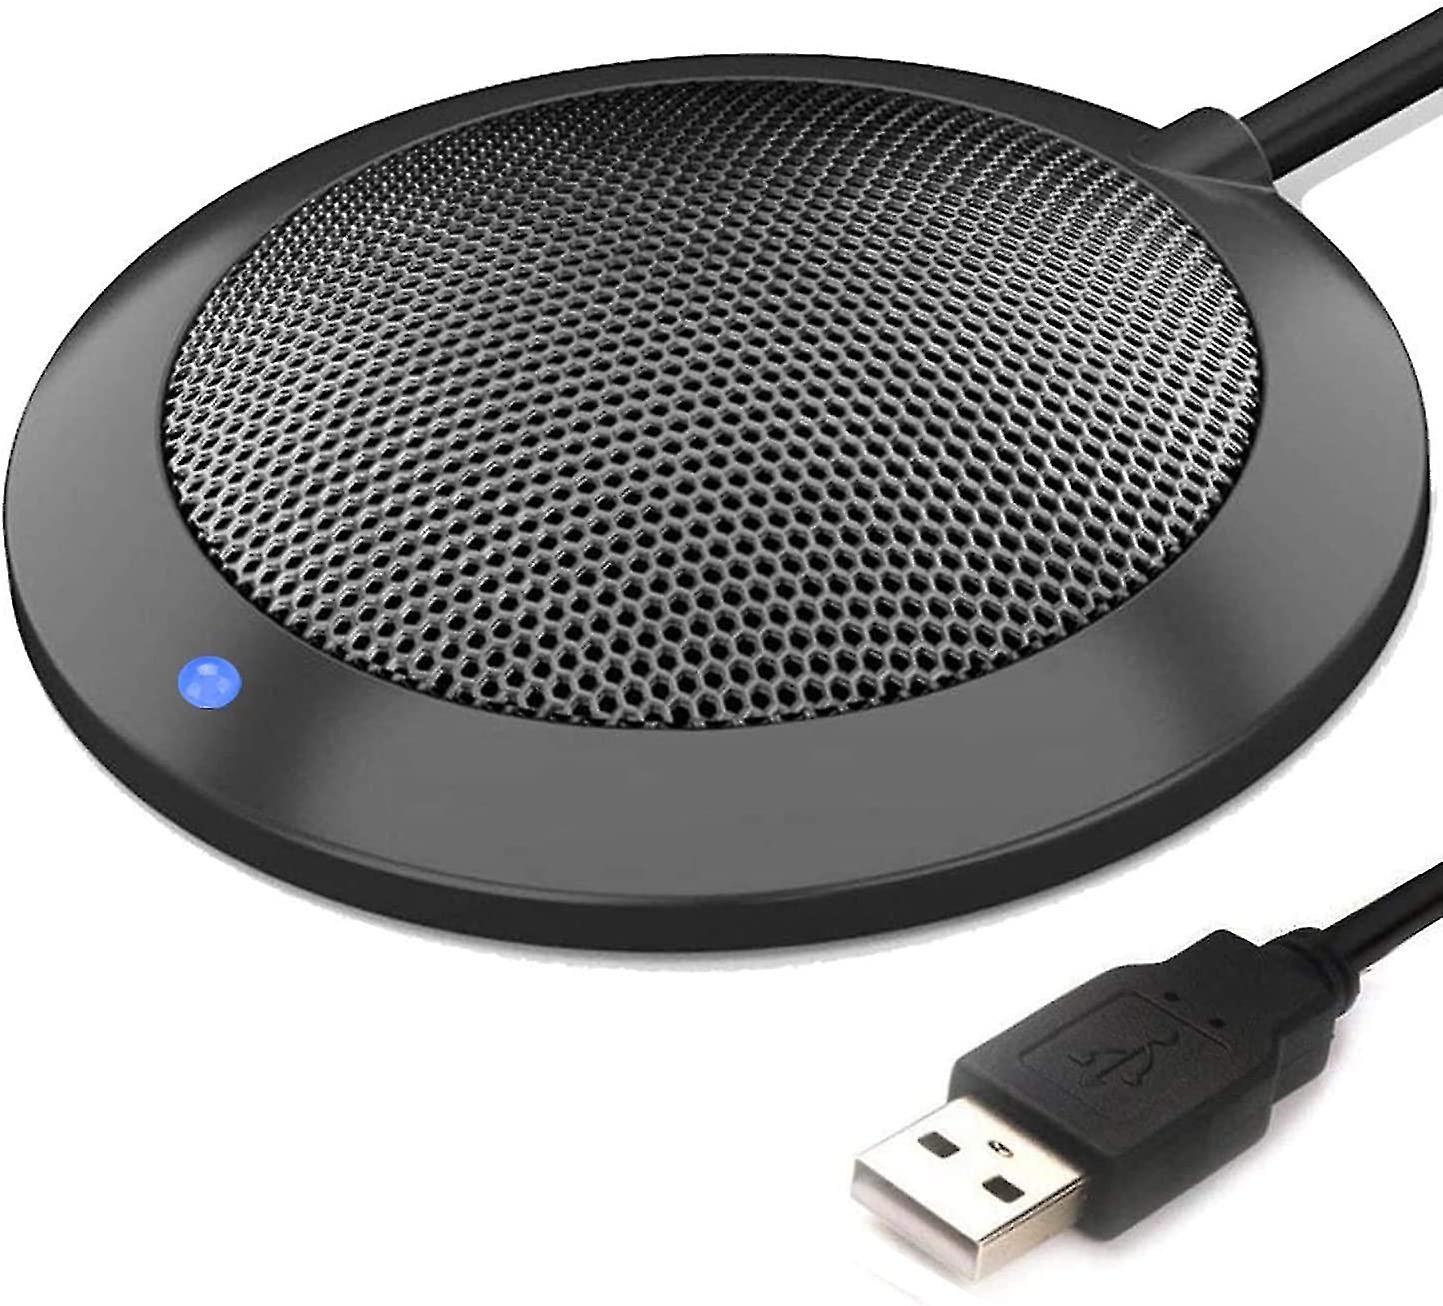
- Take the USB cable that came with your microphone and plug one end into the USB port on your computer.
- Connect the other end of the USB cable to the USB port on your USB microphone.
- Ensure that the connection is secure and that there are no loose connections. A properly connected USB microphone will have a tight fit with no wiggling.
- If your USB microphone has an on/off switch or a mute button, ensure that it is in the correct position. Refer to the microphone’s user manual for any specific instructions regarding the switch or button.
Once your USB microphone is connected, your computer should recognize it as an audio input device. You can verify this by navigating to the sound settings on your computer, as explained in the previous step.
Keep in mind that some USB microphones may have additional settings or features that can be adjusted using buttons or knobs on the microphone itself. Refer to the user manual of your microphone for instructions on how to use and adjust these settings.
That’s it! You have successfully connected your USB microphone to your computer. In the next step, we will guide you through the process of configuring Skype to recognize and use your USB microphone for audio calls and recordings.
Step 4: Configure Skype to use your USB microphone
Now that your USB microphone is connected to your computer, it’s time to configure Skype to recognize and use it as the default audio input device. Follow the steps below to ensure that Skype is set up correctly:
- Launch the Skype application on your computer and log in to your account.
- Click on the “Settings” or “Options” menu, typically represented by a gear icon. This will open the Skype settings window.
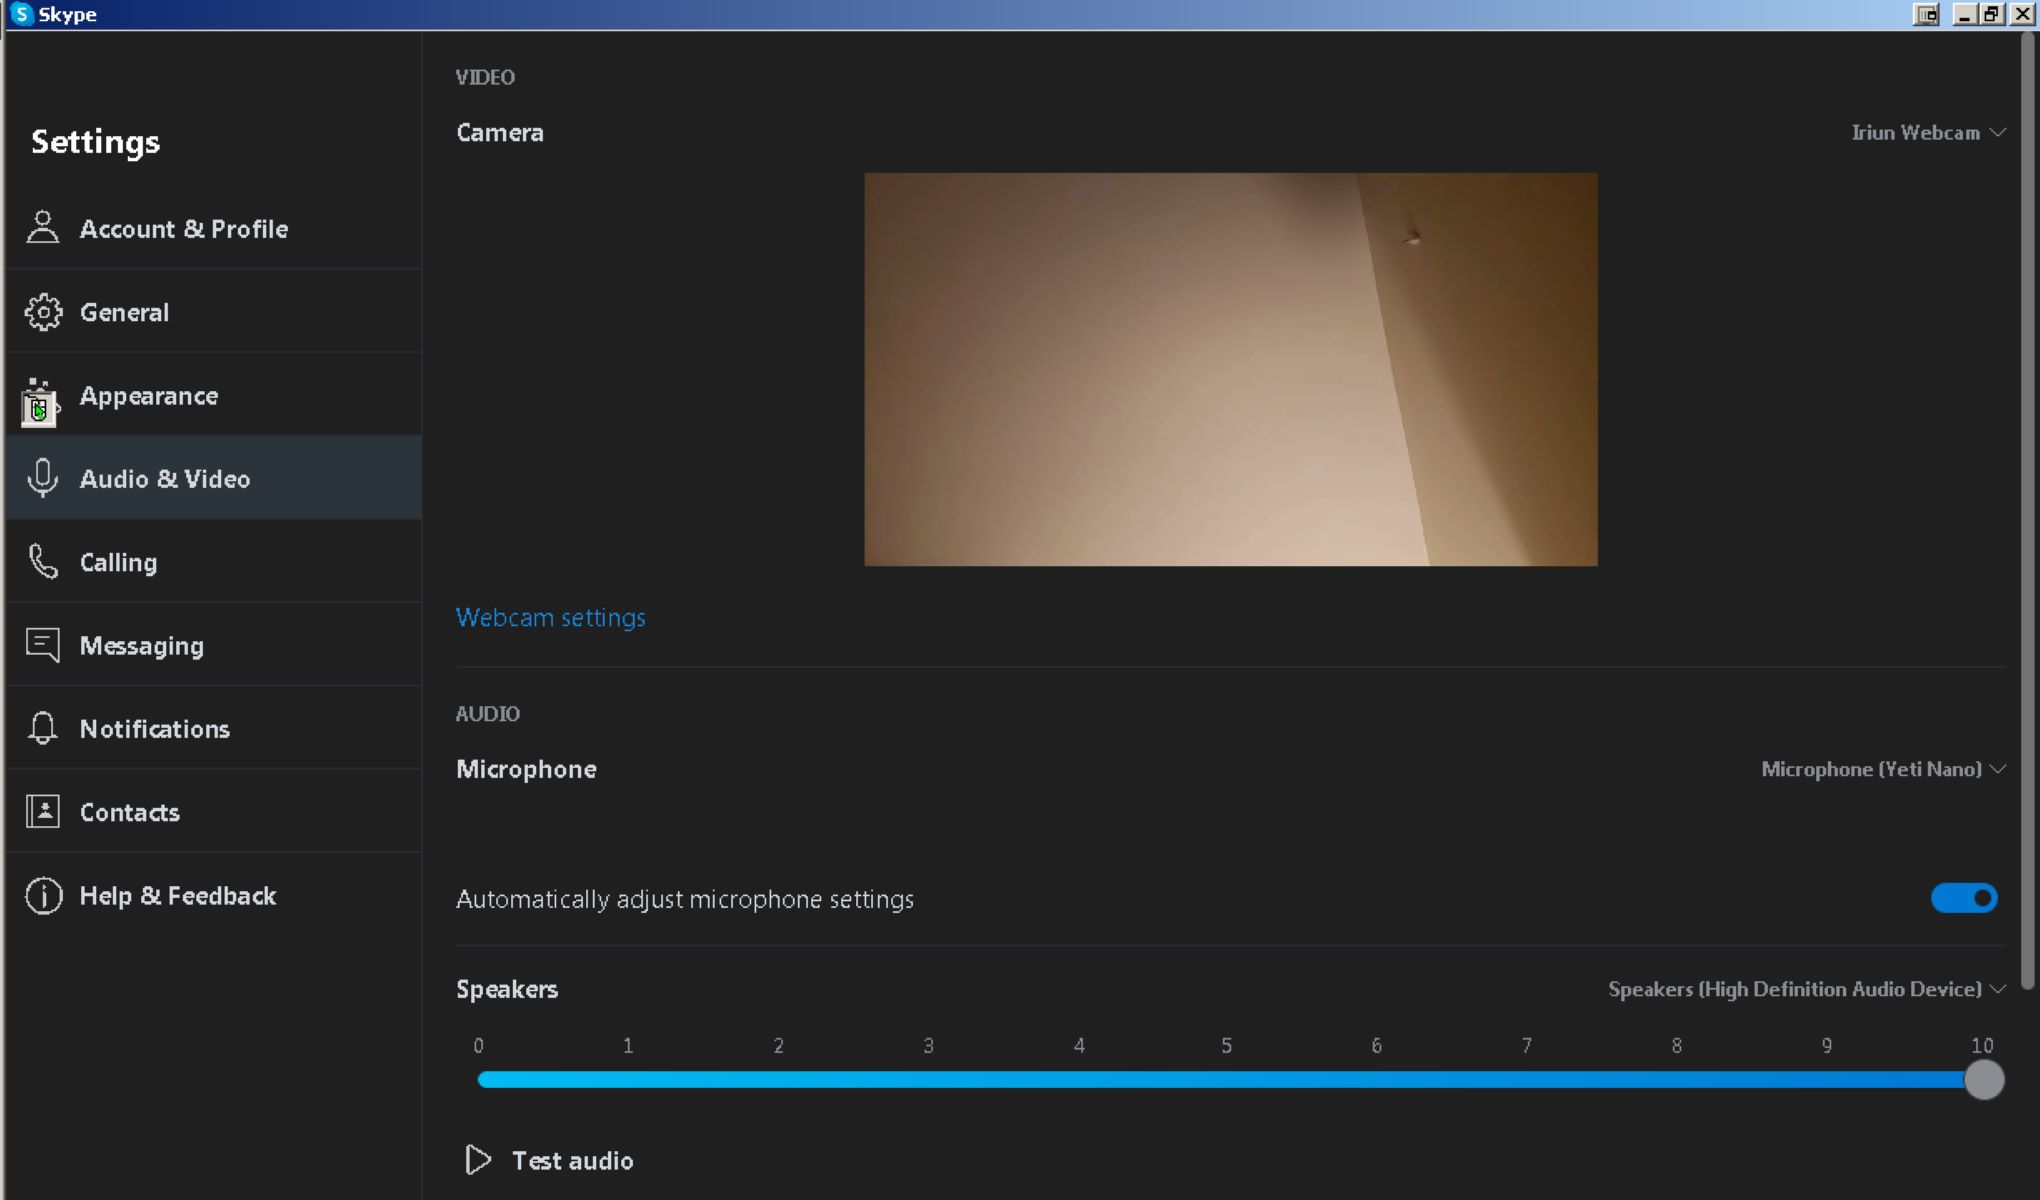
- In the settings window, navigate to the “Audio & Video” section. Here, you will find options to configure your audio and video devices.
- Under the “Microphone” or “Input Device” section, select your USB microphone from the available options. It should be listed by its name or the model number. If you don’t see your USB microphone listed, make sure it is properly connected and recognized by your computer.
- Once you have selected your USB microphone, adjust the volume or sensitivity settings if necessary. This will ensure that your microphone picks up your voice at the desired volume. You can test the microphone by speaking into it and observing the audio levels displayed on the settings page.
- If you want to test your microphone further, click on the “Test Microphone” or “Test Audio” button, if available. Skype will play a sound to test the microphone input and allow you to verify that it is working correctly.
It’s also worth mentioning that Skype allows you to set up additional audio settings, such as echo cancellation and noise suppression, to enhance the audio quality during calls. These settings can be accessed in the same “Audio & Video” section of the Skype settings.
Once you have configured Skype to use your USB microphone, you’re now ready to make calls or participate in meetings with improved audio quality. Take some time to test your microphone by making a test call or having a conversation with a friend or colleague.
Remember, if you ever encounter any issues with your USB microphone in Skype, you can revisit the settings and ensure that the correct microphone is selected. You can also check for any driver updates or consult the manufacturer’s support resources for further assistance.
Now that Skype is configured to use your USB microphone, you’re all set to enjoy clear and reliable audio during your Skype calls.
Step 5: Adjust the microphone settings in Skype
After configuring Skype to use your USB microphone, it’s important to fine-tune the microphone settings to ensure optimal audio quality. Follow these steps to adjust the microphone settings in Skype:
- Launch the Skype application on your computer and log in to your account.
- Click on the “Settings” or “Options” menu, typically represented by a gear icon. This will open the Skype settings window.
- Navigate to the “Audio & Video” section, where you previously selected your USB microphone.
- Under the “Microphone” or “Input Device” section, you will find additional options to customize your microphone settings.
- First, check the microphone volume level. Adjust the slider to set the desired microphone volume. Make sure it’s neither too low, causing your voice to be barely audible, nor too high, resulting in distorted or clipping sound.
- Next, enable or disable the “Automatically adjust microphone settings” option. When enabled, Skype will dynamically adjust the microphone volume based on background noise and ambient conditions. If you prefer more control over the microphone volume, consider disabling this option.
- Below, you may find other microphone enhancement options such as “Noise suppression” and “Echo cancellation.” These features can help improve audio quality during calls by reducing unwanted background noise and echo. Experiment with these settings to find the configuration that works best for you.
- Test the microphone settings by speaking into the microphone and observing the input level meters. Make sure the levels are peaking in the appropriate range, neither too low nor too high.
- If you encounter any issues with echo or distorted sound during calls, try adjusting the microphone settings or experimenting with different enhancements to find the optimal configuration.
Once you have adjusted the microphone settings to your preference, you’re ready to have crystal-clear audio during your Skype calls. Remember to periodically check and optimize the settings based on your audio environment and preferences.
It’s worth noting that the microphone settings in Skype may vary slightly depending on the version of Skype you’re using and the operating system on your computer. However, the general steps provided above should guide you in adjusting the microphone settings successfully.
Now that you have fine-tuned the microphone settings, you’re all set to enjoy improved audio quality during your Skype calls and meetings.
Step 6: Test your USB microphone on Skype
After configuring and adjusting the microphone settings in Skype, it’s crucial to perform a test to ensure that your USB microphone is working correctly. Follow these steps to test your USB microphone on Skype:
- Launch the Skype application on your computer and log in to your account.
- In the Skype application, click on the contact you wish to call or start a new conversation by typing in the recipient’s username.
- Select the audio call option by clicking on the phone icon or initiate a video call by clicking on the camera icon, depending on your preference.
- Once the call has connected, speak into your USB microphone to test the audio quality.
- During the call, ask the other person on the call to give you feedback on the clarity and volume of your voice. Alternatively, you can use Skype’s Echo/Sound Test Service to record and playback your voice to evaluate the microphone’s performance.
- Pay attention to any distortion, background noise, or echoes during the call. If you encounter any issues, you may need to revisit the microphone settings or adjust the microphone’s position/location for better audio capture.
- After the call or test, take note of any adjustments or improvements that can be made to enhance the audio quality for future Skype calls.
By testing your USB microphone on Skype, you can ensure that it is functioning correctly and delivering the desired audio quality. This step allows you to make any necessary adjustments to the microphone or settings to optimize the audio experience for both you and the person on the other end of the call.
Remember, audio quality can be influenced by external factors such as room acoustics, microphone placement, and background noise. Consider these factors and make adjustments accordingly to achieve the best audio performance during your Skype calls.
Now that you have successfully tested your USB microphone on Skype, you can confidently use it for voice and video calls, online meetings, and any other communication needs you may have.
Conclusion
Connecting a USB microphone to Skype can greatly enhance your communication experience, whether you’re participating in online meetings, conducting interviews, or simply having voice or video calls with friends and family. By following the steps outlined in this guide, you can successfully connect, configure, and test your USB microphone on Skype.
We began by checking the compatibility of your USB microphone and Skype to ensure they are capable of working together seamlessly. Then, we explored the installation of any necessary drivers for your microphone, allowing it to function properly with your operating system.
Next, we guided you through the process of connecting your USB microphone to your computer, ensuring a secure and stable connection. With the physical connection in place, we moved on to configuring Skype to recognize and use your USB microphone as the default audio input device.
Adjusting the microphone settings in Skype was the next step, offering you the ability to fine-tune the volume and apply enhancements such as noise suppression and echo cancellation. These adjustments help optimize audio quality and minimize unnecessary background noise.
Lastly, we emphasized the importance of testing your USB microphone on Skype to ensure it is functioning correctly. This test allowed you to evaluate the audio quality, address any issues, and make necessary adjustments to deliver optimal performance during your calls and meetings.
By following this step-by-step guide, you have unleashed the full potential of your USB microphone within the Skype platform. Whether you’re a professional using Skype for business purposes or an individual connecting with loved ones, your audio communication experience will be greatly improved.
Remember, the success of your Skype calls and meetings not only depends on the quality of your USB microphone but also on external factors such as room acoustics, microphone placement, and background noise. Take the time to set up an appropriate recording environment and constantly monitor and adjust your settings to ensure exceptional audio quality.
Now that you have successfully connected your USB microphone to Skype, you can enjoy clear, professional-grade audio for all your voice and video conversations. Happy Skyping!