Introduction
So, you’ve got a Hunterspider gaming headset that’s seen better days. Maybe the wires are frayed, the sound is cutting in and out, or the microphone has stopped working. It’s frustrating, but before you rush out to buy a new headset, consider this: you might be able to rewire it yourself. Not only will this save you money, but it’s also a great way to learn more about how your headset works and gain some valuable DIY skills.
Rewiring a gaming headset may sound daunting, especially if you’re not particularly tech-savvy, but fear not. With a bit of guidance and the right tools, you can tackle this project with confidence. In this guide, we’ll walk you through the process of rewiring your Hunterspider gaming headset, step by step. By the end, you’ll have a fully functional headset that’s as good as new.
Before we dive in, it’s important to note that working with electronics requires a certain level of caution. Always ensure that your headset is unplugged before attempting any repairs, and if you’re unsure about anything, don’t hesitate to seek professional assistance. With that said, let’s gather our tools and get ready to breathe new life into your trusty gaming headset.
Tools and Materials Needed
Before embarking on the rewiring process, it’s essential to have the right tools and materials at your disposal. Here’s what you’ll need to gather:
- Soldering iron: A quality soldering iron is crucial for making precise connections and ensuring the longevity of your repairs.
- Solder wire: Choose a solder wire with a rosin core for efficient and reliable electrical connections.
- Wire stripper: This tool will enable you to remove the insulation from the wires without damaging the conductors.
- Multimeter: An indispensable device for testing continuity, voltage, and resistance, helping you diagnose any underlying issues with the headset.
- Replacement wires: Depending on the extent of the rewiring required, you may need to have a variety of replacement wires on hand.
- Heat shrink tubing: Use this to insulate and protect the soldered connections, reducing the risk of short circuits.
- Small screwdriver set: A set of precision screwdrivers will aid in disassembling the headset and accessing its internal components.
- Replacement components (optional): If specific components within the headset, such as the microphone or speakers, need replacement, ensure you have the necessary parts ready.
- Clean workspace: Find a well-lit, clutter-free area to work in, as precision and attention to detail are crucial in electronics repair.
- Patience and caution: While not physical tools, these qualities are equally important. Take your time, follow instructions meticulously, and prioritize safety throughout the rewiring process.
By having these tools and materials prepared, you’ll be well-equipped to tackle the rewiring of your Hunterspider gaming headset effectively and safely.
Disassembly of the Hunterspider Gaming Headset
Before you can begin the rewiring process, you’ll need to carefully disassemble your Hunterspider gaming headset to access its internal wiring and components. Follow these steps to disassemble the headset:
- Unplug the headset: Ensure that the headset is disconnected from any devices and power sources before proceeding with the disassembly.
- Remove the ear cushions: Many gaming headsets have removable ear cushions that can be gently pulled away from the ear cups. This step may vary depending on the specific model of your headset.
- Locate and remove the screws: Using the appropriate screwdriver from your set, carefully locate and remove any visible screws holding the headset’s casing together. These are often found around the perimeter of the ear cups and headband.
- Separate the casing: Once the screws are removed, gently pry apart the casing of the headset, taking care not to force it and avoiding any excessive bending or twisting.
- Identify the internal components: As you open the casing, take note of the internal layout of the headset, including the position of the wires, speakers, and microphone. This will be valuable information for the rewiring process.
- Secure the removed parts: As you disassemble the headset, keep all the screws and components in a secure place to prevent loss and facilitate reassembly later on.
By following these steps, you can safely disassemble your Hunterspider gaming headset, setting the stage for the subsequent process of identifying and rewiring its internal components.
Identifying the Wires and Components
With the Hunterspider gaming headset disassembled, it’s time to identify the various wires and components within the device. This step is crucial for understanding how the headset is wired and pinpointing any areas that require attention during the rewiring process. Here’s how you can effectively identify the wires and components:
- Locate the main cable: The main cable of the headset, usually connected to the ear cups or headband, contains multiple wires responsible for transmitting audio signals, power, and ground connections.
- Identify the color-coded wires: Carefully examine the wires within the main cable, noting any color-coded insulation. Commonly, red and green wires are associated with audio signals, while black or white wires may indicate ground connections.
- Identify the microphone wires: If your headset features a built-in microphone, locate the wires leading to the microphone component. These are typically thinner and may be shielded with a separate insulation layer.
- Inspect the speaker connections: Take note of the wires leading to the headset’s speakers. These are responsible for delivering audio output and may be connected to the main cable or a separate audio control module.
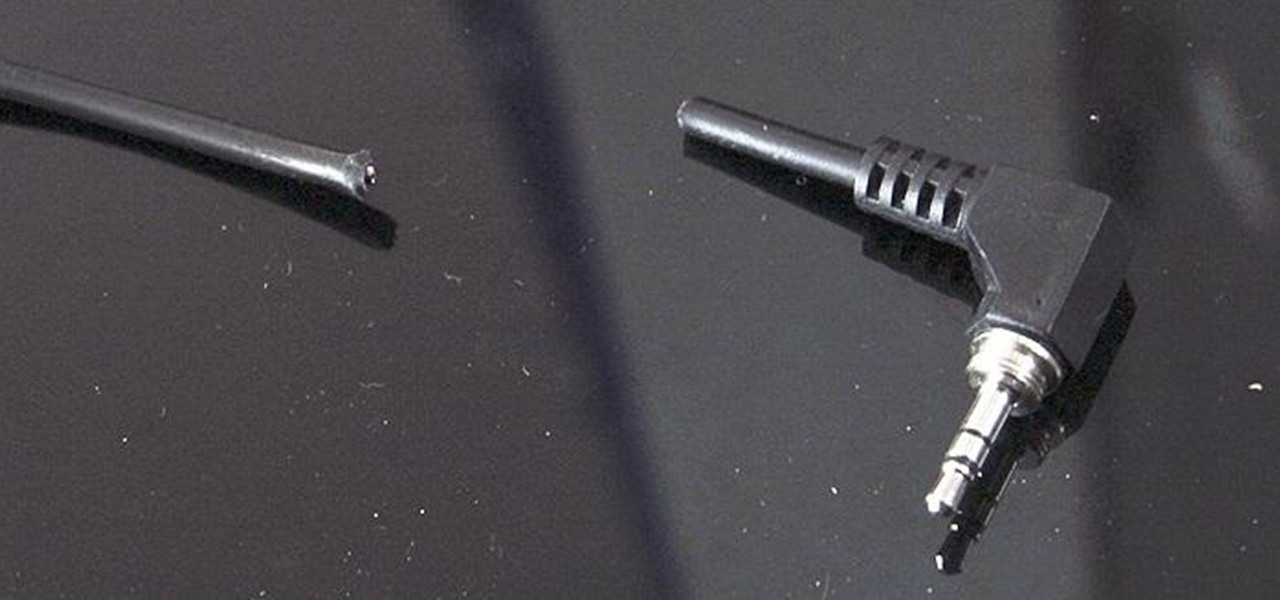
- Examine the condition of the wires: Check for any signs of damage, such as fraying, exposed conductors, or broken insulation. Identifying and addressing these issues will be essential during the rewiring process.
- Document the wire layout: Consider taking photographs or making detailed notes of the wire layout and connections to assist you during the rewiring phase, especially if the internal components are intricate or densely packed.
By carefully identifying the wires and components within your Hunterspider gaming headset, you’ll gain a comprehensive understanding of its internal wiring, setting the stage for a successful rewiring process. This knowledge will be invaluable as you proceed to rewire the headset and restore its functionality.
Rewiring the Hunterspider Gaming Headset
Now that you’ve identified the wires and components within your Hunterspider gaming headset, it’s time to embark on the rewiring process. This step involves making necessary repairs to damaged or faulty wires, ensuring proper connections, and potentially replacing components if required. Follow these essential steps to effectively rewire your gaming headset:
- Prepare the wires: If any wires show signs of damage or wear, carefully trim the affected sections and strip away a small portion of the insulation to expose fresh conductor material.
- Apply solder to the connections: Using a soldering iron, apply a small amount of solder to the exposed conductors, ensuring a secure and reliable connection. Take care to prevent solder bridges between adjacent wires.
- Insulate the connections: Slide heat shrink tubing over the soldered connections and apply heat using a heat gun or the soldering iron to shrink the tubing, providing insulation and protection for the repaired wires.
- Reassemble the headset: Once the necessary rewiring and repairs are completed, carefully reassemble the headset, ensuring that all components are securely positioned and any removed screws are reinstalled.
- Test the headset: With the rewiring process concluded, test the functionality of the headset by connecting it to a compatible device. Verify that the audio output, microphone, and any additional features are functioning as expected.
- Address any remaining issues: If any issues persist after rewiring, use a multimeter to troubleshoot and diagnose the source of the problem, ensuring that all connections are secure and components are functioning correctly.
By meticulously following these steps, you can effectively rewire your Hunterspider gaming headset, addressing any wiring issues and restoring its functionality. Remember to exercise caution and precision during the rewiring process to ensure the longevity and reliability of the repaired connections.
Testing the Rewired Headset
After completing the rewiring process, it’s crucial to thoroughly test the functionality of your Hunterspider gaming headset to ensure that the repairs have been successful. Testing the headset will allow you to verify that the audio output, microphone, and overall performance are functioning as intended. Here’s how you can effectively test the rewired headset:
- Audio playback test: Connect the headset to a compatible audio source and play various audio tracks to assess the quality and clarity of the sound output. Ensure that both earpieces are producing balanced audio and that there are no distortions or irregularities in the sound.
- Microphone test: If your headset includes a microphone, perform a test recording or use voice communication software to confirm that the microphone is capturing audio accurately and without distortion. Verify that the microphone’s input is clear and free from any unwanted noise.
- Functional controls test: If your headset features inline controls for volume, mute, or other functions, test these controls to ensure that they are responsive and properly integrated with the audio playback and microphone functions.
- Comfort and fit test: Wear the headset for an extended period to assess its comfort and fit. Ensure that the ear cushions provide adequate padding and that the headband is adjustable and secure, allowing for prolonged use without discomfort.
- Longevity test: As part of the testing process, consider using the headset for an extended period to gauge its longevity and performance over time. This will help identify any potential issues that may arise with prolonged use.
By conducting thorough testing of the rewired Hunterspider gaming headset, you can confidently ascertain the success of the rewiring process and address any remaining issues before resuming regular use. Testing ensures that the headset meets your expectations in terms of audio quality, functionality, and comfort, providing a rewarding outcome for your repair efforts.
Conclusion
Embarking on the journey of rewiring your Hunterspider gaming headset has not only allowed you to restore a valuable piece of technology but has also provided you with a hands-on learning experience in electronics repair. By following the step-by-step process outlined in this guide, you’ve gained insights into the internal components of your headset, honed your soldering skills, and successfully revived a device that may have otherwise been destined for disposal.
Throughout the rewiring process, you’ve demonstrated patience, precision, and a willingness to delve into the intricacies of electronics repair. As a result, you’ve not only saved money by avoiding the purchase of a new headset but also contributed to the reduction of electronic waste by extending the lifespan of your existing device.
Moreover, the knowledge and skills acquired through this hands-on project have empowered you to tackle future DIY electronics repairs with confidence. Whether it’s repairing frayed wires, replacing components, or troubleshooting connectivity issues, you’re now equipped with the expertise to address similar challenges in the realm of electronic devices.
As you enjoy the fully functional and rewired Hunterspider gaming headset, take pride in the accomplishment of revitalizing a piece of technology through your own efforts. The satisfaction of breathing new life into a once-troubled device serves as a testament to your resourcefulness and determination to overcome technical challenges.
By embracing the process of rewiring your gaming headset, you’ve not only revitalized a piece of technology but also cultivated valuable skills and an appreciation for the inner workings of electronic devices. As you continue to explore the realm of DIY electronics and repairs, may your newfound expertise continue to serve you well in future endeavors.