Introduction
So, you were in the middle of an intense gaming session when disaster struck – the jack of your gaming headset completely detached from the microphone. This frustrating situation can disrupt your gaming experience and leave you feeling at a loss for what to do next. However, fear not! With a little know-how and the right tools, you can fix this issue and get back to enjoying your favorite games with crystal-clear audio.
In this guide, we will walk you through the process of repairing a broken gaming headset jack that has come completely out of the microphone. Whether the jack was accidentally yanked out or simply became loose over time, we've got you covered. By following the steps outlined in this tutorial, you can save money on costly replacements and gain a sense of accomplishment by successfully repairing your headset on your own.
Throughout this guide, we'll provide clear instructions and tips to help you navigate the repair process with confidence. From assessing the damage to reattaching the jack and testing the repaired headset, we'll cover each step in detail. By the end of this tutorial, you'll have the knowledge and skills to tackle this repair project like a pro.
So, grab your tools and get ready to breathe new life into your broken gaming headset. With a bit of patience and determination, you'll soon be back in the game, enjoying immersive audio and seamless communication with your fellow gamers. Let's dive into the process of fixing your broken gaming headset jack and reclaim the joy of uninterrupted gaming sessions.
Assessing the Damage
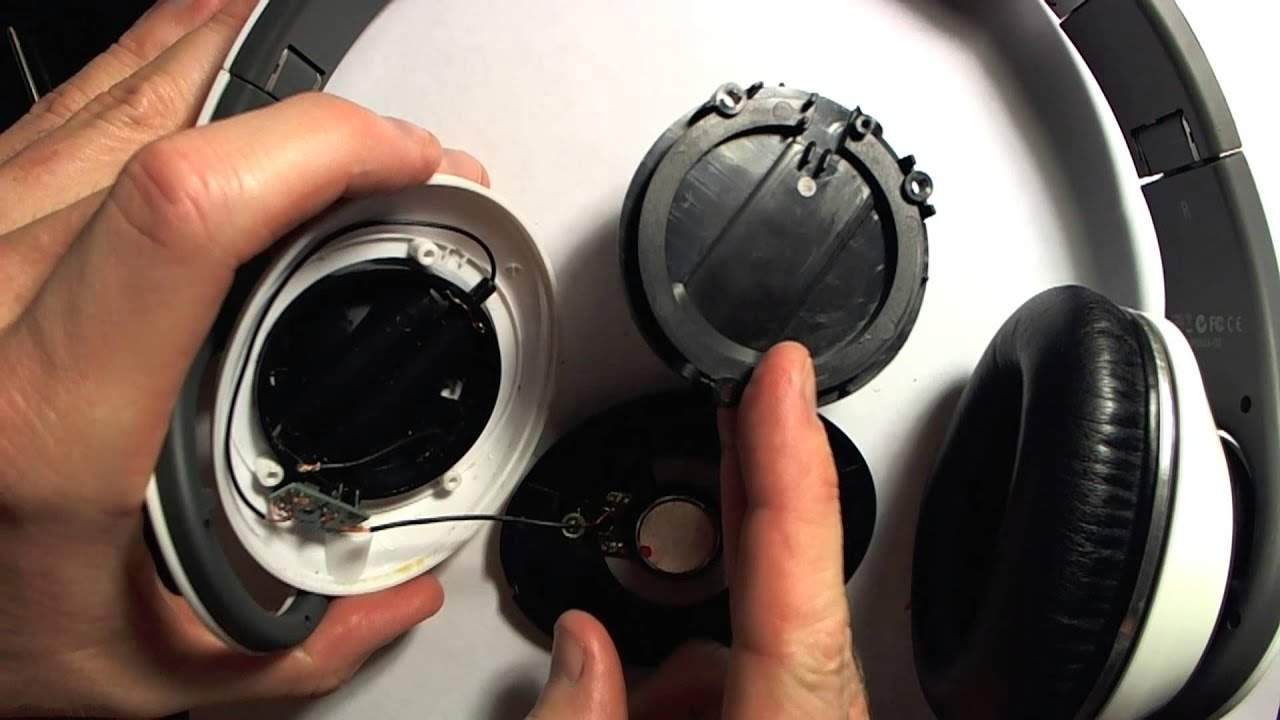
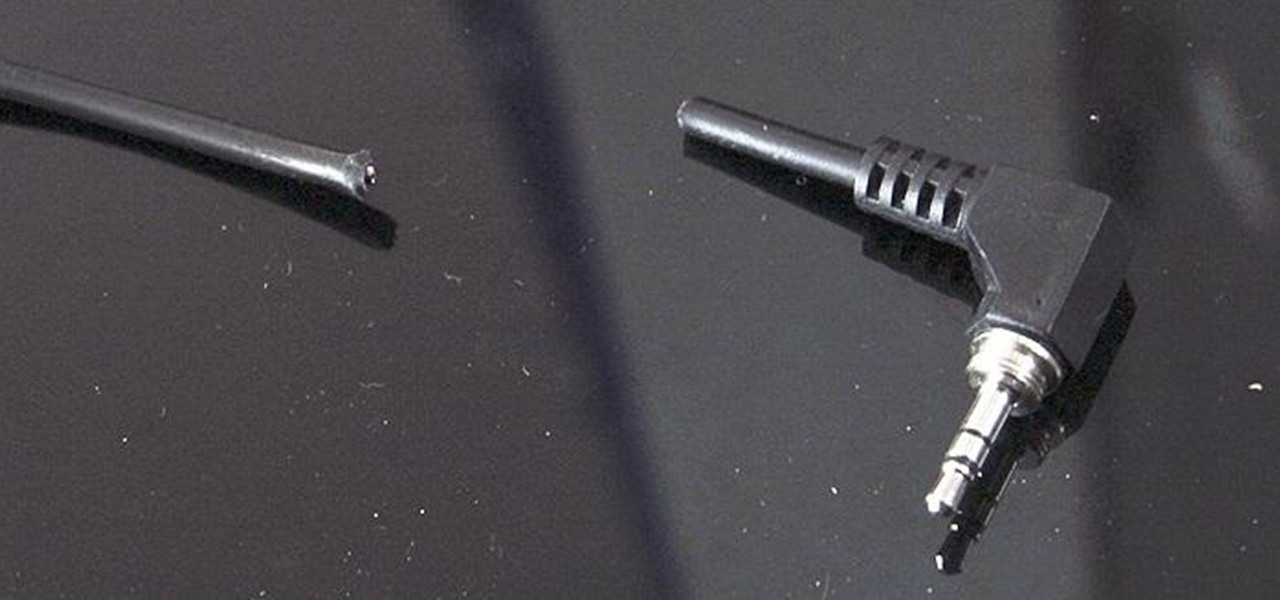
Before diving into the repair process, it’s crucial to assess the extent of the damage to your gaming headset. Start by carefully examining the detached jack and the microphone to determine the cause of the issue. Look for any visible damage, such as broken wires, a damaged jack, or loose components. Additionally, check for any signs of wear and tear that may have contributed to the jack coming out of the microphone.
Inspect the jack itself to see if any internal components, such as wires or soldering connections, are exposed or damaged. If the jack appears intact externally, gently wiggle it to see if there is any movement or if it feels loose. This can help identify any underlying issues that may have led to the detachment.
Next, examine the microphone to ensure that the port where the jack should be attached is undamaged. Look for any signs of wear or stress around the port, as this could indicate a history of strain on the connection. If the port appears damaged or deformed, it may require additional attention during the repair process.
It’s also important to consider the cause of the detachment. Was the jack forcefully pulled out, or did it become loose over time? Understanding the root cause can provide valuable insight into preventing similar issues in the future.
By thoroughly assessing the damage, you’ll gain a clearer understanding of the repair task ahead and can prepare accordingly. This initial inspection sets the stage for the subsequent steps, ensuring that you approach the repair process with a comprehensive understanding of the issue at hand.
Gathering the Necessary Tools
Before embarking on the repair process, it’s essential to gather the appropriate tools to ensure a smooth and successful headset jack repair. Having the right tools at your disposal will streamline the repair process and help you achieve professional-quality results. Here’s a list of the essential tools you’ll need:
- Soldering Iron: A soldering iron is a crucial tool for reattaching the detached jack to the microphone. Opt for a soldering iron with a fine tip to ensure precision during the soldering process.
- Solder Wire: High-quality solder wire is essential for creating a strong and reliable connection between the jack and the microphone. Look for solder wire with a rosin core for improved conductivity.
- Wire Strippers: Wire strippers are necessary for preparing the wires before soldering. Choose wire strippers that can handle the gauge of the headset wires with precision.
- Heat Shrink Tubing: Heat shrink tubing provides insulation and protection for the soldered connections. Select heat shrink tubing that fits snugly over the repaired area and can be shrunk to the appropriate size.
- Small Phillips Screwdriver: A small Phillips screwdriver will come in handy if the repair process involves disassembling any components of the headset or accessing internal wiring.
- Needle-Nose Pliers: Needle-nose pliers are useful for handling small components and securing wires during the repair process. They provide precision and control when working in tight spaces.
- Multi-Meter: A multi-meter can be used to test the continuity of wires and ensure proper connections before and after the repair. This tool is valuable for troubleshooting any electrical issues.
By gathering these essential tools, you’ll be well-equipped to tackle the repair process with confidence and precision. Additionally, having these tools on hand will minimize interruptions during the repair, allowing you to focus on restoring your gaming headset to optimal functionality.
Reattaching the Jack to the Microphone
With the necessary tools at your disposal, you’re ready to begin the process of reattaching the detached jack to the microphone of your gaming headset. Follow these step-by-step instructions to ensure a successful repair:
- Prepare the Wires: Start by carefully stripping the insulation from the exposed wires of the headset cable. Use wire strippers to remove a small section of insulation, exposing the individual wires while being cautious not to damage the conductive wires.
- Prepare the Jack: If the detached jack is still intact and undamaged, examine the internal wiring and terminals. Ensure that the terminals are clean and free of any debris or old solder. If necessary, gently clean the terminals using a small brush or cotton swab.
- Solder the Connections: Apply a small amount of solder to the terminals of the jack, ensuring that the solder flows smoothly and evenly. Then, carefully solder the corresponding headset wires to the appropriate terminals on the jack, maintaining a secure and reliable connection.
- Insulate the Connections: Once the wires are soldered to the jack, slide heat shrink tubing over each soldered connection. Use a heat source, such as a heat gun or a lighter, to shrink the tubing and provide insulation and protection for the soldered joints.
- Secure the Jack: If the repair process involves reassembling any components of the headset, carefully secure the jack in its designated position, ensuring a snug fit. Use a small Phillips screwdriver if necessary to secure the jack in place.
- Test the Connection: After reattaching the jack, use a multi-meter to test the continuity of the connections and ensure that the soldered joints are secure and functional. This step is crucial for verifying the integrity of the repair before proceeding.
By following these detailed steps and exercising precision and care, you can successfully reattach the jack to the microphone of your gaming headset. This process restores the crucial connection between the headset and the microphone, allowing you to enjoy uninterrupted audio and communication during your gaming sessions.
Testing the Repaired Headset
After reattaching the jack to the microphone, it’s essential to thoroughly test the repaired headset to ensure that the audio and microphone functionalities are fully restored. Follow these steps to conduct a comprehensive test of your gaming headset:
- Audio Playback Test: Connect the repaired headset to your gaming device and play audio from a reliable source, such as music or a gaming application. Listen carefully for any distortions, crackling sounds, or interruptions in the audio playback. Verify that both the left and right channels are functioning correctly.
- Microphone Test: Utilize a voice recording application or the communication feature in a game to test the microphone functionality. Speak into the microphone and record your voice, then play back the recording to ensure that the microphone captures clear and undistorted audio. Additionally, test the microphone’s sensitivity and noise-cancellation capabilities in various environments.
- Movement Test: While wearing the repaired headset, move and adjust the cable to simulate typical gaming movements and adjustments. Pay attention to any signal interruptions or audio distortions that may occur during cable movement. Verify that the repaired jack maintains a secure connection throughout these movements.
- Communication Test: If your gaming headset is equipped with a communication feature, engage in a conversation with a fellow gamer or friend to test the clarity and reliability of the communication channel. Ensure that the repaired headset facilitates seamless and uninterrupted communication.
By conducting these thorough tests, you can verify the effectiveness of the repair and identify any potential issues that may require further attention. If any irregularities or performance issues are detected during testing, revisit the repair process to address the underlying causes and ensure the optimal functionality of your gaming headset.
Upon successful completion of the testing phase, you can confidently return to your gaming sessions with the assurance that your repaired headset is fully functional and capable of delivering immersive audio and seamless communication. Your diligence and expertise in repairing the broken headset have restored its performance, allowing you to enjoy uninterrupted gaming experiences once again.