Introduction
If you've been enjoying the superior sound quality and exceptional noise-canceling capabilities of your Sony headphones, but have noticed a decline in battery life, it may be time to replace the battery. While this may seem like a daunting task, fear not! With the right tools and a step-by-step guide, you can easily change the battery in your Sony noise-canceling headphones and restore them to their former glory.
In this comprehensive guide, we will walk you through the process of replacing the battery in your Sony noise-canceling headphones, ensuring that you can continue to enjoy your favorite music, podcasts, or audiobooks without any interruptions. Whether you're a tech-savvy individual or a novice in the world of headphone maintenance, this guide will provide you with the necessary insights and instructions to successfully complete the battery replacement process.
By following the steps outlined in this guide, you'll not only extend the lifespan of your beloved Sony headphones but also save money by avoiding the need for professional repairs or replacements. So, without further ado, let's gather the necessary tools and embark on this rewarding journey to breathe new life into your Sony noise-canceling headphones.
Step 1: Gather the Necessary Tools
Before diving into the battery replacement process, it’s essential to gather the required tools to ensure a smooth and efficient procedure. Here’s a list of the tools you’ll need:
- Replacement Battery: The first and most crucial item on your list is the replacement battery specifically designed for your Sony noise-canceling headphones. It’s imperative to acquire a compatible battery to guarantee optimal performance and safety.
- Small Screwdriver Set: A set of precision screwdrivers, including Phillips and flathead screwdrivers, will be indispensable for accessing the battery compartment and removing the old battery.
- Clean Cloth: Keeping a clean cloth or microfiber towel handy is advisable for wiping any dust or debris that may have accumulated during the battery replacement process.
- Workspace: Find a well-lit and spacious area to work on, preferably with a flat surface to prevent any small components from getting lost during the procedure.
By ensuring that you have all the necessary tools at your disposal, you’ll be well-prepared to undertake the battery replacement process with confidence and precision. With these tools in hand, you’re ready to move on to the next step: locating the battery compartment in your Sony noise-canceling headphones.
Step 2: Locate the Battery Compartment
Before proceeding with the battery replacement, it’s essential to familiarize yourself with the location of the battery compartment in your Sony noise-canceling headphones. While the specific design may vary depending on the model, most Sony headphones feature a discreetly concealed battery compartment to maintain a sleek and seamless appearance.
To locate the battery compartment:
- Refer to the User Manual: If you have the user manual that came with your headphones, it’s advisable to consult it for detailed instructions on accessing the battery compartment. The manual typically contains illustrations and step-by-step guidance tailored to your specific headphone model.
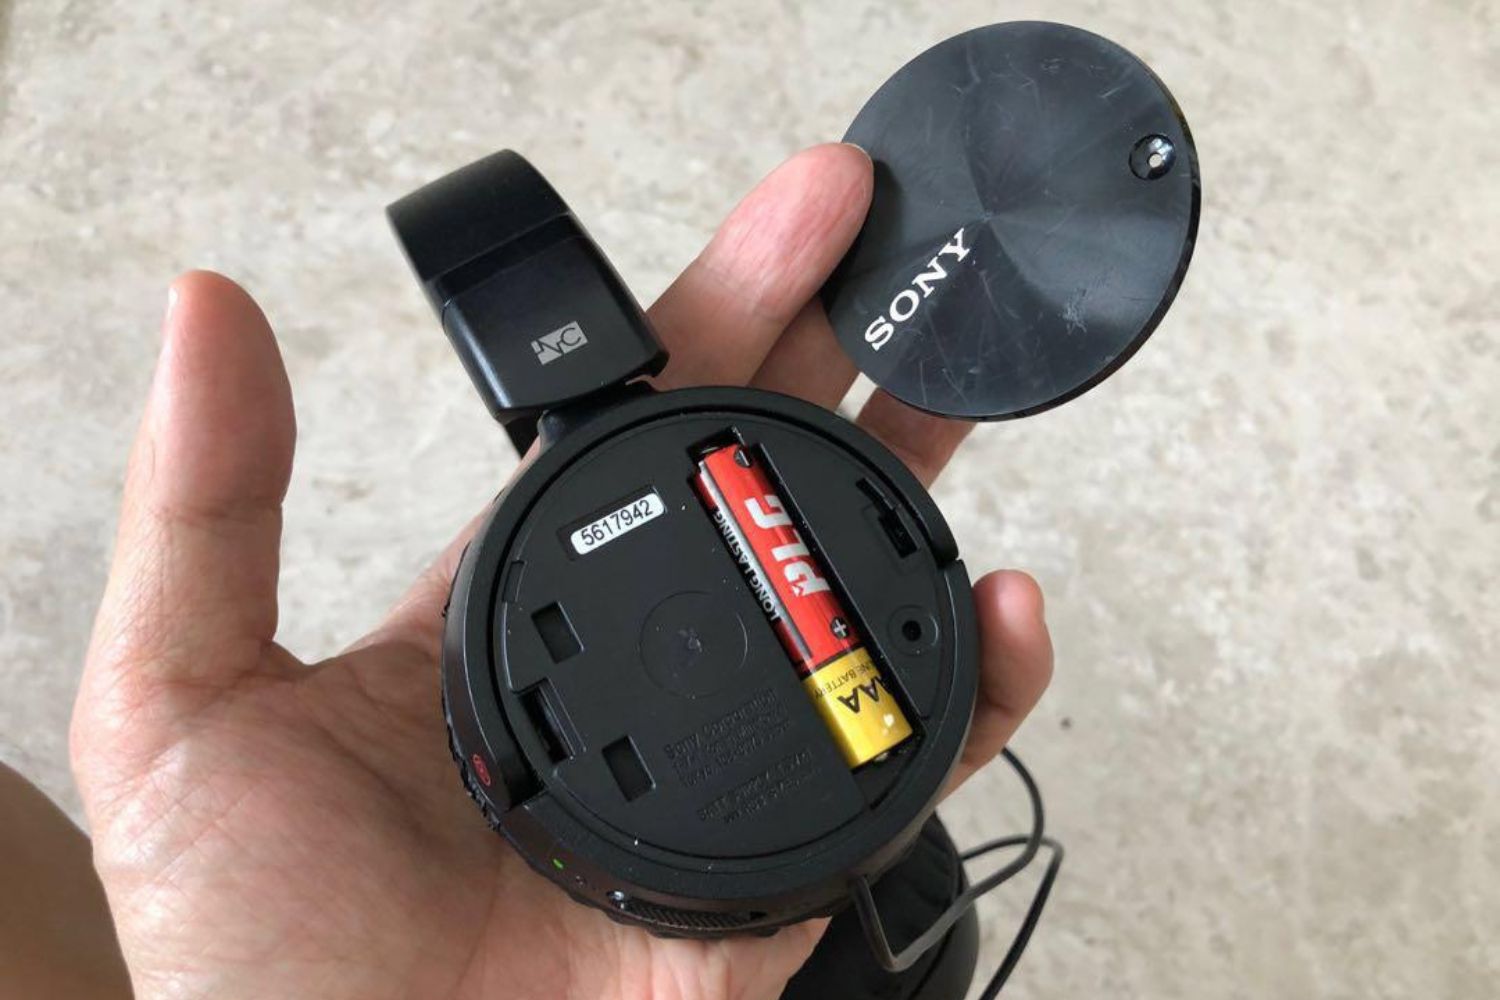
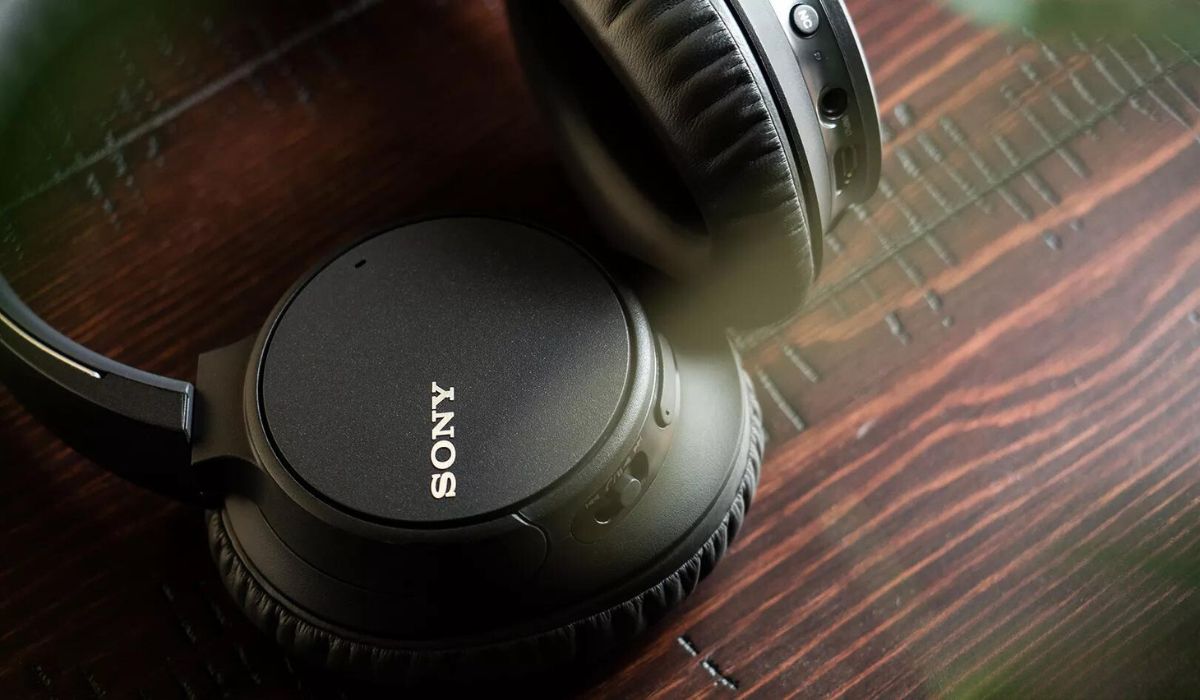
- Inspect the Ear Cups: Carefully examine the ear cups of your headphones, as the battery compartment is commonly situated within one of the ear cups. Look for subtle indentations, removable panels, or small markings that may indicate the presence of the battery compartment.
- Online Resources: In the absence of a user manual, consider visiting the official Sony support website or reputable tech forums, where you may find visual guides or instructional videos demonstrating the process of locating the battery compartment for your particular headphone model.
By taking the time to identify the precise location of the battery compartment, you’ll be better equipped to proceed with the subsequent steps of removing the old battery and inserting the new one. Once you’ve successfully located the battery compartment, you’re ready to advance to the next stage of the battery replacement process.
Step 3: Remove the Old Battery
Now that you’ve located the battery compartment, it’s time to carefully remove the old battery from your Sony noise-canceling headphones. This step requires precision and attention to detail to ensure that the old battery is safely extracted without causing any damage to the headphone components.
Here’s a systematic approach to removing the old battery:
- Power Off the Headphones: Before proceeding, ensure that your headphones are powered off to prevent any electrical mishaps during the battery removal process. Disconnect any charging cables and power sources to guarantee safety.
- Access the Battery Compartment: Using the appropriate screwdriver from your toolset, carefully remove any screws or fastenings securing the battery compartment cover. Exercise caution to avoid misplacing the screws, and set them aside in a secure location for reassembly later.
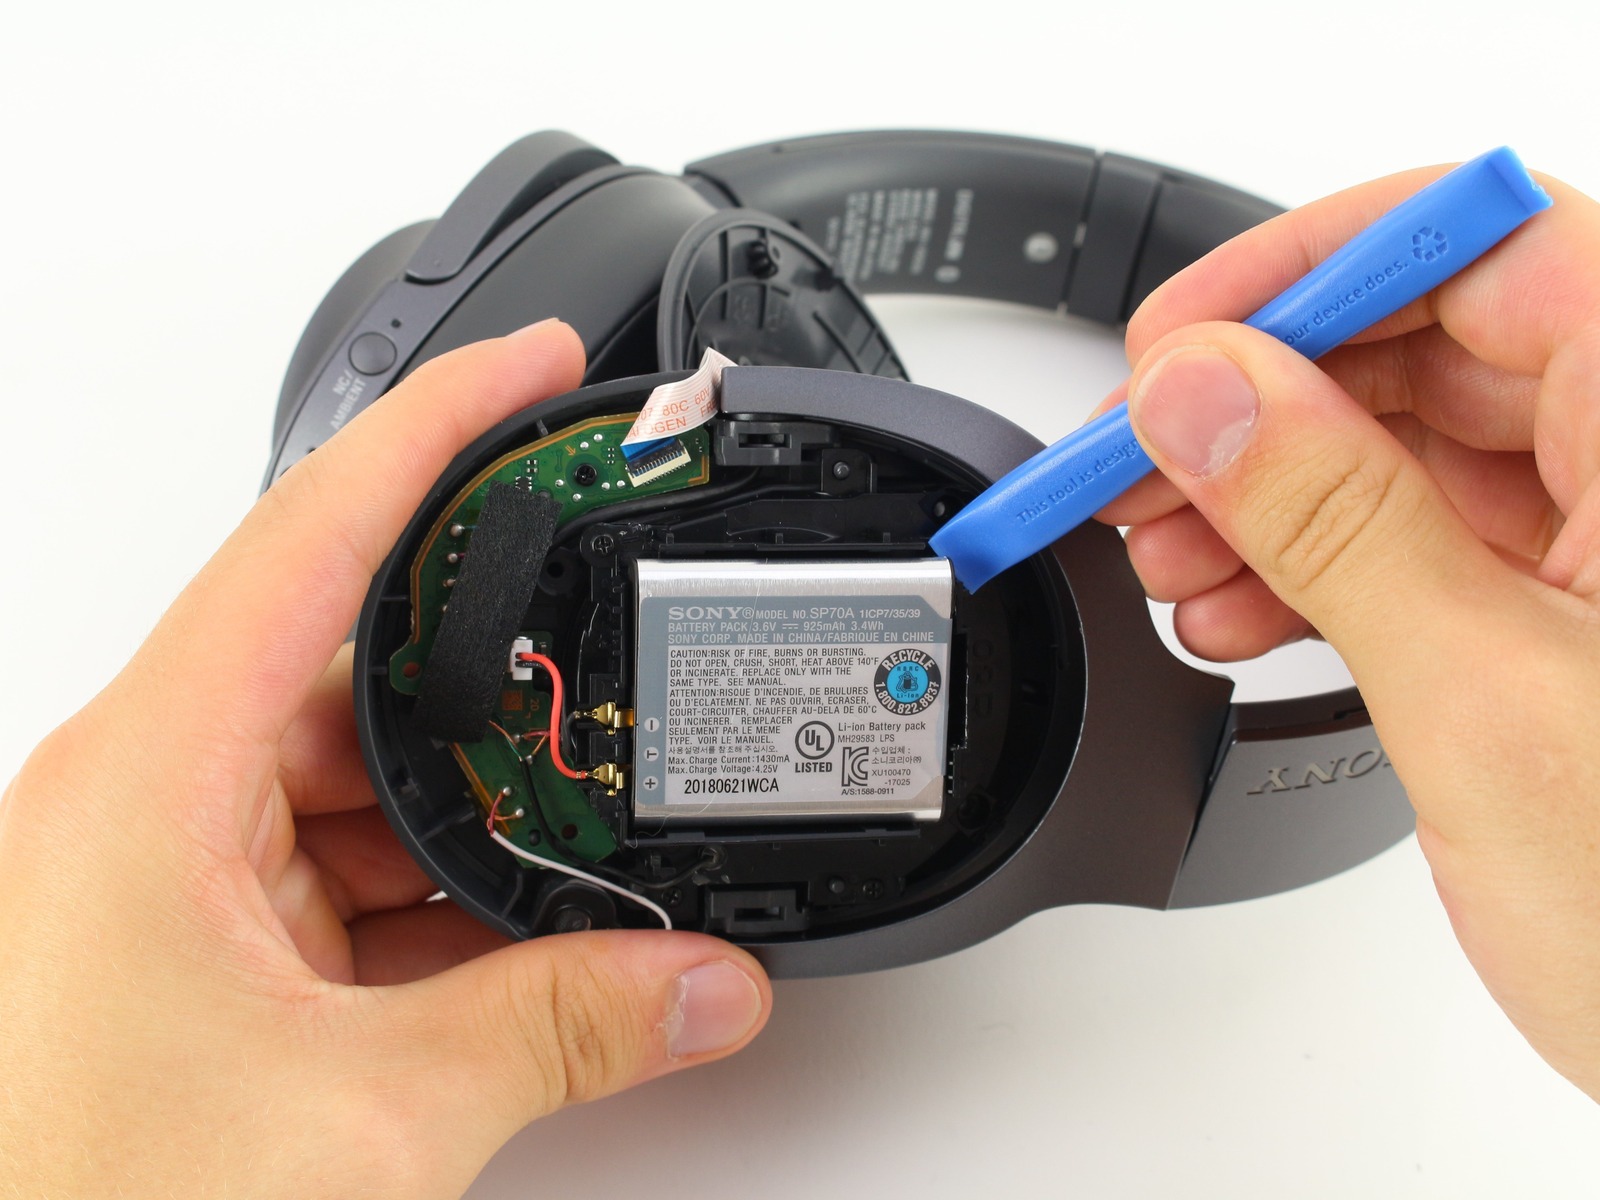
- Handle the Old Battery: Once the battery compartment is accessible, gently handle the old battery and observe how it is positioned within the compartment. Note the orientation and placement of the battery, as this will guide you when inserting the new battery.
- Remove the Old Battery: With utmost care, disconnect the old battery from its housing, ensuring that you do not exert excessive force or cause any undue strain on the headphone’s internal components. If the old battery is secured with clips or connectors, release them methodically to detach the battery from its terminals.
- Dispose of the Old Battery Responsibly: Once the old battery is removed, it’s crucial to dispose of it in accordance with local regulations and environmental guidelines. Many communities offer recycling programs for electronic waste, including batteries, to minimize ecological impact.
By following these steps diligently, you can safely extract the old battery from your Sony noise-canceling headphones, paving the way for the next phase of the battery replacement process: inserting the new battery.
Step 4: Insert the New Battery
With the old battery successfully removed, it’s time to proceed with inserting the new battery into your Sony noise-canceling headphones. This step marks a pivotal moment in the battery replacement process, as it sets the stage for revitalizing your headphones and restoring their power source to optimal condition.
Here’s a detailed guide on how to insert the new battery:
- Inspect the Battery Compartment: Before inserting the new battery, take a moment to inspect the battery compartment to ensure it is clean and free from any debris or foreign objects. Use a clean cloth to gently wipe the interior of the compartment if necessary.
- Position the New Battery: Carefully orient the new battery in accordance with the markings or indicators observed during the removal of the old battery. Align the terminals of the new battery with the corresponding connectors or contacts within the compartment, ensuring a snug and secure fit.
- Secure the Battery: If the new battery features securing clips or fastenings, follow the manufacturer’s guidelines to affix the battery firmly in place. Pay close attention to any locking mechanisms or retention features to prevent the battery from dislodging during use.
- Replace the Battery Compartment Cover: Once the new battery is securely positioned, carefully reattach the battery compartment cover, ensuring that any screws or fastenings are reinstalled according to the original configuration. Tighten the screws firmly but avoid over-tightening to prevent damage.
- Power On the Headphones: After completing the battery insertion process, power on your headphones to verify that the new battery is functioning correctly. If the headphones power up as expected, it indicates a successful installation of the new battery.
By following these steps meticulously, you can effectively insert the new battery into your Sony noise-canceling headphones, bringing them one step closer to delivering uninterrupted audio enjoyment. With the new battery in place, you’re ready to proceed to the final step: testing the headphones to ensure that they are operating optimally.
Step 5: Test the Headphones
After successfully replacing the battery in your Sony noise-canceling headphones, it’s crucial to conduct a thorough testing phase to ensure that the headphones are functioning as intended. This step serves as the final checkpoint in the battery replacement process, allowing you to validate the efficacy of the new battery and confirm that your headphones are ready to deliver exceptional audio experiences once again.
Here’s a comprehensive approach to testing your headphones:
- Power On the Headphones: Begin by powering on your headphones and allowing them to initialize. Check for any indicator lights or display notifications that confirm the headphones are receiving power from the new battery.
- Activate Noise-Canceling Function: If your Sony headphones feature noise-canceling capabilities, activate this function to assess its performance. Listen for a significant reduction in ambient noise, indicating that the noise-canceling feature is operational.
- Audio Playback Test: Play a variety of audio content, such as music tracks, podcasts, or audio samples, to evaluate the sound quality and clarity. Pay attention to any distortions, irregularities, or fluctuations in volume that may indicate issues with the new battery or the headphone’s electrical system.
- Extended Usage Test: Wear the headphones for an extended period to gauge their battery life and overall performance. Monitor the battery level to ensure that it remains stable and that the headphones maintain consistent functionality throughout the testing duration.
- Check Charging Functionality: If your headphones are rechargeable, verify that the new battery allows for successful charging. Connect the headphones to a power source and observe the charging indicator to confirm that the battery is accepting a charge and replenishing its energy reserves.
By meticulously testing your headphones after the battery replacement, you can ascertain their operational integrity and address any potential issues before resuming regular usage. If the headphones pass the testing phase with flying colors, you can rest assured that the new battery has revitalized their performance, allowing you to indulge in uninterrupted audio bliss.
Conclusion
Congratulations! By following the step-by-step guide to replacing the battery in your Sony noise-canceling headphones, you’ve successfully revitalized your beloved audio companion and restored its power source to optimal condition. This comprehensive process has empowered you to undertake a crucial maintenance task with confidence and precision, ensuring that your headphones continue to deliver exceptional sound quality and uninterrupted listening experiences.
Throughout this journey, you’ve acquired valuable insights into the intricate process of battery replacement, from gathering the necessary tools to meticulously testing the headphones after the installation of the new battery. By adhering to the detailed instructions and best practices outlined in this guide, you’ve not only extended the lifespan of your Sony headphones but also gained a deeper understanding of their internal mechanisms and maintenance requirements.
As you revel in the renewed vitality of your Sony noise-canceling headphones, remember that periodic maintenance and care are essential to preserve their performance and longevity. Whether it’s replacing the battery, cleaning the ear pads, or storing the headphones in a safe environment, your commitment to proper upkeep will ensure that they continue to enrich your auditory experiences for years to come.
With your headphones now equipped with a fresh battery and validated through rigorous testing, you can confidently immerse yourself in your favorite music, podcasts, or immersive audio content, knowing that your Sony headphones are primed to deliver uncompromised sonic bliss.
Embrace the enhanced functionality and extended battery life of your Sony noise-canceling headphones, and revel in the seamless audio experiences that await you. Your dedication to maintaining and rejuvenating your headphones serves as a testament to your appreciation for superior sound quality and unwavering commitment to audio excellence.