Introduction
Getting a Duracell battery unstuck from Sony noise-canceling headphones can be a frustrating experience, but with the right approach, it's entirely manageable. Whether the battery is stuck due to swelling, corrosion, or simple mechanical issues, it's essential to address the situation promptly to prevent any further damage to the headphones. This guide will walk you through the necessary steps to safely and effectively remove the stuck battery without causing harm to the device.
It's important to approach this task with patience and precision, as mishandling the headphones or the battery can lead to irreversible damage. By following the steps outlined in this guide, you can increase the chances of safely dislodging the battery from your Sony noise-canceling headphones. Before you begin, gather the necessary tools and prepare to work in a well-lit, distraction-free environment. With a steady hand and the right technique, you can successfully resolve this issue and get back to enjoying your favorite tunes in no time.
In the following sections, we will discuss the tools needed for the task and provide a detailed step-by-step guide on how to safely remove the stuck Duracell battery from your Sony noise-canceling headphones. Let's dive in and address this common issue with confidence and precision.
Tools Needed
Before attempting to remove the stuck Duracell battery from your Sony noise-canceling headphones, it’s crucial to gather the necessary tools to ensure a safe and successful extraction. Here are the essential items you’ll need:
- Small Screwdriver: A precision screwdriver, ideally with a Phillips or flathead tip, will be invaluable for accessing the battery compartment and carefully maneuvering the stuck battery.
- Tweezers or Small Pliers: These tools will aid in gripping the battery or assisting with any delicate maneuvers required during the extraction process.
- Cotton Swabs and Isopropyl Alcohol: If the battery is stuck due to corrosion, these items will help clean the affected areas and facilitate safe removal.
- Protective Gloves: To protect your hands from any potential battery leakage or corrosion, it’s advisable to wear gloves while handling the headphones and the battery.
- Clean Cloth: Having a soft, lint-free cloth on hand will allow you to wipe down the headphones and ensure they remain free from any debris or residue after the battery removal.
By having these tools readily available, you’ll be well-prepared to tackle the task of freeing the stuck Duracell battery from your Sony noise-canceling headphones. With the right tools and a methodical approach, you can address the issue with confidence and minimize the risk of causing further damage to your headphones.
Step 1: Assess the Situation
Before proceeding with the battery removal process, it’s crucial to carefully assess the situation to determine the cause of the battery being stuck in your Sony noise-canceling headphones. Take the following steps to evaluate the condition of the headphones and the battery:
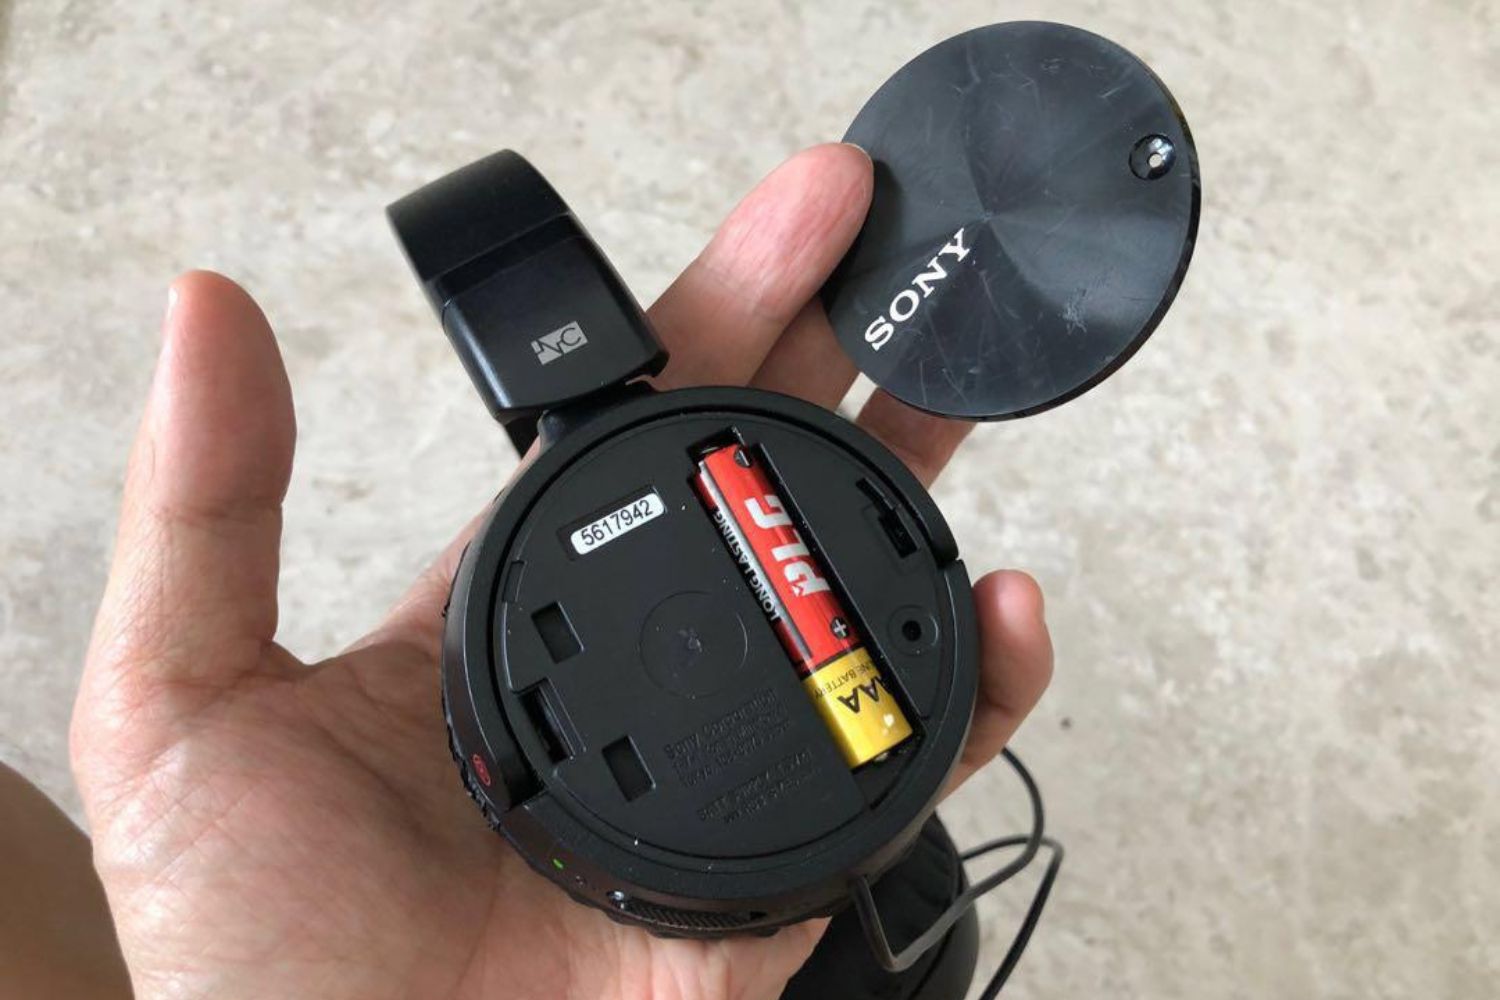
- Visual Inspection: Examine the battery compartment and surrounding areas for any signs of corrosion, leakage, or physical damage. If the battery appears swollen or there is visible corrosion, exercise caution and handle the headphones with care.
- Check for Obstructions: Ensure that there are no foreign objects obstructing the battery’s removal. Sometimes, debris or residue may accumulate around the battery, making it difficult to dislodge. Clear any obstructions carefully using a soft tool or cotton swab.
- Assess the Battery Compartment: Take note of the condition of the battery compartment and any mechanisms that secure the battery in place. Understanding the design of the compartment will help you determine the best approach for safely removing the stuck battery.
By thoroughly assessing the situation, you’ll gain valuable insights into the nature of the problem and be better equipped to proceed with the subsequent steps. This initial evaluation will inform your approach to resolving the issue and ensure that you handle the headphones and the battery with the necessary care and precision.
Step 2: Use a Small Tool
With the assessment complete, it’s time to carefully use a small tool to begin the process of dislodging the stuck Duracell battery from your Sony noise-canceling headphones. Follow these steps to proceed:
- Select the Right Tool: Choose a small screwdriver with a tip that matches the screws securing the battery compartment. If the battery compartment does not have screws, opt for a tool that can be used to gently pry the battery out without causing damage to the headphones.
- Exercise Caution: Approach the task with patience and a steady hand. Insert the small tool into the designated areas, such as the screw slots or the edges of the battery compartment, and apply gentle pressure to begin loosening the battery.
- Work Methodically: Maneuver the tool carefully, ensuring that you do not force the battery or cause any unintended damage to the headphone components. Apply consistent, controlled movements to gradually release the battery from its stuck position.
- Assess Progress: Periodically assess the progress of the battery dislodgement. If you encounter resistance or the battery does not budge, refrain from applying excessive force and reevaluate the approach to avoid causing damage to the headphones.
Using a small tool with precision and care is essential for safely initiating the process of freeing the stuck Duracell battery from your Sony noise-canceling headphones. By following these steps, you can take the necessary precautions to avoid damaging the headphones while working towards a successful resolution.
Step 3: Apply Pressure
As you proceed with the battery removal process, applying controlled pressure at the right points can help dislodge the stuck Duracell battery from your Sony noise-canceling headphones. Follow these steps to safely apply pressure and facilitate the extraction:
- Identify Pressure Points: Determine the areas where gentle pressure can be applied to encourage the battery to release from its stuck position. These may include the edges of the battery, the designated release points, or areas where the battery appears to be most firmly secured.
- Use Incremental Force: Apply incremental pressure using the small tool or tweezers, focusing on gradual movements that encourage the battery to loosen without causing damage to the headphone components. Exercise patience and refrain from using excessive force that could lead to further complications.
- Rotate and Maneuver: If applicable, carefully rotate and maneuver the battery within the compartment to dislodge it from any adhesive or mechanical constraints. Avoid abrupt movements and prioritize gentle, calculated actions to avoid unintended damage.
- Monitor the Response: Pay close attention to the response of the battery as pressure is applied. If you notice any resistance or if the battery shows signs of further entrenchment, reassess the approach and consider seeking professional assistance to avoid exacerbating the situation.
By methodically applying pressure and exercising caution throughout this step, you can increase the likelihood of safely freeing the stuck Duracell battery from your Sony noise-canceling headphones. Taking the time to approach this process with care and precision is crucial for safeguarding the integrity of the headphones and ensuring a successful outcome.
Step 4: Check for Damage
After successfully removing the stuck Duracell battery from your Sony noise-canceling headphones, it’s essential to thoroughly inspect the device for any potential damage that may have occurred during the extraction process. Follow these steps to assess the condition of the headphones and ensure that they remain in optimal working order:
- Visual Examination: Inspect the battery compartment, surrounding areas, and the battery itself for any signs of physical damage, corrosion, or leakage. If you notice any concerning indicators, such as discoloration, deformation, or residue, proceed with caution.
- Test Functionality: Once the battery is removed, test the functionality of the headphones to ensure that they continue to operate as intended. Check for any irregularities in sound quality, connectivity, or the activation of noise-canceling features to identify any potential issues that may have arisen during the battery extraction process.
- Clean and Maintain: Use a clean cloth and isopropyl alcohol to gently wipe down the battery compartment and affected areas, removing any residue or debris that may have accumulated during the battery removal. This step will help maintain the cleanliness and integrity of the headphones.
- Monitor for Changes: Keep a close eye on the headphones in the following days, observing their performance and ensuring that no delayed effects from the battery extraction process manifest. If you notice any unexpected changes or malfunctions, consider seeking professional assistance to address the issue promptly.
By diligently checking for damage and taking proactive measures to maintain the condition of your Sony noise-canceling headphones, you can mitigate the risk of potential complications and ensure that the device continues to provide an optimal listening experience.
Conclusion
Successfully removing a stuck Duracell battery from your Sony noise-canceling headphones requires patience, precision, and a methodical approach. By following the steps outlined in this guide and utilizing the necessary tools, you can address this common issue with confidence and safeguard the integrity of your headphones.
Throughout the process, it’s crucial to prioritize the careful assessment of the situation, the use of appropriate tools, and the application of controlled pressure to dislodge the battery without causing damage. Additionally, conducting a thorough inspection for any potential damage and maintaining the cleanliness of the headphones are essential steps to ensure their continued functionality.
Remember, if you encounter challenges or are uncertain about the best course of action, seeking professional assistance can help prevent further complications and preserve the quality of your Sony noise-canceling headphones. By approaching this task with care and attention to detail, you can overcome the obstacle of a stuck battery and return to enjoying your favorite music with headphones that remain in excellent condition.
With the guidance provided in this article, you are equipped to address the issue of a stuck Duracell battery in your Sony noise-canceling headphones effectively and responsibly. By prioritizing the well-being of your headphones and handling the extraction process with care, you can navigate this common challenge with confidence and maintain the optimal performance of your audio device.