Introduction
Welcome to this comprehensive guide on how to install the Newpal Video Doorbell with Chime! In today’s fast-paced world, security is a top priority for homeowners. Your front door is the first line of defense against potential intruders, and having a video doorbell can greatly enhance your home’s security. The Newpal Video Doorbell with Chime is a cutting-edge device that allows you to monitor and communicate with visitors at your doorstep from anywhere using your smartphone.
With its easy installation process, the Newpal Video Doorbell with Chime is a perfect addition to your home security system. This guide will walk you through each step, providing you with clear instructions and valuable tips to ensure a successful installation. Regardless of your level of technical expertise, you’ll find this guide to be straightforward and easy to follow.
By installing the Newpal Video Doorbell with Chime, you’ll have greater peace of mind knowing that you can see and speak to visitors, whether you’re at home, at work, or even on vacation. Additionally, the built-in motion detection feature will alert you to any suspicious activity outside your door, providing an extra layer of security.
Before we dive into the installation process, it’s important to note that the Newpal Video Doorbell with Chime requires a stable Wi-Fi connection and a smartphone or tablet with the compatible mobile app. Make sure you have these prerequisites in place before proceeding with the installation.
Now, let’s get started with unboxing your Newpal Video Doorbell with Chime and preparing for the installation process. Get ready to enhance the security of your home and enjoy the convenience of a smart video doorbell system!
Unboxing the Newpal Video Doorbell with Chime
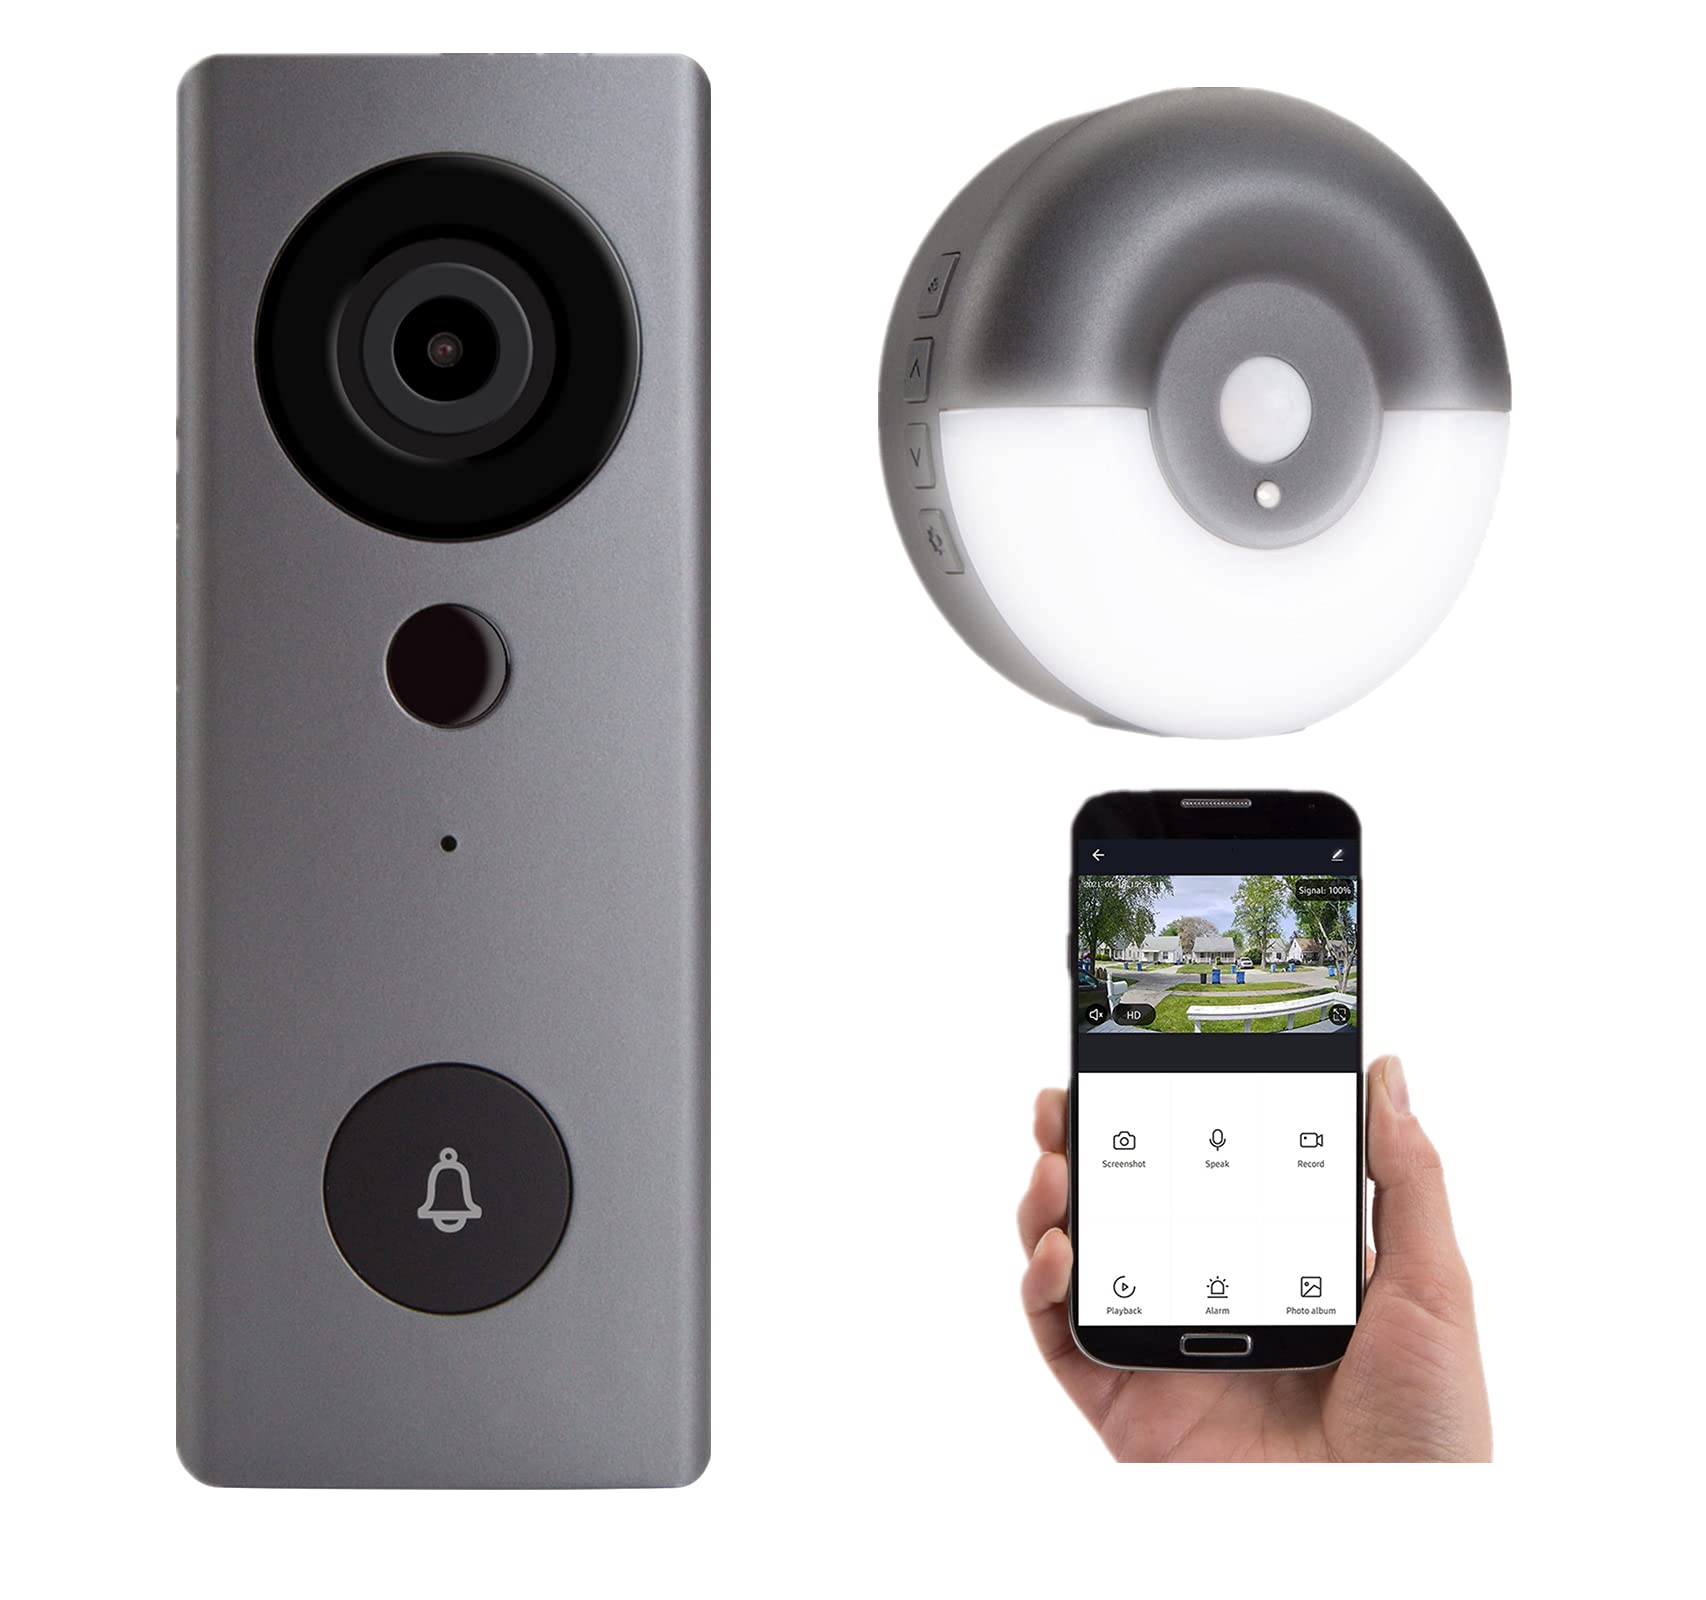
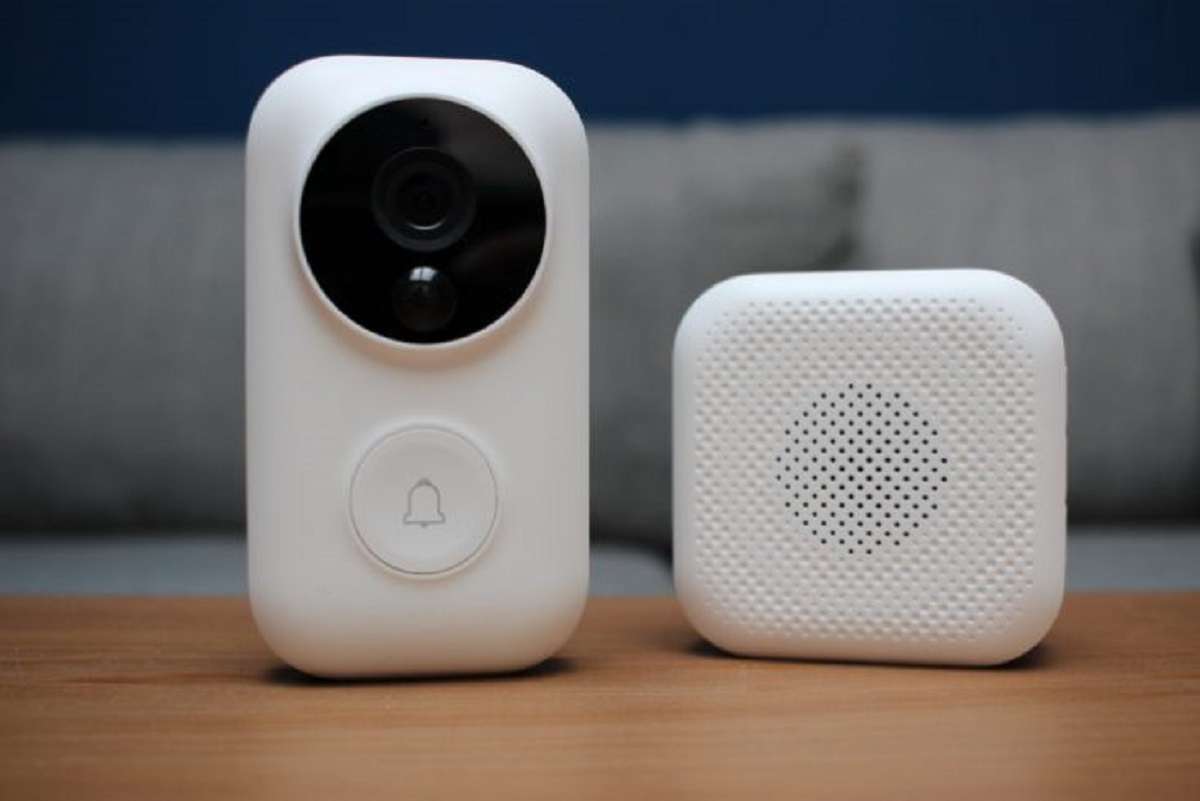
Before you begin the installation process, it’s important to unbox the Newpal Video Doorbell with Chime and familiarize yourself with its components. The packaging of the Newpal Video Doorbell with Chime includes:
- Main video doorbell unit
- Chime receiver
- Mounting bracket
- Mounting screws and anchors
- Power adapter and wires
- User manual and installation guide
Take a moment to carefully unpack each component and inspect them for any signs of damage. It’s crucial to ensure that everything is in good condition before proceeding with the installation.
The main video doorbell unit is compact and sleek, providing an unobtrusive design that blends seamlessly with your home’s exterior. On the front of the unit, you’ll find the camera lens, motion sensor, and microphone. The back of the unit houses the wiring terminals, power input, and reset button.
The chime receiver is a separate unit that emits a chime sound whenever someone presses the doorbell or when motion is detected. It connects wirelessly to the video doorbell unit and can be placed anywhere within the range of the Wi-Fi signal.
The mounting bracket is used to securely attach the video doorbell unit to your wall or door frame. It provides stability and ensures that the unit is angled correctly for best performance. The mounting screws and anchors are provided to assist with installation on different surfaces.
The power adapter and wires are essential for connecting the video doorbell to your home’s power supply. Depending on your existing doorbell setup and wiring, you may choose to use the supplied power adapter or connect it to your existing doorbell wiring.
Lastly, carefully read through the user manual and installation guide provided in the package. Familiarize yourself with the product specifications, features, and safety instructions to ensure a smooth installation experience.
With the Newpal Video Doorbell with Chime unboxed and its components in hand, we’re now ready to gather the required tools and equipment for installation.
Gathering the Required Tools and Equipment
Before you can begin installing the Newpal Video Doorbell with Chime, it’s important to gather the necessary tools and equipment. Having these items readily available will make the installation process smoother and more efficient. The tools and equipment you’ll need include:
- Screwdriver set: A screwdriver set with various types and sizes of screwdrivers will be needed to secure the mounting bracket and connect the wiring.
- Power drill: If you’re installing the video doorbell on a hard surface, such as concrete or brick, a power drill will be necessary to create holes for the mounting screws.
- Level: To ensure that the video doorbell is properly aligned and mounted straight, a level will be useful for checking the horizontal and vertical positioning.
- Tape measure: A tape measure will help you accurately measure distances and ensure proper placement of the video doorbell and mounting bracket.
- Wire strippers: If you’re connecting the video doorbell to your existing doorbell wiring, wire strippers will be needed to strip the insulation from the wires.
- Wire nuts or connectors: These will be used to secure the connections between the video doorbell and the doorbell wiring.
- Masonry drill bits (if applicable): If you’re installing the video doorbell on a hard surface, you may need masonry drill bits specifically designed to drill into concrete or brick.
- Stepladder: Depending on the height of your installation location, a stepladder may be necessary to safely reach and install the video doorbell.
- Protective gloves and safety glasses: It’s always a good idea to protect your hands and eyes during the installation process. Wear a pair of protective gloves and safety glasses to prevent any injuries.
By gathering these tools and equipment before beginning the installation, you’ll be fully prepared and minimize any potential delays or frustrations during the process.
Once you have gathered all the required tools and equipment, it’s time to proceed to the next step: preparing for installation!
Preparing for Installation
Before you start installing the Newpal Video Doorbell with Chime, it’s important to take a few preparatory steps to ensure a successful installation. These steps will help you gather the necessary information and make any necessary adjustments before moving forward. Here’s what you need to do:
- Read the user manual: Take the time to thoroughly read the user manual and familiarize yourself with the installation process. Pay close attention to any specific instructions or precautions provided by the manufacturer.
- Choose a suitable installation location: Consider the optimal placement for your video doorbell. Look for a spot that provides a clear view of your front porch or entrance, preferably at eye level. Ensure the location is within the Wi-Fi signal range and has access to a power supply.
- Check your existing doorbell setup: If you have an existing doorbell, it’s essential to check its wiring and functionality. Verify that your doorbell wiring is compatible with the Newpal Video Doorbell with Chime. If there are any issues, you may need to consult a professional electrician or consider alternative installation options.
- Check your Wi-Fi signal strength: Since the Newpal Video Doorbell with Chime relies on a stable Wi-Fi connection, it’s crucial to ensure that your Wi-Fi signal is strong enough in the chosen installation location. Use your smartphone or tablet to check the signal strength in that area.
- Make necessary Wi-Fi adjustments: If the Wi-Fi signal strength is weak, consider installing a Wi-Fi extender or relocating your router to ensure a reliable connection. This will help prevent potential issues with the video doorbell’s performance.
- Charge the battery (if applicable): If your Newpal Video Doorbell with Chime has a rechargeable battery, make sure it is fully charged before proceeding with the installation. This will ensure uninterrupted operation and prevent any potential issues during the setup process.
- Prepare the necessary tools and equipment: Ensure that you have all the required tools and equipment ready. Consult the previous section for a comprehensive list of the tools you’ll need for the installation.
By following these preparatory steps, you’ll be setting a solid foundation for a smooth and successful installation process. With everything in place, you are now ready to move on to installing the doorbell receiver chime and mounting the video doorbell!
Installing the Doorbell Receiver Chime
The next step in installing the Newpal Video Doorbell with Chime is to set up and install the doorbell receiver chime. The chime is responsible for emitting a sound whenever the video doorbell is pressed or when motion is detected. Follow these steps to install the chime:
- Choose a suitable location: Select a spot for the chime receiver that is within the wireless range of the video doorbell and easily accessible. It should be in an area where you can hear the chime throughout your home.
- Plug in the chime: Plug the chime receiver into an electrical outlet near the chosen location. Ensure that the outlet is functioning correctly. The chime should power on and be ready for pairing.
- Pair the chime with the video doorbell: Open the Newpal mobile app on your smartphone and navigate to the settings section. Follow the app’s instructions to pair the chime receiver with the video doorbell. This step may involve scanning a QR code or entering a unique code provided with the chime.
- Customize chime settings (optional): Once the chime is successfully paired, you can customize its settings. Some video doorbells offer various chime sounds or volume levels. Explore the app settings to find options that suit your preferences.
- Test the chime: Press the doorbell button on the video doorbell or trigger the motion sensor to test the chime. Make sure you can hear the sound emitted from the chime receiver. If the chime isn’t working, double-check the connection and try resetting the pairing process.
- Adjust chime placement if needed: If you find that the chime’s sound volume is too low or too loud in certain areas of your home, you may need to adjust its placement. Try relocating the chime to a more central location or use an extender if available.
Following these steps will ensure that the doorbell receiver chime is properly installed and functioning. Having the chime in place will allow you to receive audible notifications whenever someone presses the video doorbell or when motion is detected. Now, it’s time to move on to the next phase: mounting the video doorbell.
Mounting the Video Doorbell
Now that you have installed the doorbell receiver chime, it’s time to mount the Newpal Video Doorbell in its designated location. Follow these steps to ensure a secure and stable installation:
- Choose the installation location: Select a suitable location for mounting the video doorbell. It should be within the Wi-Fi signal range, have a clear view of your front porch or entrance, and allow for easy access to the wiring and power source.
- Attach the mounting bracket: Using the provided screws, attach the mounting bracket to the chosen location. Make sure it is level and securely fastened to ensure stability.
- Check alignment and positioning: Place the video doorbell onto the mounting bracket and check its alignment. Adjust the positioning if needed to ensure a clear view and optimal camera angle.
- Mark the screw holes: Once the video doorbell is in the desired position, use a pencil or marker to mark the screw holes on the mounting bracket. This will serve as a guide when drilling or screwing in the screws.
- Remove the video doorbell: Take the video doorbell off the mounting bracket and set it aside for now. This will allow you to proceed with drilling or screwing in the mounting screws.
- Drill pilot holes (if applicable): If you’re mounting the video doorbell on a hard surface like concrete or brick, use a power drill with a masonry drill bit to create pilot holes at the marked screw hole locations. This will make screwing in the mounting screws easier and prevent damage to the surface.
- Secure the mounting bracket: Using the provided screws or the appropriate ones for your surface, secure the mounting bracket to the wall or door frame. Ensure that the screws are tightened firmly but not too tight to avoid damaging the bracket or surface.
- Test the stability: Gently shake the mounting bracket to ensure it is secure and stable. If it wobbles or feels loose, recheck the screws and fasten them if necessary.
- Reattach the video doorbell: Carefully place the video doorbell back onto the mounting bracket, aligning it with the screw holes. Use the provided screws to secure the video doorbell to the bracket. Tighten the screws firmly but avoid over-tightening.
- Adjust the doorbell angle: With the video doorbell in place, adjust its angle if necessary to ensure the camera provides an optimal view of the front door area.
By following these steps, you will securely mount the Newpal Video Doorbell in your chosen location. With the video doorbell in place, you are ready to move on to the next phase: wiring the video doorbell.
Wiring the Video Doorbell
Once you have successfully mounted the Newpal Video Doorbell, the next step is to connect the wiring. This step may vary depending on your specific setup and whether you are using the provided power adapter or connecting to existing doorbell wiring. Follow the appropriate instructions below:
If using the provided power adapter:
- Locate the power input terminals on the back of the video doorbell. These terminals are typically labeled “+” and “-“.
- Plug one end of the power adapter into an electrical outlet near the video doorbell installation location.
- Connect the other end of the power adapter to the corresponding terminals on the video doorbell, ensuring proper polarity (+ to + and – to -).
- Gently tuck any excess power adapter wiring behind the video doorbell or along the mounting bracket to keep it neat and out of the way.
If connecting to existing doorbell wiring:
- Locate the existing doorbell transformer, usually found near your home’s electrical panel or in the attic.
- Turn off the power to the doorbell circuit at the circuit breaker box to prevent any electrical hazards.
- Identify the two wires connected to the existing doorbell. Typically, these wires are labeled or colored as “Front” and “Trans” or have different colored insulation.
- Using wire strippers, carefully strip approximately 0.5 inches of insulation from the ends of the doorbell wires.
- Connect the striped ends of the doorbell wires to the corresponding terminals on the back of the video doorbell, ensuring proper polarity.
- Turn the power back on at the circuit breaker box and test the video doorbell to ensure it is receiving power and functioning correctly.
- If necessary, tuck any excess wiring behind the video doorbell or alongside the mounting bracket to maintain a clean and organized installation.
Please note that if you are not comfortable working with electrical wiring, it is always best to consult a professional electrician for assistance. Safety should be your top priority during the installation process.
Once you have completed the wiring process and ensured that the video doorbell is receiving power, you are now ready to move on to the next phase: connecting the chime and video doorbell.
Connecting the Chime and Video Doorbell
After successfully wiring the Newpal Video Doorbell and installing the doorbell receiver chime, it’s time to connect the two devices together. This step is essential to ensure that the chime emits a sound whenever someone presses the video doorbell or when motion is detected. Follow these steps to connect the chime and video doorbell:
- Make sure both the chime receiver and video doorbell are powered on and within range of each other.
- Open the Newpal mobile app on your smartphone and navigate to the settings section for the video doorbell.
- Select the option to add or pair additional devices, typically labeled as “Add Device” or similar.
- Follow the app’s instructions to pair the video doorbell with the chime receiver. This step may involve selecting the specific chime receiver model and confirming the pairing code provided in the user manual or on the chime itself.
- Once the pairing process is complete, test the connection by pressing the doorbell button on the video doorbell or triggering the motion sensor. The chime should emit a sound, indicating that the devices are successfully connected.
- If the connection is not working, ensure that both devices are connected to the same Wi-Fi network and within range of each other. You may need to repeat the pairing process or consult the user manual for troubleshooting tips.
- Consider customizing chime settings: Some video doorbells and chimes offer additional settings, such as volume control or different chime sounds. Explore the app settings for any customization options that suit your preferences.
By following these steps, you will successfully connect the doorbell receiver chime and the Newpal Video Doorbell. This connection is crucial for receiving audible notifications whenever someone presses the video doorbell or when motion is detected. With the chime and video doorbell connected, you are now ready to move on to the next phase: testing the video doorbell and chime functionality.
Testing the Video Doorbell and Chime
After completing the installation and connecting the chime and video doorbell, it’s important to test the functionality of both devices. This will ensure that they are working properly and that you can receive notifications when someone presses the video doorbell or when motion is detected. Follow these steps to test the video doorbell and chime:
- Make sure both the chime receiver and the Newpal Video Doorbell are powered on and connected to the same Wi-Fi network.
- Stand in front of the video doorbell and press the doorbell button. Check if you receive an audible chime sound from the chime receiver. This indicates that the connection between the two devices is working.
- Move around in front of the video doorbell to trigger the motion sensor. Once again, listen for the chime sound coming from the chime receiver. This confirms that the motion detection feature is working correctly.
- Take out your smartphone or tablet and open the Newpal mobile app. Verify that you can see a live video feed from the video doorbell on your device. This ensures that the video streaming and communication between the app and the video doorbell is functioning properly.
- Test the two-way audio feature by speaking into your smartphone or tablet while in the app. Make sure that your voice is transmitted clearly through the video doorbell’s speaker and that you can hear any responses from the person in front of the doorbell. This feature allows you to communicate with visitors remotely.
- Repeat the testing process from different locations within your home to ensure that the chime receiver can be heard clearly throughout the house. This will help you identify any areas with weak signal reception and adjust the placement of the chime receiver if necessary.
By following these steps and conducting thorough testing, you can ensure that your Newpal Video Doorbell and chime are in proper working condition. If you encounter any issues during testing, refer to the user manual or contact the manufacturer’s support for further guidance. With everything tested and confirmed, you can now enjoy the enhanced security and convenience offered by your newly installed video doorbell and chime system.
Troubleshooting Common Installation Issues
Installing the Newpal Video Doorbell with Chime may encounter a few common issues. However, with some troubleshooting, you can overcome these challenges and ensure a successful installation. Here are some common installation issues and their potential solutions:
1. Poor Wi-Fi signal strength:
– Solution: If the Wi-Fi signal strength is weak, try moving your Wi-Fi router closer to the video doorbell or consider using a Wi-Fi extender to boost the signal in that area.
2. Video doorbell not powering on:
– Solution: Check the power connections to ensure they are secure and properly connected. If using a power adapter, verify that it is plugged into a functioning electrical outlet. If wiring to an existing doorbell, make sure the wiring connections are tight and secure. Test the power source to ensure it is working correctly.
3. Chime receiver not emitting sound:
– Solution: Confirm that the chime receiver is powered on and connected to the same Wi-Fi network as the video doorbell. Ensure that the pairing between the video doorbell and chime receiver is successful. Check the chime volume settings in the app and adjust if necessary.
4. Inconsistent motion detection:
– Solution: Adjust the sensitivity settings for motion detection in the app to find the optimal level for your specific environment. Ensure that there are no obstructions or objects blocking the video doorbell’s view. Clean the camera lens from any dust or debris that may hinder motion detection.
5. Poor audio quality during communication:
– Solution: Check your internet connection to ensure it is stable and strong. Make sure both parties are speaking clearly and at a reasonable volume. Test different locations within your home to determine if there are any areas with weaker signal reception.
6. Mounting issues:
– Solution: Double-check the mounting bracket to ensure it is securely fastened and level. If the video doorbell is not aligned properly, adjust its positioning to get a clear view. Use additional screws or anchors if needed for stability.
If you encounter any other issues during the installation process, refer to the user manual and troubleshooting guide provided by Newpal. Additionally, you can reach out to their customer support for further assistance and guidance. Remember, patience and persistence in troubleshooting can lead to a successful installation of your video doorbell with chime system.
Conclusion
Congratulations! You have successfully installed the Newpal Video Doorbell with Chime, enhancing the security and convenience of your home. Through the unboxing process, gathering the necessary tools, and following the installation steps, you have set up a reliable and efficient video doorbell system.
By unboxing the Newpal Video Doorbell with Chime, you familiarized yourself with all the components and ensured they were in good condition. Gathering the required tools and equipment allowed you to be prepared for the installation process.
Preparing for installation ensured that you had a clear understanding of the product and its specifications. Mounting the video doorbell securely and wiring it correctly were vital steps that guaranteed proper functionality.
Connecting the chime and video doorbell enabled you to receive audible alerts whenever someone pressed the doorbell or when motion was detected. Finally, testing the system ensured that everything was working as expected.
Throughout the installation process, you may have encountered common issues such as Wi-Fi signal strength problems, power-related issues, or mounting challenges. However, with troubleshooting and the right solutions, these issues were resolved, ensuring a successful installation.
Now, you can enjoy the benefits of the Newpal Video Doorbell with Chime. You have the ability to monitor and communicate with visitors at your doorstep, even when you’re not at home. The motion detection feature adds an extra layer of security, providing you with peace of mind.
Remember, should you encounter any difficulties or have any questions, consult the user manual and reach out to Newpal’s customer support for further assistance. They are there to help you with any concerns you may have throughout the lifespan of your video doorbell system.
Thank you for choosing the Newpal Video Doorbell with Chime. Enjoy the convenience, security, and peace of mind that it brings to your home!