Introduction
Welcome to a step-by-step guide on how to install a Kkmoon video doorbell. With advancements in technology, video doorbells have become increasingly popular for enhancing home security and convenience. Installing a video doorbell allows you to see who is at your door, even when you’re not at home. Kkmoon is a reputable brand known for its reliable and user-friendly video doorbells.
In this guide, we will walk you through the installation process, from unboxing the doorbell to configuring the accompanying app. Whether you’re a seasoned DIY enthusiast or new to home improvement projects, this guide will provide you with all the information you need to successfully install a Kkmoon video doorbell.
Before we dive into the installation steps, it’s important to note that the specific installation process may vary depending on the model of the Kkmoon video doorbell you have purchased. Therefore, it’s essential to carefully read the instructions provided by Kkmoon for your specific model. This guide serves as a general overview to help you understand the main steps involved in installing a Kkmoon video doorbell.
Installing a video doorbell may require basic electrical knowledge and the use of tools. If you’re not comfortable working with electricity or are uncertain about any aspect of the installation, it’s highly recommended to consult a professional electrician to ensure a safe and proper installation. However, with the right precautions and following the provided instructions, many homeowners are able to install the Kkmoon video doorbell themselves.
Now, without further ado, let’s get started with the installation process and transform your home into a safer and more convenient space.
Step 1: Unboxing and Inspection
The first step in installing your Kkmoon video doorbell is to unbox and inspect the contents of the package. Carefully remove the doorbell and all accompanying accessories from the box and lay them out on a clean and flat surface.
Take a moment to inspect each item to ensure that everything is included and in good condition. The typical components of a Kkmoon video doorbell package may include:
- The video doorbell unit
- A mounting bracket
- Mounting screws
- Screwdriver or other necessary tools
- Chime connector
- User manual and installation instructions
Check that the video doorbell unit itself is free from any visible damage or defects. Inspect the mounting bracket and screws as well, ensuring that they are all intact and undamaged. If there are any missing or damaged parts, it’s important to contact Kkmoon customer support for assistance or replacement.
It’s also a good idea to read through the user manual and installation instructions at this stage to familiarize yourself with the installation process. This will ensure that you have a clear understanding of the steps involved and any specific requirements for your particular Kkmoon video doorbell model.
By taking the time to unbox and inspect the contents, you can prevent any potential issues or delays during the installation process. Once you are confident that all the necessary components are in good condition, you’re ready to move on to the next step of the installation.
Step 2: Gathering the Required Tools
Before you can proceed with the installation of your Kkmoon video doorbell, it’s important to gather all the necessary tools. Having the right tools on hand will ensure that the installation process goes smoothly and efficiently. Here are the tools typically needed for installing a Kkmoon video doorbell:
- A power drill
- A screwdriver (usually provided in the package)
- A level (to ensure the doorbell is installed straight)
- Wire strippers (if needed for connecting the doorbell to the existing wiring)
- Tape measure (for measuring distances and ensuring proper alignment)
- Mounting screws (usually provided in the package)
- Anchor screws (if necessary for mounting on certain surfaces)
- A ladder or stepstool (if needed for reaching higher areas)
It’s important to note that the specific tools required may vary depending on the installation method and the existing setup of your home. Therefore, it’s always a good idea to carefully read the installation instructions provided by Kkmoon for your specific model to ensure you have all the necessary tools.
Before you begin the installation process, make sure that your tools are in good working condition and easily accessible. This will save you time and frustration during the installation. If you don’t have any of the tools mentioned above, consider borrowing or purchasing them beforehand to ensure a smooth installation process.
Gathering the required tools before you start the installation will not only make the process more efficient but also help prevent potential issues and delays. Once you have all the necessary tools ready, you’re prepared to move on to the next step of the installation process.
Step 3: Choosing the Ideal Location for Installation
Choosing the right location for installing your Kkmoon video doorbell is crucial for optimal functionality and convenience. The placement of the doorbell will determine the coverage area and ensure that it captures clear video footage of visitors and any other activity at your front door. Here are some factors to consider when selecting the ideal location:
- Height and Angle: The doorbell should be mounted at a height that provides a clear view of the entrance area. Typically, a height of 48 to 55 inches (about 120-140 cm) is recommended. Additionally, ensure that the doorbell is angled slightly downward to capture a person’s face, rather than just the top of their head.
- Accessibility: Make sure the location you choose is easily accessible for maintenance and potential future adjustments. You may need to replace batteries, clean the lens, or perform other maintenance tasks, so ensure there is enough space and easy access for these activities.
- Wiring Accessibility: If you’re planning to connect the doorbell to existing wiring, confirm that the chosen location has accessible wiring nearby to make the connection process easier.
- Wi-Fi Signal Strength: The video doorbell requires a stable internet connection. Check the Wi-Fi signal strength in the location you’re considering. If the signal is weak, you may need to install a Wi-Fi extender or find an alternative location with better coverage.
- Obstructions: Avoid mounting the doorbell in a location where it may be obstructed by objects like trees, bushes, or walls. Clear sightlines will ensure that the doorbell captures clear video footage.
Take your time to evaluate different potential locations and consider these factors to determine the best position for your Kkmoon video doorbell. It’s also a good idea to simulate the doorbell’s field of view by standing at the chosen location and checking if it captures the desired area. Once you have decided on the ideal location, you’re ready to move on to the next step: mounting the doorbell bracket.
Step 4: Mounting the Doorbell Bracket
Now that you have chosen the ideal location for your Kkmoon video doorbell, it’s time to mount the doorbell bracket. The bracket serves as the foundation for attaching the doorbell unit securely to your home’s exterior. Follow these steps to mount the bracket:
- Hold the doorbell bracket against the wall or door frame in the chosen location. Use a level to ensure that the bracket is straight and aligned properly.
- Using a pencil or a marker, mark the screw holes on the wall through the bracket’s mounting holes.
- Set the bracket aside and prepare to drill pilot holes for the screws. Choose an appropriately sized drill bit based on the screw size and material of the wall. Drill pilot holes at the marked positions.
- If your doorbell bracket requires wall anchors, insert them into the pilot holes until they are flush with the wall’s surface.
- Align the bracket with the pilot holes and secure it to the wall using the provided screws or appropriate screws for the wall’s material. Tighten them firmly, ensuring that the bracket is securely attached.
- Double-check the bracket’s alignment before proceeding to the next step. Use the level to ensure it is still straight.
By securely mounting the doorbell bracket, you provide a stable base for the doorbell unit. This ensures that it remains in place, unaffected by external factors such as wind or vibrations.
It’s important to note that the specific mounting instructions may vary depending on your Kkmoon video doorbell model. Always refer to the manufacturer’s instructions to ensure you follow the appropriate steps for your specific device.
With the bracket securely mounted, you have completed an important step in the installation process. Next, we will move on to connecting the wires and powering your Kkmoon video doorbell.
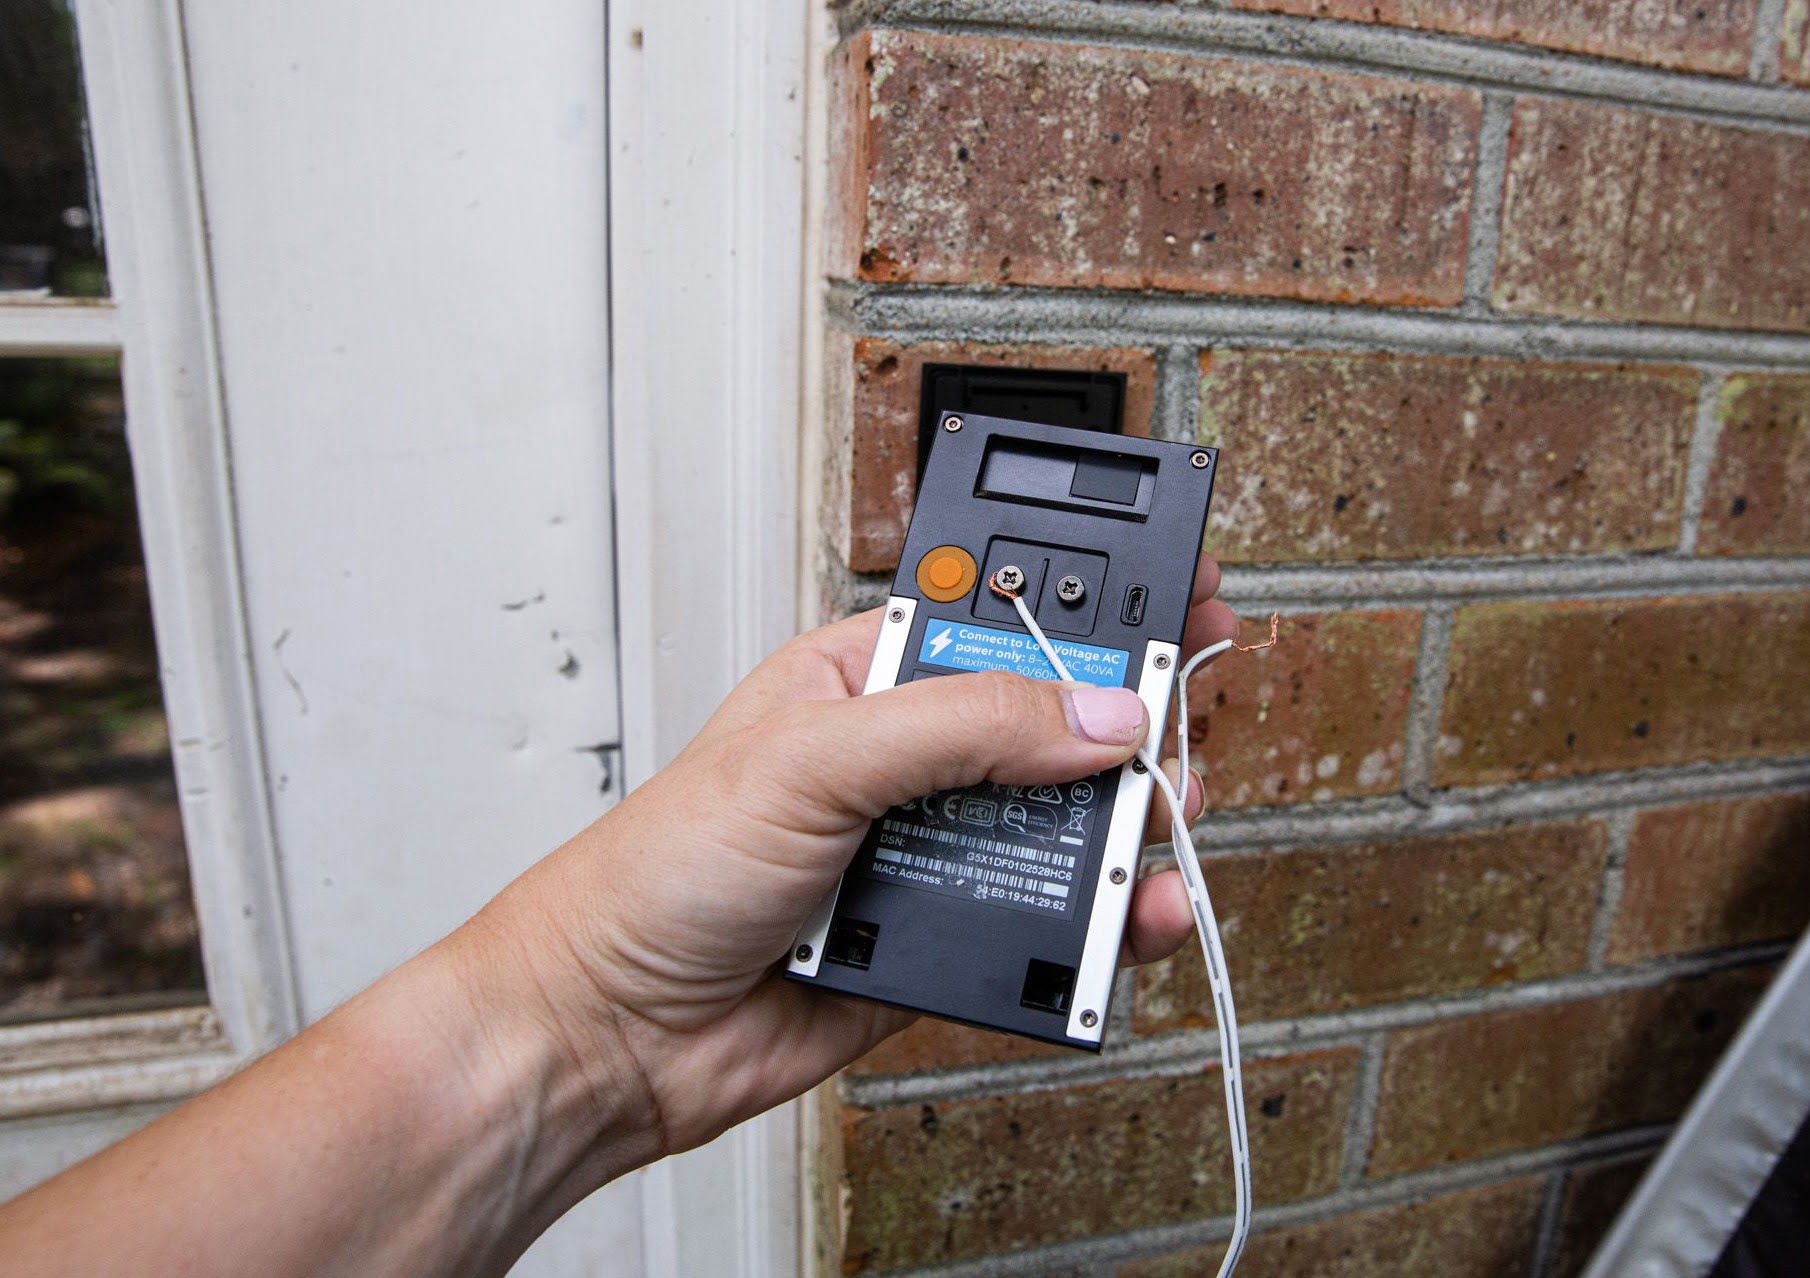
Step 5: Connecting the Wires
Once you have successfully mounted the doorbell bracket, the next step is to connect the wires for your Kkmoon video doorbell. Connecting the wires ensures that the doorbell receives power and functions properly. The specific wiring instructions may vary depending on the model you have, so always refer to the manufacturer’s instructions. Here’s a general guideline:
- Locate the wiring terminals on the back of the doorbell unit. These terminals are typically labeled with “+” and “-“, indicating the positive and negative terminals.
- Identify the wiring in your home that corresponds to the doorbell. If you’re replacing an existing doorbell, you’ll likely see two wires. If you’re installing a new doorbell and have pre-installed wiring, locate those wires.
- If necessary, strip the ends of the wires using wire strippers to expose a small portion of the copper conductors.
- Connect the wires to the appropriate terminals on the doorbell unit. The positive wire should connect to the “+” terminal, and the negative wire to the “-” terminal. Follow the recommended wiring method for your specific Kkmoon model.
- Securely tighten the wire connections using a small screwdriver or any provided connectors, ensuring there is good contact and no loose wires.
- Before proceeding with the next step, it’s essential to verify that the wires are connected correctly. Ensure the power to the doorbell circuit is turned off and use a multimeter or voltage tester to confirm there is no electrical current flowing through the wires. This step is crucial for safety.
Remember, if you’re unsure about any aspect of the wiring process, it’s always best to consult a professional electrician to ensure a safe and accurate connection.
Once the wires are securely connected, your Kkmoon video doorbell is ready to receive power and function. In the next step, we will cover the installation of the chime connector to enable the doorbell’s chime functionality.
Step 6: Installing the Chime Connector
Installing the chime connector is an essential step when setting up your Kkmoon video doorbell. The chime connector ensures that your existing doorbell chime works in harmony with the video doorbell, allowing you to hear audible alerts and notifications. Follow these steps to install the chime connector:
- Locate your existing doorbell chime box, which is usually found inside your home near the front entrance.
- Open the chime box and identify the terminals labeled “Front” and “Transformer.”
- If there are wires connected to the terminals, remove them by unscrewing the terminal screws.
- Take the chime connector provided by Kkmoon and connect the wires from the video doorbell unit to the corresponding terminals on the chime connector. Follow the specific instructions for your model, as the connector layout may vary.
- Next, connect the wires from the chime connector to the appropriate terminals on the chime box. The wire colors may differ depending on your doorbell’s wiring setup.
- Tighten the terminal screws on both the chime connector and the chime box to secure the connections.
- Close the chime box and ensure that all the connections are secure.
Once the chime connector is installed, you can test the doorbell functionality by pressing the doorbell button or using the mobile app. If the chime rings or you receive notifications on your smartphone, it means the chime connector is successfully installed and working as intended.
If you encounter any issues during the installation process or if the doorbell chime doesn’t work as expected, consult the troubleshooting section in the installation instructions or contact Kkmoon customer support for further assistance.
Now that the chime connector is properly installed, your Kkmoon video doorbell is ready to be attached to the bracket and configured for use. In the next step, we will cover the process of attaching the doorbell unit to the bracket.
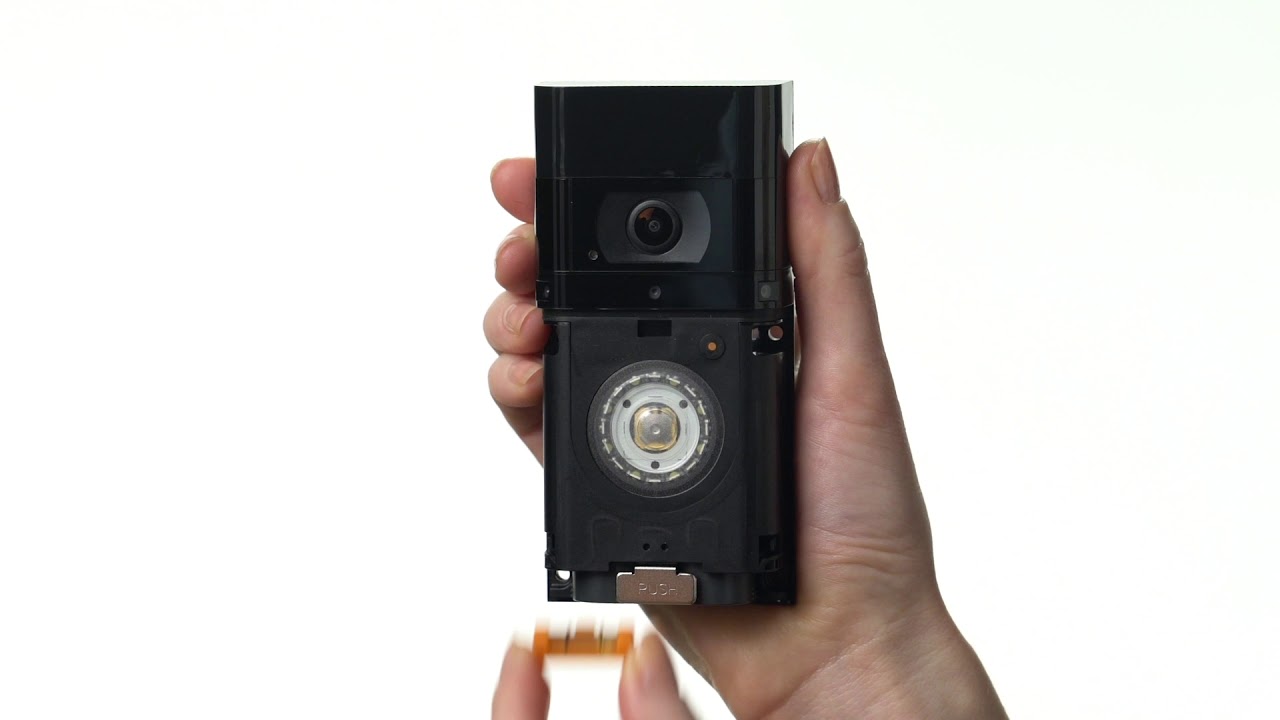
Step 7: Attach the Doorbell Unit to the Bracket
After completing the previous steps, it’s time to attach the Kkmoon video doorbell unit to the bracket that you mounted earlier. This step securely positions the doorbell unit in place and ensures it is ready to capture and transmit video footage. Follow these steps to attach the doorbell unit:
- Hold the Kkmoon video doorbell unit close to the mounted bracket, aligning the screw holes on the unit with the corresponding holes on the bracket.
- Insert the provided screws through the holes on the doorbell unit and into the bracket.
- Tighten the screws using a screwdriver or any other suitable tool until the doorbell unit is securely attached to the bracket. Be careful not to overtighten them, as it may damage the unit or the bracket.
- Double-check that the doorbell unit is aligned properly and level. Use a level if necessary.
- Ensure that the doorbell unit is firmly attached to the bracket and does not wobble or move when lightly touched.
By attaching the doorbell unit to the bracket, you ensure its stability and proper positioning for optimal functionality. This step is crucial to ensure that the camera captures a clear and unobstructed view of the entrance area.
It’s worth noting that some Kkmoon video doorbell models may have different mounting mechanisms or additional steps. Always refer to the specific instructions provided by Kkmoon for your particular model to ensure correct installation.
With the doorbell unit securely attached to the bracket, you have completed another important step in the installation process. Next, we will move on to configuring the Kkmoon video doorbell app on your smartphone or other mobile devices.
Step 8: Downloading and Configuring the Kkmoon Video Doorbell App
To fully leverage the features and functionality of your Kkmoon video doorbell, it’s necessary to download and configure the Kkmoon Video Doorbell app on your smartphone or other mobile devices. The app allows you to receive live video feeds, interact with visitors, and customize settings. Follow these steps to download and configure the app:
- Open the app store on your smartphone (e.g., Google Play Store for Android or App Store for iOS).
- Search for the “Kkmoon Video Doorbell” app.
- Select the correct app from the search results and click on the “Install” or “Get” button to download and install the app on your device.
- Once the installation is complete, open the app on your device.
- Create a new account or log in if you already have an existing account.
- Follow the on-screen prompts to add the Kkmoon video doorbell to your account. This typically involves scanning a QR code or entering a unique device ID provided with your doorbell.
- Connect your smartphone to your home Wi-Fi network and ensure it has a stable internet connection.
- Once the connection is established, the app will guide you through the setup process, including naming your doorbell, setting motion detection preferences, and configuring other settings based on your preferences.
- After completing the setup, you should be able to access the live video feed from your Kkmoon video doorbell, receive notifications, and interact with visitors through the app.
It’s important to note that the app’s features and interface may vary depending on your specific Kkmoon video doorbell model. Refer to the app’s user manual or in-app instructions for more information on its functionalities and options.
By downloading and configuring the Kkmoon Video Doorbell app, you can maximize the usability and convenience of your video doorbell. Ensure that you regularly update the app to benefit from any new features and security enhancements.
In the next step, we will cover the important final step of testing and troubleshooting your Kkmoon video doorbell installation.
Step 9: Testing and Troubleshooting
Once you have completed the installation of your Kkmoon video doorbell and configured the app, it’s important to thoroughly test its functionality and troubleshoot any potential issues. Follow these guidelines to ensure your doorbell is operating as expected:
- Test the doorbell button: Press the doorbell button or use the app to simulate a visitor. Check if the doorbell chime rings and if you receive a notification on your mobile device. If the doorbell does not ring or you do not receive any notifications, check the connections and ensure that the chime connector is installed correctly.
- Check the video feed: Open the app and verify that you can access the live video feed from your Kkmoon video doorbell. Confirm that the image is clear and that you have a stable connection. If the video is blurry or if there are connection issues, ensure that your Wi-Fi signal is strong and consider adjusting the placement of your router or installing a Wi-Fi extender.
- Test motion detection: Walk in front of the doorbell and check if it detects motion and sends you a notification. Adjust the motion detection settings in the app if needed to prevent false alarms or improve accuracy.
- Review recorded footage: Check if the video doorbell saves recorded footage correctly. Explore the app to find the storage location and adjust settings if necessary.
- Perform regular maintenance: Clean the camera lens periodically to ensure optimal video quality. Replace batteries as required if you have a battery-powered model. Keep the app and doorbell firmware up-to-date to benefit from the latest features and bug fixes.
- Troubleshoot issues: If you encounter any issues during testing, consult the troubleshooting section in the user manual or on the Kkmoon website. If the problem persists, contact Kkmoon customer support for further assistance.
By thoroughly testing your Kkmoon video doorbell and promptly addressing any issues or concerns, you can ensure that your doorbell provides reliable security and convenience for your home.
Congratulations! You have successfully completed the installation, configuration, and testing of your Kkmoon video doorbell. Enjoy the added security and convenience of knowing who’s at your door anytime, anywhere.
Conclusion
Installing a Kkmoon video doorbell can greatly enhance the security and convenience of your home. By following the step-by-step guide outlined in this article, you have learned how to unbox and inspect the doorbell, gather the necessary tools, choose the ideal location for installation, mount the doorbell bracket, connect the wires, install the chime connector, attach the doorbell unit, download and configure the Kkmoon Video Doorbell app, and test and troubleshoot any issues.
Throughout the installation process, it’s important to refer to the specific instructions provided by Kkmoon for your model, ensuring that you follow the recommended steps and precautions. Pay attention to details like wire connections, alignment, and app configuration to ensure a successful installation.
With a properly installed Kkmoon video doorbell, you can enjoy features such as live video feeds, visitor notifications, motion detection, and the ability to interact with visitors remotely. This added level of security and convenience provides peace of mind, whether you’re at home or away.
Remember to perform regular maintenance, keep the app and firmware updated, and promptly address any issues or concerns that may arise. In the event of technical difficulties, don’t hesitate to reach out to Kkmoon customer support for assistance.
Thank you for taking the time to follow this guide on installing a Kkmoon video doorbell. We hope it has been helpful in achieving a successful installation. Enjoy the benefits of your new video doorbell and the improved security it brings to your home.