Introduction
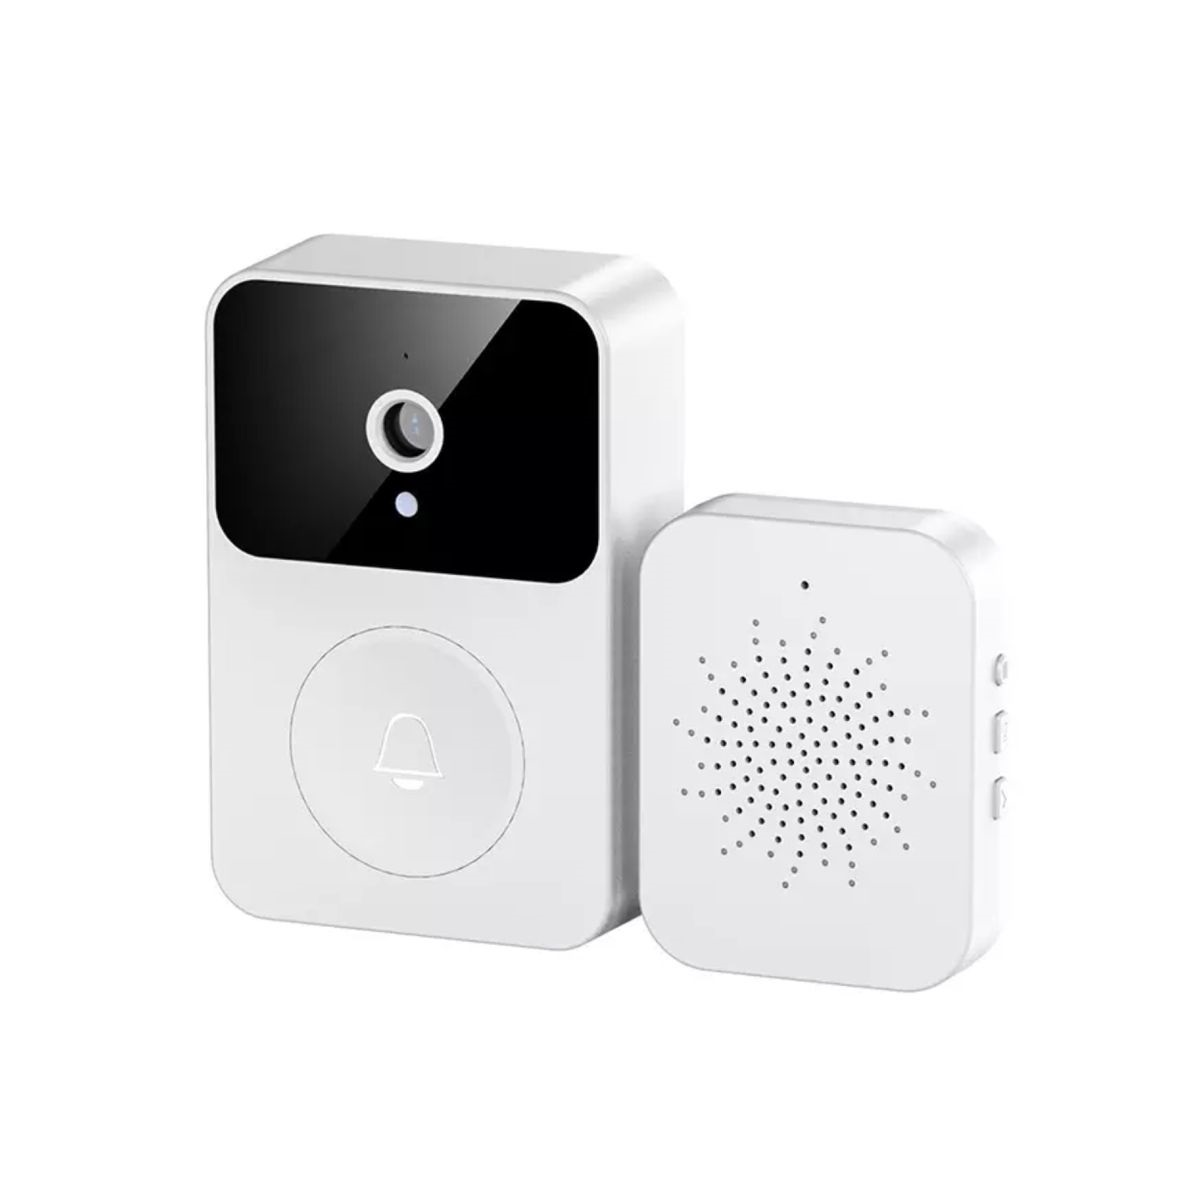
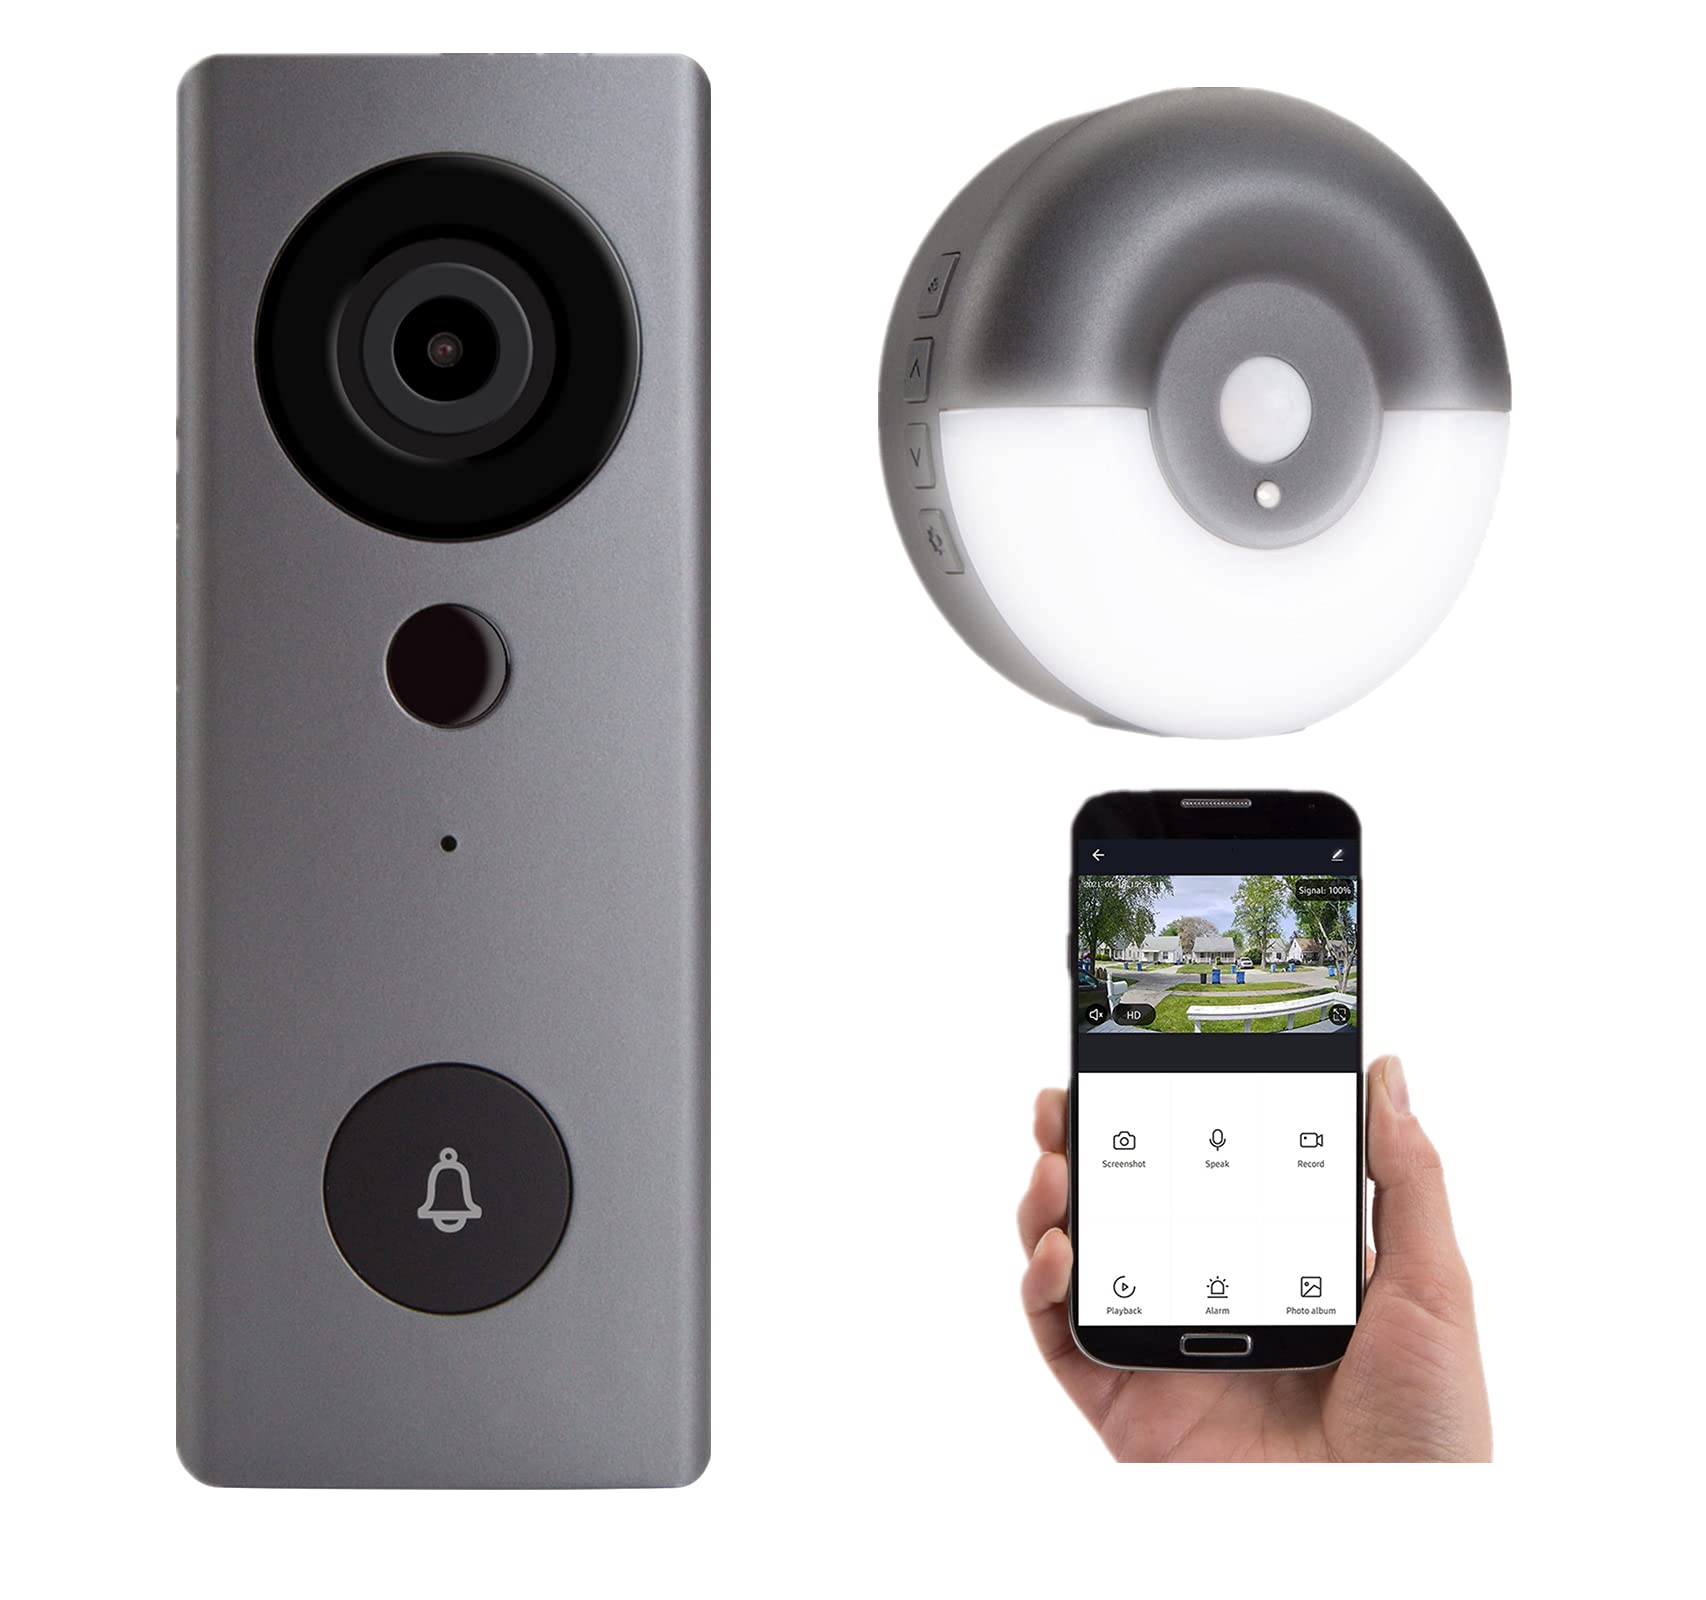
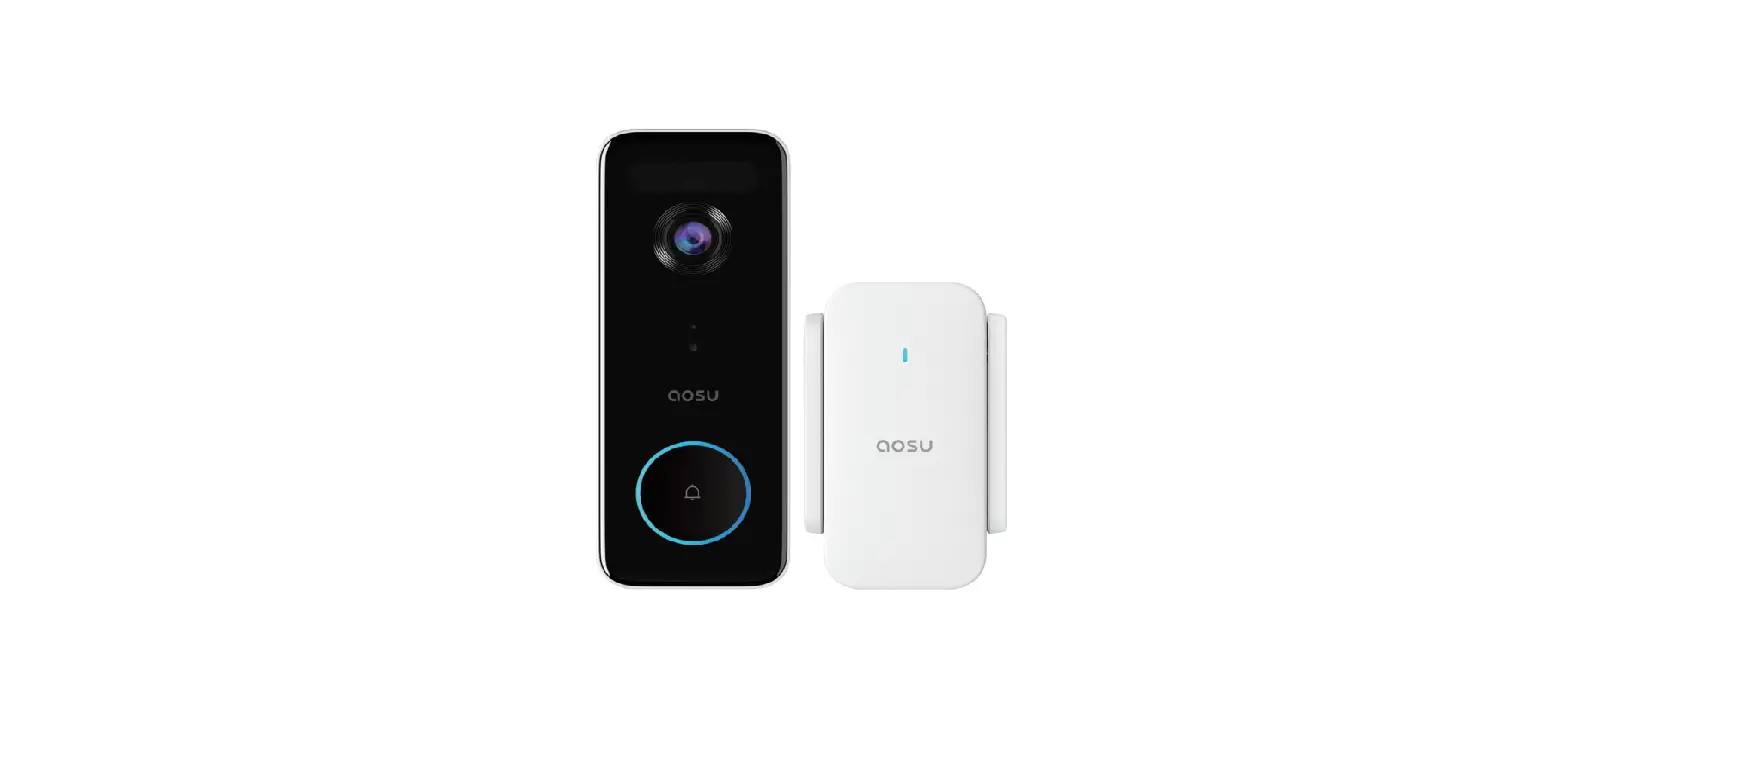
Are you looking to enhance the security of your home and improve your peace of mind? Installing a video doorbell can be a great solution. With its advanced features and convenient functionality, the Aosu Video Doorbell is a popular choice for many homeowners.
A video doorbell allows you to see and communicate with anyone who comes to your door, even when you are not at home. It provides real-time video footage and two-way audio communication, giving you complete control over your home’s security.
In this guide, we will walk you through the step-by-step process of installing the Aosu Video Doorbell. Whether you’re a tech-savvy DIY enthusiast or a novice, this guide will help you successfully set up your video doorbell and enjoy its benefits.
You don’t need to be an expert handyman to install the Aosu Video Doorbell. With some basic tools and a little patience, you can have it up and running in no time. In the following sections, we will cover everything you need to know to ensure a smooth and successful installation.
Before we begin, it’s important to note that every home is unique, and the installation process may vary depending on your existing doorbell setup and Wi-Fi network. While we provide general guidelines, it’s always a good idea to consult the Aosu Video Doorbell’s instruction manual for specific instructions tailored to your device.
So, let’s gather our tools and get started on installing your Aosu Video Doorbell!
Step 1: Gather all the necessary tools and materials
Before you begin the installation process, it’s important to gather all the necessary tools and materials. Having everything on hand will help streamline the process and ensure a smooth installation. Here’s a list of the items you’ll need:
- Aosu Video Doorbell (with mounting bracket and screws)
- Wireless router with active Wi-Fi connection
- Smartphone or tablet with the Aosu Video Doorbell app installed
- Power drill and drill bits
- Screwdriver (flathead and Phillips)
- Level
- Tape measure
- Wire strippers
- Electrical tape
- Wire nuts
Make sure to check the Aosu Video Doorbell’s instruction manual for any additional tools or materials that may be required for your specific installation situation.
Once you have gathered all the necessary tools and materials, you’re ready to move on to the next step: choosing the installation location for your Aosu Video Doorbell.
Step 2: Choose the installation location for your Aosu Video Doorbell
Choosing the right installation location for your Aosu Video Doorbell is crucial. It will determine the visibility and functionality of the device, ensuring that you get clear video footage and accurate motion detection. Here are a few factors to consider when selecting the installation spot:
- Accessibility: The installation location should provide easy access to your front door. Ensure that it is within reach for anyone who needs to press the doorbell or interact with the device.
- Line of Sight: The doorbell’s camera should have an unobstructed view of the front porch and surrounding area. Make sure there are no objects such as overhanging branches or walls that may block the camera’s line of sight.
- Height: Installing the doorbell at an appropriate height is essential for capturing clear video footage. Aim for a height that is comfortable for most people and provides a good view of the area.
- Wi-Fi Signal: Consider the distance between your wireless router and the installation location. Ensure that the Wi-Fi signal is strong enough in that area to ensure a stable connection.
- Power Source: Assess the proximity of a power source. If you are opting for a wired installation, ensure that there is an existing doorbell wiring or an electrical outlet nearby.
Once you have considered these factors, take measurements of the installation spot to ensure that it is compatible with the Aosu Video Doorbell’s dimensions. Use the level to ensure that the placement is even and straight.
Remember, the installation location you choose will have a significant impact on the performance of your Aosu Video Doorbell, so take your time to select the perfect spot. Once you have chosen the installation location, you’re ready to move on to the next step: preparing the installation area.
Step 3: Prepare the installation area
Before installing your Aosu Video Doorbell, it’s important to properly prepare the installation area. This will ensure a secure and stable mounting for your device. Follow these steps to prepare the area:
- Clean the Surface: Clear any dirt, debris, or dust from the installation area. Use a soft cloth or a brush to gently clean the surface where you’ll be attaching the mounting bracket.
- Check the Doorbell Wiring: If you are opting for a wired installation, check the existing doorbell wiring to ensure it is in good condition. Look for any damaged or frayed wires. If needed, replace or repair the wiring before proceeding.
- Secure Loose Doorbell Wires: If there are any loose or hanging wires, use wire nuts and electrical tape to secure them. This will prevent any interference or accidental disconnection during the installation process.
- Ensure a Stable Mounting Surface: The area where you plan to mount your Aosu Video Doorbell needs to be stable and secure. If the surface is uneven or damaged, consider using a mounting plate or find another location that provides a more suitable mounting surface.
- Check for Adequate Lighting: Ensure that the installation area has sufficient lighting. This will help the camera capture clear video footage even during darker hours. Consider installing additional outdoor lighting if needed.
By properly preparing the installation area, you’ll create a solid foundation for your Aosu Video Doorbell. This will contribute to its functionality and longevity. Once you have completed these preparation steps, you’re ready to move on to the next step: connecting the Aosu Video Doorbell to your Wi-Fi network.
Step 4: Connect the Aosu Video Doorbell to your Wi-Fi network
Now that you have prepared the installation area, it’s time to connect your Aosu Video Doorbell to your Wi-Fi network. Follow these steps to establish a connection:
- Open the Aosu Video Doorbell app on your smartphone or tablet.
- Create an account or log in to your existing account.
- Follow the on-screen instructions to add a new device to your account.
- Ensure that your smartphone or tablet is connected to the Wi-Fi network you want to pair your Aosu Video Doorbell with.
- Put your Aosu Video Doorbell into pairing mode. Consult the instruction manual for specific instructions on how to do this for your particular device.
- On the app, select the Wi-Fi network you want to connect the doorbell to. Enter the network password, if required.
- Wait for the app to establish a connection with your Aosu Video Doorbell. This may take a few moments.
- Once the connection is established, you should see a confirmation message on the app.
It’s essential to ensure a stable and reliable Wi-Fi connection for optimal performance of your Aosu Video Doorbell. Make sure that your wireless router is within range and that there are no obstructions that could weaken the signal.
By connecting your Aosu Video Doorbell to your Wi-Fi network, you’ll be able to access its features and receive real-time notifications and alerts on your smartphone or tablet. With the connection established, you’re ready to move on to the next step: installing the mounting bracket.
Step 5: Install the mounting bracket
With your Aosu Video Doorbell connected to your Wi-Fi network, it’s time to install the mounting bracket. The mounting bracket is what holds the doorbell securely in place. Follow these steps to install it:
- Hold the mounting bracket against the installation surface in the chosen location. Ensure that it is level and aligned as desired.
- Using a pencil or marker, mark the locations of the screw holes on the surface.
- Set aside the mounting bracket and grab your drill. Select a drill bit that is slightly smaller than the diameter of the screws provided with the Aosu Video Doorbell.
- Using the marked screw hole locations as a guide, carefully drill pilot holes into the installation surface.
- Insert the provided screws through the mounting bracket and into the pilot holes. Using a screwdriver or drill, tighten the screws until the bracket is securely attached to the surface.
- Double-check that the mounting bracket is level after securing it in place.
It’s important to ensure that the mounting bracket is securely installed to prevent any movement or instability of the Aosu Video Doorbell. Taking the time to properly align and secure the bracket will contribute to the overall functionality and appearance of your device.
Once you have installed the mounting bracket, you’re ready to move on to the next step: attaching the doorbell to the mounting bracket.
Step 6: Attach the doorbell to the mounting bracket
Now that the mounting bracket is securely installed, it’s time to attach the Aosu Video Doorbell to the bracket. Follow these steps to complete this step:
- Align the back of the Aosu Video Doorbell with the mounting bracket, ensuring that the screw holes on the doorbell line up with those on the bracket.
- Hold the doorbell in place and use the provided screws to secure it to the mounting bracket. Use a screwdriver or drill to tighten the screws, but be careful not to overtighten.
- Ensure that the doorbell is level and aligned with the mounting bracket. Make any necessary adjustments to achieve the desired position.
By securely attaching the Aosu Video Doorbell to the mounting bracket, you ensure that it remains in place and functions properly. This step is crucial in achieving optimal performance and appearance of your video doorbell.
Once the doorbell is securely attached to the mounting bracket, you’re ready to move on to the next step: adjusting the angle and position of the doorbell.
Step 7: Adjust the angle and position of the doorbell
Now that the Aosu Video Doorbell is attached to the mounting bracket, it’s time to adjust its angle and position. Properly aligning the doorbell ensures that it captures the desired field of view and maximizes its functionality. Follow these steps to achieve the desired angle and position:
- Stand in front of your doorbell and observe the live feed from the Aosu Video Doorbell app on your smartphone or tablet.
- Assess the camera’s field of view and make note of any areas that may be out of view or require adjustment.
- Gently adjust the angle of the doorbell by tilting it up, down, or sideways as needed. Take caution to avoid damaging the wires or loosening the mounting screws.
- Continuously check the live feed on your device to monitor the changes in the field of view as you adjust the angle.
- Make any necessary fine-tuning adjustments until you are satisfied with the camera’s angle and the overall view it captures.
During this step, consider any specific areas of interest or potential blind spots. Adjust the doorbell accordingly to ensure that it covers the necessary areas, such as your front porch or driveway.
Take your time to achieve the optimal angle and position of the Aosu Video Doorbell. Doing so will maximize its coverage and improve its performance in detecting motion and capturing video footage.
Once you have adjusted the angle and position of the doorbell, you’re ready to move on to the next step: connecting the doorbell wires to the existing doorbell or power source.
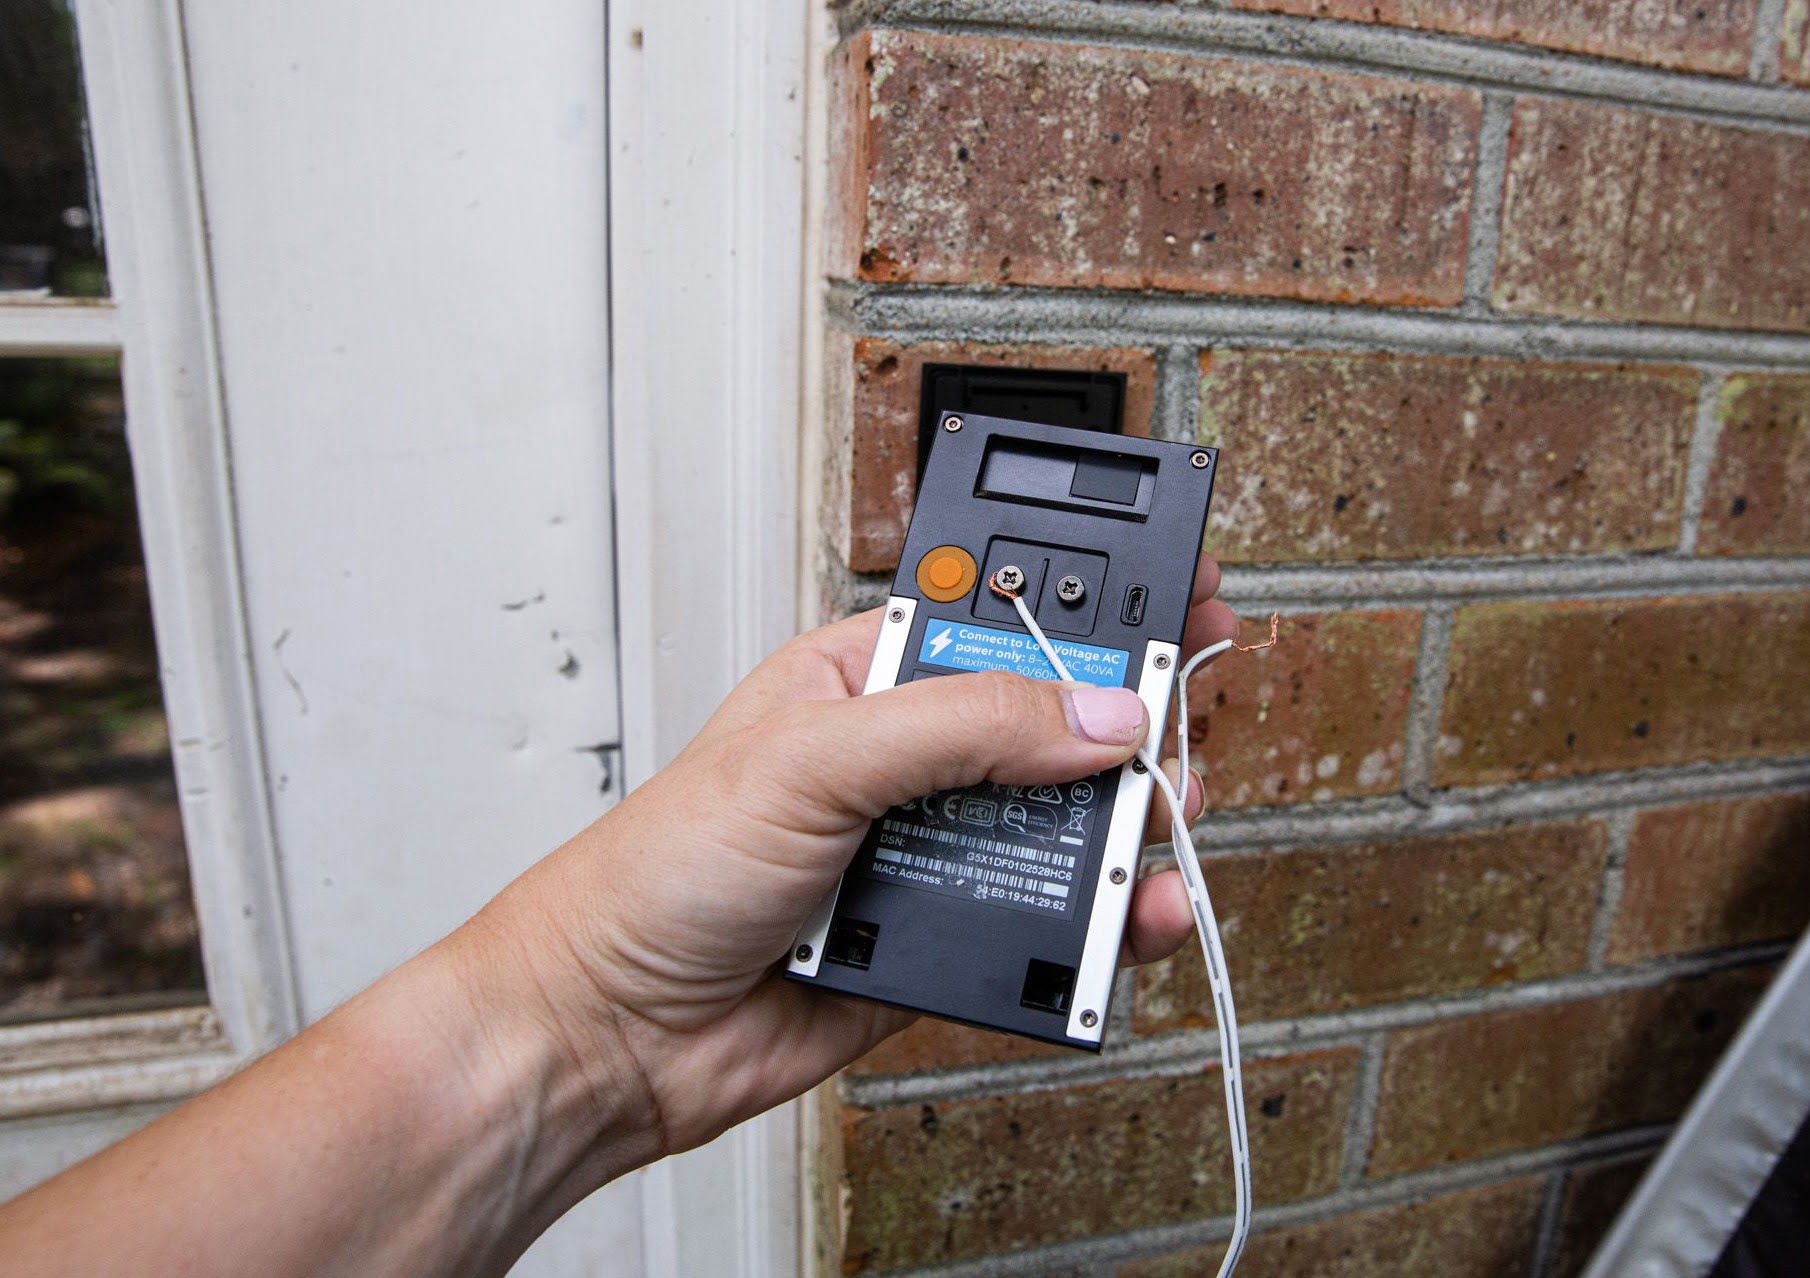
Step 8: Connect the doorbell wires to the existing doorbell or power source
Connecting the doorbell wires is an important step in the installation process of the Aosu Video Doorbell. Depending on your specific setup, you may need to connect the doorbell to the existing doorbell wiring or a power source. Follow these steps to complete this step:
- Locate the doorbell wiring or the power source near the installation area.
- If you have existing doorbell wiring, carefully remove the cover of the old doorbell to access the wires. If you are using a power source, ensure it is turned off before proceeding.
- Identify the wires on your Aosu Video Doorbell. Typically, there will be two wires: one for power (usually red) and one for the doorbell chime (usually white or green).
- Strip the ends of the wires on your Aosu Video Doorbell using wire strippers, exposing about 1/4 inch (6 mm) of the wire.
- If you have existing doorbell wiring, match the corresponding colors of the Aosu Video Doorbell wires to the wires on the existing doorbell. Connect the wires together using wire nuts and secure them with electrical tape.
- If you are using a power source, connect the red wire from your Aosu Video Doorbell to the positive terminal and the white or green wire to the negative terminal. Use wire nuts to secure the connections and cover them with electrical tape.
- Ensure that the connections are secure and properly insulated to prevent any electrical issues.
If you are unsure about the wiring setup or need further assistance, it’s recommended to consult a professional electrician or refer to the Aosu Video Doorbell’s instruction manual for detailed instructions specific to your device.
Once you have successfully connected the doorbell wires, you’re ready to move on to the next step: testing the functionality of your Aosu Video Doorbell.
Step 9: Test the functionality of your Aosu Video Doorbell
After completing the installation and connecting the doorbell wires, it’s time to test the functionality of your Aosu Video Doorbell. This step is crucial to ensure that everything is working properly and that you can fully utilize the features of your device. Follow these steps to test its functionality:
- Open the Aosu Video Doorbell app on your smartphone or tablet.
- Ensure that your smartphone or tablet is connected to the same Wi-Fi network as your Aosu Video Doorbell.
- Tap on the live view or doorbell icon in the app to initiate a video call with your doorbell.
- Observe the live feed from the doorbell’s camera on your device’s screen.
- Speak into your smartphone or tablet’s microphone and listen for the audio on the doorbell’s speaker.
- Test the motion detection feature by walking in front of the doorbell and observing if it sends motion alerts to your device.
- Test the doorbell button by pressing it to see if it triggers the doorbell chime or notifies you on your device.
- Ensure that the video and audio quality is clear and there are no issues with the connectivity of the device.
If you encounter any issues during the testing process, refer to the Aosu Video Doorbell’s instruction manual for troubleshooting steps. It may involve adjusting the position, rechecking the connections, or updating the device’s firmware.
By testing the functionality of your Aosu Video Doorbell, you can ensure that it is properly installed and functioning as expected. This step provides you with peace of mind and confidence in the security and convenience it offers.
Once you have tested the functionality of your Aosu Video Doorbell and are satisfied with its performance, congratulations! You have successfully installed and set up your Aosu Video Doorbell.
Conclusion
Installing the Aosu Video Doorbell can significantly enhance the security and convenience of your home. By following the step-by-step guide outlined in this article, you should now have a good understanding of how to install and set up your Aosu Video Doorbell.
We started by gathering all the necessary tools and materials for the installation process. Then, we moved on to choosing the optimal installation location for the doorbell, considering factors such as accessibility, line of sight, height, Wi-Fi signal, and power source proximity.
Next, we prepared the installation area by cleaning the surface, checking the doorbell wiring, securing loose wires, and ensuring a stable mounting surface. We then connected the doorbell to our Wi-Fi network, allowing us to access its features through the Aosu Video Doorbell app.
Following that, we installed the mounting bracket and securely attached the doorbell to it. We adjusted the angle and position of the doorbell to achieve the desired view and ensure proper functionality.
After that, we connected the doorbell wires to the existing doorbell wiring or power source, making sure to follow the correct color coding and securely fastening the connections. Finally, we tested the functionality of the Aosu Video Doorbell, ensuring that the video, audio, motion detection, and doorbell button were all working as intended.
By successfully completing these steps, you should now be able to enjoy the benefits of your Aosu Video Doorbell, including real-time video monitoring, two-way communication, and improved home security.
Remember, while this guide provides a general overview of the installation process, it is always recommended to refer to the Aosu Video Doorbell’s specific instruction manual for detailed instructions tailored to your device.
We hope this guide has been helpful in successfully installing your Aosu Video Doorbell. Enjoy the added security and peace of mind it brings to your home!