Introduction
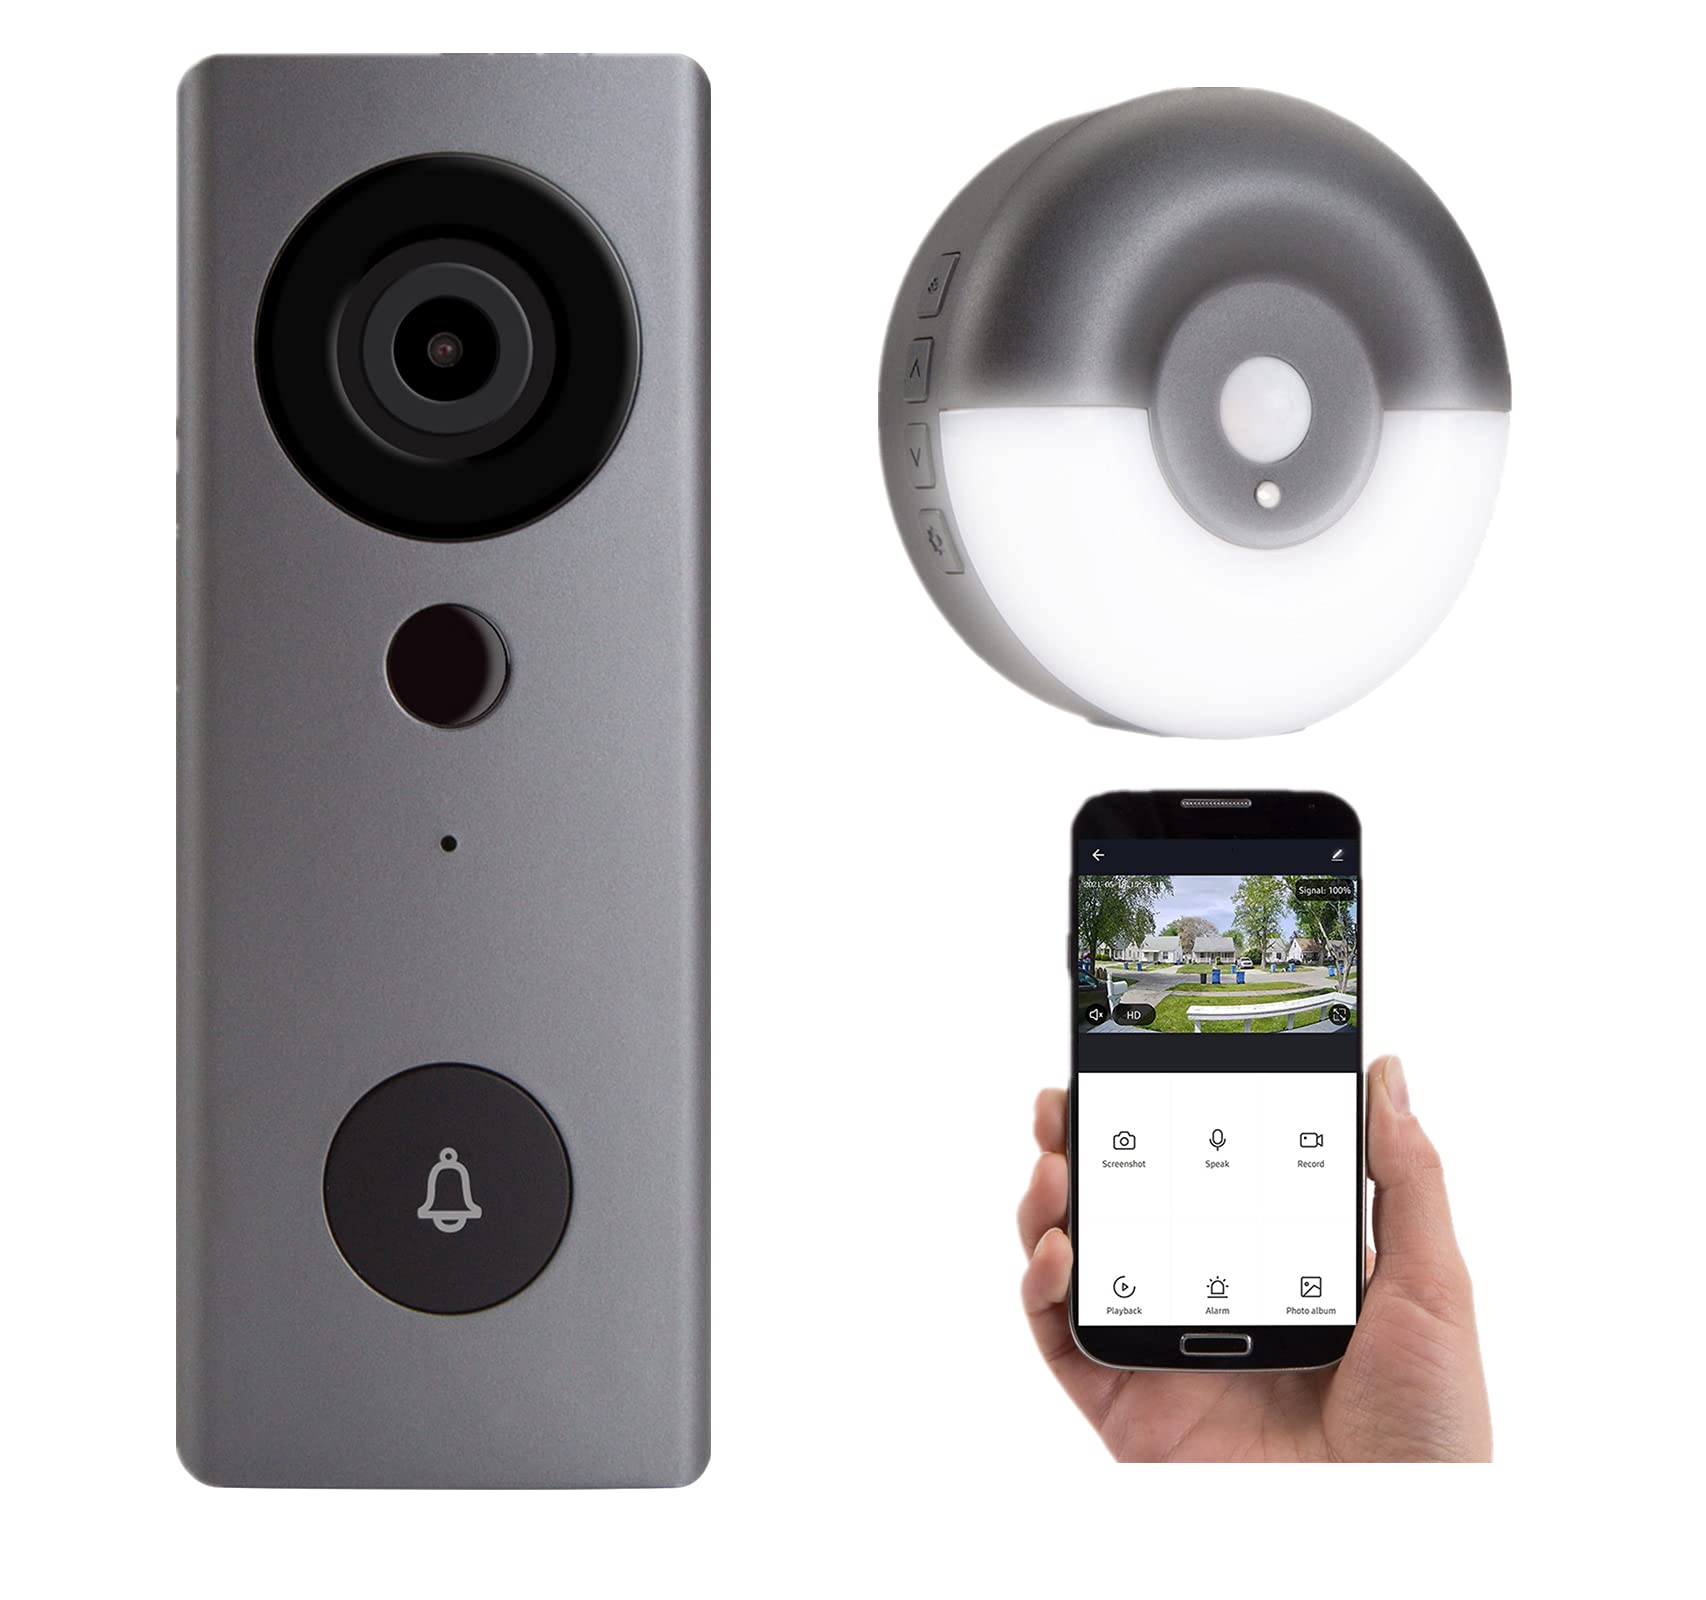
Welcome to the world of smart home security with the Eufy Video Doorbell! With its advanced features and seamless integration, this innovative device allows you to monitor your front door and enhance the security of your home. Whether you’re away on vacation or simply in another room, the Eufy Video Doorbell provides you with peace of mind and convenience.
In this comprehensive guide, we will walk you through the step-by-step process of installing the Eufy Video Doorbell. From gathering the necessary tools to configuring the doorbell settings, we’ve got you covered. By the end of this guide, you’ll be able to enjoy the benefits of a top-notch video doorbell system that keeps you connected and protected.
Before we dive into the installation process, it’s important to note that the Eufy Video Doorbell requires a wired connection and a compatible doorbell transformer with a voltage between 16V-24V. Additionally, you’ll need access to a smartphone or tablet to download the Eufy Security app, which allows you to control and customize your doorbell settings.
Now, let’s get started on this exciting journey of installing your Eufy Video Doorbell!
Step 1: Gather the necessary tools and equipment
Before you begin the installation process, it’s important to ensure that you have all the tools and equipment handy. Having everything you need at your fingertips will make the installation smoother and more efficient. Here’s a list of the tools and equipment you’ll need:
- Power drill
- Drill bit set
- Screwdriver set
- Tape measure
- Level
- Pencil
- Wire stripper
- Wire nuts or connectors
- Ladder or step stool
- Smartphone or tablet with the Eufy Security app installed
Having these tools readily available will save you time and ensure that you can complete each step without any interruptions. It’s also a good idea to gather all the equipment provided with the Eufy Video Doorbell, including the mounting plate, doorbell faceplate, screws, and any other included accessories.
Once you have everything you need, double-check that your existing doorbell setup meets the installation requirements. Make sure you have a compatible doorbell transformer with a voltage between 16V-24V. If your current setup doesn’t meet these requirements, you may need to upgrade your transformer or seek professional assistance.
Now that you have all the necessary tools and equipment, you’re ready to move on to the next step: understanding the installation requirements and guidelines. So let’s dive in!
Step 2: Understand the installation requirements and guidelines
Before you begin the installation process, it’s crucial to have a clear understanding of the installation requirements and guidelines provided by Eufy. These guidelines ensure that you install the Eufy Video Doorbell correctly and minimize the risk of any issues or complications. Here are the key points to consider:
1. Existing doorbell wiring: The Eufy Video Doorbell requires a wired connection to your existing doorbell wiring. Make sure you have a compatible transformer with a voltage between 16V-24V to provide sufficient power to the doorbell.
2. Wi-Fi network: The Eufy Video Doorbell connects to your home’s Wi-Fi network to enable remote access and real-time notifications. Ensure that you have a stable and reliable Wi-Fi signal near the installation location.
3. Mounting location: Choose a suitable location for installing the Eufy Video Doorbell. It should provide a clear view of your front door and ensure optimal functionality. Take into account factors such as height, angle, and any potential obstructions.
4. Doorbell transformer: Confirm that your existing doorbell setup meets the voltage requirements mentioned earlier. If not, you may need to upgrade your transformer to ensure proper power supply to the Eufy Video Doorbell.
5. Eufy Security app: Install the Eufy Security app on your smartphone or tablet. This app allows you to control and customize your Eufy Video Doorbell settings, receive notifications, and access the live video feed from your doorbell.
Understanding these installation requirements and guidelines is crucial for a successful installation process. It ensures that you have the necessary infrastructure in place and helps you avoid any potential pitfalls or complications along the way.
Now that you are familiar with the installation requirements and guidelines, you’re ready to move on to the next step: preparing your existing doorbell setup. Let’s proceed!
Step 3: Prepare your existing doorbell setup
Before you can install the Eufy Video Doorbell, it’s important to prepare your existing doorbell setup. This step ensures that your wiring and doorbell are ready for the installation process. Follow these guidelines to ensure a smooth transition:
1. Turn off the power: Before working with any electrical components, turn off the power supply to your existing doorbell at the circuit breaker. This step is crucial to prevent any accidents or electrical shocks during the installation process.
2. Remove the existing doorbell faceplate: Gently remove the faceplate of your current doorbell. This will expose the wiring and the doorbell chime, allowing you to assess the existing setup and make any necessary adjustments.
3. Check the wiring condition: Inspect the wiring and make sure it is in good condition. Look for any signs of damage, fraying, or loose connections. If you notice any issues, it’s best to replace the wiring or consult a professional electrician for assistance.
4. Assess the compatibility: Verify that your existing doorbell wiring is compatible with the Eufy Video Doorbell. Check the voltage of your doorbell transformer to ensure it falls within the recommended range of 16V-24V.
5. Label the wiring: If there are multiple wires connected to your existing doorbell, label them for identification. This will make it easier to connect the wires to the appropriate terminals on the Eufy Video Doorbell later in the installation process.
6. Remove any excess wiring: If you have excess wiring, trim it to a manageable length. Be careful not to cut the wires too short, as you will need enough length to connect them to the Eufy Video Doorbell.
By preparing your existing doorbell setup, you ensure that the installation process goes smoothly and minimize any potential issues or complications. Take the time to carefully assess the wiring, check compatibility, and label the wires for easy identification.
Now that you have prepared your existing doorbell setup, you’re ready to move on to the next step: removing the old doorbell, if applicable. Let’s delve into it!
Step 4: Remove the old doorbell, if applicable
If you have an existing doorbell installed, it’s necessary to remove it before you can proceed with the installation of your Eufy Video Doorbell. Follow these steps to safely remove the old doorbell:
1. Turn off the power: Start by turning off the power to your existing doorbell at the circuit breaker. This ensures that you’re working with a safe electrical environment.
2. Remove the faceplate: Carefully remove the faceplate of the old doorbell. This will expose the inner components and wiring.
3. Disconnect the wiring: Take note of the wires connected to the terminals of the old doorbell. Using a screwdriver or wire stripper, unscrew the terminals to detach the wiring. Be cautious and gentle to avoid damaging the wires or other components.
4. Remove the mounting screws: Locate the mounting screws that are securing the old doorbell to the wall or door frame. Use a screwdriver to remove these screws and detach the old doorbell from its mounting location.
5. Patch any holes: If the old doorbell left behind any holes or marks on your wall or door frame, take the opportunity to patch and repair them. This ensures a clean and professional installation for your new Eufy Video Doorbell.
6. Inspect the wiring: While you have the old doorbell removed, take the time to inspect the wiring for any signs of damage or wear. Replace any faulty or damaged wiring to ensure a reliable connection for your Eufy Video Doorbell.
By removing the old doorbell properly, you create a clean slate for installing your Eufy Video Doorbell. Take your time and exercise caution during this step to avoid any accidental damage or mishaps.
Now that you have successfully removed the old doorbell, you’re ready to proceed to the next step: mounting the Eufy Video Doorbell. Let’s continue our installation journey!
Step 5: Mount the Eufy Video Doorbell
Now that you have prepared the existing doorbell setup and removed the old doorbell, it’s time to mount your Eufy Video Doorbell. Follow these steps to ensure a secure and professional installation:
1. Select the mounting location: Choose a suitable location for installing your Eufy Video Doorbell. It should provide a clear view of your front door and ensure optimal functionality. Use a level to ensure that the mounting surface is straight.
2. Mark the drilling points: Place the mounting plate of the Eufy Video Doorbell against the wall or door frame in the chosen location. Use a pencil to mark the drilling points through the holes in the mounting plate. Ensure the plate is level and aligned properly.
3. Drill the holes: Use a power drill and a drill bit suitable for your mounting surface (e.g., wood, concrete) to drill the marked holes. Be mindful of any electrical wiring or pipes behind the drilling area to avoid damage or accidents. Clean away any debris from the drilled holes.
4. Attach the mounting plate: Align the holes in the mounting plate with the drilled holes and insert the included screws through the plate into the holes. Use a screwdriver to tighten the screws until the plate is securely attached to the wall or door frame.
5. Position the doorbell: Slot the Eufy Video Doorbell onto the mounting plate. Ensure it aligns correctly and sits flush against the surface. Apply gentle pressure to secure the doorbell onto the mounting plate.
6. Check stability: Once the doorbell is attached, ensure it is stable and securely mounted. Gently wiggle the doorbell to check for any loose connections or movements. If needed, retighten the screws on the mounting plate to ensure a firm hold.
By following these steps, you will have successfully mounted your Eufy Video Doorbell. Take your time to ensure proper alignment and stability, as a secure installation is vital for optimal performance and longevity.
Now that the Eufy Video Doorbell is mounted, you’re ready to move on to the next step: connecting the wires to the doorbell. Let’s proceed further in our installation process!
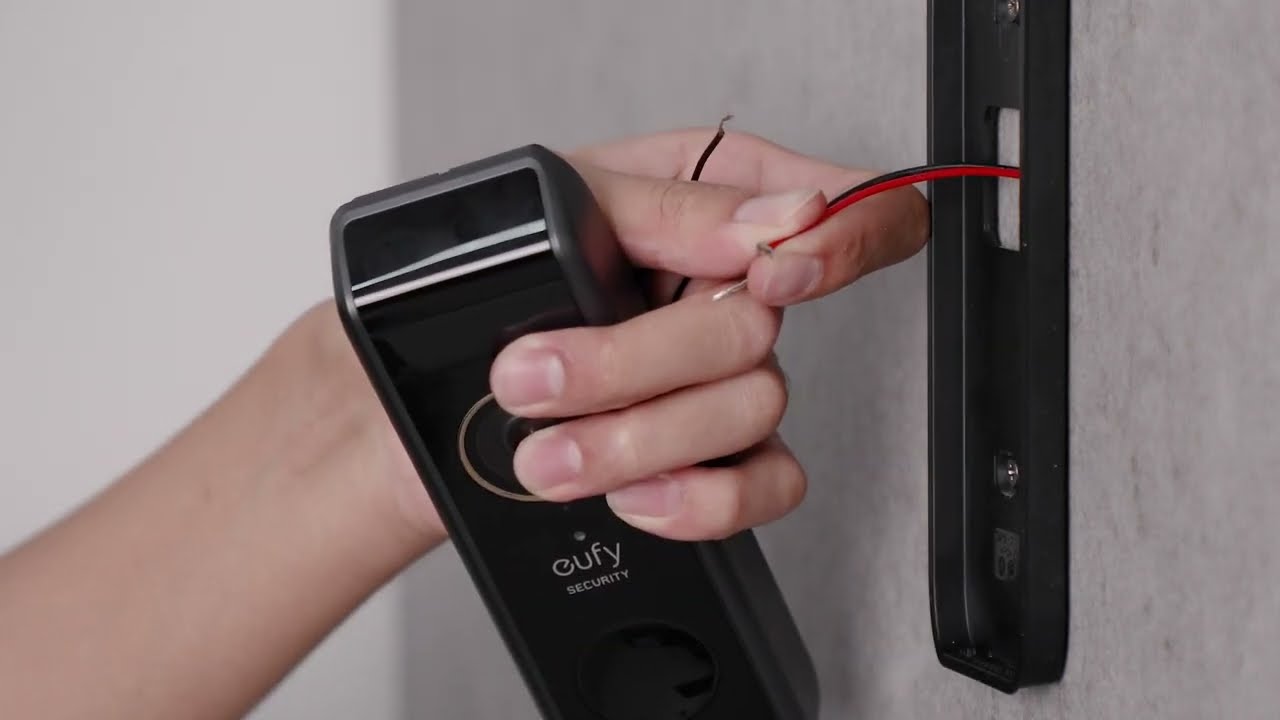
Step 6: Connect the wires to the doorbell
With the Eufy Video Doorbell securely mounted, it’s time to connect the existing doorbell wires to the designated terminals on the doorbell. Properly connecting the wires ensures that your Eufy Video Doorbell receives power and functions correctly. Follow these steps to connect the wires:
1. Identify the wires: Take note of the wires coming out of the wall or door frame that were previously connected to your old doorbell. These wires typically include a red (power) wire and a white or green (ground) wire. Make sure to double-check the labeling you did during the preparation step.
2. Strip the wire insulation: Use a wire stripper to carefully remove some of the insulation from the end of each wire. Remove approximately 1/4 inch of insulation to expose the metal wire underneath. Be cautious not to cut or damage the actual wires.
3. Attach the wires to the terminals: Locate the terminals on the back of the Eufy Video Doorbell. Typically, there will be two terminals: one marked “Trans” or “Transformer” for the red power wire, and another marked “Ground” or “GND” for the white or green ground wire. Insert the stripped ends of the wires into the respective terminals.
4. Tighten the terminal screws: Once the wires are inserted into the terminals, use a screwdriver to tighten the screws on each terminal. Ensure that the wires are securely connected and there is no slippage or loose connection. This will ensure a reliable electrical connection.
5. Check the wire connections: After tightening the terminal screws, gently tug on each wire to ensure they are securely connected. If any wire comes loose, retighten the respective terminal screw to ensure a firm connection.
By following these steps, you will have successfully connected the existing doorbell wires to your Eufy Video Doorbell. Double-check that the wires are properly attached and there is no exposed or frayed wiring. This will ensure a safe and reliable power supply to your video doorbell.
Now that the wires are connected, we can move on to the next step: attaching the mounting plate and doorbell faceplate. Let’s continue our installation journey!
Step 7: Attach the mounting plate and doorbell faceplate
Now that the wires are securely connected to the Eufy Video Doorbell, it’s time to attach the mounting plate and doorbell faceplate. This step gives your doorbell a polished and finished look. Follow these steps to complete the installation:
1. Align the mounting plate: Ensure that the mounting plate is properly aligned with the Eufy Video Doorbell. The mounting plate should fit snugly against the back of the doorbell.
2. Insert the tabs: Align the tabs on the mounting plate with the corresponding slots on the back of the doorbell. Gently insert the tabs into the slots until they are securely in place.
3. Push the lower part: Apply gentle pressure to the lower part of the doorbell faceplate and push it upwards until it clicks into place. This will secure the faceplate onto the mounting plate.
4. Verify the secure attachment: Once the faceplate is attached, give it a gentle tug to ensure it is securely fixed in place. Double-check that there is no wobbling or movement of the faceplate.
5. Test the doorbell button: Press the doorbell button to confirm that it operates smoothly and registers a response on the Eufy Security app. This will ensure that the faceplate is properly aligned and allows for seamless functionality.
By following these steps, you will have successfully attached the mounting plate and doorbell faceplate to your Eufy Video Doorbell. This step adds a professional and aesthetically pleasing touch to your installation.
Now that the mounting plate and faceplate are securely attached, you’re ready to move on to the next step: configuring the Eufy Video Doorbell settings. Let’s proceed to set up your doorbell to your preferences!
Step 8: Configure the Eufy Video Doorbell settings
With the physical installation of your Eufy Video Doorbell complete, it’s time to configure its settings to customize your user experience. Follow these steps to set up and personalize your doorbell:
1. Open the Eufy Security app: Launch the Eufy Security app on your smartphone or tablet. If you haven’t already done so, make sure to download and install the app from the App Store or Google Play Store.
2. Create or log in to your Eufy account: If you are a new user, create an account by following the app’s instructions. If you already have a Eufy account, log in using your credentials.
3. Add your Eufy Video Doorbell: Tap the “+” icon or the “Add Device” option in the app to add your video doorbell. Follow the on-screen instructions to connect the app to your doorbell over your home’s Wi-Fi network.
4. Set up motion detection: Customize the motion detection settings to your preference. Determine the areas you want the doorbell to monitor and adjust the sensitivity level. This ensures that you receive accurate motion alerts without unnecessary notifications.
5. Configure the doorbell chime: Set up the doorbell chime functionality to receive audible notifications when someone rings the doorbell. You can choose from various chime options and adjust the volume to your liking.
6. Explore additional settings: The Eufy Security app offers additional settings for advanced features such as two-way audio, night vision, and cloud storage options. Take the time to explore these settings and customize them according to your preferences.
7. Test the doorbell functionality: Once you have configured the settings, perform a test to ensure that your Eufy Video Doorbell is functioning correctly. Press the doorbell button and verify that you receive a notification on your smartphone or tablet, and that the live video feed is displayed.
By following these steps, you will have successfully configured your Eufy Video Doorbell settings. This will allow you to tailor the doorbell’s functionality to suit your specific needs and preferences.
Now that you have configured the settings, you can move on to the next step: connecting the doorbell to your home’s Wi-Fi network. Let’s proceed to ensure seamless connectivity!
Step 9: Connect the doorbell to your home’s Wi-Fi network
In order to fully utilize the features of your Eufy Video Doorbell, it needs to be connected to your home’s Wi-Fi network. Follow these steps to establish a stable and reliable connection:
1. Ensure your Wi-Fi network is active: Make sure that your home’s Wi-Fi network is up and running. Check that other devices connected to the network are working properly.
2. Launch the Eufy Security app: Open the Eufy Security app on your smartphone or tablet.
3. Access the doorbell settings: Navigate to the settings menu within the app, typically indicated by a gear or cog icon.
4. Select “Wi-Fi network setup”: Look for the option within the settings menu to set up the Wi-Fi network for your doorbell. Tap on it to proceed.
5. Enter your Wi-Fi network credentials: Provide the necessary information, such as your network name (SSID) and password, when prompted. Double-check the details to avoid any errors.
6. Connect to your Wi-Fi network: Once you have entered the correct Wi-Fi network credentials, the Eufy Video Doorbell will attempt to connect to your network. Wait for the process to complete.
7. Verify the connection: After the Eufy Video Doorbell has successfully connected to your Wi-Fi network, you should see a confirmation message in the app. It may take a few moments to establish a stable connection.
8. Test the connection: To ensure that the doorbell is properly connected, try accessing the live video feed through the app. If the feed is clear and there are no connection issues, your Eufy Video Doorbell is successfully connected to your home’s Wi-Fi network.
By following these steps, you will have successfully connected your Eufy Video Doorbell to your home’s Wi-Fi network. This allows for seamless communication between the doorbell and your smartphone or tablet, enabling you to access the features and functionalities of the doorbell remotely.
Now that your doorbell is connected to your Wi-Fi network, you’re ready to move on to the final step: testing the functionality of the Eufy Video Doorbell. Let’s make sure everything is working perfectly!
Step 10: Test the functionality of the Eufy Video Doorbell
Now that your Eufy Video Doorbell is installed, configured, and connected to your home’s Wi-Fi network, it’s time to put it to the test and ensure everything is functioning as expected. Follow these steps to test the functionality of your doorbell:
1. Ring the doorbell: Press the doorbell button or ask a friend or family member to ring the doorbell. This will trigger the notification on your smartphone or tablet, indicating that someone is at your front door.
2. Receive notifications: Check your smartphone or tablet to see if you receive a real-time notification when the doorbell is rung. Make sure the notification sound and vibration settings are working properly.
3. View the live video feed: Open the Eufy Security app and access the live video feed from your Eufy Video Doorbell. Verify that the video display is clear and that you can see a live view of your front doorstep.
4. Test two-way audio: Use the app to initiate a two-way audio conversation with the person at the door. Speak into your device and ensure that your voice is transmitted clearly through the doorbell’s speaker.
5. Check motion detection: Walk in front of the doorbell to test its motion detection capabilities. Verify that you receive a real-time notification when motion is detected, and ensure that the alerts are timely and accurate.
6. Explore additional features: Take the time to familiarize yourself with other available features, such as video recording, snapshot capture, and customized settings. Test these features to ensure they are functioning properly.
By following these steps, you will be able to test the functionality of your Eufy Video Doorbell and ensure that it is working as intended. If you encounter any issues or notice any irregularities, refer to the troubleshooting section of the Eufy Security app or consult Eufy support for assistance.
Now that you have successfully tested your Eufy Video Doorbell, you can rest assured knowing that you have a reliable and secure front door monitoring system. Enjoy the convenience and peace of mind that your new smart home security device provides!
Conclusion
Congratulations on successfully completing the installation of your Eufy Video Doorbell! By following the step-by-step instructions and guidelines provided in this guide, you have transformed your front door into a smarter and more secure entry point for your home.
We started by gathering the necessary tools and equipment, ensuring that you had everything you needed for a smooth installation process. Then, we delved into understanding the installation requirements and guidelines, ensuring that you were fully aware of the necessary steps and precautions.
You prepared your existing doorbell setup, removed the old doorbell if applicable, and mounted the Eufy Video Doorbell securely in a suitable location. Connecting the wiring and attaching the mounting plate and doorbell faceplate ensured a professional and clean finish.
After that, you configured the Eufy Video Doorbell settings to personalize your user experience, connected it to your home’s Wi-Fi network, and thoroughly tested its functionality. You can now enjoy the benefits of remote access, real-time notifications, and two-way audio communication.
Overall, installing the Eufy Video Doorbell not only enhances the security of your home but also provides convenience and peace of mind. You can now monitor your front door from anywhere, ensuring that you never miss any important visitors or deliveries.
If you have any further questions or encounter any issues with your Eufy Video Doorbell, refer to the manufacturer’s documentation, online resources, or reach out to Eufy support for assistance. They will be happy to help you make the most of your new smart home security device.
Thank you for choosing Eufy Video Doorbell, and enjoy the added security and convenience it brings to your home!